manuals.online logo
Brands
  1. Home
  2. •
  3. Brands
  4. •
  5. Grohe
  6. •
  7. Plumbing Product
  8. •
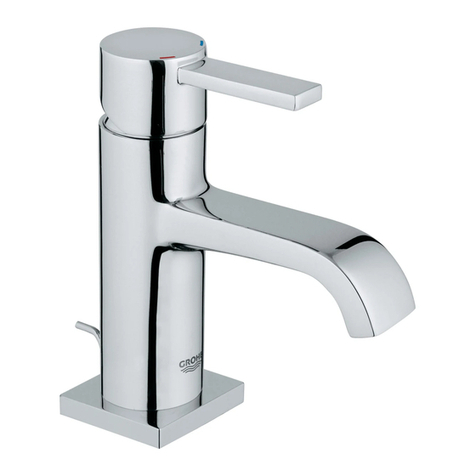
  9. Grohe Allure 32 144 User manual

Grohe Allure 32 144 User manual

D.....1 I.....2 N.....3 GR .....5 TR .....6 BG .....7 RO .....9
GB .....1 NL .....2 FIN .....4 CZ .....5 SK .....6 EST .....8 CN .....9
F.....1 S.....3 PL .....4 H.....5 SLO .....7 LV .....8 RUS .....9
E.....2 DK .....3 UAE .....4 P.....6 HR .....7 LT .....8
Design & Quality Engineering GROHE Germany
Allure
96.609.331/ÄM 218661/07.11
Allure
32 144
32 757
32 146 23 076
32 147
D.....1 I.....2 N.....3 GR .....5 TR .....6 BG .....7 RO .....9
GB .....1 NL .....2 FIN .....4 CZ .....5 SK .....6 EST .....8 CN .....9
F.....1 S.....3 PL .....4 H.....5 SLO .....7 LV .....8 UA .....9
E.....2 DK .....3 UAE .....4 P.....6 HR .....7 LT .....8 RUS .....10
32 75732 144
23 076 32 146 32 147
27mm
3mm
13mm
*19 017
19mm
1
Anwendungsbereich:
Der Betrieb mit drucklosen Speichern (offenen
Warmwasserbereitern) ist nicht möglich.
Technische Daten
Zur Einhaltung der Geräuschwerte nach DIN 4109 ist bei
Ruhedrücken über 5 bar ein Druckminderer einzubauen.
Höhere Druckdifferenzen zwischen Kalt- und Warmwasser-
anschluss sind zu vermeiden!
DDiese Technische Produktinformation ist
ausschließlich für den Installateur oder
eingewiesene Fachkräfte!
Bitte an den Benutzer weitergeben!
Fließdruck: min. 0,5 bar – empfohlen 1 – 5 bar
Betriebsdruck: max. 10 bar
Prüfdruck: 16 bar
Durchfluss bei 3 bar Fließdruck
bei Waschtisch: ca. 6 l/min
bei Bidet: ca. 9 l/min
Temperatur Warmwassereingang max. 80 °C
Empfohlen (Energieeinsparung): 60 °C
Installation:
Rohrleitungssystem vor und nach der Installation
gründlich spülen (DIN 1988/DIN EN 806 beachten)!
Funktion:
Anschlüsse auf Dichtheit und Armatur auf Funktion
prüfen.
Wartung:
Alle Teile prüfen, reinigen, evtl. austauschen.
Bei Wartungsarbeiten Wasserzufuhr absperren!
Beim Einbau der Kartusche auf richtigen Sitz der
Dichtungen achten.
Verschraubung einschrauben und fest anziehen.
Ersatzteile: siehe Explosionsdarstellung
(* = Sonderzubehör)
Pflege: siehe Pflegeanleitung
Application:
Operation with unpressurised storage heaters is not possible.
Specifications
If static pressure exceeds 5 bar, a pressure-reducing valve
must be fitted.
Avoid major pressure differences between hot and cold water
supply.
GB This technical product information is exclusively
for the installer or trained specialists.
Please pass these instructions on to the user.
Flow pressure: min. 0.5 bar – recommended 1 – 5 bar
Operating pressure: max. 10 bar
Test pressure: 16 bar
Flow rate at 3 bar flow pressure:
for wash basin: approx. 6 l/min
for bidet mixer: approx. 9 l/min
Hot water inlet temperature max. 80 °C
Recommended (energy saving): 60 °C
Installation:
Flush piping system prior and after installation of
fitting thoroughly (Consider EN 806)!
Function:
Check connections for leaks and check function of
fitting.
Maintenance:
Inspect and clean all components and replace if
necessary.
Shut off water supply for maintenance work.
When installing the cartridge, ensure that the
seals are correctly seated.
Screw in and tighten screwing.
Replacement parts: see exploded drawing
(* = special accessories)
Care: see Care Instructions
Domaine d'application:
Un fonctionnement avec des accumulateurs sans pression
(chauffe-eau à écoulement libre) n'est pas possible!
Caractéristiques techniques
Installer un réducteur de pression en cas de pressions statiques
supérieures à 5 bars.
Eviter les différences importantes de pression entre les
raccordements d'eau chaude et d'eau froide!
FLa documentation technique/produit est
exclusivement destinée aux plombiers et aux
personnels qualifiés.
Penser à la remettre à l’utilisateur.
Pression dynamique: minimale 0,5 bar –
recommandée 1 à 5 bars
Pression de service: 10 bars maxi.
Pression d'épreuve: 16 bars
Débit à une pression dynamique de 3 bars:
du robinetterie de lavabo: env. 6 l/min
du robinetterie de bidet: env. 9 l/min
Température de l’eau chaude 80 °C maxi.
Recommandée (économie d'énergie): 60 °C
Installation
Bien rincer les canalisations avant et après
l’installation (respecter la norme EN 806)!
Fonctionnement
Contrôler l’étanchéité des raccordements et contrôler
le fonctionnement de la robinetterie.
Maintenance
Contrôler et nettoyer toutes les pièces, les
remplacer le cas échéant.
Fermer les arrivées d’eau en cas de maintenance.
Contrôler le siège des joints lors du montage de la
cartouche.
Insérer la bague filetée et serrer jusqu'au blocage.
Pièces de rechange voir vue explosée
(* = accessoires spéciaux).
Entretien: voir les instructions d’entretien
2
Campo de aplicación
No es posible el funcionamiento con acumuladores sin
presión (calentadores de agua sin presión).
Datos técnicos
Si la presión en reposo es superior a 5 bares, hay que instalar
un reductor de presión.
¡Deberán evitarse diferencias de presión importantes entre
las acometidas del agua fría y del agua caliente!
E¡Esta información técnica de productos está
destinada exclusivamente para el instalador o
profesionales del sector!
¡Por favor, entréguesela al usuario!
Presión de trabajo: mín. 0,5 bares – recomendada 1 – 5 bares
Presión de utilización: máx. 10 bares
Presión de verificación: 16 bares
Caudal para una presión de trabajo de 3 bares:
batería de lavabo: aprox. 6 l/min
batería de bidé: aprox. 9 l/min
Temperatura de la entrada del agua caliente máx. 80 °C
Recomendada (ahorro de energía): 60 °C
Instalación:
¡Purgar a fondo el sistema de tuberías antes y
después de la instalación (tener en cuenta EN 806)!
Funcionamiento:
Comprobar la estanqueidad de las conexiones y el
funcionamiento de la grifería.
Mantenimiento:
Verificar todas las piezas, limpiarlas y cambiarlas
en caso de necesidad.
¡Cerrar la alimentación de agua al realizar trabajos de
mantenimiento!
Al montar el cartucho tener en cuenta el correcto
asiento de las juntas. Enroscar la unión atornillada y
apretar fuertemente.
Recambios: véase la vista de despiece
(* = Accesorio especial)
Cuidados: véanse las instrucciones de conservación
Gamma di applicazioni:
Non è possibile il funzionamento con accumulatori di acqua
calda a bassa pressione (accumulatori di acqua calda a
circuito aperto).
Dati tecnici
Per pressioni statiche superiori a 5 bar si raccomanda
l’installazione di un riduttore di pressione.
Evitare grandi differenze di pressione fra i raccordi d'acqua
fredda e d'acqua calda!
IQueste informazioni tecniche sul prodotto sono
ad uso esclusivo dell’installatore e di personale
qualificato!
Si prega di consegnarle all’utente!
Pressione idraulica min. 0,5 bar – consigliata 1 – 5 bar
Pressione di esercizio max. 10 bar
Pressione di prova 16 bar
Portata alla pressione di 3 bar:
con rubinetto lavabo: circa 6 l/min
con miscelatore bidet: circa 9 l/min
Temperatura ingresso acqua calda: max. 80 °C
Consigliata (risparmio energetico): 60 °C
Installazione:
Prima e dopo l’installazione pulire a fondo il sistema
di tubazioni (osservare la norma EN 806)!
Funzionamento:
Controllare la tenuta dei raccordi e il funzionamento
del rubinetto.
Manutenzione:
Controllare, pulire ed eventualmente sostituire
tutti i pezzi.
Chiudere l’entrata dell’acqua durante i lavori di
manutenzione!
Durante il montaggio della cartuccia controllare
che le guarnizioni siano perfettamente in sede.
Avvitare il raccordo a vite e serrarlo bene.
Pezzi di ricambio: vedi immagini esplose
(* = accessori speciali).
Manutenzione ordinaria: vedi istruzioni per
manutenzione ordinaria
Toepassingsgebied:
Het werken met lagedrukboilers (open warmwatertoestellen)
is niet mogelijk!
Technische gegevens
Bij statische drukken boven 5 bar dient een drukreduceerventiel
te worden ingebouwd.
Voorkom hoge drukverschillen tussen de koud- en
warmwateraansluiting!
NL Deze technische productgegevens zijn uitsluitend
bedoeld voor de installateur of gekwalificeerde
monteurs!
Overhandig deze aan de gebruiker!
Stromingsdruk: min. 0,5 bar – aanbevolen 1 – 5 bar
Werkdruk: max. 10 bar
Testdruk: 16 bar
Capaciteit bij 3 bar stromingsdruk:
bij wastafelmengkraan: ca. 6 l/min
bij bidetmengkraan: ca. 9 l/min
Temperatuur warmwateringang max. 80 °C
Aanbevolen (energiebesparing): 60 °C
Installeren:
Leidingen vóór en na het installeren grondig spoelen
(EN 806 in acht nemen)!
Werking:
Controleer of de aansluitingen niet lekken en of de
kraan werkt.
Onderhoud:
Controleer alle onderdelen, reinig en vervang
deze indien nodig.
Sluit bij onderhoudswerkzaamheden de watertoevoer
af!
Controleer bij het inbouwen van de kardoes of de
afdichtingen goed zitten.
Breng de schroefring aan en draai deze stevig vast.
Reserveonderdelen: zie stuklijst
(* = speciaal toebehoren)
Reiniging: zie reinigingsaanwijzing

This manual suits for next models

4

Other Grohe Plumbing Product manuals

Grohe Eurostyle Cosmopolitan 33 590 User manual

Grohe

Grohe Eurostyle Cosmopolitan 33 590 User manual

Grohe Essence 32 105 User manual

Grohe

Grohe Essence 32 105 User manual

Grohe Euroeco Special 32 767 User manual

Grohe

Grohe Euroeco Special 32 767 User manual

Grohe GROHTHERM MICRO 34 487 User manual

Grohe

Grohe GROHTHERM MICRO 34 487 User manual

Grohe GRANDERA 23 311 User manual

Grohe

Grohe GRANDERA 23 311 User manual

Grohe EUPHORIA 26 419 User manual

Grohe

Grohe EUPHORIA 26 419 User manual

Grohe Grohtherm 2000 New User manual

Grohe

Grohe Grohtherm 2000 New User manual

Grohe Ondus User manual

Grohe

Grohe Ondus User manual

Grohe Atrio 21 046 User manual

Grohe

Grohe Atrio 21 046 User manual

Grohe Aquatower 3000 27 010 User manual

Grohe

Grohe Aquatower 3000 27 010 User manual

Grohe ATRIO 19 291 User manual

Grohe

Grohe ATRIO 19 291 User manual

Grohe Allure 23 077 User manual

Grohe

Grohe Allure 23 077 User manual

Grohe Concetto 32202 User manual

Grohe

Grohe Concetto 32202 User manual

Grohe Grandera 19 929 User manual

Grohe

Grohe Grandera 19 929 User manual

Grohe EUROECO COSMOPOLITAN E 36 273 User manual

Grohe

Grohe EUROECO COSMOPOLITAN E 36 273 User manual

Grohe Sense Guard 22 513 User manual

Grohe

Grohe Sense Guard 22 513 User manual

Grohe Eurostyle Cosmopolitan 20 208 User manual

Grohe

Grohe Eurostyle Cosmopolitan 20 208 User manual

Grohe Ondus 36 070 User manual

Grohe

Grohe Ondus 36 070 User manual

Grohe BLUE 31 312 User manual

Grohe

Grohe BLUE 31 312 User manual

Grohe Veris 32 192 User manual

Grohe

Grohe Veris 32 192 User manual

Grohe Sense Guard 22 500 User manual

Grohe

Grohe Sense Guard 22 500 User manual

Grohe Tectron 37 324 User manual

Grohe

Grohe Tectron 37 324 User manual

Grohe Tectron 38 394 User manual

Grohe

Grohe Tectron 38 394 User manual

Grohe 19578 User manual

Grohe

Grohe 19578 User manual

Popular Plumbing Product manuals by other brands

Moen SANI-STREAM 8797 manual

Moen

Moen SANI-STREAM 8797 manual

Cistermiser Easyflush EVO 1.5 manual

Cistermiser

Cistermiser Easyflush EVO 1.5 manual

Kohler Triton Rite-Temp K-T6910-2A installation guide

Kohler

Kohler Triton Rite-Temp K-T6910-2A installation guide

BEMIS FNOTAB100 Installation instruction

BEMIS

BEMIS FNOTAB100 Installation instruction

Hans Grohe ShowerTablet Select 700 13184000 Instructions for use/assembly instructions

Hans Grohe

Hans Grohe ShowerTablet Select 700 13184000 Instructions for use/assembly instructions

Akw Stone Wash Basin Installation instructions manual

Akw

Akw Stone Wash Basin Installation instructions manual

Enlighten Sauna Rustic-4 user manual

Enlighten Sauna

Enlighten Sauna Rustic-4 user manual

Moen ShowHouse S244 Series quick start guide

Moen

Moen ShowHouse S244 Series quick start guide

Sanela SLWN 08 Mounting instructions

Sanela

Sanela SLWN 08 Mounting instructions

Franke 7612982239618 operating instructions

Franke

Franke 7612982239618 operating instructions

Heritage Bathrooms Granley Deco PGDW02 Fitting Instructions & Contents List

Heritage Bathrooms

Heritage Bathrooms Granley Deco PGDW02 Fitting Instructions & Contents List

Tres TOUCH-TRES 1.61.445 instructions

Tres

Tres TOUCH-TRES 1.61.445 instructions

STIEBEL ELTRON WS-1 Operation and installation

STIEBEL ELTRON

STIEBEL ELTRON WS-1 Operation and installation

Miomare HG00383A manual

Miomare

Miomare HG00383A manual

BELLOSTA revivre 6521/CR1 quick start guide

BELLOSTA

BELLOSTA revivre 6521/CR1 quick start guide

American Standard Heritage Amarilis 7298.229 parts list

American Standard

American Standard Heritage Amarilis 7298.229 parts list

BorMann Elite BTW5024 quick start guide

BorMann

BorMann Elite BTW5024 quick start guide

Moen 1225 quick start guide

Moen

Moen 1225 quick start guide

manuals.online logo
manuals.online logoBrands
  • About & Mission
  • Contact us
  • Privacy Policy
  • Terms and Conditions

Copyright 2025 Manuals.Online. All Rights Reserved.