manuals.online logo
Brands
  1. Home
  2. •
  3. Brands
  4. •
  5. Grohe
  6. •
  7. Plumbing Product
  8. •
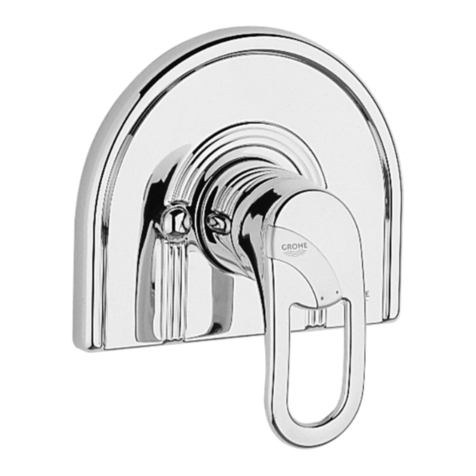
  9. Grohe Ondus 20 149 User manual

Grohe Ondus 20 149 User manual

D......1 I......5 N......9 GR ......13 TR ......17 BG ......21 RO ......25
GB ......2 NL ......6 FIN ......10 CZ ......14 SK ......18 EST ......22 CN ......26
F......3 S......7 PL ......11 H......15 SLO ......19 LV ......23 RUS ......27
E......4 DK ......8 UAE ......12 P......16 HR ......20 LT ......24
Design & Quality Engineering GROHE Germany
GROHE Ondus
96.318.031/ÄM 214937/07.11
20 149
24 031
D.......1 I......2 N......3 GR ......5 TR ......6 BG ......7 RO ......9
GB .......1 NL ......2 FIN ......4 CZ ......5 SK ......6 EST ......8 CN ......9
F.......1 S......3 PL ......4 H......5 SLO ......7 LV ......8 RUS ......9
E......2 DK ......3 UAE ......4 P......6 HR ......7 LT ......8
I
20 149
24 031
Please pass these instructions on to the end user of the fitting.
S.v.p remettre cette instruction à l'utilisateur de la robinetterie!
Bitte diese Anleitung an den Benutzer der Armatur weitergeben!
II
24mm
32mm
30mm
2,5mm
17mm
30mm
19mm
8mm
1 2
3 4
5 6
7
8
9
1
D
Anwendungsbereich
Der Betrieb mit drucklosen Speichern (offenen
Warmwasserbereitern) ist nicht möglich!
Technische Daten
• Fließdruck min. 0,5 bar /empfohlen 1-5 bar
• Betriebsdruck max. 10 bar
• Prüfdruck 16 bar
Zur Einhaltung der Geräuschwerte nach DIN 4109 ist bei
Ruhedrücken über 5 bar ein Druckminderer einzubauen.
Höhere Druckdifferenzen zwischen Kalt- und
Warmwasseranschluss sind zu vermeiden!
• Durchfluss bei 3 bar Fließdruck:
bei Waschtisch: ca. 6 l/min
bei Bidet: ca. 13 l/min
•Temperatur
Warmwassereingang max. 80 °C
Empfohlen: (Energieeinsparung) 60 °C
Installation
Rohrleitungssystem vor und nach der Installation
gründlich spülen (DIN 1988/DIN EN 806 beachten)!
Einbau und Anschluss, siehe Klappseite II, Abb. [1] bis [8].
Maßzeichnung auf Klappseite I beachten.
Ablaufgarnitur einbauen, siehe Klappseite I.
Kelch abdichten!
Anschluss
Verbindung der Seitenventile mit den Versorgungsleitungen
herstellen.
Kalt- und Warmwasserzufuhr öffnen und Anschlüsse auf
Dichtheit prüfen.
Wartung
Alle Teile prüfen, reinigen, evtl. austauschen und mit Spezial-
armaturenfett einfetten.
Kalt- und Warmwasserzufuhr absperren.
Oberteil,siehe Abb. [9].
Seitenventil gegen Zurückrutschen sichern!
Ersatzteile, siehe Klappseite I ( * = Sonderzubehör).
GB
Application
Operation with low-pressure displacement water heaters is
not possible!
Technical data
• Flow pressure min. 0.5 bar / recommended 1 - 5 bar
• Operating pressure max. 10 bar
• Test pressure 16 bar
If static pressure is greater than 5 bar, fit pressure reducer.
Avoid major pressure differences between cold and hot water
supply.
• Flow rate at 3 bar flow pressure:
for wash basin: approx. 6 l/min
for bidet mixer: approx. 13 l/min
• Temperature
Hot water inlet: max. 80 °C
Recommended: (energy saving) 60 °C
Installation
Flush piping system prior and after installation of fitting
thoroughly (Consider EN 806)!
Installation and connection, see fold-out page II, Figs. [1]
to [8].
Refer to the dimensional drawing on fold-out page I.
Fit pop-up waste set,see fold-out page I.
Seal plug-hole rim!
Connection
For this purpose the side valves must be connected to the
supply lines.
Open cold and hot water supply and check connections
for watertightness.
Maintenance
Inspect and clean all parts, replace as necessary and grease
with special grease.
Shut off cold and hot water supply.
Headpart, see Fig. [9].
Secure side valve against sliding back!
Replacement parts, see fold-out page I(* = special
accessories).
F
Domaine d'application
Un fonctionnement avec des accumulateurs sans pression
(chauffe-eau à écoulement libre) n'est pas possible!
Caractéristiques techniques
• Pression dynamique : min. 0,5 bar - recommandée 1 à 5 bar
• Pression de service maximale 10 bars
• Pression d’épreuve 16 bars
Il est nécessaire d'installer un réducteur de pression lorsque la
pression statique est supérieure à 5 bars.
Eviter des différences importantes de pression entre les
raccords d'eau chaude et d'eau froide!
• Débit à une pression dynamique de 3 bars:
du robinetterie de lavabo: env. 6 l/min
du robinetterie de bidet: env. 13 l/min
• Température
Arrivée d'eau chaude : 80 °C maxi.
Recommandée : (économie d'énergie) 60 °C
Installation
Bien rincer les canalisations avant et après l’installation
(respecter la norme EN 806)!
Montage et raccordement, voir volet II, fig. [1] à [8].
Tenir compte de la cote du schéma sur le volet I.
Monter l'ensemble de vidage, voir volet I.
Etancher la bonde!
Raccordement
Raccorder les robinets d'arrêt aux conduites d'alimentation.
Ouvrir l'arrivée d'eau froide et d'eau chaude et vérifier
l'étanchéité des raccords.
Maintenance
Contrôler toutes les pièces, les nettoyer, les remplacer si
nécessaire et les graisser avec de la graisse spéciale pour
robinetterie.
Fermer l'arrivée d'eau chaude et d'eau froide.
Tête, voir fig. [9].
Bloquer le robinet d'arrêt pour l'empêcher de glisser!
Pièces de rechange, voir volet I (* = accessoires en option).
2
E
Campo de aplicación
¡No es posible el funcionamiento con acumuladores sin presión
(calentadores de agua sin presión)!
Datos técnicos
• Presión de trabajo mín. 0,5 bares / recomendada 1 - 5 bares
• Presión de utilización máx. 10 bares
• Presión de verificación 16 bares
Si la presión en reposo es superior a 5 bares, hay que instalar un
reductor de presión.
¡Deberán evitarse diferencias de presión importantes entre las
acometidas del agua fría y del agua caliente!
• Caudal para una presión de trabajo de 3 bares:
batería de lavabo aprox. 6 l/min
batería de bidé aprox. 13 l/min
• Temperatura
Entrada del agua caliente máx. 80 °C
Recomendada (ahorro de energía) 60 °C
Instalación
¡Purgar a fondo el sistema de tuberías antes y después
de la instalación (tener en cuenta EN 806)!
Montaje y conexión, véase la página desplegable II, figs. [1] a [8].
Respetar el croquis de la página desplegable I.
Montar el vaciador automático, véase la página desplegable I.
¡Estanqueizar el cuerpo!
Conexiones
Establecer la conexión de las válvulas laterales con los conductos
de alimentación.
Abrir las llaves de paso del agua fría y del agua caliente
y comprobar la estanqueidad de las conexiones.
Mantenimiento
Verificar todas las piezas, limpiarlas, cambiarlas en caso de
necesidad y engrasarlas con grasa especial para griferías.
Cerrar las llaves de paso del agua fría y del agua caliente.
Montura,véase la fig. [9].
¡Asegurar la válvula lateral para que no se deslice hacia atrás!
Piezas de recambio, véase la página desplegable I
(* = accesorios especiales).
I
Gamma di applicazioni
Non è possibile il funzionamento con accumulatori di acqua calda
a bassa pressione (accumulatori di acqua calda a circuito aperto).
Dati tecnici
• Pressione idraulica min. 0,5 bar / consigliata 1 – 5 bar
• Pressione di esercizio max. 10 bar
• Pressione di prova 16 bar
Per pressioni statiche superiori a 5 bar si raccomanda
l’installazione di un riduttore di pressione.
Evitare grandi differenze di pressione fra i raccordi d'acqua fredda
e d'acqua calda!
• Portata a 3 bar di pressione idraulica:
con rubinetto lavabo: ca. 6 l/min
con miscelatore bidet: ca. 13 l/min
• Temperatura
In entrata max. 80 °C
Consigliata (risparmio di energia) 60 °C
Installazione
Prima e dopo l’installazione pulire a fondo il sistema di
tubazioni (osservare la norma EN 806)!
Montaggio e raccordi, vedere il risvolto di copertina II, fig. [1]
fino a [8].
Rispettare le quote di installazione sul risvolto di copertina I.
Montaggio dello scarico,vedere il risvolto di copertina I.
Sigillare la piletta.
Raccordo
Stabilire il collegamento dei rubinetti laterali con le tubazioni di
alimentazione.
Aprire l’entrata dell’acqua calda e fredda e controllare la tenuta
dei raccordi.
Manutenzione
Controllare, pulire, eventualmente sostituire tutti i pezzi
e ingrassare con grasso speciale.
Chiudere le entrate dell'acqua calda e fredda.
Testina,vedere fig. [9].
Fissare il rubinetto laterale in modo che non possa scivolare.
Per i pezzi di ricambio, vedere il risvolto di copertina I
(* = accessori speciali).
NL
Toepassingsgebied
Het werken met lagedrukboilers (open warmwatertoestellen) is
niet mogelijk!
Technische gegevens
• Stromingsdruk min. 0,5 bar / aanbevolen 1 - 5 bar
• Werkdruk max. 10 bar
• Testdruk 16 bar
Bij statische drukken boven 5 bar dient een
drukreduceerventiel te worden ingebouwd.
Voorkom hoge drukverschillen tussen de koud- en
warmwateraansluiting!
• Capaciteit bij 3 bar stromingsdruk:
bij wastafelmengkraan: ca. 6 l/min
bij bidetmengkraan: ca. 13 l/min
• Temperatuur
warmwateringang max. 80 °C
Aanbevolen (energiebesparing) 60 °C
Installeren
Leidingen vóór en na het installeren grondig spoelen
(EN 806 in acht nemen)!
Inbouw en aansluiting, zie uitvouwbaar blad II, afb. [1] t/m [8].
Neem de maatschets op uitvouwbaar blad I in acht.
Afvoergarnituur inbouwen, zie uitvouwbaar blad I.
Dicht de rand af!
Aansluiting
Sluit de toevoerleidingen op de zijkleppen aan.
Open de koud- en warmwatertoevoer en controleer de
aansluitingen op lekkages.
Onderhoud
Controleer en reinig alle onderdelen. Vervang onderdelen
indien nodig. Vet de onderdelen met speciaal armaturenvet in.
Koud- en warmwatertoevoer afsluiten.
Bovendeel,zie afb. [9].
Borg de zijklep tegen terugglijden.
Reserveonderdelen, zie uitvouwbaar blad I (* = speciaal
toebehoren).

This manual suits for next models

1

Other Grohe Plumbing Product manuals

Grohe Eurowing 19520 User manual

Grohe

Grohe Eurowing 19520 User manual

Grohe Eurosmart Cosmopolitan 19 381 User manual

Grohe

Grohe Eurosmart Cosmopolitan 19 381 User manual

Grohe EUROSTYLE COSMOPOLITAN 23 300 User manual

Grohe

Grohe EUROSTYLE COSMOPOLITAN 23 300 User manual

Grohe Avensys Parts list manual

Grohe

Grohe Avensys Parts list manual

Grohe GROHTHERM F User manual

Grohe

Grohe GROHTHERM F User manual

Grohe Grohtherm 1000 34 334 User manual

Grohe

Grohe Grohtherm 1000 34 334 User manual

Grohe Eurostyle Cosmopolitan 33 561 User manual

Grohe

Grohe Eurostyle Cosmopolitan 33 561 User manual

Grohe Grohtherm 1000 User manual

Grohe

Grohe Grohtherm 1000 User manual

Grohe 34 953 User manual

Grohe

Grohe 34 953 User manual

Grohe Sense Guard 22 500 User manual

Grohe

Grohe Sense Guard 22 500 User manual

Grohe 06490XX0 User manual

Grohe

Grohe 06490XX0 User manual

Grohe 13968000 User manual

Grohe

Grohe 13968000 User manual

Grohe Essence 32 216 User manual

Grohe

Grohe Essence 32 216 User manual

Grohe 37 021 User manual

Grohe

Grohe 37 021 User manual

Grohe 34 558 User manual

Grohe

Grohe 34 558 User manual

Grohe Aquatower 2000 User manual

Grohe

Grohe Aquatower 2000 User manual

Grohe Eurodisc 32 302 User manual

Grohe

Grohe Eurodisc 32 302 User manual

Grohe 29 038 User manual

Grohe

Grohe 29 038 User manual

Grohe Start 32 277 User manual

Grohe

Grohe Start 32 277 User manual

Grohe Ladylux Plus 33 737 User manual

Grohe

Grohe Ladylux Plus 33 737 User manual

Grohe 33 961 User manual

Grohe

Grohe 33 961 User manual

Grohe EUROSMART COSMOPOLITAN E 36 334 User manual

Grohe

Grohe EUROSMART COSMOPOLITAN E 36 334 User manual

Grohe QUICKFIX User manual

Grohe

Grohe QUICKFIX User manual

Grohe Grohtherm 3000 34 185 User manual

Grohe

Grohe Grohtherm 3000 34 185 User manual

Popular Plumbing Product manuals by other brands

Moen SANI-STREAM 8797 manual

Moen

Moen SANI-STREAM 8797 manual

Cistermiser Easyflush EVO 1.5 manual

Cistermiser

Cistermiser Easyflush EVO 1.5 manual

Kohler Triton Rite-Temp K-T6910-2A installation guide

Kohler

Kohler Triton Rite-Temp K-T6910-2A installation guide

BEMIS FNOTAB100 Installation instruction

BEMIS

BEMIS FNOTAB100 Installation instruction

Hans Grohe ShowerTablet Select 700 13184000 Instructions for use/assembly instructions

Hans Grohe

Hans Grohe ShowerTablet Select 700 13184000 Instructions for use/assembly instructions

Akw Stone Wash Basin Installation instructions manual

Akw

Akw Stone Wash Basin Installation instructions manual

Enlighten Sauna Rustic-4 user manual

Enlighten Sauna

Enlighten Sauna Rustic-4 user manual

Moen ShowHouse S244 Series quick start guide

Moen

Moen ShowHouse S244 Series quick start guide

Sanela SLWN 08 Mounting instructions

Sanela

Sanela SLWN 08 Mounting instructions

Franke 7612982239618 operating instructions

Franke

Franke 7612982239618 operating instructions

Heritage Bathrooms Granley Deco PGDW02 Fitting Instructions & Contents List

Heritage Bathrooms

Heritage Bathrooms Granley Deco PGDW02 Fitting Instructions & Contents List

Tres TOUCH-TRES 1.61.445 instructions

Tres

Tres TOUCH-TRES 1.61.445 instructions

STIEBEL ELTRON WS-1 Operation and installation

STIEBEL ELTRON

STIEBEL ELTRON WS-1 Operation and installation

Miomare HG00383A manual

Miomare

Miomare HG00383A manual

BELLOSTA revivre 6521/CR1 quick start guide

BELLOSTA

BELLOSTA revivre 6521/CR1 quick start guide

American Standard Heritage Amarilis 7298.229 parts list

American Standard

American Standard Heritage Amarilis 7298.229 parts list

BorMann Elite BTW5024 quick start guide

BorMann

BorMann Elite BTW5024 quick start guide

Moen 1225 quick start guide

Moen

Moen 1225 quick start guide

manuals.online logo
manuals.online logoBrands
  • About & Mission
  • Contact us
  • Privacy Policy
  • Terms and Conditions

Copyright 2025 Manuals.Online. All Rights Reserved.