3
Revision date: 06.28.19 H5_30_Wide_HT_Roll_Up
Important Information
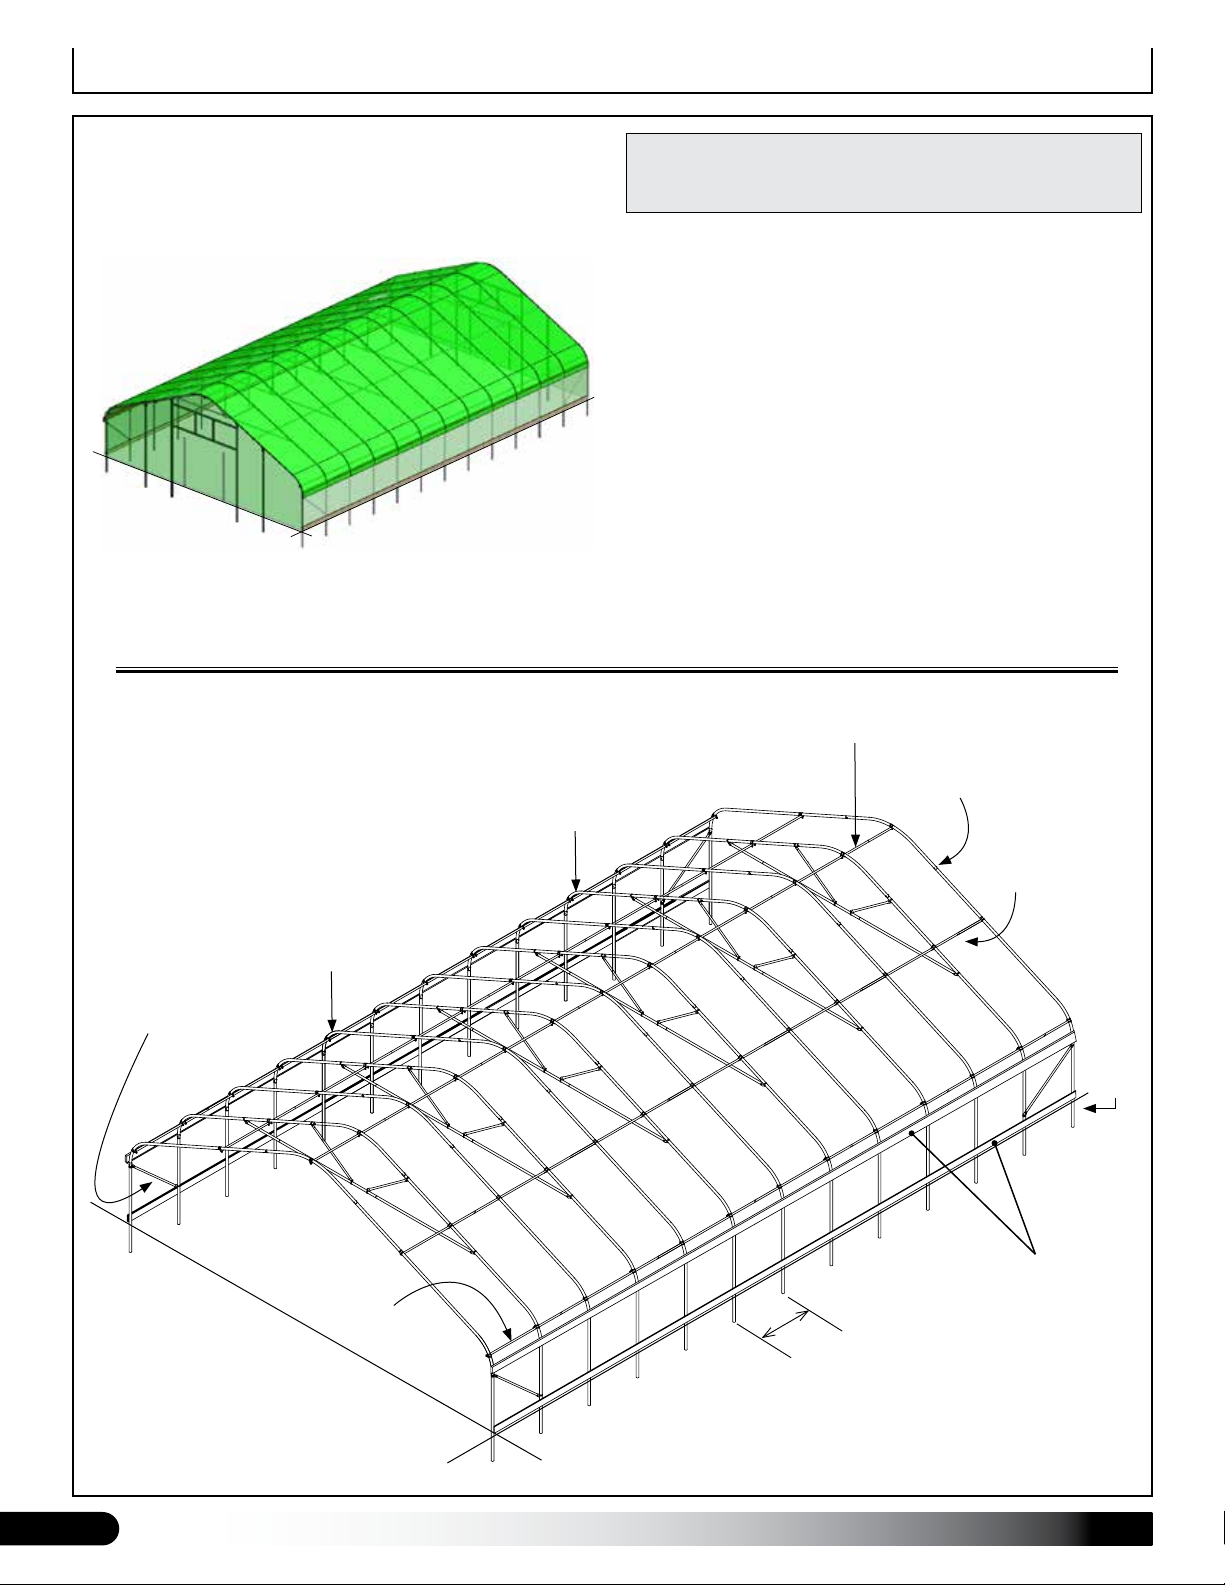
ASSEMBLY
Following instructions as presented will help ensure
proper assembly. Failing to follow these steps may result
in an improperly assembled and anchored structure.
NOTE: Once main frame is assembled, many remaining
procedures can occur simultaneously, depending on
available assistants and equipment. Before you begin,
review all technical documents to better understand
overall building design.
Steps outlining basic frame assembly are as follows:
1. Verify all parts are included in shipment. Notify
Customer Service for questions or concerns.
2. Read this guide and all additional documentation
included with shipment before you begin.
3. Gather tools, bracing, ladders, lifts, and assistants
needed for assembly.
4. Check weather before you install roof cover and
any end panels. Do not install covers or panels on a
windy or stormy day.
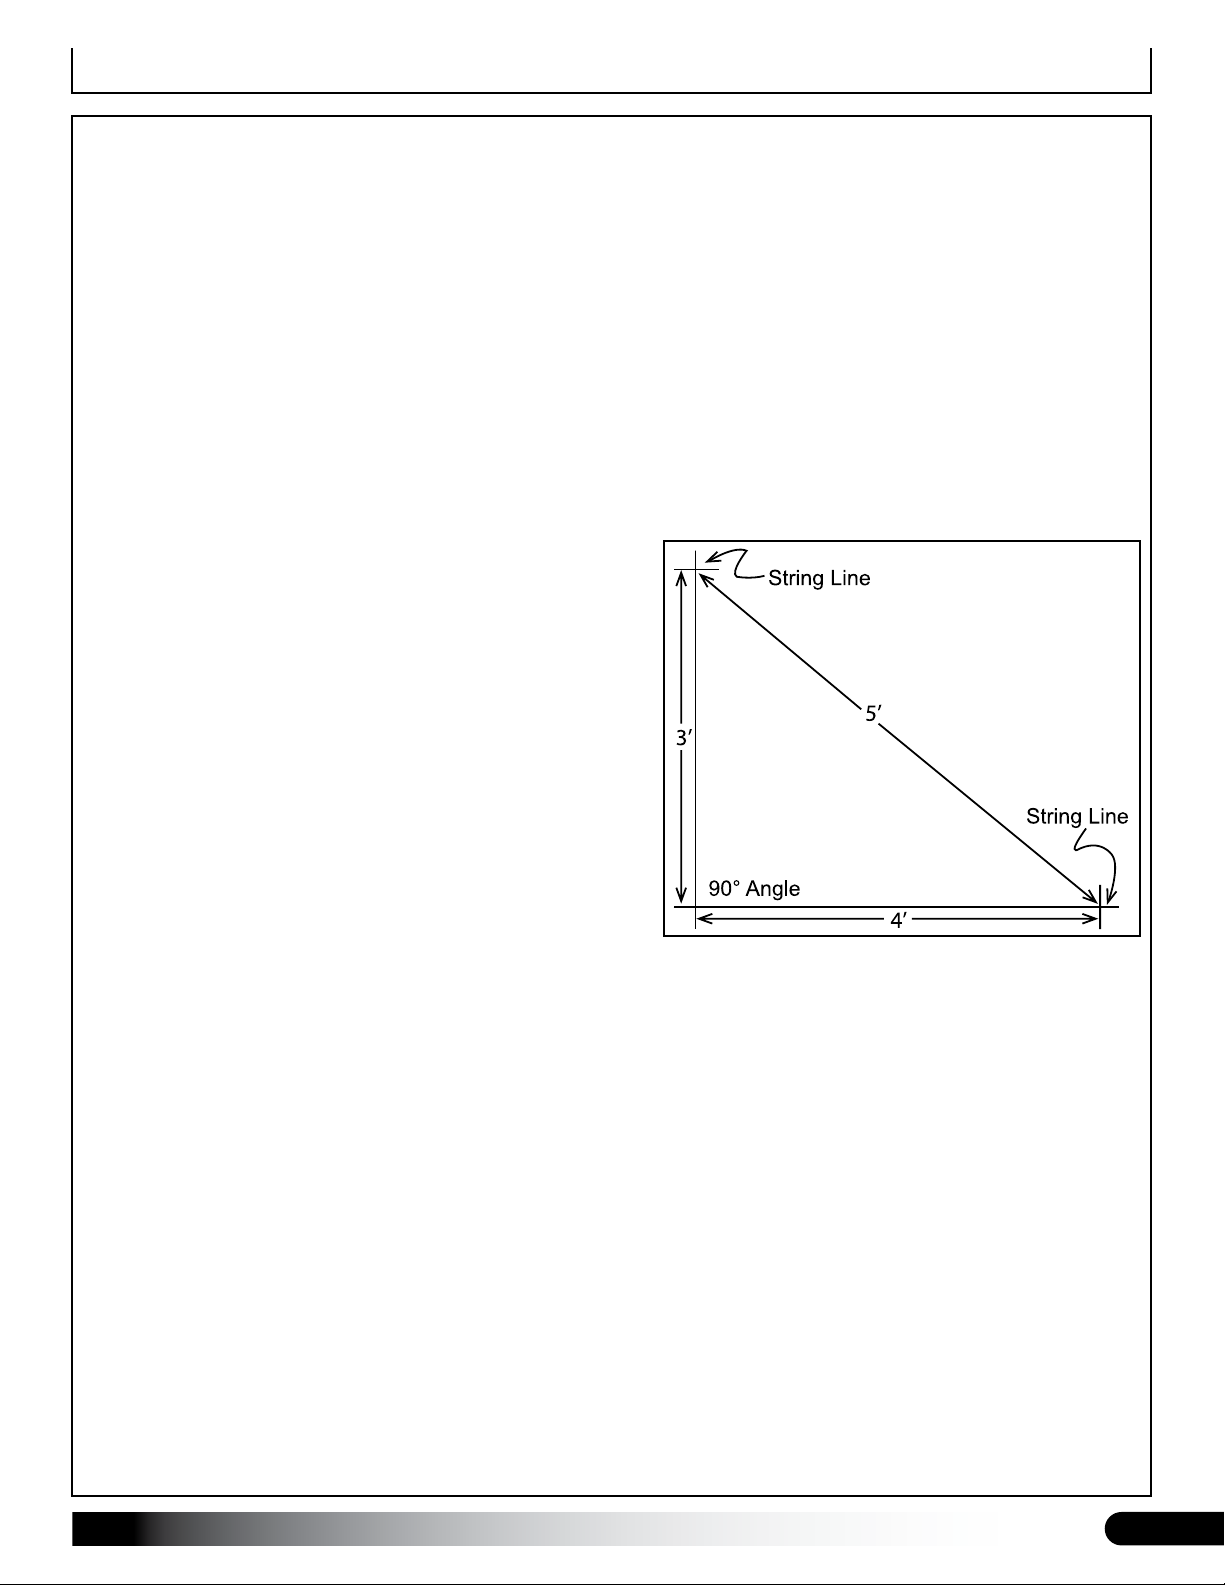
5. Re-evaluate location and site based on information
and precautions presented in the documentation.
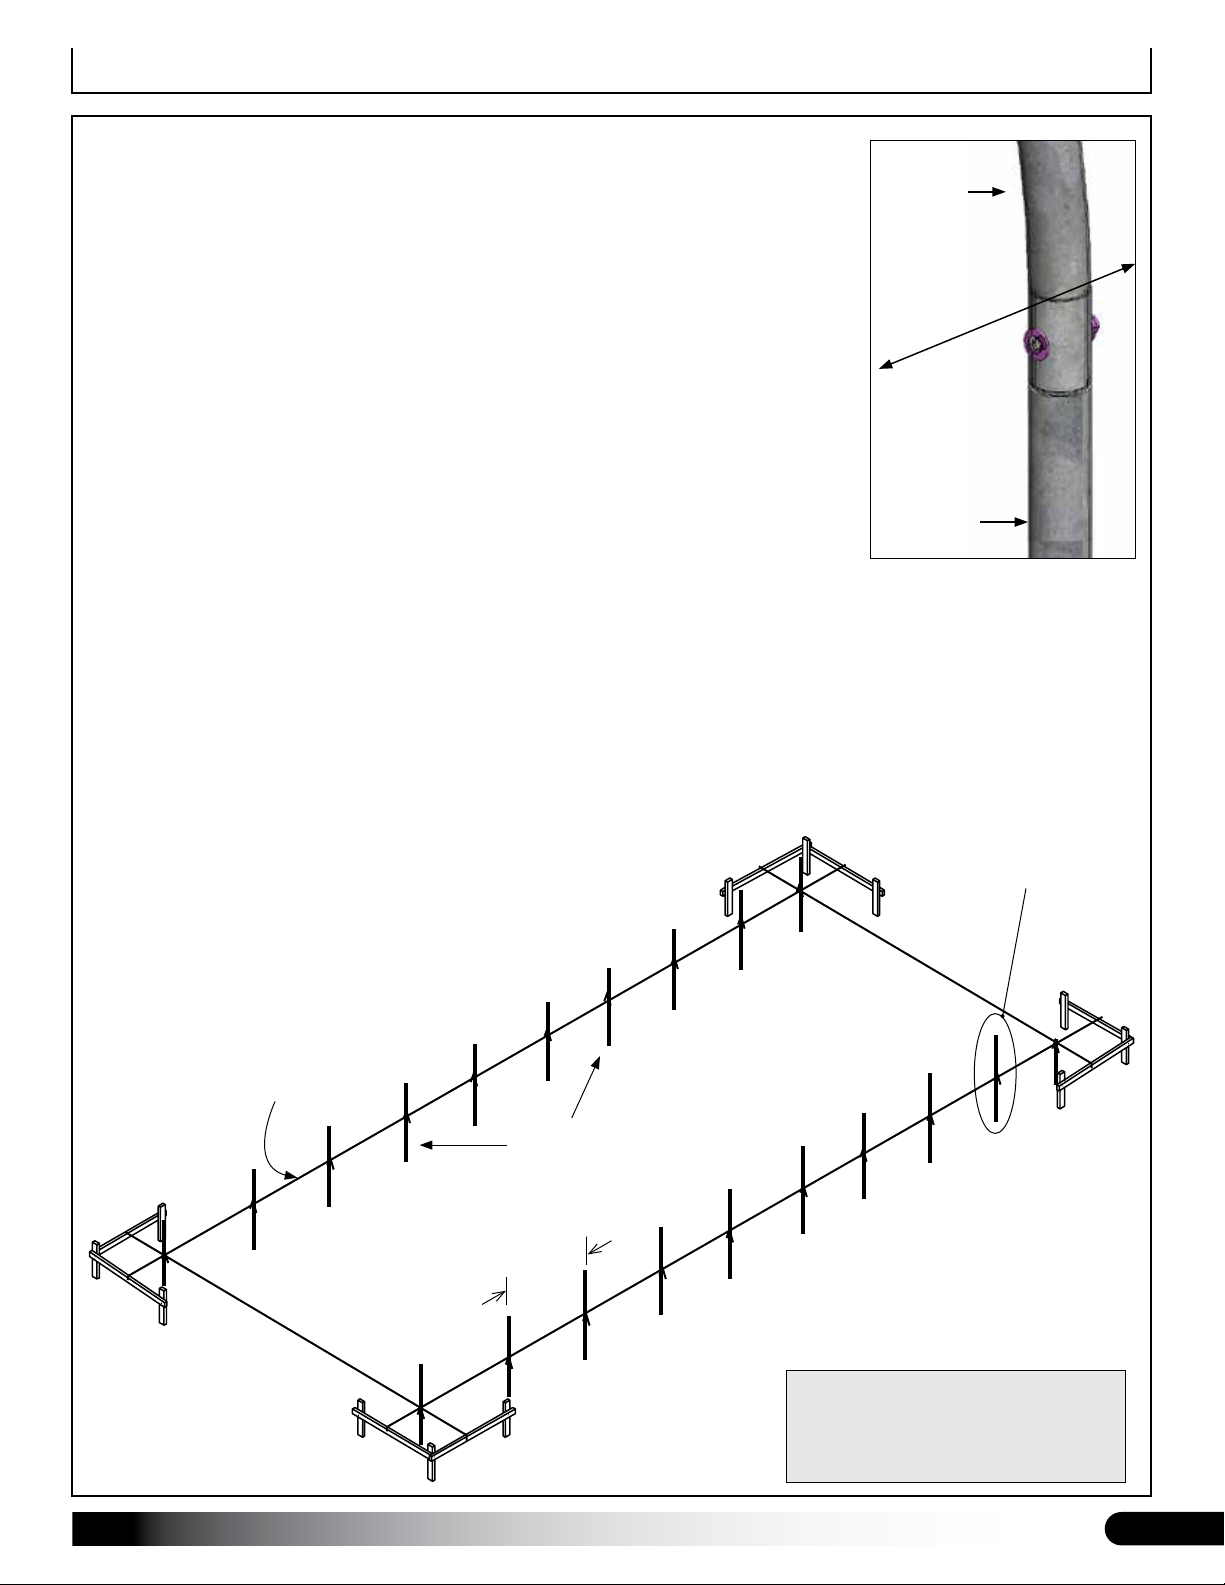
6. Prepare site (if applicable). Set ground posts.
7. Assemble rafter components — Style A & B.
8. Assemble main building frame (rafters, purlins, etc).
9. Install end frame and end panels.
10. Attach baseboards and ribbon boards (customer-
supplied). Fasteners are included.
11. Attach 102197 aluminum u-channel along sides for
cover installation. Consult these instructions and all
drawings for additional details.
12. Attach 102197 aluminum u-channel to top of each
end rafters.
13. Install main cover.
14. Install roll-up (or drop-down) sides and anti-billow
ropes.
15. Complete and return all warranty information as
instructed if present.
REQUIRED TOOLS
The following list identifies the main tools needed for
assembly. Additional tools and supports may be needed
depending on structure and location.
• Tape measure or measuring device and marker to
mark locations on pipes and rafters.
• Variable speed drills and clutched drivers. (Cordless
with extra batteries works best.)
• Metal-cutting saws or tools to cut pipe and
aluminum. Saw or blade to cut wood.
• Drill bit set with 3/16" and 3/8" bit.
• Plumb Bob and level.
• Wrenches and socket set, hammer, and gloves.
• Adjustable pliers and self-locking pliers.
• Ladders, work platforms, and other machinery for
lifting designed to work safely at height of building.
• Safety equipment to protect head, eyes, hands and
feet.
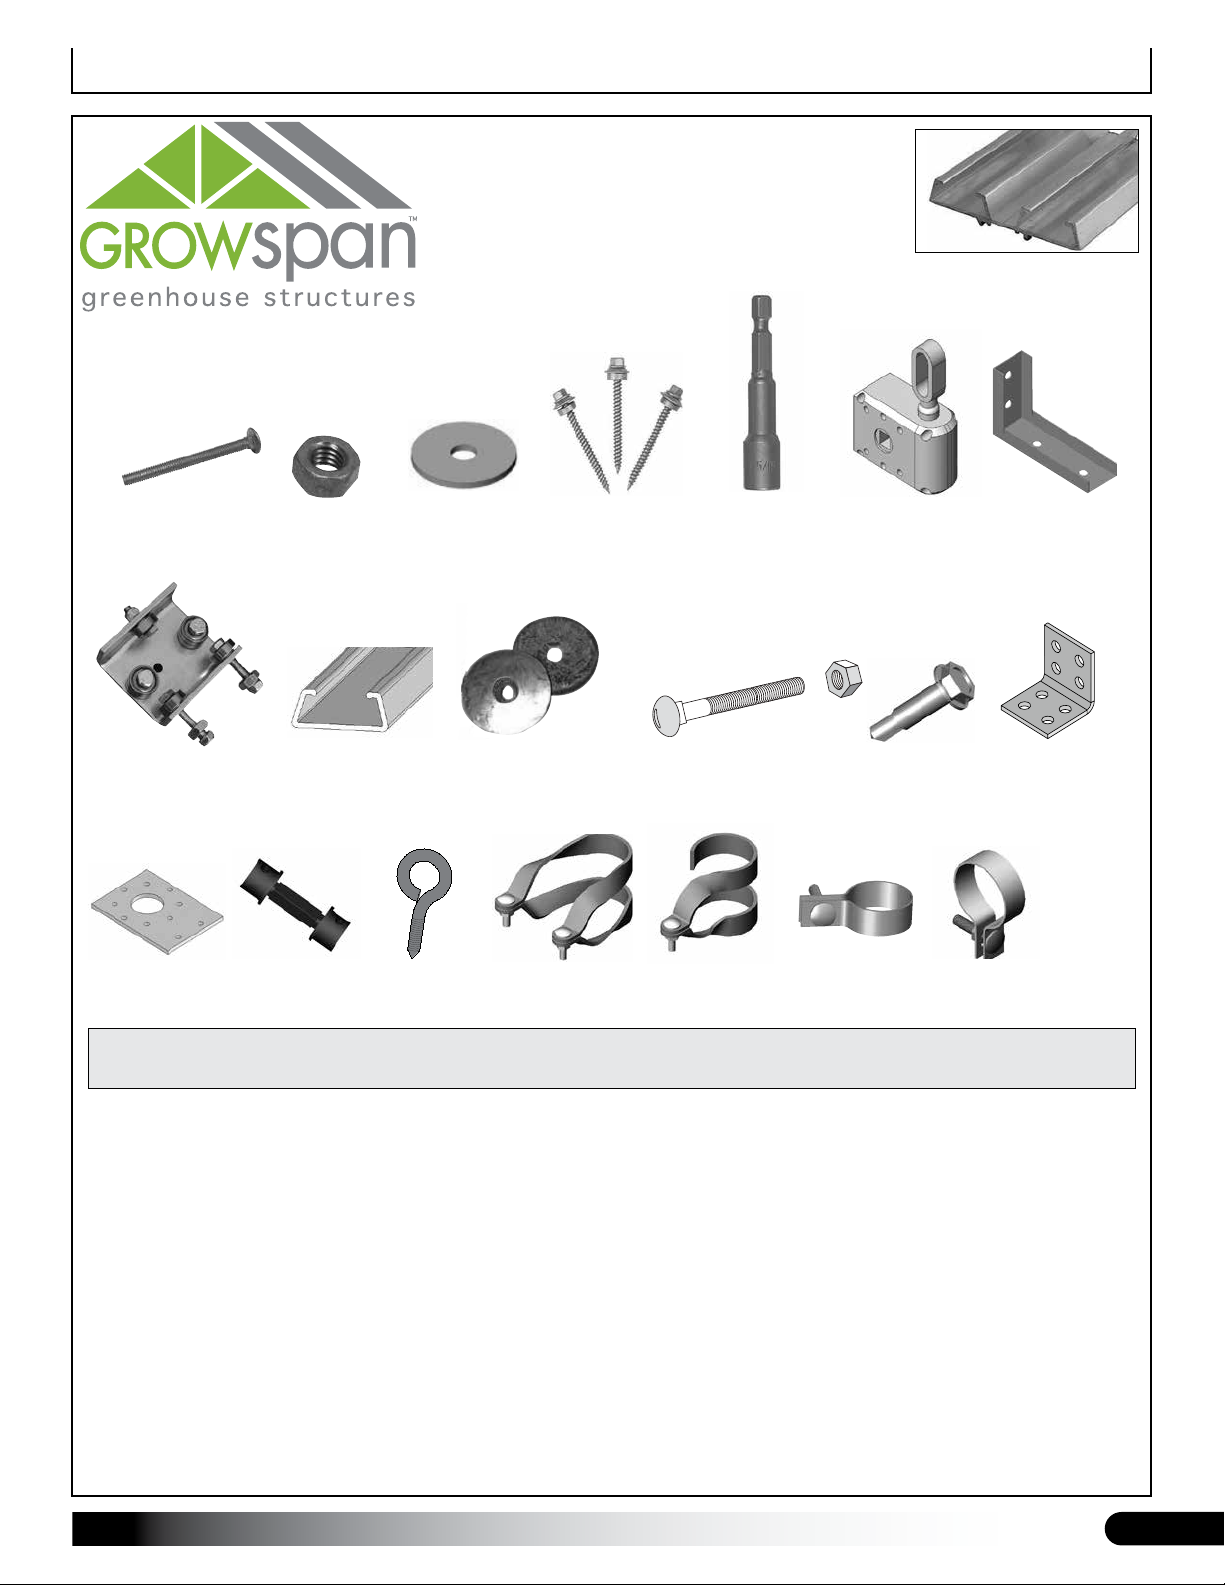
UNPACK AND IDENTIFY PARTS
The following steps will ensure that you have all the
necessary parts before you begin.
1. Unpack contents of shipment and place where
you can easily inventory parts. Refer to the Bill of
Materials/Spec Sheets.
2. Verify all parts listed on Bill of Materials/Spec
Sheets are present. If anything is missing or you
have questions, consult Pictorial Parts Guide and
all diagrams for clarification, or contact Customer
Service.
NOTE: Do not open plastic bags containing smaller
parts such as fasteners or washers at this time.
Simply verify quantities.
ASSEMBLY NOTE: Install Tek screws using a clutched
drill driver running approximately 750 RPM while
applying approximately 50 lbs of force.
Do not use an impact driver to install Tek screws!