Grundig D350 User manual

FOR A GOOD
DIGITAL CORDLESS PHONE
D350/D350A
EN

1
D350/D350A
Dear customer,
You have just acquired a new generation Grundig telephone.
This device has been manufactured with the utmost care. We reserve the right to make changes,
modifications and improvements without notice to the products described in this user guide.
To operate the device safely and easily, please read carefully the paragraph “Recommendations and
safety instructions”, page 4.
The CE label confirms that the product complies with the 1999/5/EC regulations of the
European Union Parliament regarding wireless systems and telecommunications.
The declaration of compliance may be looked up on the www.grundig-dect.com website
section "Support" or can be obtained from the following address :
Sagemcom Broadband SAS
250, route de l'Empereur
92848 Rueil-Malmaison Cedex - France
Copyright © Sagemcom Broadband SAS
All rights reserved
Sagemcom is a registered trademark

D350/D350A
www.grundig-dect.com
2
Overview
Recommendations and safety instructions .............................................. 4
Discover... ................................................................................................. 5
Your phone .............................................................................................................5
Set-up... .................................................................................................... 7
Connect the base ....................................................................................................7
Handset set-up .......................................................................................................7
Charging the handset .............................................................................................8
The handset screen ................................................................................................8
Switching the handset on / off ................................................................................8
Batteries replacement ...........................................................................................8
Browsing through the menus .................................................................................9
Menu tree structure................................................................................ 11
Making and receiving calls... .................................................................. 13
Managing a call ....................................................................................................13
Options during a call ............................................................................................14
Managing several calls .........................................................................................15
Using additional handsets ....................................................................................18
Locating your handset ..........................................................................................23
Listening to your messages .................................................................................23
Locking / Unlocking the keypad ...........................................................................24
Using the phonebook ............................................................................................25
Listening and Recording...(model D350A) .............................................. 33
Enabling/disabling the answering machine .........................................................33
Answering machine message ..............................................................................34
Record a memo ....................................................................................................37
Listening to your messages .................................................................................38
Delete all your messages .....................................................................................39

3
D350/D350A
Setting up................................................................................................ 40
The phone .............................................................................................................40
The handset ..........................................................................................................52
The base ...............................................................................................................59
Answering machine (model D350A) .....................................................................66
The alarm................................................................................................ 72
Tracing your calls.... ............................................................................... 75
Call logs ................................................................................................................75
Environmental information..................................................................... 79
Packaging .............................................................................................................79
Batteries ...............................................................................................................79
The product ..........................................................................................................79
Terms and Conditions for United Kingdom & Ireland only ..................... 80
Terms and conditions for other countries .............................................. 82

D350/D350A
www.grundig-dect.com
4
Recommendations and safety instructions
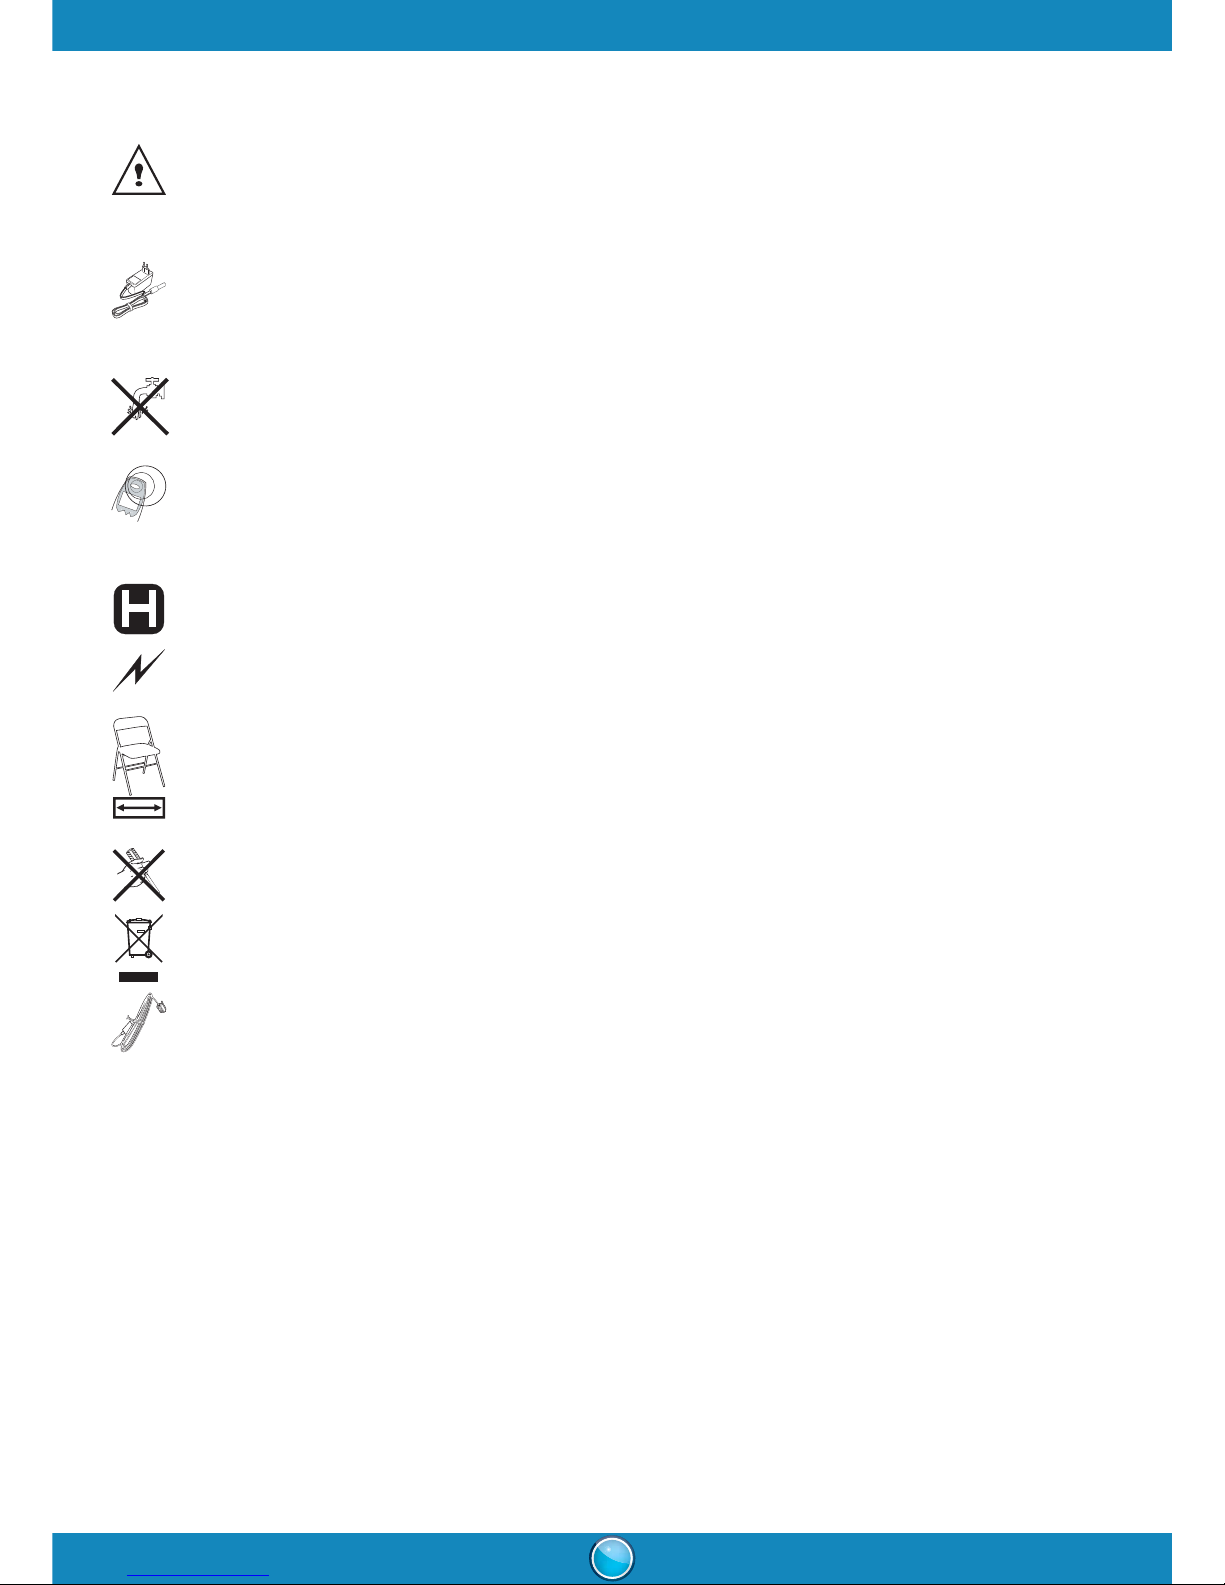
For safety reasons, never put the handset in the base station without the batteries inserted or without the
lid on the batteries compartment as this could cause an electric shock.
To avoid damaging your handset/base, only use certified rechargeable batteries NiMH 1.2 V 750 mAh,
never use non-rechargeable batteries. Insert the batteries in the handset batteries compartment.
Only use the power unit supplied and connect it to the electricity mains in accordance with the installation
instructions in this user manual and the details on the sticker regarding voltage, electrical current and
frequency. As a precaution if there is a risk of danger, the power plug can be pulled out to disconnect the
230 volt power supply. Therefore the sockets should be near the device and easily accessible.
Do not install your DECT telephone in a damp environment, such as a bathroom, washroom, kitchen etc,
and not within 1.50 metres of a source of water or outside. This device is designed for use in temperatures
of between 5 °C and 40 °C.
Your DECT telephone has a range of approx. 50 metres indoors and up to 300 metres outdoors. The range
can be affected by the proximity of metal objects, such as a television and electrical devices.
Zones without reception may appear owing to elements in the building. This can cause brief interruptions
in the conversation, caused by faulty transmission.
Certain medical equipment and highly-sensitive machines or security systems may be affected by the
transmission power of the telephone. In these cases we recommend adhering to the safety information.
In regions greatly affected by electrical storms we recommend that you protect your telephone circuit
with a special fixture for excess voltage.
Your D350/D350A has anti-skid pads that should leave no traces on your furniture and ensure stability.
However, given the wide variety of finishes used by furniture manufacturers, traces may appear on
surfaces in contact with the parts of your D350/D350A.
Sagemcom Broadband SAS decline all responsibility in any such cases of damage.
Do not attempt to remove screws or open the appliance. It does not contain any user-replaceable parts.
Worn out batteries must be disposed of in line with the recycling regulations in this user manual.
This product is intended to be connected to the public analogue telephone network of any British
and Irish network operator. If problems should arise, contact your nearest specialist dealer.
Only use the telephone cable supplied.

5
D350/D350A
Discover...
Discover...
The pack
Your phone
The base
1Access keys to the answering machine *
(refer to the paragraph “Listening to your
messages”, page 38).
2Handset location.
3Handset(s) Search / Pairing key.
•
Long press:
pairing of handsets.
•
Short press
: paging of handsets.
Indicator light operation *:
*Model
D350A
Fixed Handset on line.
- or -
Answer Machine on.
Blinking
New message(s) on your answering machine.
- or -
Access answering machine menu on the handset / remote.
- or -
Recording a message.
- or -
The base is in pairing mode.
Check that you have the following items in your pack:
a
D350
or
D350A
base according to model,
a handset,
two rechargeable batteries (type NiMH 1.2 V 750 mAh),
a telephone connection cord,
a mains power supply with connection cord,
a quick start guide.
If you have purchased a duo or trio, pack, you will also find for each extra handset:
a charger,
a mains power supply with connection cord,
two rechargeable batteries (type NiMH 1.2 V 750 mAh).
1
2
3

D350/D350A
www.grundig-dect.com
6
The handset
1Earpiece
2Graphic screen
3Browser
4OK / Menu key:
•Confirm
•access to the menu and/or options
5"Hang up" key
•
Short press:
back to the main menu
•
Short press
: end a call (during a call).
•
Long press
: switch off / switch on the handset.
6Alphanumeric keypad
7"Hash" key:
•Long press : (de)activate the silent mode.
8Mute button : cuts off the microphone (during a call)
9Microphone
10 R key (flashing, to manage several calls).
11 "Star" key
Long press: (un)lock the keypad.
12 Key 1:
Long press: access to voicemail service
(to set voicemail number, refer to section “Changing
your voice mail number”, page 51)
13 "Open line" / "Hands-free" key
•Accept a call
•Enable / disable hands-free mode (during a call).
14 C / intercom key:
•Back to the previous menu.
•Correct the entry / Cancel
•Call an additional handset (from the standby
screen)
15 Charging terminals.
16 Loudspeaker
1
2
3
4
5
6
7
8
9
10
11
13
12
14
16
15

7
D350/D350A
Set-up...
Set-up...
Connect the base
1Take the telephone connection cord, click it into its socket.
2Connect the other end of the cord to the telephone socket.
3Take the power adapter.
4Connect the end of the cord to the base and the power adapter to
the wall socket.
Handset set-up
1Take the batteries provided in the packaging.
2Turn over your handset
3Insert the batteries one by one according to their polarities as indicated in the illustration.
4Fit the hatch to the handset.
5The screen turns on and a welcome message in all the languages supported by the telephone is
displayed on the screen, press .*
6Select the country where you will use the phone by pressing the top or the bottom of the
browser and press .*
7Place your handset on its charger and fully charge the batteries.
* Depending on version
Before making connections, please see the safety instructions at the start of the booklet.
1
3
4
2
123
45
+
+
-
-
15 H
+
+
-
-
+
-
+
-
+
-
+
-

D350/D350A
www.grundig-dect.com
8
Charging the handset
To charge your phone, place the handset on the base, making sure that the base is connected to an AC
outlet. The batteries charging icon moves to inform you that charging is in progress. The icon display
stops moving when the batteries are charged.
The handset screen
In standby mode or during use, your phone screen informs you of your
phone’s current state through icons, and in particular :
1Status icons : Indicates your phone’s current state.
2Information field :
•Standby screen :in the normal state, displays the name of the handset
and the current time.
•In the menus : displays the selected menu name, function or setting.
3Action area : displays the actions associated with the multi-function
keys and in the ongoing menu (refer to section "The
multifunction keys ", page 9).
THE ICONS DISPLAYED
Switching the handset on / off
To switch on the handset, give a long press on the key .
To switch off the handset, give a long press on the key .
The message Switch off Handset? is displayed. Press the key to confirm.
Batteries replacement
1Turn off the handset.
2Remove the batteries compartment hatch.
3Remove the old batteries, insert the new batteries one by one the right way as indicated by their
polarities.
4Refit the batteries compartment hatch.
DECT signal:
blinks when the handset is out of range of the
base or when the base is not supplied
Keypad locked
Answering machine activated* Silent mode activated
New message(s) on your answering machine.* Batteries charge condition
Missed (s) call (s) not consulted Speakerphone enabled
Voice(s) message(s) not consulted Phone in conversation mode
Alarm on * model D350A
To ensure optimum charging, leave the handset on the charger for at least 15 hours when
using the phone for the first time. During charging, the batteries may heat up. This is quite
normal and perfectly safe.
Interc Menu
Handset1
15:29 15/12
1
2
3

9
D350/D350A
Set-up...
Browsing through the menus
Browser
To access the phone menu, press . In the principal menu, press the top or the bottom of the
browser. In the option list, press the top or the bottom of the browser.
The multifunction keys
Your telephone has two and "multifunctions" keys which you can use in several ways:
Main menu
From the standby screen In a menu
To access the telephone menu. To enter a menu, to validate an action in a menu.
To make an Intercom call
(call to another handset).
To return to the previous menu.
To delete characters. With each press, the
character preceding the cursor is deleted.
Worn out batteries should be discarded in accordance with the recycling instructions given in
chapter “Environmental information”, page 79.
To prevent damage to your handset, only use approved rechargeable batteries NiMH 1.2 V 750
mAh. Never use non-rechargeable batteries.
From the standby screen:
Access to the outgoing call list
In a menu:
Navigate up ()
From the standby screen:
Access to the caller list
In a menu:
Navigate bottom ()
OK
Phonebook
Back
Display
Phonebook
Audio
Alarm
Call List *
Settings
Answer Machine **
* Model D350
** Model D350A

D350/D350A
www.grundig-dect.com
10
Illustration
To browse-through menus, use the browser and two multifunction buttons:
1Press the key . The main menu is displayed on the screen.
2From the main menu, press the top or the bottomof the browser to select the desired menu.
3Confirm your choice by pressing the key .
4Press the top or bottom of the browser to scroll through the menus and access the desired
function.
5Confirm your choice by pressing the key .
6Cancel your choice / Exit the displayed menu :
•either by pressing the key .
•or by pressing the red key : the home screen is displayed.
Necessary settings before use
ADJUST THE DATE AND TIME
To access the date and time setting menu:
1Press the key . The main menu is displayed on the screen.
2Select Settings menu by pressing the top or bottom of the browser. Confirm your choice by
pressing the key .
3Scroll through the menus to the Date & Time menu by pressing the top or bottom of the
browser. Confirm your choice by pressing the key .
4Scroll through the menus to the Set Time/Date menu by pressing the top or bottom of the
browser. Confirm your choice by pressing the key .
5Enter the time: using the numeric keypad (hours then minutes).
6Confirm your entry by pressing the key .
Enter the date using the numeric keypad (day, month and year) in the form DD/MM/YYYY.
7Confirm your entry by pressing the key .
You have just set your phone’s current date and time. You can also set the date and time display format
(see “Setting the date and the time format”, page 46).
Refer to the “Menu tree structure”, page 11 section to find out about your phone’s functions.
It is recommended to set the date and time accurately to allow you to keep track of the
timings of your calls and messages.
If you have the Display number option, the date and time will, depending on your operator, be
set automatically when you receive a call.

11
D350/D350A
Menu tree structure
Menu tree structure
Phonebook New Entry
Option Calling Number
Edit Entry
View Entry
Copy Entry * * You must have at least two handsets paired
on the same base
refer to “Associating a new handset”,
page 56 section.
Copy All *
Delete Entry
Delete All
Capacity
Edit Call Group
Speed Dial
Audio Ring Tone Setup External Calls
Internal Calls
Volume
Silent
Signal Tones
Display Handset Name
Screensaver
Contrast
Settings Date & Time Time Format
Date Format
Set Time/Date
Display
Handset Select Base
Language
Auto Answer
Auto Hang Up
Register HS
De-register
Reset Handset
Base Flash Time
Dial Mode
Call Sharing
Change PIN
Reset Base
Mailbox

D350/D350A
www.grundig-dect.com
12
Alarm Alarm X * Alarm On/Off * : X from 1 to 5
Time
Melody
Call List * Settings Call List Type * : model D350
New Call Alert
Answer Machine ** Play messages ** : model D350A
Delete Old Msgs
Answer On/Off
Greeting Msg.
Record Memo
Settings Answer Mode
TAM Language
Answer Delay
Recording Time
Remote Access

13
D350/D350A
Making and receiving calls...
Managing a call
Making a call
At the end of the call, press the handset key (or replace the handset on its base, refer to the “Auto
talk off”, page 55).
Receiving a call
At the end of the call, press the handset key (or replace the handset on its base, refer to the “Auto
talk off”, page 55).
00:00:10
123456
123456
Dial your contact’s number. Press the green key
Predialing
Clear Option Interc Option
1
2
If you make a mistake, press the key to delete the last character entered.
Silent Answ.
123456
Press the green key
Your handset includes an Auto Answer function.
For further details, refer to the “Answering automatically”, page 54.

D350/D350A
www.grundig-dect.com
14
Options during a call
You can use the following options during a call:
Enable/Disable loudspeaker
During a call,
Adjusting the volume
During a call,
00:00:10
123456
Interc Option
Press the green key
When the battery charge icon is at minimum, the hands-free function is not available until the
next charging cycle.
OK
Use the browser

15
D350/D350A
Making and receiving calls...
The secret mode allows you to temporarily mute the line so that you are not heard by the caller.
During a call,
Managing several calls
Your phone allows you to take and manage several calls when you are already on the line (depending
on your line provider).
During a call,
Your first call is put on hold and you can talk with the second caller.
Enabling/Disabling the secret mode
Receiving a second call
00:00:10
123456
Interc Option
123456
Bip
00:01:25
123456R
56R
56R
2
5
00:01:25
123456R2
56R2
6R2
56
Presence of a second call.
+
Interc Option Interc Option
1
2

D350/D350A
www.grundig-dect.com
16
During a call,
The call in progress is then put on hold and you can take back the previous call.
Making a second call
Switching from one call to the other
00:01:25
123456R
56R
56R
2
5
00:01:25
...456R2789
6R7895
6R278
6R278
+
Interc Option Interc Option
Dial your contact's
number.
12
00:01:25
123456R
56R
56R
2
5
00:01:25
123456R2
56R2
6R2
56
+
Interc Option Interc Option
12

17
D350/D350A
Making and receiving calls...
You will return to the other call.
You can then talk with your two contacts at the same time.
To end the 3-way conference, press the key .
Ending one of the calls in progress
Talking with two contacts at the same time (3-way conference)
00:01:25
123456R
56R
56R
2
5
00:01:25
123456R1
56R1
6R1
56
+
Inter Option
Interc Option
12
00:01:25
123456R
56R
56R
2
5
00:01:25
123456R3
56R3
6R3
56
+
Interc Option Interc Option
12

D350/D350A
www.grundig-dect.com
18
Using additional handsets
You can associate additional handsets with your phone: you can then make and receive outside calls or
calls between these handsets.
End the call by pressing .
Calling another handset (intercom)
You first have to pair the handsets with the base.
For further details, refer to “Associating a new handset”, page 56.
Interc Menu Back OK
Handset 1
Handset 2
Intercom
Intercom
Select the
handset *
Back OK
Handset 2
Intercom
Intercom
Silent Answ.
Handset 1
Calling
The Calling Handset
The handset called
* If you only have two paired handsets on the same base, the handset called rings automatically.
14:37 23/06
123
4

19
D350/D350A
Making and receiving calls...
If the share call mode is activated, you can join in a conversation from another handset registered with
the same base (refer to paragraph “Enable / Disable the intrusion mode”, page 63).
You will then join in the conversation.
Join in a conversation already taking place
You must have at least two handsets paired on the same base.
00:12:10
123456
Interc Option
Press the green key
Handset in communication
Handset A
Conference:
Conference:
Handset B
12
This manual suits for next models
1
Table of contents
Other Grundig Cordless Telephone manuals

Grundig
Grundig 01M-8926982600-0121-03 User manual

Grundig
Grundig ELYA User manual

Grundig
Grundig SEEN A User manual

Grundig
Grundig 01M-8926982600-5220-03 User manual

Grundig
Grundig Selio ECO User manual

Grundig
Grundig GDT 1000 User manual

Grundig
Grundig Selio User manual

Grundig
Grundig ELYA User manual

Grundig
Grundig D1110 User manual

Grundig
Grundig GDT 310 User manual