Gunter & Hauer MARTA 60 User manual

Günter & Hauer
INSTRUCTION MANUAL
COOKER HOOD
MARTA 60

Günter & Hauer
CONTENT
PRECAUTIONS
2
SIZE & APPEARANCE
4
INSTALLATION & CONNECTION
6
CONTROL PANEL
9
MAINTENANCE
10
TROUBLESHOOTING
12
SPECIFICATIONS
13

Günter & Hauer
2
PRECAUSTIONS
Before installing the appliance and using it, please read the
instruction carefully.
It is very important that the instruction manual is kept with
the appliance so that it can be consulted in the future if you
have any questions.
If you transfer or sell this appliance to another person, make
sure that the instruction is also given to them.
This appliance must only be used for the purpose for which it
is intended, i.e. for cooking at home.
The hood may have a design different from the hood shown in the schemes in this
manual, however, the operation, maintenance and installation instructions remain the
same.
Warning! To avoid breakage before turning on the hood in the cold season, it is
necessary to keep it unpacked at room temperature for at least 2 hours.
Do not start the installation of the hood and do not remove the protective film from the
stainless-steel hood until you are sure about the technical serviceability of the hood by
connecting it to the mains and checking all its functions.
We recommend that all work on the installation, connection and repair of your hood
should be trusted only to qualified professionals who are engaged in performing such
work. Installation, connection and repair of the hood by unauthorized persons can lead
to poor quality of work and, as a consequence, to damage of the product. The
manufacturer is not responsible for any damage and breakdowns associated with
improper installation, connection and repair of the hood.
The name of the model and the most important technical characteristics of the hood are
indicated in the plate inside the case.
CHILDREN SAFETY
Often children are not aware of the dangers of electrical appliances. During the
operation of the hood it is necessary to monitor children and forbid them to play with it.
Packaging materials (such as plastic wrap) can cause suffocation. Keep them out of
children’s reach.

Günter & Hauer
3
The hood is connected to the mains with a voltage of 220-240 V ~, 50 Hz. To avoid
electric shock, the hood must be plugged into a grounded socket. This product belongs
to class 1 protection against electric shock. Do not use light bulbs whose power rating
exceeds that specified in the hood specifications, as bulbs with higher wattages can
cause various damage to the electrical circuit. Operation of the hood without an
aluminium grease trap is prohibited. When using the hood at the same time with other
heating devices (gas, oil, coal stoves, etc.), in addition to electric, you may need
additional ventilation.
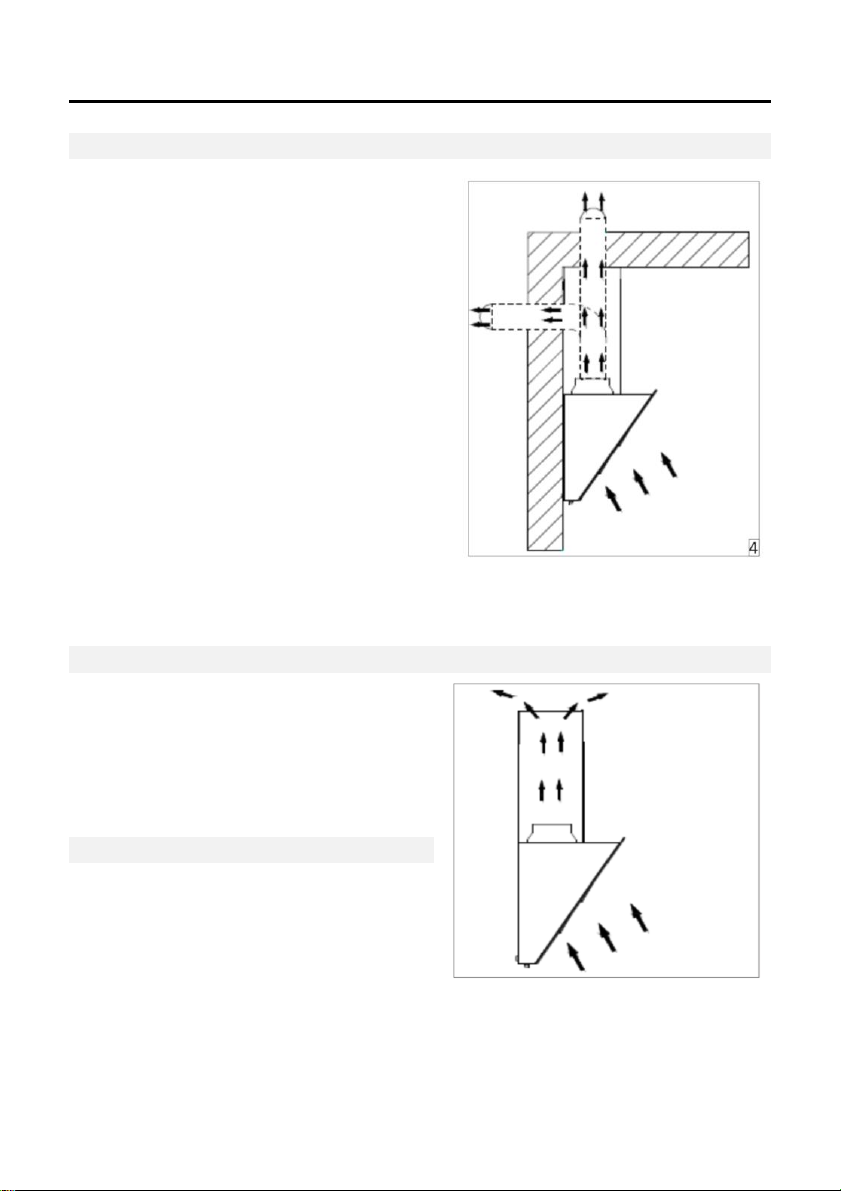
Air passing through the hood and released into the atmosphere should only be vented to
a separate kitchen ventilation shaft and should not enter the chimney or other duct used
to remove smoke from other devices.
When installing the hood to remove air into the ventilation shaft, do not use an air duct
with a smaller diameter than specified in the operating instructions. This can create
additional resistance to the exhaust air and increase noise and vibration, as well as
overheating of the engine.
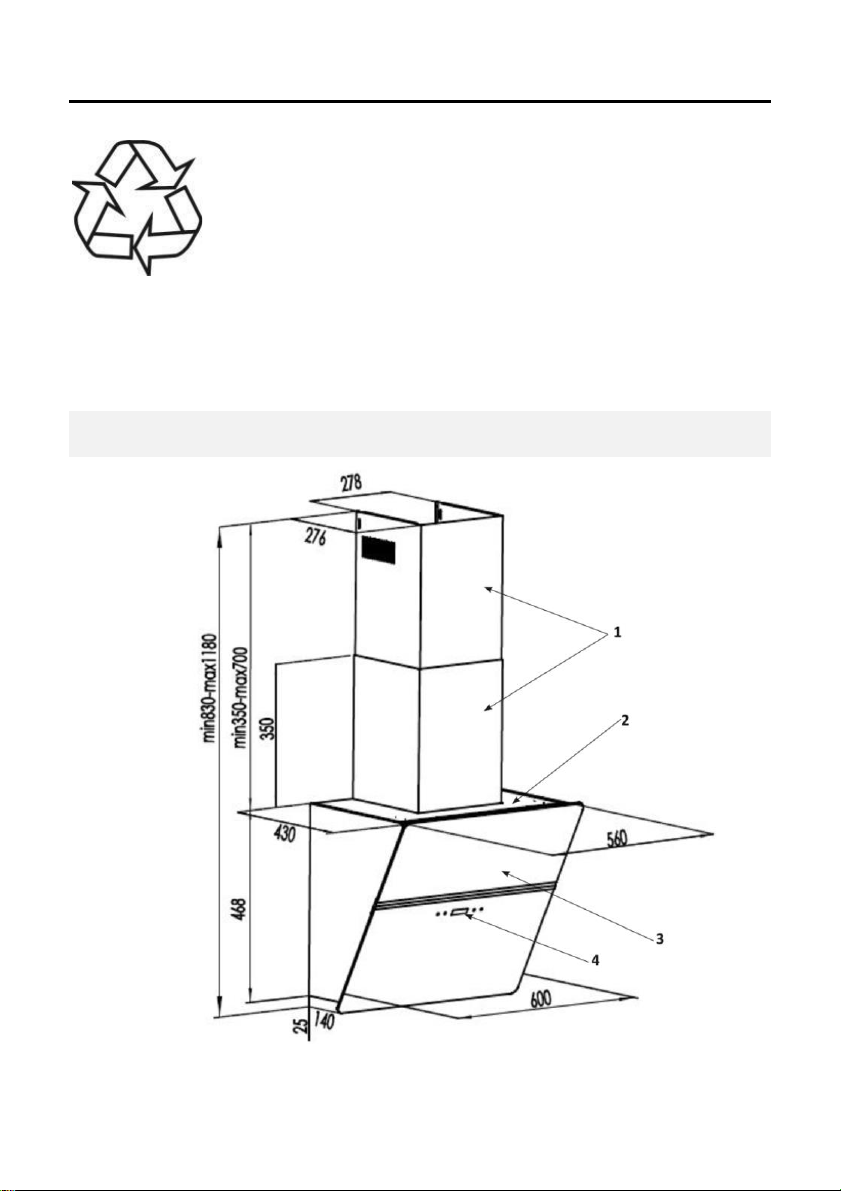
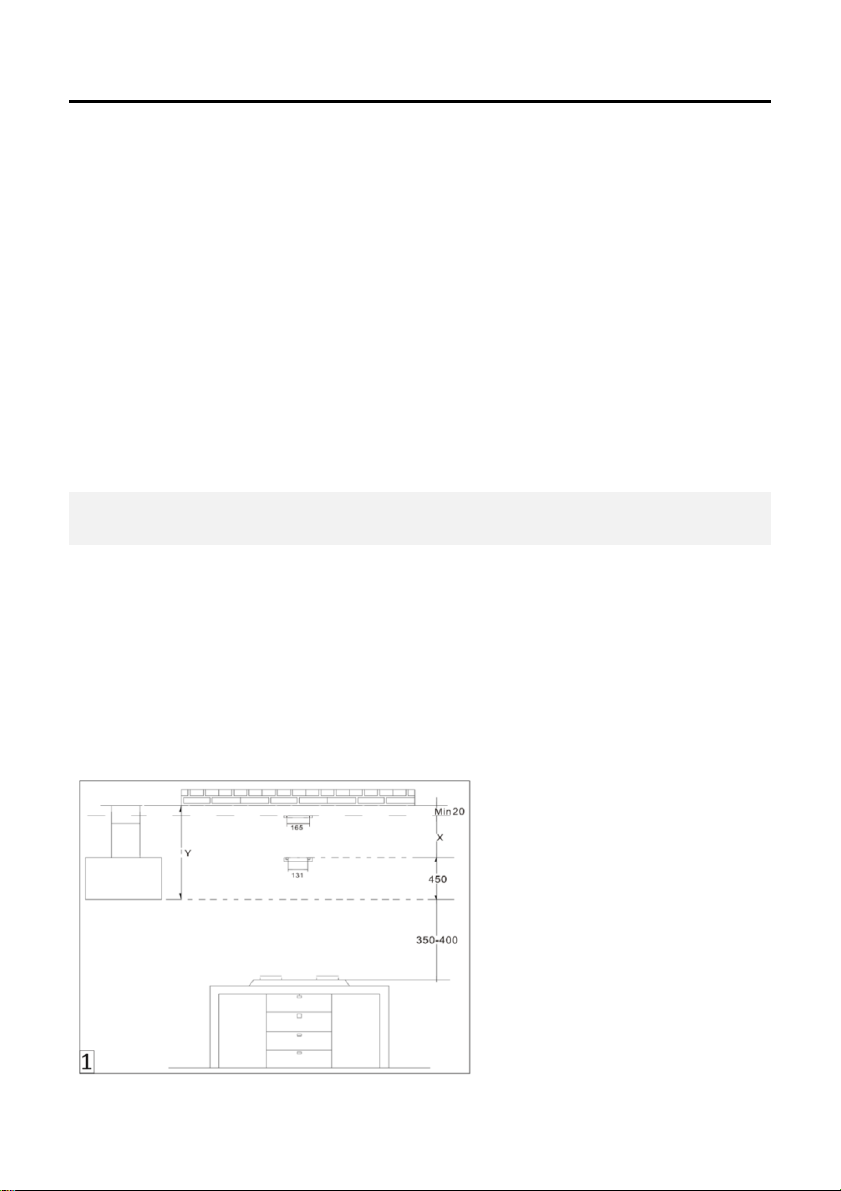
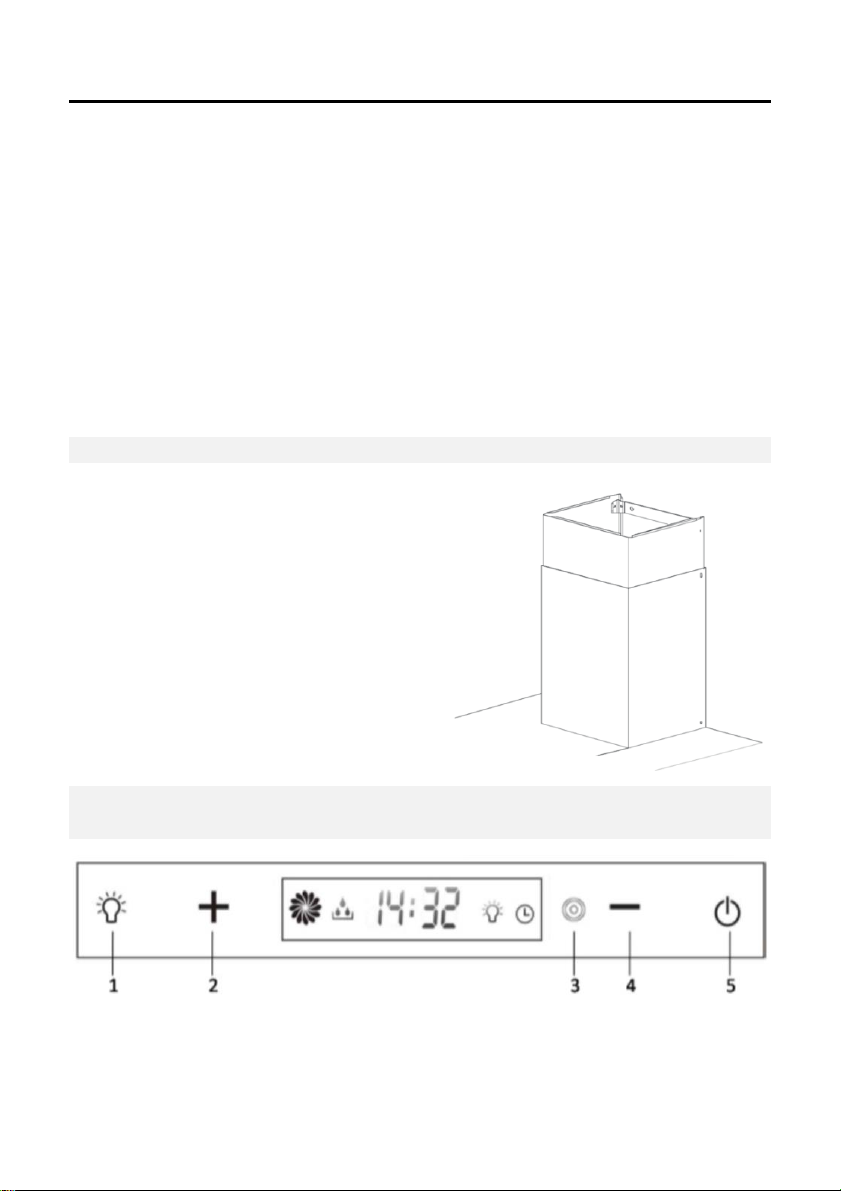
The hood must be installed above the electric hobs at a height of at least 65 cm, and
above the gas burners - at least 75 cm.
Switch off the mains voltage before carrying out any operation to clean or repair the
hood.
According to these instructions, ensure timely washing of reusable aluminium grease
traps. Unwashed filters reduce the efficiency of the hood and can cause a fire due to the
accumulation of oil and dust.
Do not sterilize food with an open flame directly under the hood. This can ignite the
crude aluminium grease trap.
Do not leave hot oil inside the pan on the stove. Overheated fat and oil ignite easily,
which can cause the ignition of the crude aluminium grease trap. The flame of the gas
burners must always be covered with utensils. Strong heat from the flame of gas burners
can damage the hood.
Do not turn on the hood to reduce smoke caused by an outbreak in the apartment. The
included extractor will create additional draft for fire. In case of any ignition, disconnect
the hood from the mains, cover the flame with a dense material that will prevent access
of oxygen to the flame; never use water for extinguishing.

Günter & Hauer
4
The equipment was protected from damage during transportation.
After unpacking the equipment, we kingly ask you to remove the
packaging elements in a way that is safe for the environment.
All materials used for packaging are environmentally safe and 100%
recyclable, as indicated by the appropriate symbol.
WARNING! Packaging materials (plastic bags, pieces of foam, etc.) should be
inaccessible to children during unpacking.
For more detailed information about recycling of this device, please contact your local
Civic Office, your waste disposal service or the shop where you purchased the product.
SIZE & APPEARANCE

Günter & Hauer
5
HOOD DESCRIPTION
The outer part of the hood comprises from the following components (figure below):
1) External (decorative) box
2) Hood body
3) Glass front panel
4) Display and control panel
* The hood shown in the photo may differ from your model.
• Only a qualified professional has the right to install and connect the hood to the mains!
It is recommended to install the hood by two people.
• Before installing the stainless-steel hood, carefully remove the protective plastic film
from all surfaces of the hood and the pipe.
• Make sure that the dimensions of the product you have purchased match the selected
installation location.
• To facilitate installation, we recommend that you temporarily remove grease traps and
other components. These components are installed in their places after the installation
of the hood. For a description of how to remove them, see the relevant sections.
• Check that there are no objects inside the hood placed during its transportation (e.g.
bags with screws, instructions, etc.) if any, remove them and store.
• If possible, disconnect and move the kitchen elements located under the hood and next
to the installation area to allow more free access to the ceiling / walls to which the hood
will be attached.
If this is not possible, protect furniture and other objects as carefully as possible during
installation.
• Choose a flat surface, cover it with protective coating and lay the hood and fasteners
on it.
• To connect the hood to the mains, disconnect the voltage on the common electrical
panel of your home. Also check that there is a mains socket and a chimney opening next
to the hood installation area (in the area also accessible after the hood installation).
• Perform all necessary work (for example: installation of a mains socket and / or
creating a hole for a chimney).

Günter & Hauer
6
• The distance of the lower limit of the hood above the hob surface must be at least 65
cm - for electric hobs, and not less than 75 cm for gas or combined hobs. If the
instructions for installing a gas hob stipulates a greater distance, then take this into
account.
• Before installation, make sure that the work area is clean to prevent wood chips and
dust from getting into the hood.
• Do not use hoods on ventilation ducts / chimneys that are used to remove air from
other appliances, such as fireplaces, ovens, etc.
• The bend of the ventilation pipe should not exceed 120, it should be laid parallel to
or above the starting point and be brought to the outer wall.
• After installation, make sure that the grease trap is positioned horizontally to avoid the
accumulation of fat on one side.
INSTALLATION & CONNECTION
1) Draw a vertical line on the wall to the ceiling or to the required height, marking the
centre of the area where the hood will be installed (see Fig. 1).
2) Draw a horizontal line at a height of 650-750 mm from the surface of the electric hob
or gas hob (see Fig. 1).
3) Add the mounting bracket 8 on the wall at a distance of 30 mm from the ceiling or
the existing upper limit, aligning in the centre relative to the vertical line (see Fig. 1).
4) Make marks on the wall in the centre of the holes in the bracket (see Fig. 1).
5) Add the mounting bracket 9 on
the wall, aligning in the centre
relative to the vertical line. (see
Fig. 1)
6) Make marks on the wall in the
centre of the holes in the bracket
(see Fig. 1).
7) Drill all holes with a diameter of
10 mm in the centre of all the
marks. Attach both brackets with
screws and anchors.

Günter & Hauer
7
BODY INSTALLATION
1) Before hanging the case on the wall,
attach the lower casing of the pipe to it.
2) Hang the body on the hood bracket 9
(see Fig. 2).
3) Carefully lower the body until it is
securely fastened to the bracket.
INSTALLATION OF AIR DUCT
Caution: To reduce the risk of fire, use only a
metal air duct.
1) Install the duct adapter on the hood.
2) Put the air duct of the required length and
diameter of 150 mm on the recessed part of the
air duct adapter
3) Secure the air duct with the two screws on
both sides of the adapter. Make sure the air duct
is secured properly.

Günter & Hauer
8
CONNECTION
Caution: To reduce the risk of fire, use only a
metal air duct
1. Decide exactly how the corrugation will be
laid between the hood and the outlet.
2. The most effective hood works with a
straight, short air duct.
3. Long curved air ducts reduce the efficiency
of the hood. Try to avoid this as much as
possible. Also, in this case, you may need a
larger diameter air duct to increase the
efficiency of the hood
4. Put the corrugation of the required length
and diameter of 150 mm on the duct adapter.
5. Install the ceiling / wall cover. Connect the
air duct to it.
Use adhesive tape to connect the duct parts together.
Air recirculation mode
Caution: Do not use plastic or rigid air ducts.
1. Install the carbon filter.
2. Note that the air will come from two
ventilation grilles located on the sides of the
lower decorative cover.
ELECTRICITY CONNECTION
1. All models of hoods are connected to the
mains with a voltage of 220-240 V ~, 50 Hz.
To avoid electric shock, the hood must be
plugged into an earthed socket.
2. The mains connection must be carried out by a qualified technician in accordance
with all applicable norms and standards. Disconnect the power supply before starting
the work.

Günter & Hauer
9
3. If the power cord is damaged, it must be replaced by the manufacturer, its service
agent or a qualified person in order to avoid an accident.
4. Do not use a plug and extension cord other than those originally supplied with the
hood.
5. Grounding of this hood is mandatory. Do not remove the grounding contact from the
plug.
6. For the purposeof additional protectionof the hood againstvoltage drops ina network
it is recommended to connect it through the additional automatic switch 6A.
3. Before installation of decorative boxes of an air duct, deduce a wire for connection
of the hood to the power supply network.
INSTALLATION OF TELESCOPIC PIPE
Decorative lower cover. Carefully lower the
decorative lower cover onto the upper cover.
Carefully place the lower cover in the recess
on the top of the hood, then attach the cover
to the bracket with screws.
Decorative top cover. Insert the top cover
from the top into the bottom cover. Attach
the top cover to the mounting bracket, which
must be screwed to the wall with two screws.
CONTROL PANEL
The hood is controlled by touch buttons on the front panel.

Günter & Hauer
10
1. SWITCHING ON LIGHTING
2. SPEED INCREASE
3. DPU SIGNAL RECEIPT SENSOR
4. SPEED REDUCTION
5. ON / OFF
The hood has 3 speed levels.
TIME SETTING
Press the button for 3 seconds. The time indicator will flash on the display. Use the
+ / - buttons to select hours. Press again and set minutes with +/-.
The time will be set automatically if no action is taken for the next 3 seconds.
TIMER
While the hood fan is running, press the button for 3 seconds. The time indicator on
the display will start flashing.
Set the hood shutdown timer using the +/- buttons (1-15 minutes).
The setting will be confirmed automatically if no action is taken within the next 3
seconds.
FILTER CONTAMINATION INDICATOR
After a while using the hood, the indicator will appear on the display. This means
that the hood filter is dirty and needs cleaning.
After cleaning the filter, put it back in the hood. The indicator will continue to flash.
To turn it off, press the button for 3 seconds.
NOTE: If the filters have not been rinsed, the indicator will flash even after the button
is pressed .
MAINTENANCE
GREASE CAPTURE FILTERS
* Grease traps should be cleaned periodically (every two months or more often with
heavy use). Use a warm detergent solution.
* Grease traps can be washed.
1. Remove the filters one by one by pulling the handle. Tilt the filter down and pull out.
2. Wash the filters, trying not to bend them. Allow to dry.
3. When replacing the filters, insert them with the handle outwards.

Günter & Hauer
11
4. To insert the filter, insert the tabs on it
with the grooves on the hood. Pull the
handle, push the filter into place and
release.
Make sure the filter is inserted securely.
SERVICE
Note: If you are going to wash the inside of the hood, you must first remove the glass
panel. To avoid damaging the panel or injuring you, you need to follow the instructions
below:
You can remove two panels from the hood.
- Press the bottom panel inwards until you hear the lock clicking.
- Lift and pull out the glass.
- Similarly, click on the middle panel until it clicks, lift and pull the glass.
Note: To avoid damage do the
following:
It is recommended to remove
the bottom panel first, then the
middle.
When installing the panels back
in place, it is recommended to
first put the middle, then the
bottom panels.
HOOD LIGHTING
This hood uses two LED strips (DC 12 V, max 3 W)
NOTE: Unplug the appliance before carrying out any maintenance.

Günter & Hauer
12
To replace the lamp, do the following:
1. Remove the lamp cover with a screwdriver.
2. Pull the lamp to the side (DO NOT ROTATE).
3. Insert a new lamp (LED, max 3 W). Do not touch the lamp with bare hands!
WARNING: THE LAMP CEILING AND THE LAMP ITSELF CAN BE HOT!
TROUBLESHOOTING
ISSUE
SOLUTION
The hood does not turn on
- Check the electrical connection
- Check the fan setting
Low hood efficiency
- The fan speed is not high enough
- Check the condition of the grease filter
(wash once every 1,5-2 months /
charcoal (carbon) filter may need to be
replaced)
- Check the air outlet pipe (there must
be a draft)
The hood switches off during operation
- The safety device has tripped
- This can happen if the extractor hood
is not installed high enough from the
hob.
- Switch off the hob and wait for the
hood to restart.
- Frequent repetition of this fault can
lead to breakage of the hood.

Günter & Hauer
13
SPECIFICATIONS
Supplied voltage: 220 ~ 240 V / 50 Hz AC.
Engine noise at maximum speed: ≤65 dB.
Lighting: LED strip (3 W Max).
Engine power: 273 W.
Productivity: 1000 m³ / h.
Dimensions, mm (W x H x D):
• 600x276x830x1180
Diameter of an air duct: 150 mm.
If you cannot solve any problems yourself, contact an authorized service
centre. This may require data (model name and serial number) from the
nameplate. You can find a plate under the grease filters.
This appliance complies with EU Directive 2002/96 / CE
A special sign depicting a crossed-out wheeled bin means that this appliance
must be disposed of separately from household waste in accordance with
local regulations. You will help to avoid negative consequences for the
environment and human health, which can be caused by improper recycling
at the end of its service life. Disposal of the appliance must be carried out in
accordance with current environmental legislation and waste disposal
regulations. For more detailed information about recycling of this appliance,
please contact the relevant department (Department of Ecology and
Environmental Protection), the cleaning service or the shop where you
purchased the appliance.
The manufacturer is not liable for damage caused by improper
installation of the device, as well as violations of the rules of
operation or misuse.
«Günter & Hauer GmbH»
www.gunter-hauer.eu
Table of contents
Other Gunter & Hauer Ventilation Hood manuals

Gunter & Hauer
Gunter & Hauer ATALA 1060 GL User manual

Gunter & Hauer
Gunter & Hauer AGNA 1000 IX User manual

Gunter & Hauer
Gunter & Hauer VICTORIA User manual

Gunter & Hauer
Gunter & Hauer BRITA 60 User manual

Gunter & Hauer
Gunter & Hauer MARGARETTE User manual

Gunter & Hauer
Gunter & Hauer ATALA 1060 GL User manual

Gunter & Hauer
Gunter & Hauer ANGELA User manual

Gunter & Hauer
Gunter & Hauer ATALA 1000 BI User manual