2 3
3/8“
Ø 3,5 mm
Ø 12,0 mm
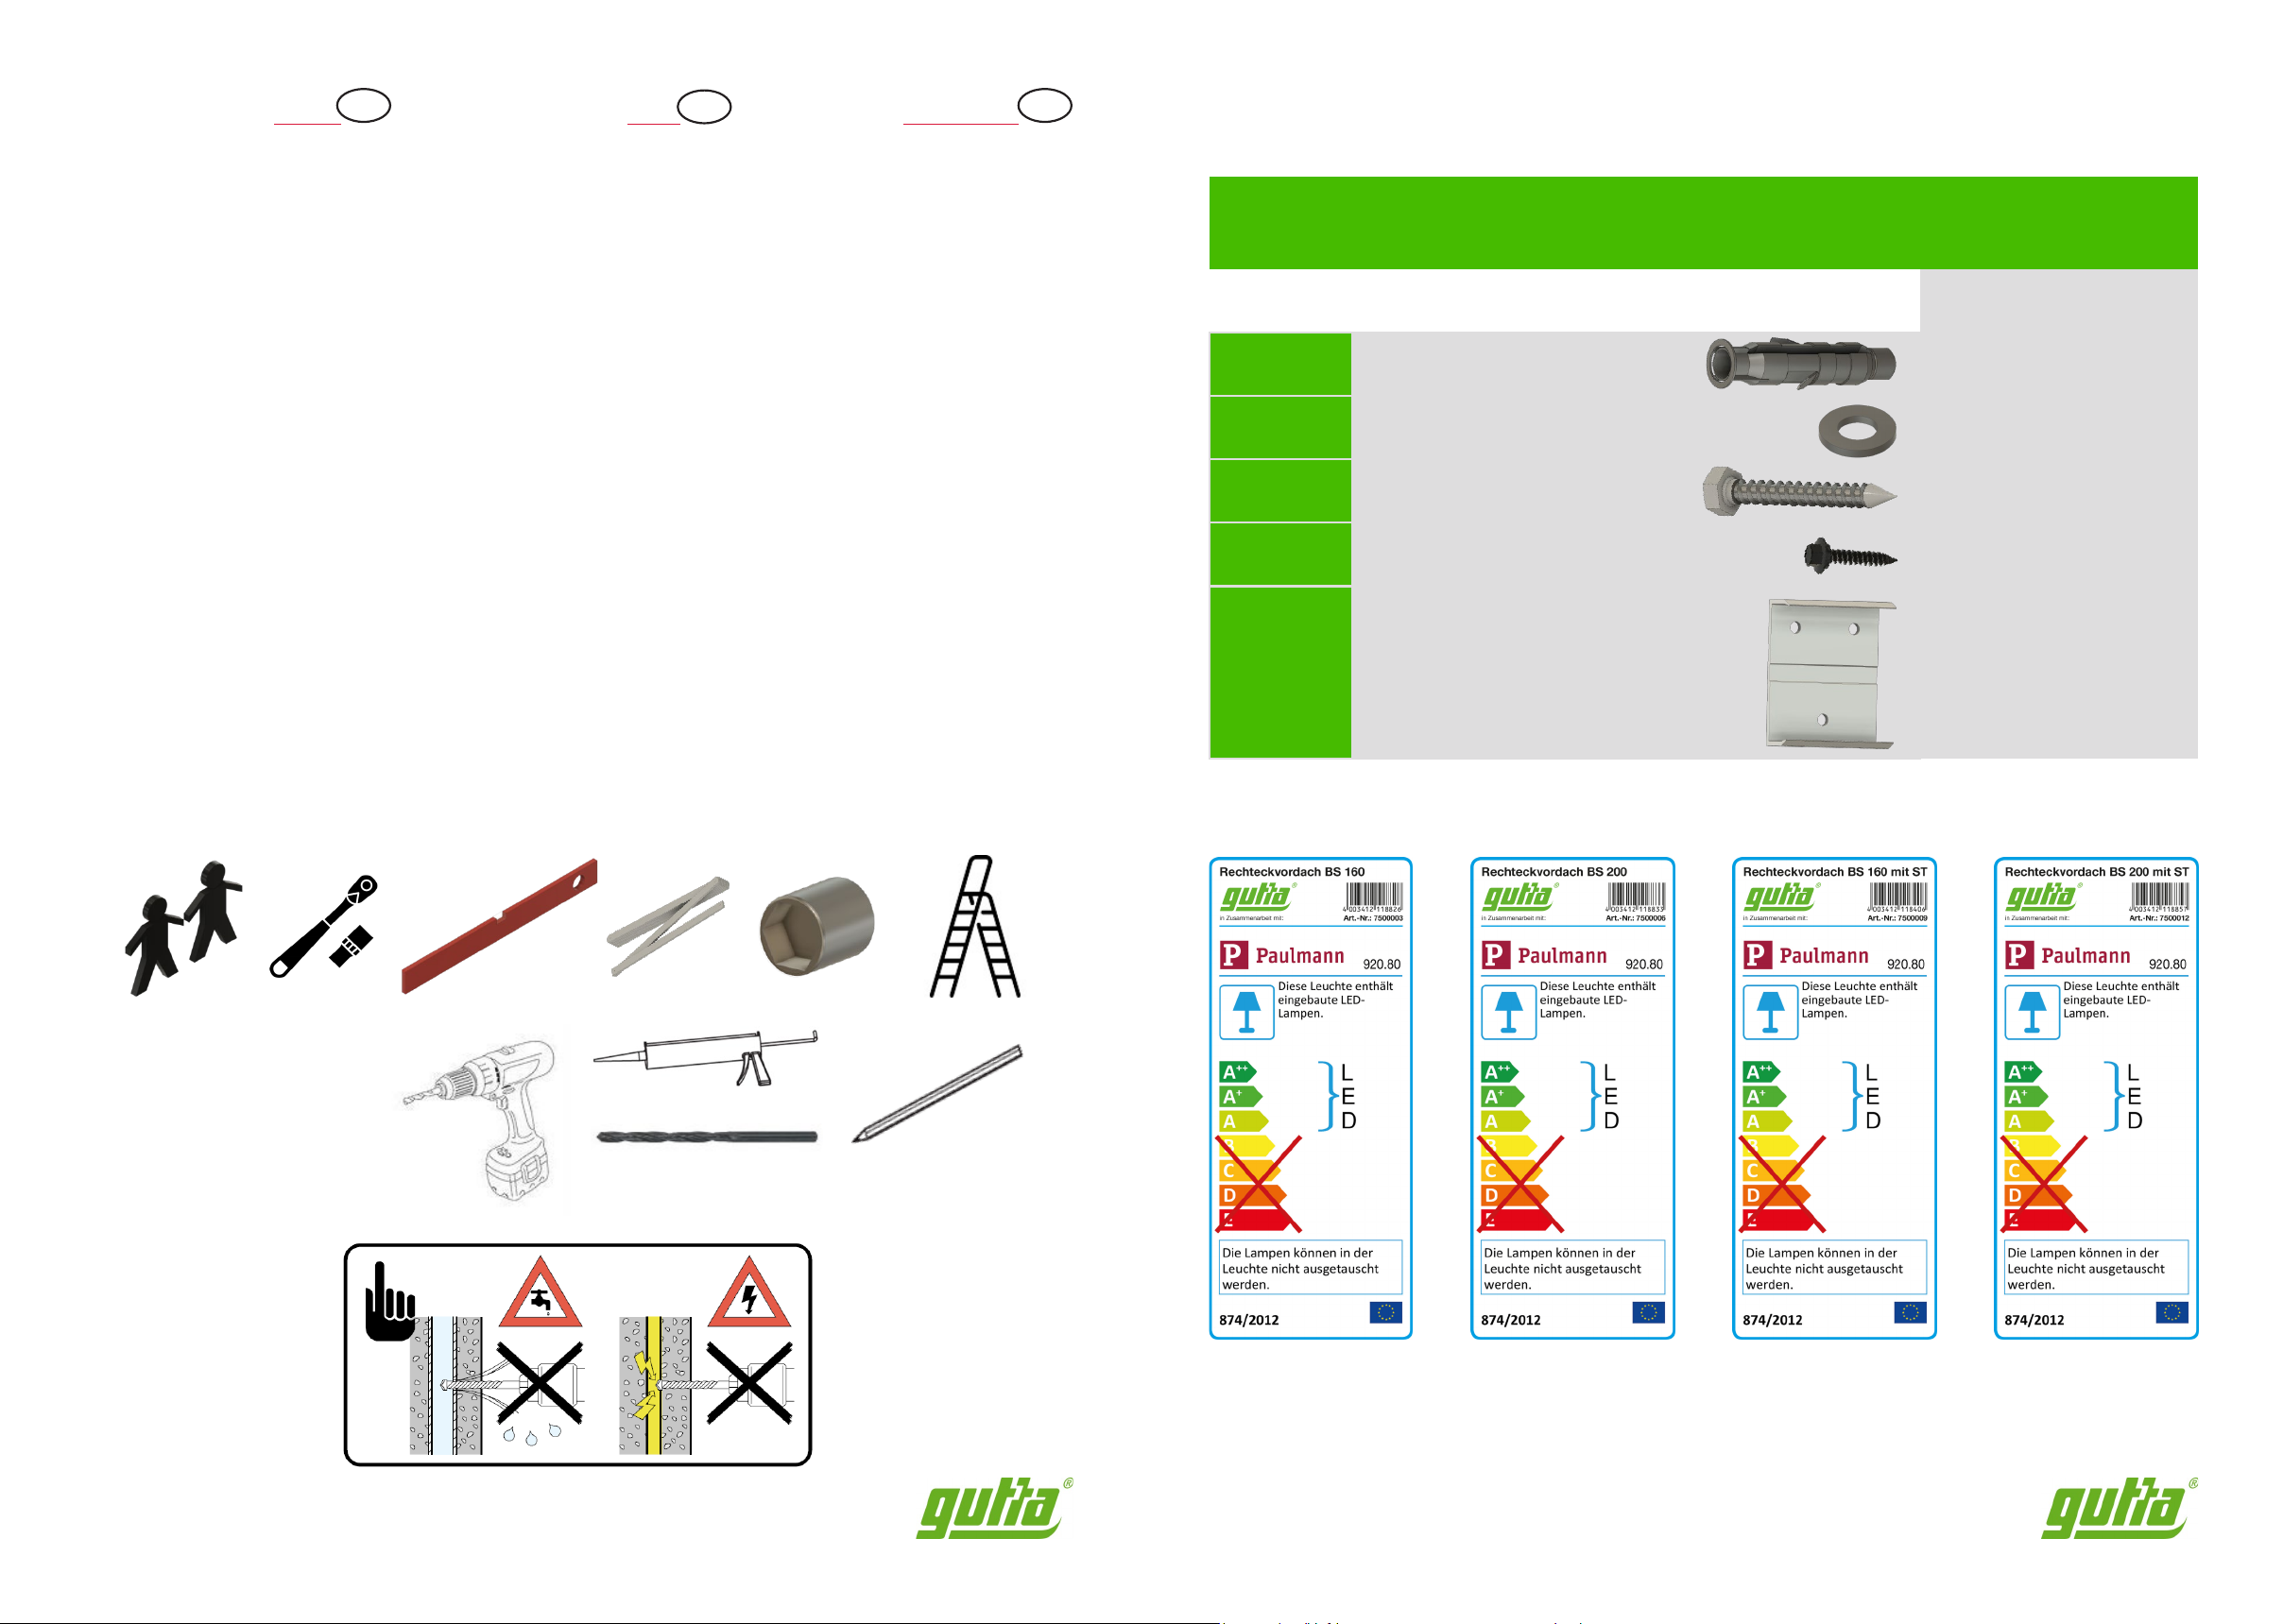
Nr.
No.
No.
Bezeichnung
Description
Przeznaczenie
Stück
Pieces
Sztuki
BS 160 BS 200
1. Dübel Ø 12 mm
Plugs / Kołek rozporowy
5.
4.
3.
2. U-Scheibe
Washers / Podkładka
Schraube 10 x 80 mm
Screw / Śruba
Metallschraube 4,8 x 20 mm Metal
srew / Wkręty do metalu
Wandhalter 110 x 137 mm Wall
bracket / Wspornik ścienny
6 9
23
12 18
6 9
6 9
GB
DPL
Ważne zalecenia !
•Przed montażem prosimy o dokładne zapoznanie się z
instrukcją montażu i sprawdzenie przesyłki z uwagi na
możliwe wadliwe części lub uszkodzenia podczas
transportu. Nie ponosimy żadnej odpowiedzialności za
szkody w produktach już zmontowanych.
•Przed montażem prosimy o sprawdzenie typu,
wymiarów i koloru, czy są poprawne.
•Daszek może być używany tylko zgodnie z jego
przeznaczeniem. W przeciwnym razie roszczenia z tytułu
odpowiedzialności za produkt nie będą akceptowane!
•
Czyść daszek co 3 miesiące i używaj tylko zalecanego
środka czyszczącego (bez środków do szorowania lub
rozpuszczalników). W razie potrzeby lakierowane części
mogą być również traktowane pastą polerską do
samochodów.
•Odpływy wody należy regularnie czyścić (aby uniknąć
szkód spowodowanych przez nagromadzoną wodę).
•W każdym przypadku mocowania zadaszenia muszą
być odpowiednie do konstrukcji danej ściany. Należy
zapewnić bezpieczne mocowanie.
•Nagromadzony śnieg i lód należy usunąć z zadaszenia.
•Uwaga - niebezpieczeństwo wypadku! Nie przekraczać
nośność; nie wspinać się ani nie obciążać własnym
ciężarem zadaszenia.
•Zalecenie: Montaż należy przeprowadzić w dwie osoby.
Należy również uszczelnić zadaszenie używając
standardowego, dostępnego w handlu silikonu.
•Należy wykonać instalację elektryczną lub ją usunąć
przez wykwalifikowanego elektryka.
•Na części podlegające zużyciu nie przysługują żadne
roszczenia gwarancyjne po upływie ustawowego okresu
gwarancji.
•
W tym celu możemy również dostarczyć oddzielne akcesoria
zadaszenia. Aby uzyskać szczegółowe informacje, skontaktuj
się z lokalnym sprzedawcą.
•Projekt może ulec zmianie.
Wichtige Hinweise!
• Vor der Montage bitte Montageanleitung genauestens
durchlesen und Produkt auf evtl. Transportschäden
bzw. Fehler überprüfen, da für Schäden an bereits mon-
tierten Produkten keine Haftung übernommen werden
kann.
• Prüfen Sie vor dem Einbau, ob Typ, Maß und Farbe
übereinstimmen.
• Maßanfertigungen sind vom Umtausch ausgeschlos-
sen.
• Das Vordach darf nur für den vorgeschriebenen
Zweck verwendet werden, anderenfalls erlischt der
Produkthaftungsanspruch!
• Reinigen Sie das Vordach bitte in Abständen von ca.
3 Monaten. Verwenden Sie nur vom Handel empfohlene
Pflegemittel (keine Scheuer- oder Lösungsmittel). Die
lackierten Teile können auch bei Bedarf mit Autopolitur
behandelt werden.
• Die Wasserabläufe sind regelmäßig zu reinigen (an-
sonsten Beschädigungsgefahr durch Stauwasser).
• Die Befestigungsmittel sind der jeweiligen Beschaf-
fenheit der Wand anzupassen. Eine ausreichende Be-
festigung ist zu gewährleisten.
• Bei erhöhter Schnee- und Eislast ist das Vordach ab-
zuräumen.
• Achtung Unfallgefahr! Vordach ist nicht begehbar.
•
Empfehlung: Die Montage sollte von zwei Personen
durchgeführt werden. Zusätzlich müssen Sie mit einem
handelsüblichen Silikon abdichten.
• Die Elektroinstallation muss vom Elektro-Fachmann
ausgeführt oder abgenommen werden.
• Auf Verschleißteile besteht nach Ablauf der gesetzli-
chen Garantiezeit kein Garantieanspruch.
• Zu diesem Vordach liefern wir auch separates Zube-
hör. Bitte informieren Sie sich bei Ihrem Fachhändler.
• Änderung der Konstruktion vorbehalten.
Important
Reccommendations!
• Prior to assembly please study the assembly instruc-
tions in detail and check the consignment for possible
faulty parts or damage during transportation. No liability
will be assumed for damage to products already as-
sembled.
• Please check that type, dimensions and colour corre-
spond before assembly
• Custom-made parts cannot be exchanged.
• The canopy may only be used for the intended pur-
pose, otherwise no claims for product liability can be
accepted!
•
Clean the canopy every 3 months and only use a re-
commended cleaning product (no scrubbing 0agents or
solvents). If necessary, the lacquered parts can also be
treated with with car polish.
• The water drains should be cleaned regularly (in order
to avoid damages caused by accumulated water).
• In each case, the canopy fastenings must be suitable
for the construction of the wall in question. Secure at-
tachment must be warranted.
•
Accumulated snow and ice should be removed from the
canopy.
• Caution - Danger of Accident! The canopy is not load
bearing; do not climb or place your weight on the ca-
nopy.
• Recommendation: Assembly should be carried out by
two persons. You must also seal the canopy using stan-
dard commercial silicone.
• The electrical installation must be carried out or re-
moved by a qualified electrician.
• No guarantee claims can be accepted for parts sub-
ject to wear and tear after the statutory guarantee pe-
riod has expired.
• We can also supply separate accessories for this ca-
nopy. Please ask your local trader for further.
• The design is subject to alterations.
Stückliste | Parts list | Lista części


