GyroSet Glory User manual

GyroSet Glory Headset User Manual (Win)
Product features------------------------------------------------------------------
The GyroSet Glory headset is a pointing device / head mouse
The GyroSet Glory headset is a versatile tool to control computers by head movements. The headset
can also be used as a wheelchair head controller together with the GyroSet Guide wheelchair
controller or interfaces to various other wheelchair controllers.
Below are the main components of GyroSet Glory:
1. USB connector. It is a Micro USB connector used mainly for charging the headset.
2. The Power switch switches power on and off for the headset (Slide left: ON; slide right: OFF)
3. Mode Selector button (big button). The mode selector button switches between headset
control and computer mouse control. When pushed it also centres the cursor on the screen.
The location of the button allows it to be pushed against a headrest of a wheelchair.
4. Click sensor. An infrared sensor that detects blinks or cheek movements based on its
placement. It is specially designed so that it’s not disturbed by sunlight, other ambient light
sources or darkness.
The GyroSet Glory headset contains a Lithium-ion battery that lasts 18-24 hours with
continuous usage, when fully charged. The headset communicates with the USB dongle
wirelessly.
What’s in the box-----------------------------------------------------------------
1. GyroSet Glory headset
2. Micro USB to USB charging/data cable
3. USB dongle

Downloading the GoryTools software-- ------------------------------------
The device can be set up / customised to individual needs. By installing the application you will be
able to change the parameters of the headset.
1. Open an internet bowser
2. Go to nowtechnologies.co.uk or nowtech.hu and find SUPPORT in the upper-right corner,
choose DOWNLOADS from the roll-down menu
3. Choose your operating system and click ‘Glory Tools Windows application’, wait for the .zip
file to download
4. Unpack the .zip file and run setup.exe
5. Once finished insert the dongle into one of the free USB ports and click on the GloryTools
icon - a sidebar will appear:
Setting up the GoryTools software and the headset step by step --------------------------
Please follow these steps to ensure smooth operation and the best
user experience with the GyroSet Glory headset!
1. Click the status icon to see the Main Menu
Status Icon –Active Headset
Status Icon –Inactive Headset
2. The Main Menu will appear.
3. Take the headset out of the box and place it next to the computer.
4. Turn on the headset while still on the table (the LED should show green, if not then the
battery is depleted and the headset should be charged by using the USB cable)
5. Go to System Status and check if all the parameters are shown
6. Go to Settings Pairing and pair the dongle with the headset (on how to do it please
check the Pairing Menu description further in this manual

7. Once paired, the headset can be used with its default settings right away, but depending
on your environment its sensors may need to be calibrated. It is recommended to
calibrate the sensors once the box has been opened.
8. Go to Settings Calibration and follow the instructions on the screen (there is a
description further in this manual on how to do calibration)
9. Put on the headset and position the blink sensor about 1 cm distance from the corner of
your eye or your cheek. On how to best position the sensor please see our FAQ section.
10. Once calibrated you may go to the Mouse Profile Editor to adjust the range and filters for
best user experience. The settings can be saved into separate profiles. For an explanation
of the various possibilities please see the Mouse Profile Editor section.

Menu descriptions ---------------------------
Main Menu
In the main menu you will find 4 menu items:
1. Mouse Profile Editor –this is the most important menu item for a user. This allows
customizing the behavior and operation of the mouse.
2. Settings –Under Settings, further technical items can be found (Channels, Calibration,
Pairing and Firmware update
3. System Status –this menu item allows the user to see the operational status of the headset
and the dongle
4. Appearance –lets the user adjust the sidebar’s properties and the language of the
GloryTools application
5. Help - In the upper-right corner you will see a question mark that takes you to HELP. Under
Help you will find instructions and the manual.

Channel Selector
Although not in the Main Menu, when pressing the Mode Selector Button (Big button) against your
headrest the channel selector appears automatically if it was configured in the Appearances menu.
You may encounter this screen early in the setup process.
Select the computer mode by pressing the Mode Selector button (Big button) on the headset very
briefly and close channel selector by clicking ‘Back’.
When pressing the Mode Selector Button (Big button) against your headrest the channel selector
appears automatically if it was configured in the Appearances menu.
The headset can be used to control computers or to drive wheelchairs. There is a possibility to switch
between computer control and wheelchair drive channels. Therefore there are two types of ‘press’
the user can do with the Mode Selector.
1. Short press (a very quick press, about half a second) switches between active and inactive
modes of the chosen function –e.g. when in computer control mode, a short press activates
or deactivates the control of the mouse cursor.
2. Long press (about 2 seconds) switches between the channels or control functions –e.g.
switches between computer control and wheelchair control.
You can add further PCs or wheelchairs to control and you can switch between them.

Mouse Profile Editor
Here you can set up different profiles for yourself or multiple users. You can experiment with various
modes to find out which one is the best fit for you.
MOUSE MODE
I. Fixed Range (absolute mouse): This is the recommended mode to use. In this mode, the
cursor moves in a fixed range on the screen, in other words the screen’s field is the area
where the cursor’s movement makes sense. It can be imagined as the angle of head
turning necessary to move the cursor from one side of the screen to the other. The
screen’s range is defined by the borders of the screen. This mode allows for the most
accurate and smooth operation, however the user can experience some shift over time
regarding the center position of the cursor due to the user’s movements.
II. Range free (relative mouse): In this mode the cursor’s movement is not restricted to the
borders of the screen; however the user will not see it moving outside of the screen. In
this mode cursor center position can be adjusted by trying to move the cursor beyond
the screen’s border. This mode of operation is not as accurate and smooth as the fixed
range, but more direct and some users prefer it over the other method.

JUMP TO CENTER
It is recommended that you as the user experiment with various postures, how the most convenient
for you to look at the screen. Look at the center of the screen from a distance of about 80 cm to 120
cm.
I. Automatic: By pressing the Mode Selector button to activate the mouse mode the cursor
will automatically jump to the center of the screen. Please note that the position of your
head at this time will be center position –to go back to the center of the screen with the
cursor you should go back to this position.
II. Timer: After pushing the Mode Selector button to activate mouse mode you will have X
seconds to move your head to the center position. This time interval can be set on the
slider.
Jump to center time: Sets the time you have to place your head in a center position counted from the
press of the Mode Selector (big button). This position will determine the center of your screen. When
you go back to this position the cursor should be in the middle of your screen. This center position
should be comfortable to maintain.
Jump to Center feedback: This option lets you hear or see feedback on the screen to remind you that
you need to move your head to the center position. Ticking ‘Audio’ gives a beeping sound and until it
beeps you have time to move your head. Ticking ‘Visual’ gives a visual signal towards the center of
the screen.
HEAD MOUSE RANGE: sets the range of movement needed to get the cursor from one side of the
screen to the other, essentially it also determines the speed of the cursor. The higher it is set the
slower is the cursor movement and a greater head movement is needed to get the cursor to the
other side of the screen. Adjust this setting for better accuracy.
Autorange: if this option is selected, the headset will estimate the range of movement the user has
based on usage and set the behavior of the cursor accordingly. This option is not selected by default.
TREMOR FILTER: You can filter out involuntary movements by setting the tremor filter higher. The
higher the filter is set the less sensitive the cursor will be. When set high (e.g. above 30%) users may
experience that the cursor reacts much slower, however it is a useful function to experiment with to
achieve better accuracy.
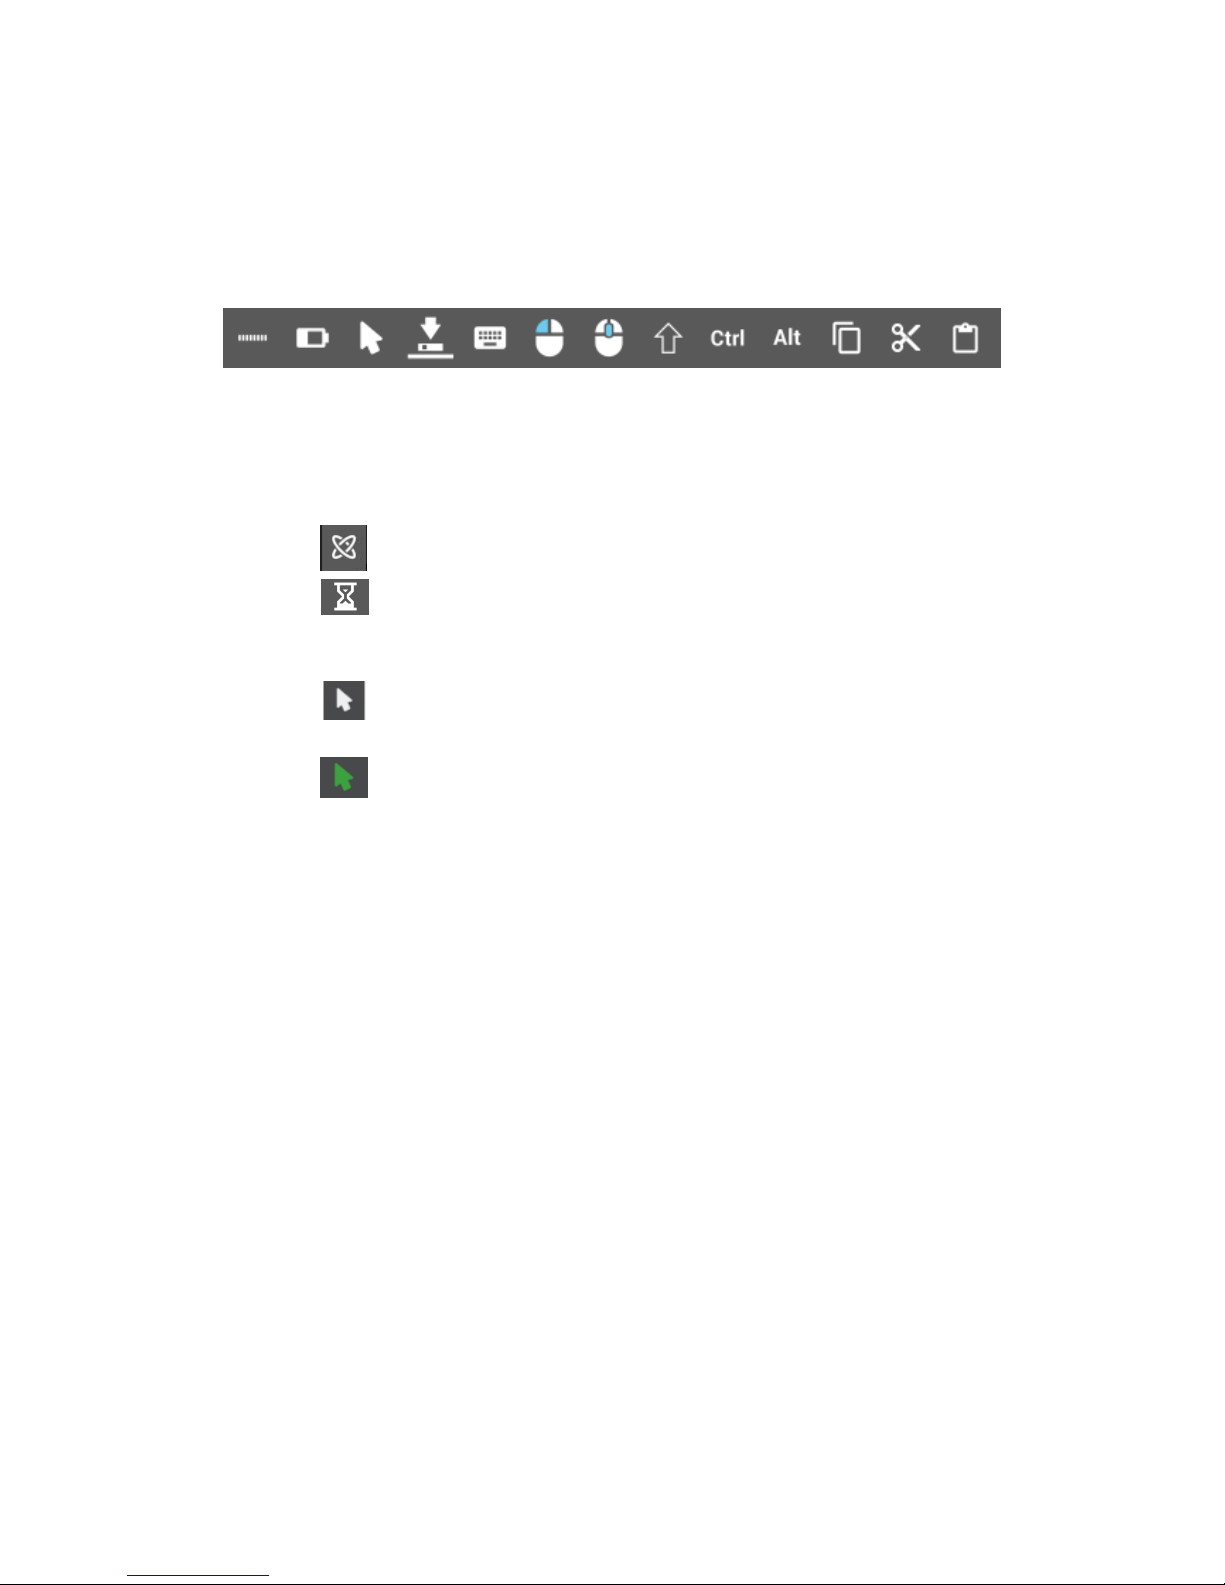
SCROLL SPEED: 100% is fastest - 1% is the slowest. You can toggle the scroll function on the sidebar
by clicking . This is used to scroll webpages and word processor pages. The same effect can be
achieved by dragging the scrollbar on any given page.
Defaults: resets all points to factory settings

SAVE PROFILES: You can Save any profile by giving it a name in the New profile name field, then
clicking the ‘+’sign.
You can delete any profiles by selecting the profile name from profiles and then clicking the ‘–‘sign.
Always click ‘Apply’after making changes.
System Status
The system status lets you see the parameters of the dongle and the headset.
You only need to use it in case you would like to make sure that the dongle is operational, that it
communicates with the headset and in case you are talking to support. If the model of the headset is
moving when you move the headset, then the system works in general.
Here you can see the firmware versions of the dongle, whether the serial number of the dongle is
paired with the serial number of the headset and various other settings.

Appearance
On the Appearance screen the following options can be set:
1. Sidebar
a. Show or hide sidebar
b. Whether the sidebar should appear horizontally or vertically
c. When the sidebar is not being used it is dimmed so that the user can see what’s
behind it.
d. The sidebar can be restricted to the primary screen or can be allowed to move to
a secondary screen in case multiple screens are used.
e. The sidebar opacity slider adjusts the opacity. The higher the percentage the less
opaque the slider is.
f. Sidebar oversizing adjusts the sidebar’s size for better comfort.
2. Headset
a. The channel selector screen will appear briefly as a popup when the control type
changes
3. Language
a. The GloryTools application’s language can be selected.

The Sidebar
The sidebar is the primary interface with the user. It has been designed to help navigation, signal
battery and operational status and enhance productivity.
The sidebar’s default position is vertical on the left side of the screen.
Available functions from left to right:
1. Handle icon –lets the user grab it and place the sidebar anywhere on the screen
2. Battery indicator –signals the headset’s battery charge level.
3. Usage mode indicator –it can take a number of forms.
a. icon is shown if no headset is present, but the dongle is plugged in
b. icon is shown when the headset is turned on but sensors are initializing (it has
to be left still on the table for about 10 seconds after turning it on and before putting
it on the user’s head.)
c. icon is shown when a headset is present (switched on an paired) but the
headset is inactive.
d. icon is shown when the headset is present and the mouse mode is active.
4. Sidebar position change icon –with a single click the user can move the sidebar to the
other side of the screen.
5. On screen keyboard –invokes the on-screen keyboard.
6. Right mouse click –toggles the right mouse click. By default the headset uses left click.
7. Scroll mode- toggles the scroll wheel’s function to aid scrolling by head movements
instead of grabbing a scrollbar and pulling it.
8. Shift –toggles SHIFT
9. Ctrl –toggles CTRL
10. Alt –toggles ALT
11. Copy –invokes the Ctrl+C, or copy to clipboard function
12. Cut - invokes the Ctrl+X, or cut to clipboard function
13. Paste –invokes the Ctrl+V, or paste to document function

Settings
Under Settings those technical functions can be found that are important for the reliable operation
of the headset over the long run, but the user does not need them every day.
1. Channels –enabled the headset to switch between controls of assigned devices (PC,
wheelchair mobile etc.). Additional devices need additional dongles.
2. Calibration –lets the user or their helper calibrate the headset’s sensors in a few easy steps
3. Pairing - allows the pairing of the headset to various devices.
3. Firmware update –occasionally there is a firmware upgrade coming as we are continuously
developing the product. This menu allows for the easy installation of firmware onto the
headset ad the dongle.
Channel Selector
When pressing the Mode Selector Button (Big button) against your headrest the channel selector
appears automatically if it was configured in the Appearances menu. You may encounter this screen
early in the setup process.

Select the computer mode by pressing the Mode Selector button (Big button) on the headset very
briefly and close channel selector by clicking ‘Back’.
When pressing the Mode Selector Button (Big button) against your headrest the channel selector
appears automatically if it was configured in the Appearances menu.
The headset can be used to control computers or to drive wheelchairs. There is a possibility to switch
between computer control and wheelchair drive channels. Therefore there are two types of ‘press’
the user can do with the Mode Selector.
1. Short press (a very quick press, about half a second) switches between active and inactive
modes of the chosen function –e.g. when in computer control mode, a short press activates
or deactivates the control of the mouse cursor.
2. Long press (about 2 seconds) switches between the channels or control functions –e.g.
switches between computer control and wheelchair control.
You can add further PCs or wheelchairs to control and you can switch between them.

Calibration
It is recommended that the headset be calibrated before the first use and once every one or two
months but only if the user experiences slight shifts in headset movement. Otherwise the product is
designed to self-calibrate, so in most cases calibration will be a rare occasion.
Please follow the instruction on the screen to calibrate your GyroSet Glory headset.
Here we also provide the list of steps:
1. Please make sure the headset is turned on and is resting on the table near the computer
2. Go into Settings Calibration
3. Leave the headset on the table and do not move it. This measures the environment when
still. Wait for the progress bar to complete.
4. As a next step pick up the headset and turn / rotate it in all directions. Wait for the
progress bar to complete. This measures the magnetic field around.
5. When finished, place the headset on a flat surface and wait for the calibration to finish.
6. Press finish when the software reports success.
Pace the headset on a horizontal surface

Turn / rotate the headset in all directions to measure the magnetic field.
When completed press finish.

Device Pairing
On this page various devices can be paired to a particular dongle. This ensures that the particular
device (e.g. headset) only talks to one dongle.
When the dongle is plugged into the computer and properly operating, the Pairing screen will show
all the available devices that are in the vicinity and are turned on.
Please note the address / ID of the device you would like to pair.
After selecting the desired device to be paired with the particular dongle, press ‘Back’ and the two
devices will be paired.

Firmware update
This option lets the user update the firmware of the dongle or the headset when an upgrade is
available.
A firmware bundle is provided when new upgrades come out.
The new bundle needs to be downloaded and saved onto a local drive.
On the local drive the file needs to be selected and the Upload button will become active.
Click upload and wait for the process to be completed (should take around 5 minutes)
Frequently Asked Questions-- ------------------------------------
1. How best to position the blink / wink sensor?
Put on the headset and position the blink sensor about 1 cm distance from the corner of your
eye or your cheek, whichever the more convenient for you. Some users use the corner of
their mouth. It detects the light reflected from the surface of your skin / eye. The sensor self-
calibrates when the mouse is activated by the Mode Selector (big button). When
repositioning the sensor, make sure that you press the big button (click the mouse off and
then back on).
2. How do I click, drag and drop?

You can click drag and drop by using the blink sensor. The sensor can detect when your eye is
open or closed, it can also detect partially closed eyes. If you wink, or blink make it so that it
feels deliberate. The sensor ignores quick blinks of the eye. You can select, highlight, grab
objects, icons etc, on the screen and move them around. Make sure you wink continuously /
keep your one eye closed to keep grabbing objects. When you want to release it, just open
your eye, return to normal and the object will be released.
3. What is Short Press and Long press?
Short press (a very quick press, about half a second) switches between active and inactive
modes of the chosen function –e.g. when in computer control mode, a short press activates
or deactivates the control of the mouse cursor.
Long press (about 2 seconds) switches between the channels or control functions –e.g.
switches between computer control and wheelchair control.
4. I have limited range of movement, how do I adjust the mouse to accommodate this?
You have to spend some time trialing various options in the Profile Editor. Try using the Fixed
Range with the Head Mouse Range below 50% and tremor filter around 40%. However
everyone had different needs, so feel free to experiment with these options. It may be that
the Range Free mode is more appropriate for you. In this case please note that the Head
Mouse Range needs to be adjusted differently.
5. What is the best posture to use the headset?
Depends on user really, but most people find it best to use with a straight upright back and
around 4-5 cm distance from the headrest. You should be comfortably facing the center of
the screen. Do not hesitate to ‘click the mouse off’ and then back on to readjust the center
position in Fixed Range Mode.
6. What is the recommended operating system setting to use with the headset?
We recommend increasing font and icon size or decreasing screen resolution, so that icons,
scrollbars and other objects become larger, easier to hit or grab. On a normal computer
setting with high resolution it is very hard to hit the chosen object and users can get very
tired. You should also try to use your computer’s accessibility options and see what it offers.
7. Does the headset work with any computer?
The headset is a Human Interface Device, as such it works with all Mac and PC systems when
the dongle is plugged into an USB port. The sidebar and the GloryTools is not needed for
operation but helps a great deal.
8. The sidebar does not come up for me, what should I do?
Please open task manager and check if GloryTools is running. If not, please start it. If it is
already running and your dongle is plugged in please unplug the dongle and then plug it in
again. If it does not help, please exit GloryTools in Task Manager and unplug the dongle. Plug
the dongle in again and THEN start GloryTools.
9. The GloryTools icons are not active, what should I do?
You may have a dongle that has a firmware that is not compatible with the GloryTools
installed. You can upgrade the firmware or install an earlier version of GloryTools. In this case
please contact us for support.
Table of contents