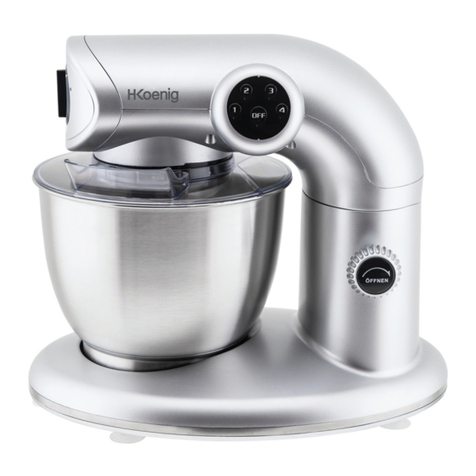
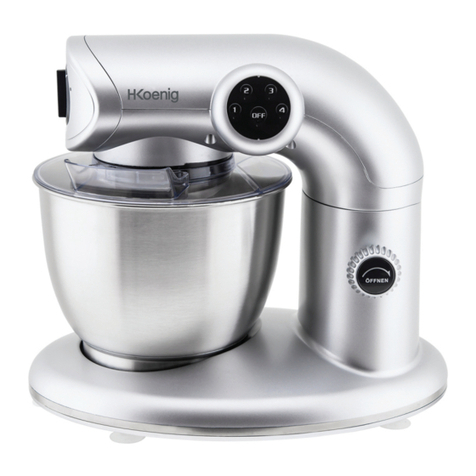
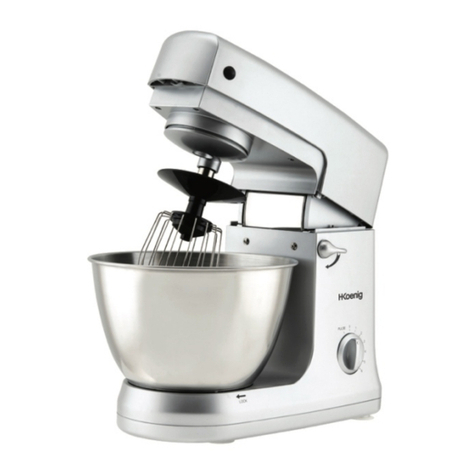
H.Koenig KM126 User manual

Instruction manual
Manuel d'utilisation
Benutzerhandbuch
Gebruiksaanwijzing
Manual de usuario
Manuale d’uso
Manual de Instruções
KM126
Stand Mixer Multifunctions
Robot Pétrin Multifonctions
Robot Mixer Multifunktions
Robot Keukenmachine Multifunctioneel
Robot Batidora Multifuncion
Robot lmpastatrice Multifunzione
Robot de Cozinha Multifoncional

ENGLISH
Safety Instructions
When using electrical appliances, basic safety
precautions should always be followed including the
following:
- To protect against risk of electrical shock do not put
stand mixer and power supply cord in water or other
liquid. If the supply cord is damaged, it must be
replaced by the manufacturer, its service agent or
similarly qualified persons in order to avoid a hazard.
- Close supervision is necessary when any appliance
is used by or near children.
- This appliance shall not be used by children. Keep
the appliance and its cord out of reach of children.
- Always disconnect the appliance from the
supply if it is left unattended and before
assembling, disassembling or cleaning.
- Switch off the appliance and disconnect from
supply before changing accessories or
approaching parts that move in use.
- Care shall be taken when handling the sharp cutting
blades, emptying the bowl and during cleaning.
-Appliances can be used by persons with reduced
physical, sensory or mental capabilities or lack of
experience and knowledge if they have been given
supervision or instruction concerning use of the
appliance in a safe way and if they understand the
hazards involved. Children shall not play with the
appliance.
- Unplug from outlet when not in use, before putting
on or taking off parts, and before cleaning.
- Avoid contacting moving parts. Keep hands,
hair, clothing, as well as spatulas and other
utensils away from beaters during operation to

reduce the risk of injury to persons, and/or damage
to the mixer.
- Do not operate any appliance with a damaged cord
or plug or after the appliance malfunctions, or is
dropped or damaged in any manner. Return appliance
to the nearest authorized service facility
forexamination, repair or electrical or mechanical
adjustment.
- The use of attachments not recommended or sold by
the manufacturer may cause fire, electric shock or
injury.
- Do not use outdoors. This product is for household
use only.
- Do not let cord hang over edge of table or counter.
- Remove beaters from mixer before washing.
- This appliance may be used by children of at least
8 years of age, as long as they are supervised and
have been given instructions about using the appliance
safely and are fully aware of the dangers involved.
- Cleaning and maintenance should not be carried
out by children unless they are at least 8 years of age
and are supervised by an adult.
- Keep the appliance and its power cord out of reach
of children under 8 years of age.
- When using electrical equipment, safety precautions
must always be taken to prevent the risk of fire, electric
shock and/or injury in the event of misuse.
- Make sure that the voltage rating on the type plate
corresponds to your main voltage of your installation. If
this is not the case, contact the dealer and do not
connect the unit.
- Keep this manual for future reference and pass it on
with the equipment to any future users.
- The machine is only used for household and indoor.

GROUNDING INSTRUCTIONS
This appliance must be grounded while in use to protect the operator from electrical
shock. The appliance is equipped with a 3-conductor cord and a 3-prong grounding-
type plug to fit the proper grounding-type receptacle.
EXTENSION CORDS
Use only 3-wire extension cords which have 3-prong grounding-type plugs and 3-pole cord
connectors that accept the plug from the appliance. Use only extension cords having an
electrical rating not less than the rating of the appliance. Do not use damaged extension
cords. Examine extension cord before using and replace if damaged. Do not abuse extension
cord and do not yank on any cord to disconnect. Keep cord away from heat and sharp edges.
Overview of the Components
`

3、Technical data
Model: KM126
Rated voltage: 220-240V~, 50/60Hz
Power consumption: 800W
Protection class: I
This device has been tested according to all relevant current CE guidelines, such as
electromagnetic compatibility and low voltage directives, and has been constructed in
accordance with the latest safety regulations. Subject to technical changes without prior
notice!
Main Components and Standard Accessories:
1
Driver shaft
9
Support
2
Screw
10
Mixing bowl
3
Front cover
11
Splash Cover
4
Drive arm
12
Funnel
5
Power cord
13a
Hook
6
Operation and Level regulator
13b
Beater
7
Level for raising and Lowering arm
13c
Whisk
8
Power Switch&LED

3. Operating the appliance
3.1 Speed regulator Timing display
1、Power plug connected to the power supply and press the power switch (8), the speed show
“0"and the time show “00:00".
2 、When the speed show "0",if the consumer forget to turn off the power switch, 5 minutes the
LED will no display and the machine return to standby mode automatically.
3、Turn the knob CW one time,the speed rise 1(0-8),opposite turn the knob CCW one
time ,the speed falling 1 (8-0).
Countdown Function:
The count-down timer is for any recipe that specifies the length of time ingredients should be mixed.
1. To set the count-down time,rotate the knob anticlockwise for 3 seconds.
2. Preset time is 2 minutes as 02:00 displayed on the LED screen.
3. Rotate the knob clockwise once, time increases 10 seconds,that is 2 minutes plus 10
seconds.Rotate the knob
anticlockwise once, time decreases 10 seconds, that is 1 minute plus 50 seconds.
4. Rotate the knob anticlockwise for 3 seconds, timer is fixed and countdown is well set.
5. Rotate the knob clockwise to select the speed and machine will start to work. It will automatically
turn off when the timer has finished counting down.

4. Using the Mixing Bowl
1.Place the mixing bowl into its holding device and turn
the dish in the direction of LOCK until it locks into place.(picture
1)
2.In order to lift the drive arm, press the lever (7)
downwards in the direction of the arrow. The drive arm
will now move upwards.(picture 2)
3.Mount the required utensil by inserting the top into the
drive shaft and locking the cotter pin in the shaft by turning
to the right.(picture 4)
4.Now fill in your ingredients. Do not overfill the machine
- the maximum quantity of ingredients is 1.5 kg.
5.Lower the arm using the lever (7).(picture 3)
6.Insert the mains plug into a properly installed 220-240V~,
50/60Hz safety power socket.
7.Turn the machine using the speed regulator(6) to a speed
between 1 and 8 (corresponding to the mixture).

Adjusting the Levels and Using the Hook for not more than 1.5kg of Mixture
Levels
Use
Type of Mixture
1-3
H
ook
Heavy mixtures(e.g. bread or short pastry)
1-8
hook
、
beater
Medium-
heavy mixtures(e.g. crepes or sponge
mixture)
Whisk
Light mixtures (e.g. cream, egg white,
blancmange)
NOTE:
l Short operation time: With heavy mixtures, do not operate the machine for more than 10
min,
and then allow it to cool down for a further 10 min.
l Use the splash guard to protect against liquid mixtures.
• Mixing the egg with whisk need 3min
8.After kneading/stirring turn the switch (6) back to the “0” position as soon as the mixture
has formed a ball. Then remove the mains plug.
9.Press the lever (7) downwards and the arm will be raised.
10.The mixture can now be released with the help of a spatula and removed from the mixing bowl.
11.The mixing bowl can now be removed by turning to the left.
12.Clean the parts as described under “Cleaning” .
Suggested Recipes
Sponge Mixture (Basic Recipe), Level 3-4
Ingredients:
250grams soft butter or margarine, 250grams sugar, 1 packet vanilla sugar or 1 bag Citro-Back, 1
pinch of salt, 4 eggs, 500grams wheat fl our, 1 packet baking powder, approx. 1/8 litre milk.
Preparation:
Transfer the wheat fl our and the remaining ingredients to the mixing bowl, stir with the stirrer for
30 seconds on level 1, then for approximately 3 minutes on level 3. Grease a tin or cover with
baking paper. Fill in the mixture and bake. Before the cake is removed from the oven, test to see
if it is done. With a sharp wooden stick pierce the centre of the cake. If no mixture sticks to it, the
cake is cooked. Turn the cake on to a cake grid and allow to cool.
Traditional Oven
Insertion height: 2
Heating: electric oven, top and bottom heat 175-200° Celsius; gas oven: level 2-3
Baking time: 50-60 minutes

Depending on taste, this recipe can be changed, for example with 100g raisins or 100g nuts or
100g grated chocolate. In fact, the possibilities are endless.
Linseed Bread Rolls, Level 1-2
Ingredients:
500-550g wheat flour, 50g linseed, 3/8 litre water, 1 cube of yeast (40g), 100g low-fat curds, well
drained,
1 tsp salt. For coating: 2 tbsp of water.
Preparation:
Soak the linseed in 1/8 litre of lukewarm water. Transfer the remaining lukewarm water (1/4 litre)
into the mixing bowl, crumble in the yeast, add the curds and mix with the kneading hook on level
2. The yeast must be completely dissolved. Put the flour with the soaked linseed and the salt into
the mixing bowl. Knead thoroughly on level 1, then switch to level 2 and continue kneading for 3-5
minutes. Cover the mixture and allow to rise in a warm place for 45-60 minutes. Knead thoroughly
once more, remove from the bowl and form sixteen rolls. Cover the baking tin with wet baking paper.
Place the rolls on this and allow to rise for 15 minutes. Coat with lukewarm water and bake.
Note:
The above formula do not operate the machine for more than 10 min and then allow it to cool
down for a further 10 min.
Traditional Oven:
Insertion height: 2
Heating: electric oven: top and bottom heat 200-220°C (preheated for 5 minutes),gas oven level 2-
3
Baking time: 30-40 minutes
Chocolate Cream, Level 5-6
Ingredients:
200ml sweet cream, 150g semi-bitter chocolate coating, 3 eggs, 50-60g sugar, 1 pinch of salt,
1 packet of vanilla sugar, 1 tablespoon cognac or rum, chocolate flakes.
Preparation:
Beat the cream in the mixing bowl with the whisk until stiff. Remove from the bowl and place
somewhere to cool. Melt the chocolate coating in accordance with the instructions on the packet
or in the microwave at 200W for 3 min. In the meantime, beat the eggs, sugar, vanilla sugar,
cognac or rum and salt in the mixing bowl with the whisk on level 3 to form a foam. Add the

melted chocolate and stir in evenly on level 5-6. Leave a little of the cream for decoration. Add
the remaining cream to the creamy mixture and stir in briefl y using the pulse function. Decorate
the chocolate cream and serve well cooled.
Warning
-Before cleaning remove the mains lead from the socket.
- When leaving the machine at work, please cut off the power of machine.
- Never immerse the housing with motor in water!
- Do not use any sharp or abrasive detergents.
Cleaning
- Before cleaning remove the mains lead from the socket.
- Never immerse the housing with motor in water!
- Do not use any sharp or abrasive detergents.
- After operation, all the accessories should be cleaned as
soon as possible in order to avoid the ingredientsstick on
the accessories for long time and difficult to clean.
- The bowl, dough hook, beater, whisk, pasta maker should
put into water and cleaning with dishcloth or
brush(Sometimes can dip in water for 10 minutes first, it
will be easier to clean)
- The meat grinder and salad maker should be flushed
against the tap and use brush to wash (especially
thefood tray and blade of meat grinder accessories and
the cutter of salad maker)
- Be careful you hand get hurt when cleaning。
Motor Housing
- Only a damp rinsing cloth should be used to clean the
outside of the housing.

Mixing Bowl, Mixing Equipment
CAUTION:
- The components are not suitable for cleaning in a
dishwasher. If exposed to heat or caustic
cleaners they might become misshapen or discolored.
- Components that have come into contact with food can
be cleaned in soapy water.
WARNING:
Danger of injury!
- Allow the parts to dry thoroughly before reassembling the
device.
- Please apply a small quantity of vegetable oil likely to the
screens after they have dried.
`
ENVIRONMENT
CAUTION:
Do not dispose of this product as it has with other household products. There is a
separation
of this waste product into communities, you will need to inform your local authorities
about the
places where you can return this product. In fact, electrical and electronic products
contain
hazardous substances that have harmful effects on the environment or human health and
should be recycled. The symbol here indicates that electrical and electronic equipment should
be chosen carefully, a wheeled waste container is marked with a cross.
Adeva SAS / H.Koenig Europe - 8 rue Marc Seguin - 77290 Mitry Mory - France

FRANÇAIS
CONSIGNES
Consignes de sécurité
Lorsque l'on utilise un appareil électrique, il faut toujours
respecter des précautions de base, y compris celles-ci :
- Pour se protéger contre les risques de choc électrique, ne
mettez pas l'appareil et son cordon d'alimentation dans
l'eau ou dans un autre liquide. Si le cordon d'alimentation
est endommagé, il doit être remplacé par le fabricant, son
agent de service ou des personnes ayant une qualification
similaire afin d'éviter tout accident.|
- Une surveillance étroite est requise lors de l’utilisation de
tout appareil par des enfants ou à proximité d’eux.
- Cet appareil ne doit pas être utilisé par des enfants. Ne
laissez pas l'appareil et son cordon d'alimentation à leur
portée.
- Débranchez toujours l'appareil de la prise électrique s'il
est laissé sans surveillance, mais aussi avant l'assemblage,
le démontage ou le nettoyage.
- Éteignez et débranchez l’appareil avant de remplacer
les accessoires ou de toucher les pièces qui sont en
mouvement.
- Des précautions doivent être prises lors de la
manipulation des lames coupantes, du vidage du bol et
pendant le nettoyage.
- Les appareils peuvent être utilisés par des personnes
dont les capacités physiques, sensorielles ou mentales
sont réduites ou qui manquent d'expérience et de
connaissances, si elles ont été surveillées ou si elles
ont reçu des instructions concernant l'utilisation de
l'appareil en toute sécurité et si elles comprennent les
risques encourus. Les enfants ne doivent pas jouer
avec l’appareil.

- Débranchez l'appareil de la prise lorsque celui-ci n'est
pas utilisé, avant de mettre ou d'enlever des pièces
mobiles et avant de le nettoyer.
- Évitez tout contact avec les pièces mobiles. Gardez
vos mains, vos cheveux, vos vêtements, ainsi que les
spatules et autres ustensiles à l'écart des fouets
pendant le fonctionnement, afin de réduire les risques
de blessure et / ou de détérioration du mixeur.
- N’utilisez pas l’appareil si le cordon d'alimentation ou la
prise est endommagée, ni après un dysfonctionnement,
une chute ou un quelconque dégât à l’appareil. Renvoyez
l’appareil au centre de service agréé le plus proche afin
qu’il fasse l’objet d’un contrôle, d’une réparation, voire
d’un réglage électrique ou mécanique.
- L'utilisation d'accessoires, qui ne sont pas
recommandés ou vendus par le fabricant de cet appareil,
pourrait provoquer un incendie, une électrocution ou une
blessure.
- N’utilisez pas l'appareil à l'extérieur. Ce produit est
uniquement conçu pour un usage domestique.
- Ne laissez pas le câble pendre sur le bord d'une table ou
d'un comptoir.
- Enlevez les fouets du mixeur avant de les laver.
- Cet appareil peut être utilisé par des enfants d’au moins 8
ans, tant qu’ils sont surveillés et ont reçu des instructions
pour utiliser l’appareil en toute sécurité et sont pleinement
conscients des dangers encourus.
- Le nettoyage et l’entretien ne doivent pas être effectués
par des enfants à moins qu’ils aient au moins 8 ans et qu’ils
soient surveillés par un adulte.
- Gardez l’appareil et son cordon d’alimentation hors de
portée des enfants de moins de 8 ans.
- Lors de l’utilisation d’équipements électriques, des
précautions de sécurité doivent toujours être prises pour
éviter les risques d’incendie, d’électrocution et / ou de
blessure en cas de mauvaise utilisation.

- Assurez-vous que la tension nominale sur la plaque
signalétique corresponde à la tension principale de votre
installation. Si ce n’est pas le cas, contactez le revendeur
et ne branchez pas l’appareil.
- Conservez ce manuel en lieu sûr et transmettez-le avec
l’appareil au futur utilisateur.
- L’emploi de l’appareil est uniquement domestique et en
intérieur.
INSTRUCTIONS DE MISE À LA TERRE
Cet appareil doit être mis à la terre lors de son utilisation afin de protéger l’utilisateur contre
les chocs électriques. L'appareil est équipé d'un cordon à 3 conducteurs et d'une fiche à 3
broches pour l'insertion dans une prise de terre appropriée.
RALLONGES ÉLECTRIQUES
Utilisez uniquement des rallonges à 3 fils munies de fiches à 3 broches avec mise à la terre et de
connecteurs de câble à 3 pôles acceptant la fiche de l'appareil. Utilisez uniquement des rallonges
électriques dont la puissance nominale n’est pas inférieure à celle de l’appareil. N’utilisez pas de
rallonges endommagées. Examinez la rallonge avant de l’utiliser et remplacez-la si elle est
endommagée. Ne maltraitez pas la rallonge et ne tirez sur aucun cordon pour la déconnecter.
Gardez le cordon à l'écart de la chaleur et des objets tranchants.

Présentation des éléments
Éléments principaux et accessoires standard :
1
Arbre d'entraînement
9
Support
2
Vis
10
Bol
3
Couvercle avant
11
Couvercle de protection
4
Bras d'entraînement
12
Entonnoir
5
Cordon d'alimentation
13a
Crochet
6
Bouton de mise en marche et
régulateur de niveau
13b
Batteur
7
Levier permettant de régler la
hauteur du bras
13c
Fouet
8
Interrupteur et LED
Nom des pièces

3 、Données techniques
Modèle : KM126
Tension Nominale : 220-240 V, 50/60 Hz.
Consommation électrique : 800 W
Classe de protection : I
Cet appareil a été testé conformément à toutes les directives CE en vigueur, notamment en
ce qui concerne la compatibilité électromagnétique et les directives relatives aux basses
tensions, et a été construit conformément aux normes de sécurité les plus récentes. Sous
réserve de modifications techniques sans préavis !

3. Utilisation de l'appareil
Régulateur de vitesse Minuteur
1. Brancher la fiche d’alimentation sur le secteur et appuyer sur l’interrupteur d’alimentation
(8), la vitesse indique «0» et l’heure «00:00».
2. Lorsque la vitesse indique « 0 », si l’utilisateur oublie d’éteindre l’appareil pendant 5 minutes,
rien ne s’affiche et l’appareil revient automatiquement en mode veille.
3, Tourner le bouton CW une fois, la vitesse augmente d’une unité (0-8). Tourner le bouton
CCW une fois en sens inverse, la vitesse baisse d’une unité (8-0).
Fonction de compte à rebours :
Le compte à rebours est pour toute recette qui spécifie la durée de mélange des ingrédients.
2. Pour régler le compte à rebours, tourner le bouton dans le sens inverse des aiguilles d’une montre
pendant 3 secondes.
6. Le temps prédéfini est de 2 minutes, 02:00 étant affiché sur l’écran LED.
7. Tournez le bouton une fois dans le sens des aiguilles d’une montre, le temps augmente de 10
secondes, soit 2 minutes plus 10 secondes. Dans le sens inverse des aiguilles d’une montre, le
temps diminue de 10 secondes, soit 1 minute plus 50 secondes.
8. Tournez le bouton dans le sens inverse des aiguilles d’une montre pendant 3 secondes, la
minuterie est fixe et le compte à rebours est bien réglé.
9. Tournez le bouton dans le sens des aiguilles d’une montre pour sélectionner la vitesse et
l’appareil commencera à fonctionner. Il s’éteint automatiquement une fois le compte à rebours
terminé.
VITESSE
TEMPS
BOUTON

Utilisation du bol mélangeur
1. Placer le bol dans son emplacement et le tourner
en direction de LOCK jusqu’à ce qu’il se verrouille (Image 1).
3. Pour lever le bras d'entraînement, appuyer sur le
levier (7) vers le bas dans le sens de la flèche. Le bras
d’entraînement se déplace maintenant vers le haut
(Image 2).
4. Monter l'ustensile requis en insérant le haut dans l'arbre
d'entraînement et en bloquant la goupille fendue dans
l'arbre en tournant vers la droite (Image 4).
5. Maintenant, remplir l’appareil avec vos ingrédients. Ne
le remplissez pas excessivement. La quantité
maximale d’ingrédients est de 1,5 kg.
5. Abaisser le bras à l’aide du levier (7) (Image 3).
10. Insérer la fiche dans une prise de courant 220-240V,
50 / 60Hz aux normes.
11. Allumer l’appareil à l’aide du régulateur de vitesse sur
une vitesse comprise entre 1 et 8 (correspondant au
mélange).

Réglage des niveaux et utilisation du crochet avec 1,5 kg de mélange au maximum
Niveaux
Utilisation
Type de mélange
1-3
crochet
Mélanges lourds (par ex. pâte à pain ou pâte brisée)
1-8
crochet, batteur
Mélanges moyennement lourds (par exemple : crêpes)
fouet
Mélanges légers (par ex. crème, blanc d’oeuf, blanc manger)
REMARQUE :
l Temps de fonctionnement court : Avec des mélanges lourds, ne pas faire fonctionner
l’appareil plus de 10 minutes,
puis laissez-le refroidir pendant 10 minutes supplémentaires.
l Utiliser le couvercle de protection pour vous protéger contre les mélanges liquides.
• Mélanger un œuf avec le fouet nécessite 3 minutes.
Après que l’appareil a pétri / mélangé son contenu, remettre le bouton (6) sur « 0 » dès
que le mélange a formé une boule. Retirer ensuite la fiche de la prise.
Appuyer sur le levier (7) vers le bas et le bras se lèvera.
Le mélange peut maintenant être dégagé à l'aide d'une spatule et retiré du bol.
Vous pouvez maintenant retirer le bol mélangeur en le tournant vers la gauche.
Nettoyer les pièces comme décrit à la rubrique « Nettoyage ».
Recettes suggérées
Sponge cake (Recette de Base), Niveau 3-4
Ingrédients :
250 grammes de beurre mou ou de margarine, 250 grammes de sucre, 1 paquet de sucre vanillé
ou 1 sac Citro-Back, 1 pincée de sel, 4 œufs, 500 grammes de farine de blé, 1 paquet de levure
chimique, env. 1/8 litre de lait.
Préparation :
Placer la farine de blé et les autres ingrédients dans le bol, mélanger avec l’agitateur pendant
30 secondes au niveau 1, puis pendant environ 3 minutes au niveau 3. Graisser un moule ou
couvrir avec du papier sulfurisé. Remplir le mélange et faire cuire. Avant de retirer le gâteau du
four, vérifier s'il est cuit. Avec un bâtonnet pointu, percer le centre du gâteau. Si le mélange ne
colle pas, le gâteau est cuit. Placer le gâteau sur une grille et le laisser refroidir.
Four Traditionnel
Hauteur d'insertion : 2
Chauffage : four électrique, chaleur supérieure et inférieure 175-200° C ; four à gaz : niveau 2-3

Temps de cuisson : 50-60 minutes
Selon les goûts, cette recette peut être modifiée, par exemple avec 100 g de raisins secs, 100 g
de noix ou 100 g de chocolat râpé. En fait, les possibilités sont infinies.
Petits pains aux graines de lin, niveau 1-2
Ingrédients :
500-550g de farine de blé, 50g de graines de lin, 3/8 litre d'eau, 1 cube de levure (40g), 100g de
lait caillé écrémé, bien égoutté,
1 petite cuillérée de sel. Pour le nappage : 2 cuillérées à soupe d'eau.
Préparation :
Tremper les graines de lin dans 1/8 litre d’eau tiède. Transférer l’eau tiède restante (1/4 litre) dans
le bol, émietter la levure, ajouter le lait caillé et mélanger avec le crochet pétrisseur au niveau 2.
La levure doit être complètement dissoute. Mettre la farine avec les graines de lin trempées et le
sel dans le bol au niveau 1, puis passer au niveau 2 et continuer à pétrir pendant 3 à 5 minutes.
Couvrir le mélange et laisser lever dans un endroit chaud pendant 45 à 60 minutes. Pétrir à
nouveau soigneusement, retirer du bol et former seize rouleaux. Couvrir le moule avec du papier
sulfurisé humide. Placer les petits pains dessus et les laisser lever pendant 15 minutes. Recouvrir
avec de l'eau tiède et cuire.
Remarque :
La recette ci-dessus ne fait pas fonctionner l’appareil pendant plus de 10 minutes et le laisse
ensuite refroidir pendant 10 minutes supplémentaires.
Four Traditionnel :
Hauteur d'insertion : 2
Chauffage : four électrique avec chaleur supérieure et inférieure 200-220°C (préchauffé pendant 5
minutes), four à gaz niveau 2-3
Temps de cuisson : 30-40 minutes
Crème au Chocolat, niveau 5-6
Ingrédients :
200 ml de crème sucrée, 150 g de chocolat moyennement amer, 3 œufs, 50 à 60 g de sucre,
1 pincée de sel, 1 sachet de sucre vanillé, 1 cuillérée à soupe de cognac ou de rhum, des
flocons de chocolat.
Table of contents
Languages:
Other H.Koenig Mixer manuals

H.Koenig
H.Koenig KM80 User manual

H.Koenig
H.Koenig KM124 User manual

H.Koenig
H.Koenig Top Chef TOPC416 User manual

H.Koenig
H.Koenig KM120 User manual

H.Koenig
H.Koenig KM128 User manual

H.Koenig
H.Koenig KM80 User manual

H.Koenig
H.Koenig KM78 User manual

H.Koenig
H.Koenig KM68 User manual

H.Koenig
H.Koenig KM65 User manual

H.Koenig
H.Koenig MX15 User manual