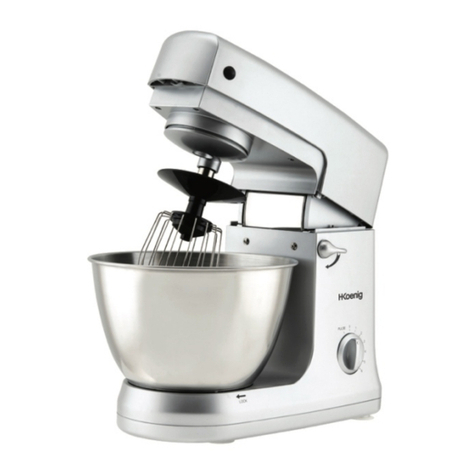
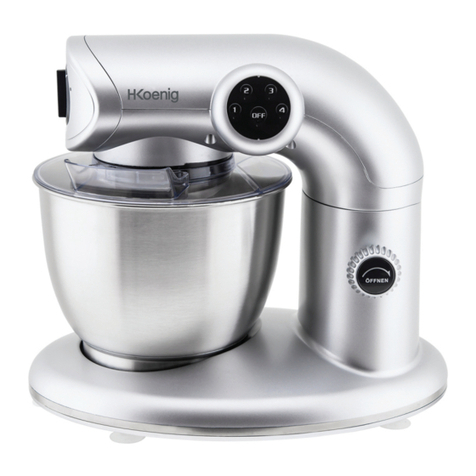
H.Koenig KM65 User manual

KM65
Stand Mixer
Robot / Pétrin Multifonctions
Robot / Mixer Multifunktions
Robot / Keukenmachine Multifunctioneel
Robot / BatidoraMultifunción
Robot Impastatrice Multifunzione
Instruction manual
Manuel d'utilisation
Bedienungsanleitung
Handboek
Manual de utilización
Manuale d'uso

Stand Mixer with Meat Grind
Keep this manual for future reference
and pass it on with the equipment to any future users.
Technical Data
Rated voltage: 220-240V~, 50/60Hz
Power consumption: 600W
Protection class: II
Short operation time: 10 Min.
This device has been tested according to all relevant current CE guidelines, such as electromagnetic compatibility
and low voltage directives, and has been constructed in accordance with the latest safety regulations.
Subject to technical changes without prior notice!
General Safety Instructions
Read the operating instructions carefully before putting the appliance into operation and keep the instructions
including the warranty, the receipt and, if possible, the box with the internal packing. If you give this device to other
people, please also pass on the operating instructions.
The appliance is designed exclusively for private use and for the envisaged purpose. This appliance is not fit
for commercial use. Do not use it outdoors (except if it is designed to be used outdoors). Keep it away from
sources of heat, direct sunlight, humidity (never dip it into any liquid) and sharp edges. Do not use the
appliance with wet hands. If the appliance is humid or wet, unplug it immediately.
When cleaning or putting it away, switch off the appliance and always pull out the plug from the socket (pull on
the plug, not the cable) if the appliance is not being used and remove the attached accessories.
Do not operate the machine without supervision. If you should leave the workplace, always switch the machine
off or remove the plug from the socket (pull the plug itself, not the lead).
Check the appliance and the cable for damage on a regular basis. Do not use the appliance if it is damaged.
Do not try to repair the appliance on your own. Always contact an authorized technician. To avoid the exposure
to danger, always have a faulty cable be replaced only by the manufacturer, by our customer service or by a
qualified person and with a cable of the same type.
Use only original spare parts.
Pay careful attention to the following “Special Safety Instructions”.
Children and Frail Individuals
In order to ensure your children‘s safety, please keep all packaging (plastic bags, boxes, polystyrene etc.) out
of their reach.
Caution! Do not allow small children to play with the foil as there is a danger of suffocation!
In order to protect children or frail individuals from the hazards of electrical equipment, please ensure that this
device is only used under supervision. This device is not a toy. Do not allow small children to play with it.
Special safety Instructions for this Machine
Only operate this machine under supervision.
Do not interfere with any safety switches.
Do not insert anything into the rotating hooks while the machine is working.
Place the machine on a smooth, fl at and stable working surface.

Do not insert the mains plug of the machine into the power socket without having installed all the necessary
accessories.
Only the pusher should be used for refilling the mincer.
Danger of overloading! Please use the device either as a mincer or mixer, but never both functions at the
same time.
Overview of the Components
Main Components:
1
Drive shaft
6
Power Cord
2
Helix drive cover
7
Pulse operation and level regulator
3
Mixing bowl
8a
Kneading hook
4
Top Cover with Screw
8b
Whisk
5
Lever for raising and lowering the arm
8c
Stirrer

Accessories:
9
Slide
15b
Sausage attachment, small
10
Spiral Housing
15c
Adapter for 15
11
Spiral
16
Filling Tray
12
Blades
17
Presser Meat Mincer
13
Sieve
19
Biscuit Attachment
14
Lock
19
Biscuit Attachment
15a
Sausage attachment, large
20
Biscuit Attachment
Using the Mixing Bowl
1. Place the mixing dish into its holding device and turn the dish in the direction of LOCK until it locks into place.
2. In order to lift the arm, press the lever (5) downwards in the direction of the arrow. The arm will now move
upwards.
3. Mount the required utensil by inserting the top into the drive shaft and locking the cotter pin in the shaft by
turning to the right.
4. Now fill in your ingredients.
Do not overfill the machine - the maximum quantity of ingredients is 2 kg.
5. Lower the arm using the lever (5).

6. Insert the mains plug into a properly installed 230 V/50 Hz safety power socket.
7. Switch the machine using the level regulator to a speed between 1 and 6 (corresponding to the mixture).
8. For pulse operation (kneading at short intervals), turn the switch to the “PULSE” position. The switch has to be
held in this position according to the desired interval length. When the switch is released it returns
automatically to the “0”position.
Adjusting the Levels and Using the Hook for not more than 2 kg of Mixture
Levels
Use
Type of Mixture
1-2
Kneading hook
Heavy mixtures(e.g. bread or short pastry)
3-4
Stirrer
Medium-heavy mixtures(e.g. crepes or sponge mixture)
5-6
Whisk
Light mixtures (e.g. cream, egg white, blancmange)
Pulse
Whisk
Interval (e.g. for mixing under sponge, egg white)
NOTE:
Short operation time: With heavy mixtures, do not operate the machine for more
than ten minutes, and then allow it to cool down for a further ten minutes.
Use the splash guard to protect against liquid mixtures.
9. After kneading/stirring turn the switch (7) back to the “0” position as soon as the mixture has formed a ball.
Then remove the mains plug.
10. Press the lever (5) downwards and the arm will be raised.
11. The mixture can now be released with the help of a spatula and removed from the mixing bowl.
12. The mixing bowl can now be removed by turning to the left.
13. Clean the parts as described under “Cleaning” .
Suggested Recipes
Sponge Mixture (Basic Recipe), Level 3-4
Ingredients:
250grams soft butter or margarine, 250grams sugar, 1 packet vanilla sugar or 1 bag Citro-Back, 1 pinch of salt, 4
eggs, 500grams wheat fl our, 1 packet baking powder, approx. 1/8 litre milk.
Preparation:
Transfer the wheat fl our and the remaining ingredients to the mixing bowl, stir with the stirrer for 30 seconds on
level 1, then for approximately 3 minutes on level 3. Grease a tin or cover with baking paper. Fill in the mixture and
bake. Before the cake is removed from the oven, test to see if it is done. With a sharp wooden stick pierce the
centre of the cake. If no mixture sticks to it, the cake is cooked. Turn the cake on to a cake grid and allow to cool.
Traditional Oven
Insertion height: 2
Heating: electric oven, top and bottom heat 175-200° Celsius; gas oven: level 2-3
Baking time: 50-60 minutes
Depending on taste, this recipe can be changed, for example with 100g raisins or 100g nuts or 100g grated
chocolate. In fact, the possibilities are endless.
Linseed Bread Rolls, Level 1-2
Ingredients:
500-550g wheat fl our, 50g linseed, 3/8 litre water, 1 cube of yeast (40g), 100g low-fat curds, well drained, 1 tsp

salt. For coating: 2 tbsp of water
Preparation:
Soak the linseed in 1/8 litre of lukewarm water. Transfer the remaining lukewarm water (1/4 litre) into the mixing
bowl, crumble in the yeast, add the curds and mix with the kneading hook on level 2. The yeast must be completely
dissolved. Put the flour with the soaked linseed and the salt into the mixing bowl. Knead thoroughly on level 1, then
switch to level 2 and continue kneading for 3-5 minutes. Cover the mixture and allow to rise in a warm place for
45-60 minutes. Knead thoroughly once more, remove from the bowl and form sixteen rolls. Cover the baking tin
with wet baking paper. Place the rolls on this and allow to rise for 15 minutes. Coat with lukewarm water and bake.
Traditional Oven:
Insertion height: 2
Heating: electric oven: top and bottom heat 200-220°C (preheated for 5 minutes),gas oven level 2-3
Baking time: 30-40 minutes
Chocolate Cream, Level 5-6
Ingredients:
200ml sweet cream, 150g semi-bitter chocolate coating, 3 eggs, 50-60g sugar, 1 pinch of salt, 1 packet of vanilla
sugar, 1 tablespoon cognac or rum, chocolate flakes.
Preparation:
Beat the cream in the mixing bowl with the whisk until stiff. Remove from the bowl and place somewhere to cool.
Melt the chocolate coating in accordance with the instructions on the packet or in the microwave at 600W for 3
minutes. In the meantime, beat the eggs, sugar, vanilla sugar, cognac or rum and salt in the mixing bowl with the
whisk on level 3 to form a foam. Add the melted chocolate and stir in evenly on level 5-6. Leave a little of the cream
for decoration. Add the remaining cream to the creamy mixture and stir in briefl y using the pulse function.
Decorate the chocolate cream and serve well cooled.
Meat mincer
Initial Operation - General
1. Remove the cover (2) from the helix drive and take out the screw (16).
2. Place the spiral housing (10) with the filler neck facing upwards into the spiral drive and turn the screw (16)
clockwise until it is closed.
3. Place the filling tray on the filler neck in such a way that the receptacle of the tray is positioned under the arm.
4. Push the spiral into the horizontal section of the spiral housing until the axle locks in place. Please see the
sections on “Operating the Mincer” and “Sausage Attachment”.

Operation Meat Mincer (see illustration A)
NOTE:
Cut the meat into pieces of about 2.5 cm. Please take care that the
meat does not contain any bones or sinews.
1. First place the blade on the end of the helix and then a screen of your choice. Please pay attention to the
screen and the recesses on the helix housing. Screw the lock (14) on until it is “hand tight”.
2. Put the pieces of meat on to the fi lling tray (17) and into the fi ller neck.
3. Place a vessel under the exit.
4. Please ensure that the function switch (7) is turned to “Off”.
5. Connect the device to a 230 V, 50 Hz safety contact power socket.
6. Turn the mincer on by the switch (7).
7. If necessary push the meat with the presser (18). Please do not follow this up with your fingers.
Operation Sausage Attachment (see illustration B/C)

1. Place the adapter (15c) on the axle of the spiral auger.
2. Insert a sausage attachment (15a or b) into the lock. Attachment is a for thick sausages, attachment b for
thin sausages.
3. Turn the lock “hand tight”on to the spiral housing.
4. Push the sausage skin (using either real or synthetic skin) over the sausage skin and knot the end.
5. Fill the sausage paste on to the filling tray and into the filler neck.
6. Repeat steps 4 to 7 as described in “Operation Meat Mincer”.
7. The sausage mixture is pressed through the sausage attachment and filled into the sausage skin.
8. When the first sausage has reached the desired length, squeeze it together with your fingers at the end of
the sausage top. Turn the sausage around its own axis once or twice.
NOTE:
Cut Levels 1 to 4 are suitable for mincer operation.
Do not operate the device for more than 10 minutes and then allow it to cool down for a further 10
minutes.
You can turn off the device after each single sausage length until you are more experienced.
Carry out step 8 as described. Then turn on the meat mincer again.
If you decide to use real skin, let it soak in water for a while before use.
Take care that the sausage skin is filled „loosely“ as during boiling or frying the sausage expands
and the skin might tear.
Operation with Biscuit Attachment (see illustration D)
1. Please follow points 1 to 4 as described under “Initial Operation”.
2. Unscrew the biscuit attachment and select the desired biscuit cutter.
3. Put the mixture on to the filling tray and the filler neck.
4. Please ensure that the function switch (7) is turned to “Off”.
5. Connect the device to a 230 V, 50 Hz safety contact power socket.
6. Turn the mincer on by the screw (7).
7. If necessary, push the mixture further down with the pusher (18). Do not touch with your fingers.
8. Hold the elongated mixture at the exit and cut it off at the desired length.

Cleaning
Before cleaning remove the mains lead from the socket.
Never immerse the housing with motor in water!
Do not use any sharp or abrasive detergents.
Motor Housing
Only a damp rinsing cloth should be used to clean the outside of the housing.
Mixing Bowl, Mixing Equipment and Components of the Mincer
CAUTION:
The components are not suitable for cleaning in a dishwasher. If exposed to heat or caustic
cleaners they might become misshapen or discolored.
Components that have come into contact with food can be cleaned in soapy water.
Allow the parts to dry thoroughly before reassembling the device.
Please apply a small quantity of vegetable oil likely to the screens after they have dried.
ENVIRONMENT
CAUTION:
Do not dispose of this product as it has with other household products. There is a separation of this
waste product into communities, you will need to inform your local authorities about the places where
you can return this product. In fact, electrical and electronic products contain hazardous substances
that have harmful effects on the environment or human health and should be recycled. The symbol here
indicates that electrical and electronic equipment should be chosen carefully, a wheeled waste container is
marked with a cross.
Manufactured and imported: Adeva SAS 8 rue Marc Seguin 77290 Mitry-Mory FRANCE
WARNING:
The blade of the mincer is very sharp!
Danger of injury!

FRANCAIS
Données techniques
Modèle : KM65
Tension nominale : 220-240V, 50/60Hz
Puissance maximale : 1000W
Classe de protection : II
Afin de prolonger la durée de vie de l’appareil, nous vous conseillons des utilisations par tranches de : 10 min maxi
Cet appareil a été testé selon toutes les directives CE actuelles applicables, comme les directives de compatibilité
électromagnétiques et les directives basses tensions, et a été construit en conformité avec les dernières législations
de sécurité en date.
Sujet à changements techniques sans préavis !
Instructions générales de sécurité
Lisez ce manuel d'instructions avec attention avant d'utiliser l'appareil, et conservez ces instructions, y compris la
garantie, le reçu et, si possible, la boîte avec l'emballage intérieur. Si vous donnez l'appareil à quelqu'un d'autre,
transmettez aussi les instructions d'utilisation.
L'appareil est conçu exclusivement pour un usage privé et pour le but envisagé. Cet appareil ne convient pas à
un usage commercial. Ne l'utilisez pas à l'extérieur (sauf s'il est conçu pour ça). Tenez-le loin des sources de
chaleur, de l'éclairage direct du soleil, de l'humidité (ne le plongez jamais dans un liquide) et des angles aigus.
N'utilisez pas l'appareil avec les mains mouillées. Si l'appareil est humide ou mouillé, débranchez-le
immédiatement.
Quand vous le nettoyez ou le rangez durablement, éteignez l'appareil et débranchez-le (tirez sur la prise, pas
sur le cordon) si l'appareil ne doit pas être utilisé et enlevez les accessoires qui lui sont rattachés.
Ne faites pas fonctionner l'appareil sans surveillance. Si vous devez quitter l'espace de travail, éteignez
toujours la machine ou débranchez-le (tirez sur la prise, pas sur le cordon).
Vérifiez régulièrement que l'appareil et le câble ne sont pas endommagés. N'utilisez pas l'appareil s'il est
endommagé.
N'essayez pas de réparer l'appareil vous-même. Contactez toujours un technicien habilité. Pour éviter de vous
exposer à un éventuel danger, ne faites remplacer un câble endommagé que par le fabricant, par notre service
après-vente ou par une personne qualifiée, et avec un câble du même type.
Si le cordon d'alimentation est endommagé, il doit être remplacé auprès d'un Service après-vente afin d'éviter
tout danger.
N'utilisez que des pièces de rechange d'origine.
Faites particulièrement attention aux "Instructions spéciales de sécurité" qui suivent.
Enfants et personnes vulnérables
Pour garantir la sécurité de vos enfants, conservez tous les emballages (sacs en plastique, boîtes, polystyrène,
etc.) hors d'atteinte.
Attention ! Ne laissez pas les jeunes enfants jouer avec le sac : il y a un risque de suffocation !
Cet appareil n’est pas prévu pour être utilisé par des personnes (y compris les enfants) dont les capacités
physiques, sensorielles ou mentales sont réduites, ou des personnes dénuées d’expérience ou de
connaissance, sauf si elles ont pu bénéficier, par l’intermédiaire d’une personne responsable de leur sécurité,
d’une surveillance ou d’instructions préalables concernant l’utilisation de l’appareil.
Il convient de surveiller les enfants pour s’assurer qu’ils ne jouent pas avec l’appareil.
N'utilisez cette machine que sous surveillance.


Ne manipulez aucun interrupteur de sécurité.
Ne rien insérer dans les crochets tournants quand la machine fonctionne.
Disposez la machine sur une surface de travail lisse, plane et stable.
Ne branchez pas la machine sur le secteur sans avoir installé tous les accessoires nécessaires.
Seul le poussoir doit servir à remplir le hachoir.
Risque de surcharge ! Utilisez l'appareil comme un hachoir ou un mixer, mais jamais les deux à la fois.
Aperçu des composants
Principaux composants :
1
Arbre d'entraînement
6
Câble d'alimentation
2
Protection
7
Régulateur de vitesse
3
Bol de mélange
8a
Crochet de malaxage
4
Protection supérieure avec vis
8b
Fouet
5
Levier pour lever et abaisser le bras
8c
Batteur

9
Accessoire pour biscuit
15b
Tube pour saucisses (petit format)
10
Support
15c
Adaptateur pour 15a et 15b
11
Hélice
16
Vis
12
Lame
17
Plateau
13
Accessoire pour hachoir
18
Poussoir
14
Fixation de sécurité
19
Accessoire pour saucsisses
15a
Tube pour saucisses (grand format)
20
Accessoire pour biscuit
Accessoires:

Utilisation du bol de mélange
1. Disposez le bol de mélange sur son support et tournez-le dans la direction de verrouillage (marquée LOCK)
jusqu'à ce qu'il se verrouille.
2. Pour soulever le bras, appuyez sur le levier (5) vers le bas dans le sens de la flèche. Le bras s'élève.
3. Montez l'ustensile requis en insérant le haut sur l'arbre d'entraînement et en verrouillant la goupille dans l'arbre
en le tournant vers la droite.
4. Versez vos ingrédients.
La machine ne doit pas déborder –la quantité maximale d'ingrédients est de 2 kg.
5. Abaissez le bras avec le levier (5).
6. Branchez sur une prise sécurisée convenablement installée 230 V / 50 Hz.
7. Activez la machine en utilisant le régulateur de niveau à une vitesse entre 1 et 6 (en fonction du mélange).
8. Pour un fonctionnement par impulsions (malaxage sur de courts intervalles), tournez l'interrupteur en position
“PULSE”. L'interrupteur doit être maintenu dans cette position en fonction de l'intervalle de temps désiré. Quand
on le relâche, l'interrupteur retourne automatiquement en position “0”.
Réglage des niveaux et utilisation du crochet pour moins de 2 kg de mélange
Niveaux
Utilisation
Type de mélange
1-2
Crochet de malaxage
Mélanges lourds (ex. pain ou pâtisserie)
3-4
Batteur
Mélanges mi-lourds (ex. crêpes ou biscuits)
5-6
Fouet
Mélanges légers (ex. crème, blancs d'œufs, blanc-manger)
Pulse
Fouet
Battage par intervalles (ex. pour mélanger de consistance
inférieure à l'éponge, blanc d'œuf)
NOTE :
Durée de fonctionnement brève : Avec des mélanges lourds, ne faites pas
fonctionner la machine plus de dix minutes, puis laissez-la refroidir dix minutes.
Utilisez la protection anti-éclaboussures pour vous protéger des mélanges liquides.
9. Après le malaxage/mélangeage, ramenez l'interrupteur (7) en position “0” dès que le mélange a formé une
boule. Puis débranchez l'appareil.
10. Abaissez le levier (5) : le bras se lève.
11. Maintenant, vous pouvez déverser le mélange hors du bol de mélange à l'aide d'une spatule.
12. Puis vous pouvez enlever le bol de mélange en le tournant vers la gauche.
13. Nettoyez les pièces comme décrit au chapitre “Nettoyage”.

Hachoir
Installation
1. Retirez la protection (2) du KM65 et retirez la vis sur le hachoir (4).
2. Placer le support (10) sur le KM65 puis remettez la vis pour plus de sécurité.
3. Placer ensuite le plateau de remplissage (17) sur le haut du support (voir visuel ci-dessous).
Assemblage du hachoir (voir illustration A)
NOTE:
Coupez la viande en morceaux de 2,5 cm max et véréfiez que
celle-ce ne contienne pas d'os ou de nerfs.
1. Premièrement placez la lame (12) sur l'extrémité de l'hélice (11) puis choisissez l'accessoire pour hachoir que
vous préférez (13). Vissez ensuite la fixation de sécurité (14).
2. Mettez les morceaux de viande sur le plateau (17).
3. Placez un récipient sous la sortie.
4. Assurez vous que le régulateur de vitesse soit sur la position 0.
5. Branchez l'appareil.
6. Mettez en route le robot (7).
7. Si nécessaire pousser la viande avec le poussoir (18). Ne jamais pousser la viande avec vos doigts.

Installation des accessoires pour saucsisses (voir illustrations B/C)
1. Placez l'adaptateur (15c) sur l'hélice (11).
2. Insérez l'accessoire pour saucisse (15a ou 15b) sur l'adaptateur. L'accessoire 15a pour les saucisses
épaisses, le 15b pour les fines.
3. Tournez le tout à la main sur le support (10) pour verrouiller.
4. Placez de la peau à saucisse (réelle ou synthétique) sur l'extrémité du tube et nouez-la.
5. Placez de la chaire à saucisse sur le plateau et inserez-là à l'aide du poussoir.
6. Répétez les étapes 4 à 7 de la notice pour hacher.
7. Le mélange à saucisse est pressé à travers l'accessoire à saucisse et remplie la peau.
8. Lorsque la première saucisse a atteint la longueur désirée, pressez son extrémité et tournez-la une fois ou
deux pour la refermer.
NOTE:
Utilisez les vitesses 1 à 4 pour la réalisation de saucisses.
Ne pas faire fonctionner l'appareil plus de 10 minutes consécutives.
Vous pouvez éteindre l'appareil après chaque saucisse pour vous entrainer jusqu'à ce que vous
soyez plus expérimenté.
Effectuez l'étape 8 comme décris ci-dessus puis rallumez le hachoir à viande.
Si vous décidez d'utiliser de la vraie peau pour vos saucisses laissez la tremper quelques instants
avant de l'utiliser.
Vérifiez que la peau soit bien rempli pour que lors de la cuisson les saucisses ne se déchirent
pas.

Installation des accessoires pour biscuits (voir illustrations D)
1. Assemblez les éléments comme sur l'illustration ci-dessus.
2. Mettre votre préparation pour biscuit sur le plateau.
3. Vérifiez que le régulateur de vitesse soit sur la position 0.
4. Branchez l'appareil.
5. Mettre l'appareil en marche.
6. Si nécessaire pousser la préparation avec le poussoir (18). Ne jamais utiliser vos doigts.
7. Maintenez la préparation à la sortie de l'appareil et coupez de smorceaux de la taille désirée.
Nettoyage
Avant de nettoyer l'appareil, débranchez-le.
Ne plongez jamais l’appareil dans l'eau !
N'utilisez aucun outil pointu ni aucun détergent abrasif.
Carter du moteur
On ne doit utiliser qu'un linge humide pour nettoyer l'extérieur du carter.
Bol de mélange, équipement de mélange et composants du hachoir
ATTENTION :
Les composants ne conviennent pas au nettoyage au lave-vaisselle. S'ils sont exposés à la
chaleur ou à des produits nettoyants caustiques, ils risquent de se déformer ou de se
décolorer.
Les composants qui sont entrés en contact avec la nourriture peuvent se laver dans l'eau savonneuse.
Laissez les pièces bien sécher avant de remonter l'appareil.
DANGER :
La lame du hachoir est très acérée !
Risque de blessures !
D

Appliquez une petite quantité d'huile végétale sur les tamis quand ils ont séché.
Suggestions de recettes
Biscuit (recette de base), niveau 3-4
Ingrédients :
250 g de beurre doux ou de margarine, 250 g de sucre, 1 paquet de sucre vanillé ou 1 sac de citro-back, 1 pincée de
sel, 4 œufs, 500g de farine de blé, 1 paquet de levure chimique, env. 12,5 cl de lait
Préparation :
Versez la farine de blé et les autres ingrédients dans le bol de mélange, agitez avec le fouet pendant 30 secondes
au niveau 1 puis, pendant environ 3 minutes, au niveau 3. Beurrez un moule ou couvrez-le avec du papier sulfurisé.
Versez le mélange et cuisez-le. Avant d'enlever le gâteau du four, testez pour voir s'il est terminé : avec un bout de
bois, percez le milieu du gâteau. Si le mélange ne colle pas, le gâteau est cuit. Placez le gâteau sur une grille à
pâtisserie et laissez-le refroidir.
Four traditionnel :
Hauteur d'insertion : 2
Cuisson : four électrique : chauffage haut et bas 175-200°C ; four à gaz : thermostat 2-3
Durée de cuisson : 50-60 minutes
Selon les goûts, vous pouvez modifier cette recette, par exemple en y ajoutant 100 g de raisins, 100 g de noix ou
100 g de chocolat en poudre. En fait, les possibilités sont infinies.
Petits pains aux graines de lin, niveau 1-2
Ingrédients :
500-550 g de farine de blé, 50 g de graines de lin, 37,5 cl d'eau, 1 cube de levure (40 g), 100 g de lait écrémé caillé
bien égoutté, 1 cuillérée à café de sel. Pour le glaçage : 2 cuillérées à café d'eau
Préparation :
Trempez les graines de lin dans 12,5 cl d'eau tiède. Transférez le reste de l'eau tiède (0,25 l) dans le bol de mélange,
saupoudrez-y la levure, ajoutez le lait caillé et mélangez avec le crochet de malaxage au niveau 2. La levure doit
complètement se dissoudre. Versez la farine avec les graines de lin humides et le sel dans le bol de mélange.
Malaxez longuement au niveau 1, puis passez au 2 et continuez à malaxer pendant 3-5 minutes. Couvrez le
mélange et laissez-le lever dans un endroit chaud pendant 45-60 minutes. Malaxez à nouveau longuement, enlevez
du bol et formez seize rouleaux. Couvrez le moule avec du papier sulfurisé humide. Placez les rouleaux dessus et
laissez-les lever pendant 15 minutes. Couvrez-les d'eau tiède et passez à la cuisson.
Four traditionnel :
Hauteur d'insertion : 2
Cuisson : four électrique : chauffage haut et bas 200-220°C (préchauffage 5 minutes), four à gaz : thermostat 2-3
Durée de cuisson : 30-40 minutes
Crème au chocolat, niveau 5-6
Ingrédients :
200 ml de crème douce, 150 g de glaçage au chocolat mi-amer, 3 œufs, 50-60 g de sucre, 1 pincée de sel, 1 paquet
de sucre vanillé, 1 cuillérée à café de cognac ou de rhum, chocolat en flocons
Préparation :
Battez la crème dans le bol de mélange avec le fouet jusqu'à obtenir une consistance dure. Enlevez-la du bol et
disposez-la dans un endroit où refroidir. Faites fondre le glaçage au chocolat en suivant les instructions sur le
paquet ou dans un four à micro-ondes à 600 W pendant 3 minutes. Dans le même temps, battez les œufs, le sucre,

le sucre vanillé, le cognac ou le rhum, et le sel dans le bol de mélange avec le fouet au niveau 3 pour obtenir une
mousse. Ajoutez le chocolat fondu et agitez de façon régulière au niveau 5-6. Gardez un peu de crème pour la
décoration. Ajoutez le reste de la crème au mélange crémeux et agitez brièvement en utilisant la fonction Pulse.
Décorez la crème au chocolat et servez-la fraîche.
ENVIRONNEMENT
Fabriqué pour et importé par : Adeva SAS 8 rue Marc Seguin 77290 Mitry-Mory FRANCE
www.hkoenig.com - contact@hkoenig.com - Tél. 01 64 67 00 01

Deutsch
Technische Daten
Modell: KM65
Nennspannung: 220-240V 50/60Hz
Maximal leistung: 1000W
Schutzklasse: II
Um die Lebensdauer des Geräts zu verlängern, ist es Verwendungen von maximal 10 Minuten
empfohlen.
Dieses Gerät wurde in Übereinstimmung mit allen geltenden EU-Richtlinien in Kraft, wurde
getestet, wie von EMV und Niederspannungsrichtlinie gerichtet und wurde in Übereinstimmung
mit den neuesten Sicherheits-Gesetzgebung bis heute gemacht.
Änderungen ohne vorherige Ankündigung ändern.
Allgemeine Sicherheitshinweise
Lesen Sie die Gebrauchsanweisung sorgfältig, bevor Sie das Gerät, und halten, einschließlich
der Garantieschein, Kassenbon und, wenn möglich, deren Verpackung. Wenn Sie das Gerät an
eine andere Person geben, geben sie auch mit dieser Anleitung.
Das Gerät ist ausschließlich für den privaten Gebrauch und zu den vorgesehenen
Zwecken konzipiert. Dieses Gerät eignet sich nicht für den kommerziellen Einsatz. Nicht
im Freien verwenden (es sei denn, das ist für konzipiert, dass). Fernhalten von
Wärmequellen, direkter Sonneneinstrahlung, Feuchtigkeit (nicht in Flüssigkeiten tauchen)
und spitzen Winkeln. Verwenden Sie nicht das Gerät mit nassen Händen. Wenn das
Gerät feucht oder nass werden, trennen Sie es sofort.
Bei der Reinigung oder Aufbewahrung über einen längeren Zeitraum, ausschalten und
von (Stecker ziehen, nicht am Kabel) wenn das Gerät nicht zu benutzen ist und entfernen
Sie alle Zubehörteile befestigt.
Verwenden Sie nicht das Gerät nicht unbeaufsichtigt. Wenn Sie Arbeitsbereich verlassen
haben, immer das Gerät ausschalten und ziehen (ziehen Sie am Stecker und nicht am
Kabel).
Regelmäßig kontrollieren, ob das Gerät und das Kabel nicht beschädigt sind. Nicht
verwenden, wenn beschädigt ist.
Versuchen Sie nicht, das Gerät selbst zu reparieren. Kontaktieren Sie einen qualifizierten
Techniker. Um die Exposition gegenüber möglichen Gefahren zu vermeiden, dann
ersetzen Sie einfach das beschädigte Kabel Hersteller, unserem Kundendienst oder von
einer qualifizierten Person, und ein Kabel des gleichen Typs.
Wenn das Netzkabel beschädigt ist, muss es von einem Post-Sale-Service ersetzt
werden, um Gefährdungen zu vermeiden.
Verwenden Sie nur Original-Ersatzteile.
Achten Sie besonders auf "Spezielle Sicherheitshinweise."

Kinder und gefährdete Personen
Um die Sicherheit ihrer Kinder zu gewährleisten, halten Sie das gesamte
Verpackungsmaterial (Plastiktüten, Kartons, Styropor, usw.). Außer Reichweite.
Achtung! Lassen Sie Kinder nicht mit dem Beutel spielen: es gibt Erstickungsgefahr!
Dieses Gerät ist nicht für die Verwendung durch Personen (einschließlich Kinder) mit
eingeschränkten physischen, sensorischen oder geistigen Fähigkeiten konzipiert. Oder
Mangel an Erfahrung oder Wissen, sofern sie nicht über die Verwendung des Gerätes
wurden durch eine verantwortliche Person für ihre Sicherheit angewiesen.
Sollten Kinder zu überwachen, um sicherzustellen, dass sie nicht mit dem Gerät spielen.
Kontrollieren Sie stets das Gerät während des Gebrauchs.
Nicht mit einem Sicherheitsschalter manipulieren.
Stecken Sie nichts in den Zapfen, während das Gerät in Betrieb ist.
Stellen Sie das Gerät auf eine ebene Arbeitsfläche, flach und stabil.
Stecken Sie das Gerät ohne Installation alle notwendigen Zubehörteile.
Nur die Taste sollte verwendet werden, um die Blätter zu füllen.
Gefahr der Überlastung! Verwenden Sie das Gerät zum Schneiden oder Vermischung,
aber nie beides gleichzeitig.
Beschreibung der Komponenten
Table of contents
Languages:
Other H.Koenig Mixer manuals

H.Koenig
H.Koenig KM60 User manual

H.Koenig
H.Koenig MX15 User manual

H.Koenig
H.Koenig KM78 User manual

H.Koenig
H.Koenig KM124 User manual

H.Koenig
H.Koenig TOPCHEF TOPC451 User manual

H.Koenig
H.Koenig KM128 User manual

H.Koenig
H.Koenig KM80 User manual

H.Koenig
H.Koenig KM80 User manual

H.Koenig
H.Koenig KMC90 User manual

H.Koenig
H.Koenig KM126 User manual