manuals.online logo
Brands
  1. Home
  2. •
  3. Brands
  4. •
  5. H3C
  6. •
  7. Switch
  8. •
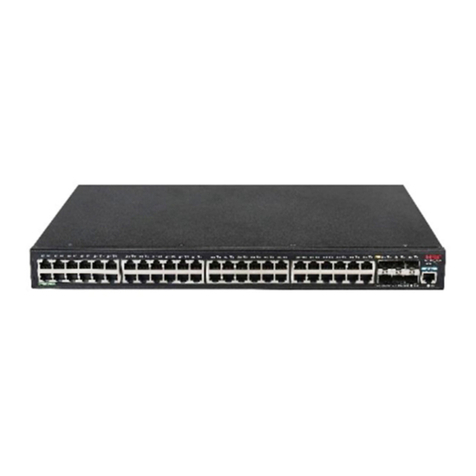
  9. H3C NSQ1GP24TXEA0 LPU User manual

H3C NSQ1GP24TXEA0 LPU User manual

Manual version: 6PW105-20181010 BOM: 3123A0R6
i
H3C NSQ1GP24TXEA0 LPU manual
1 Card view
Figure 1 NSQ1GP24TXEA0 LPU
2 Specifications
Figure 2 Front panel of the NSQ1GP24TXEA0
(1) 100/1000 Mbps SFP port (2) 10/100/1000BASE-T Ethernet port
(3) 10 Gbps XFP port (4) XFP port LED
(5) Ethernet port status LED (6) SFP port status LED
Table 1 LPU specifications
Item S
p
ecification
Dimensions (H × W × D) 40 × 399 × 352 mm (1.57 × 15.71 × 13.86 in)
Power consumption 54 W to 95 W
Weight 3.08 kg (6.79 lb)
Hot swapping Supported
Connector type LC
RJ-45
Interfaces
•Sixteen 1000/100 Mbps SFP ports
•Eight combo interfaces
•Two 10GBASE-R-XFP ports
Manual version: 6PW105-20181010 BOM: 3123A0R6
ii
Item S
p
ecification
Transmission speed
•1000/100 Mbps SFP ports—1000/100 Mbps, full duplex.
•1000 Mbps copper Ethernet ports—1000/100/10 Mpbs, half/full duplex.
•10 Gbps XFP ports—10 Gbps.
Ambient temperature
•Operating: 0°C to 45°C (32°F to 113°F)
•Storage: –40°C to +70°C (–40°F to +158°F)
Ambient humidity
•Operating: 10% RH to 95% RH, noncondensing
•Storage: 5% RH to 95% RH, noncondensing
Compatible device model
and slot
•M9006 gateway (slot 2 to slot 5)
•M9010 gateway (slot 0 to slot 3 and slot 6 to slot 9)
•M9014 gateway (slot 0 to slot 5 and slot 8 to slot 13)
•T9006 IPS (slot 2 to slot 5)
•T9010 IPS (slot 0 to slot 3 and slot 6 to slot 9)
•T9014 IPS (slot 0 to slot 5 and slot 8 to slot 13)
NOTE:
•The SFP ports and the 10/100/1000Base-T Ethernet ports on the LPU form one combo interfaces.
Only one port in a combo interface can work at a time.
•The 100/1000 Mbps SFP ports do not support SFP-GE-T transceiver modules.
•10GBASE-R-XFP 10-GE ports can operate only in 10G forced full-duplex mode.
Table 2 SFP module specifications
Type Central
wavelen
g
th
Connector
t
yp
e
Cable
s
p
ecifications
Maximum
transmission
distance
SFP-GE-SX-MM850-A 850 nm LC
50/125 μm
multi-mode fiber 550 m (0.34 miles)
62.5/125 μm
multi-mode fiber 275 m (0.17 miles)
SFP-GE-LX-SM1310-A 1310 nm LC 9/125 μm single
mode fiber 10 km (6.21 miles)
SFP-GE-LH40-SM1310 1310 nm LC 9/125 μm single
mode fiber 40 km (24.86 miles)
SFP-GE-LH40-SM1550 1550 nm LC 9/125 μm single
mode fiber 40 km (24.86 miles)
SFP-GE-LH80-SM1550 1550 nm LC 9/125 μm single
mode fiber 80 km (49.71 miles)
SFP-GE-LH100-SM1550 1550 nm LC 9/125 μm single
mode fiber 100 km (62.14 miles)
SFP-GE-T N/A RJ-45
Category-5 twisted
pair cable 100 m (0.06 miles)
SFP-GE-LX-SM1310-BIDI
1490 nm
(receive)/1310
nm (transmit)
LC 9/125 μm single
mode fiber 10 km (6.21 miles)
Manual version: 6PW105-20181010 BOM: 3123A0R6
iii
Type Central
wavelen
g
th
Connector
t
yp
e
Cable
s
p
ecifications
Maximum
transmission
distance
SFP-GE-LX-SM1490-BIDI
1490 nm
(transmit)/1310
nm (receive)
LC 9/125 μm single
mode fiber 10 km (6.21 miles)

SFP-GE-LH70-SM1470-CW 1470 nm LC 9/125 μm single
mode fiber 70 km (43.50 miles)
SFP-GE-LH70-SM1490-CW 1490 nm LC 9/125 μm single
mode fiber 70 km (43.50 miles)
SFP-GE-LH70-SM1510-CW 1510 nm LC 9/125 μm single
mode fiber 70 km (43.50 miles)
SFP-GE-LH70-SM1530-CW 1530 nm LC 9/125 μm single
mode fiber 70 km (43.50 miles)
SFP-GE-LH70-SM1550-CW 1550 nm LC 9/125 μm single
mode fiber 70 km (43.50 miles)
SFP-GE-LH70-SM1570-CW 1570 nm LC 9/125 μm single
mode fiber 70 km (43.50 miles)
SFP-GE-LH70-SM1590-CW 1590 nm LC 9/125 μm single
mode fiber 70 km (43.50 miles)
SFP-GE-LH70-SM1610-CW 1610 nm LC 9/125 μm single
mode fiber 70 km (43.50 miles)
SFP-FE-SX-MM1310-A 1310 nm LC
50/125μm
multi-mode fiber 2 km (1.24 miles)
62.5/125μm
multi-mode fiber
SFP-FE-LX-SM1310-A 1310 nm LC 9/125μm single
mode fiber 15 km (9.32 miles)
SFP-FE-LH40-SM1310 1310 nm LC 9/125μm single
mode fiber 40 km (24.86 miles)
SFP-FE-LH80-SM1550 1550 nm LC 9/125μm single
mode fiber 80 km (49.71 miles)
NOTE:
•BIDI modules use different central wavelengths in transmit and receive directions, in order to
implement bidirectional transmission of optical signals over the same fiber.
•BIDI modules must be used in pair. For example, if an SFP-GE-LX-SM1310-BIDI is used at one end,
an SFP-GE-LX-SM1490-BIDI must be used at the other end.
For supported XFP modules, see the following table.
Manual version: 6PW105-20181010 BOM: 3123A0R6
iv
Table 3 Specifications of XFP modules
Optional XFP
module
Central
wavelen
g
th
Connector
t
yp
e
Cable specifications Maximum transmission
distance
XFP-SX-MM850 850 nm LC 50/125 μm multi-mode
optical fiber 300 m (984 ft)
XFP-LX-SM1310 1,310 nm LC 9/125 μm single-mode
optical fiber 10 km (6 miles)
XFP-LH40-SM1550 1,550 nm LC 9/125 μm single-mode
optical fiber 40 km (25 miles)
XFP-LH80-SM1550 1,550 nm LC 9/125 μm single-mode
optical fiber 80 km (50 miles)
3 LEDs
The NSQ1GP24TXEA0 provides LEDs to show the operating status of the LPU.
Table 4 RJ-45 Ethernet port LED description
LED status Descri
p
tion
Flashing The Ethernet port is receiving or sending data.
On A link is present.
Off No link is present.
Table 5 SFP port LED description
LED status Descri
p
tion
Flashing The SFP port is receiving or sending data.
On A link is present.
Off No link is present.
Table 6 XFP port LED description
LIN
K
ACT Descri
p
tion
On Flashing A link is present, and the XFP port is receiving or sending data.
On Off A link is present, but no data is being received or sent.
Off Off No link is present.
4 Installing and removing the NSQ1GP24TXEA0
CAUTION:
•Wear a reliably-grounded ESD wrist strap before you install or remove the LPU.
•Do not touch the surface-mounted components directly with your hands when you install or remove
the LPU.
Manual version: 6PW105-20181010 BOM: 3123A0R6
v
4.1 Installing the NSQ1GP24TXEA0
1. Face the front panel of the device.
2. Identify the slot to install the LPU, and remove the filler panel from the slot.
This manual uses slot 3 as an example.
3. Place the LPU horizontally with the surface-mounted components facing upward. Pull outward the
ejector levers and gently push the LPU in along the slot guide rails until the LPU is in close contact
with the backplane. (See callout 1 in Figure 3 .)
4. Push the ejector levers inward. (See callout 2 in Figure 3 .)
5. Tighten the captive screws with a Phillips screwdriver to secure the LPU in the slot. (See callout 3
in Figure 3 .)
Figure 3 Installing an NSQ1GP24TXEA0
(1) Gently push the LPU in alon
g
the slot
g
uide rails until the LPU is in close contact with the backplane.
(2) Push the ejector levers inward. (3) Ti
g
hten the captive
screws
with a Phillips screwdriver.
4.2 Removing the NSQ1GP24TXEA0
1. Use a Phillips screwdriver to loosen the captive screws at both sides of the LPU until all pressure is
released.
2. Pull the ejector levers at both sides of the LPU outward, and pull the LPU along the guide rails until
it completely comes out of the backplane.
3. Place the LPU on an anti-static workbench with the surface-mounted components up, or put it in an
anti-static bag.
If no new LPU is to be installed, install a filler panel to prevent dust and ensure good ventilation in
the device.
Copyright © 2018 New H3C Technologies Co., Ltd.
The information in this document is subject to change without notice.
1
2
3

Other H3C Switch manuals

H3C PSR450-12A User manual

H3C

H3C PSR450-12A User manual

H3C S9500 Series User manual

H3C

H3C S9500 Series User manual

H3C S9500 Series Installation instructions

H3C

H3C S9500 Series Installation instructions

H3C SecPath T9000-S User manual

H3C

H3C SecPath T9000-S User manual

H3C H3C S3600 Series Installation instructions

H3C

H3C H3C S3600 Series Installation instructions

H3C S7500E-XS Series Installation manual

H3C

H3C S7500E-XS Series Installation manual

H3C S5560S Series Instruction Manual

H3C

H3C S5560S Series Instruction Manual

H3C S3600V2-52TP-SI Installation manual

H3C

H3C S3600V2-52TP-SI Installation manual

H3C S5500-28C-EI-DC User manual

H3C

H3C S5500-28C-EI-DC User manual

H3C s5800 series User manual

H3C

H3C s5800 series User manual

H3C s5800 series User manual

H3C

H3C s5800 series User manual

H3C S5500-EI series User manual

H3C

H3C S5500-EI series User manual

H3C s5820x series Installation manual

H3C

H3C s5820x series Installation manual

H3C S12500X-AF Series User manual

H3C

H3C S12500X-AF Series User manual

H3C S5830V2 series User manual

H3C

H3C S5830V2 series User manual

H3C S5500-SI Series User manual

H3C

H3C S5500-SI Series User manual

H3C S7500 Series User manual

H3C

H3C S7500 Series User manual

H3C S9500 Series User manual

H3C

H3C S9500 Series User manual

H3C S10506 Operating and maintenance manual

H3C

H3C S10506 Operating and maintenance manual

H3C S7500X Series User manual

H3C

H3C S7500X Series User manual

H3C FS5300-EI Series Instruction Manual

H3C

H3C FS5300-EI Series Instruction Manual

H3C S9500 Series User manual

H3C

H3C S9500 Series User manual

H3C S3610 Series User manual

H3C

H3C S3610 Series User manual

H3C S3600-28PSI User manual

H3C

H3C S3600-28PSI User manual

Popular Switch manuals by other brands

3Com SuperStack 3870 installation guide

3Com

3Com SuperStack 3870 installation guide

Larson Electronics EXHL-TRN-LE1 Series manual

Larson Electronics

Larson Electronics EXHL-TRN-LE1 Series manual

SMC Networks TigerSwitch SMC6624M Specifications

SMC Networks

SMC Networks TigerSwitch SMC6624M Specifications

CBS ArcSafe RSA-80A Installation and operation

CBS ArcSafe

CBS ArcSafe RSA-80A Installation and operation

TRENDnet TEG-S5g - Gigabit GREENnet Switch Specifications

TRENDnet

TRENDnet TEG-S5g - Gigabit GREENnet Switch Specifications

Gomax MX-5004V user manual

Gomax

Gomax MX-5004V user manual

Shinybow USA SB-4106 instruction manual

Shinybow USA

Shinybow USA SB-4106 instruction manual

Agilent Technologies 34972A user guide

Agilent Technologies

Agilent Technologies 34972A user guide

Crestron GreenLight DIN-8SW8 Operations & installation guide

Crestron

Crestron GreenLight DIN-8SW8 Operations & installation guide

Zehnder Rittling ZD 15 Assembly, installation and operating instructions

Zehnder Rittling

Zehnder Rittling ZD 15 Assembly, installation and operating instructions

ASTEK A54812-SW-01 Read me

ASTEK

ASTEK A54812-SW-01 Read me

HP Voltaire InfiniBand Grid Director 4200 QDR Documentation roadmap

HP

HP Voltaire InfiniBand Grid Director 4200 QDR Documentation roadmap

WTI RPC-4850 Series quick start guide

WTI

WTI RPC-4850 Series quick start guide

LevelOne ProCon GSW-2690 user manual

LevelOne

LevelOne ProCon GSW-2690 user manual

Velleman HQ-Power VMS4 manual 

Velleman

Velleman HQ-Power VMS4 manual 

Lenovo QLogic 12200 Product guide

Lenovo

Lenovo QLogic 12200 Product guide

Omnitron Systems Technology RuggedNet GPoE+/Si user manual

Omnitron Systems Technology

Omnitron Systems Technology RuggedNet GPoE+/Si user manual

Ovislink 16-Port Fast Ethernet 10/100Mbps N-Way... user guide

Ovislink

Ovislink 16-Port Fast Ethernet 10/100Mbps N-Way... user guide

manuals.online logo
manuals.online logoBrands
  • About & Mission
  • Contact us
  • Privacy Policy
  • Terms and Conditions

Copyright 2025 Manuals.Online. All Rights Reserved.