6
DEUTSCHENGLISH FRANÇAIS ITALIANO ESPAÑOL NEDERLANDS
PORTUGUÊS SVENSKA DEUTSCHENGLISHFRANÇAISITALIANOESPAÑOLNEDERLANDS PORTUGUÊS
SVENSKA
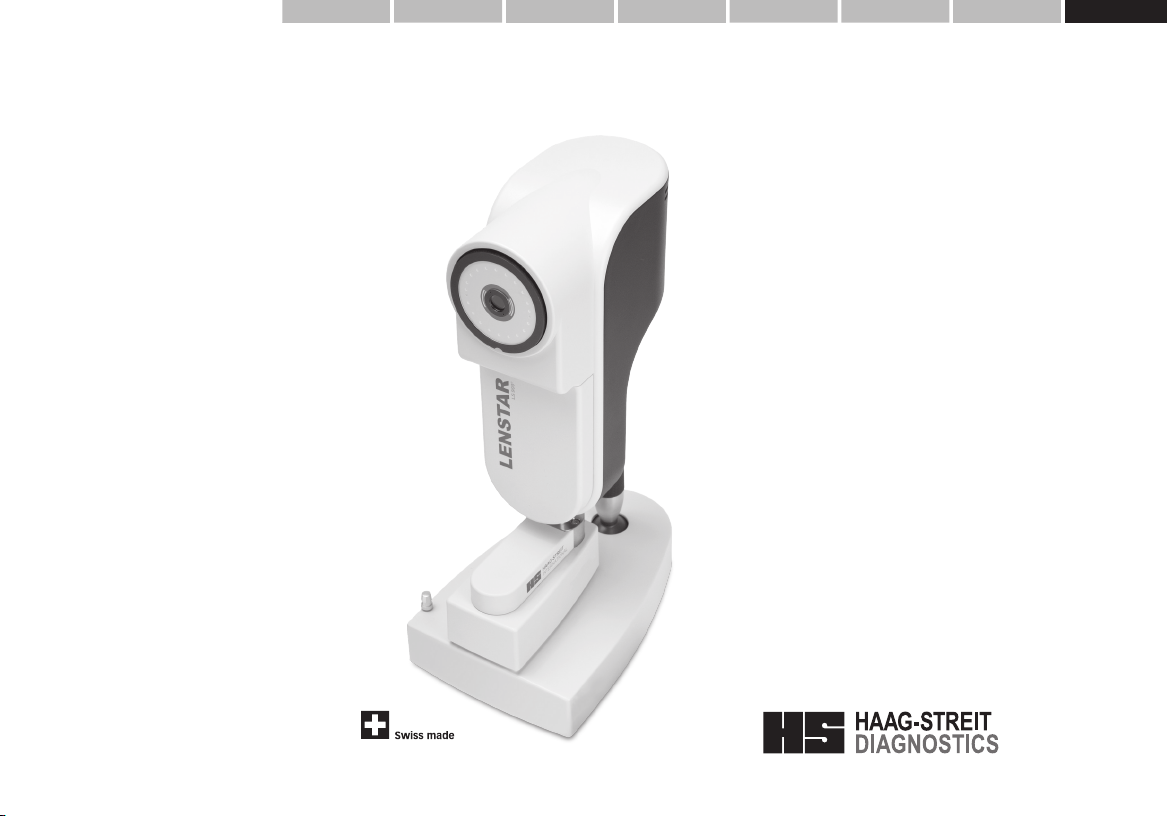
© HAAG‑STREIT AG, 3098 Koeniz, Switzerland – HS‑Doc. no. 1500.7220055.04140 – 14. Edition / 2020 – 02
• Dense lenticular opacities may make it impossible to measure the axial
eye length and lens thickness.
• Pronounced opacities of the central cornea can likewise make it impossi‑
ble to measure corneal thickness, anterior chamber depth, lens thickness
or axial eye length.
• Blood in the vitreous may make it impossible to measure the axial eye
length.
• Keratometry may be erroneous in eyes that have undergone keratore‑
fractive surgery because such eyes may signicantly deviate from spher‑
ical surfaces.
• The user should make a visual check when carrying out the measure‑
ment procedure, to ensure that all light spots are present.
• If the device repeatedly generates error messages, stop using it and con‑
tact the customer service.
• You are recommended always to examine both of the patient’s eyes ve
times. The user should subject the measurement readings to extra scru‑
tiny if there is a notable difference between the right and left eye. The fol‑
lowing are classed as notable differences:
•More than 1 D with respect to central corneal refractive power
=> 0.18 mm difference with respect to the corneal curvature radius
• More than 0.3 mm with respect to axial eye length
• More than 1 D with respect to emmetropic IOL refractive power
• The user must check the A‑Scan when measuring anterior chamber
depth in pseudophakic mode. If only one IOL signal is visible, it is not
clear whether this signal relates to the front or back of the IOL. Uncer‑
tainty in this case can lead to the displayed reading for anterior chamber
depth being inaccurate by the thickness of the IOL (approx. ±1 mm).
• The measured corneal thickness is not intended as a basis for the correc‑
tion of intraocular pressure readings for diagnosing glaucoma.
• An excessively tilted or decentered IOL may make it impossible to mea‑
sure the anterior chamber depth, lens thickness and aqueous depth.
• Measurement readings obtained from patients with a non‑intact cornea
(e.g., due to a corneal transplant, corneal opacity or corneal scarring,
etc.) may possibly be inaccurate (this applies to keratometry in particu‑
lar), and the user should check the data for plausibility.
• Ambient light has a bearing on pupil‑diameter measurement readings.
The user is responsible for ensuring the correct level of ambient light
when carrying out pupillometry. The LS 900 cannot monitor ambient light,
so do not use pupillometry as the decisive factor when considering kera‑
torefractive surgery.
• Keratometry may not be accurate in eyes with keratoconus, and so the
user must verify its plausibility.
• The user must verify that the eye assignment (OD, OS) is correct for the
measured eye.
• The white‑to‑white distance reading is merely an indirect measurement
of the inner lateral dimensions of the anterior ocular section. It therefore
provides only approximate indications of the actual inner lateral dimen‑
sions of the anterior ocular section and of the size of the implant used.
• The measured results of patients with asteroid hyalosis may not be accu‑
rate (in particular the axial length measurement) and must therefore be
veried by the user in terms of their plausibility.
• If the optional T‑Cone is used, the user should verify the even illumina‑
tion of the cone.
1.6.2 IOL calculation
The measurements taken with the LS 900 are a central element of every IOL cal‑
culation. A further important parameter in calculating the lens to be implanted is the
IOL constant. When using the Lenstar LS 900, only IOL constants optimised for opti‑
cal biometers should be used. Please contact your IOL manufacturer for information
on optimised IOL constants for optical biometry. An alternative source of information
for IOL constants optimised for optical biometry is the website of the “User Group for
Laser Interference Biometry” (ULIB) at the University of Wuerzburg, Germany. Even
though the constants published there have been optimised for a different optical bi‑
ometer, published data [1, 2, 3] indicate that these IOL constants can also be used
for calculating IOL power with the Lenstar. Downloadable IOL Constants les for the
Lenstar, featuring the ULIB IOL‑Constants for the Haigis, Hoffer Q, Halladay I, SRK/T
and SRK II ‑ Formulae as well as IOL Constants for the use with the Olsen Formula
are available in the Key‑User section of the Haag‑Streit homepage.
To further improve the clinical result, Haag‑Streit recommends that every surgeon
creates personally optimised IOL constants based on pre‑operative measurement
data generated with the Lenstar and reliable postoperative data (e.g., 3 months after
the operation).
1.6.3 References
[1] Buckhurst P J, Wolffsohn J S, Shah S, Naroo S A, Davies L N, Berrow E J, “A
new optical low coherence reectometry device for ocular biometry in cataract pa‑
tients”, British Journal of Ophthalmology 2009;93:949‑953 [2] Holzer M P, Mamusa
M, Auffarth G U, “Accuracy of a new partial coherence interferometry analyser for
biometric measurements”, British Journal of Ophthalmology 2009;93: 807‑810
1500_7220055_04140_Gebrauchsanweisung-LS-900_01_eng.indd 61500_7220055_04140_Gebrauchsanweisung-LS-900_01_eng.indd 6 20.01.2020 11:42:2520.01.2020 11:42:25