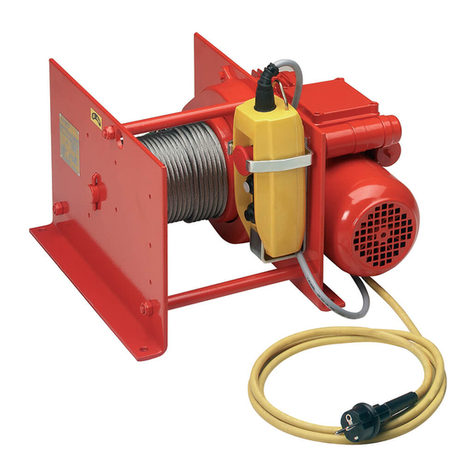
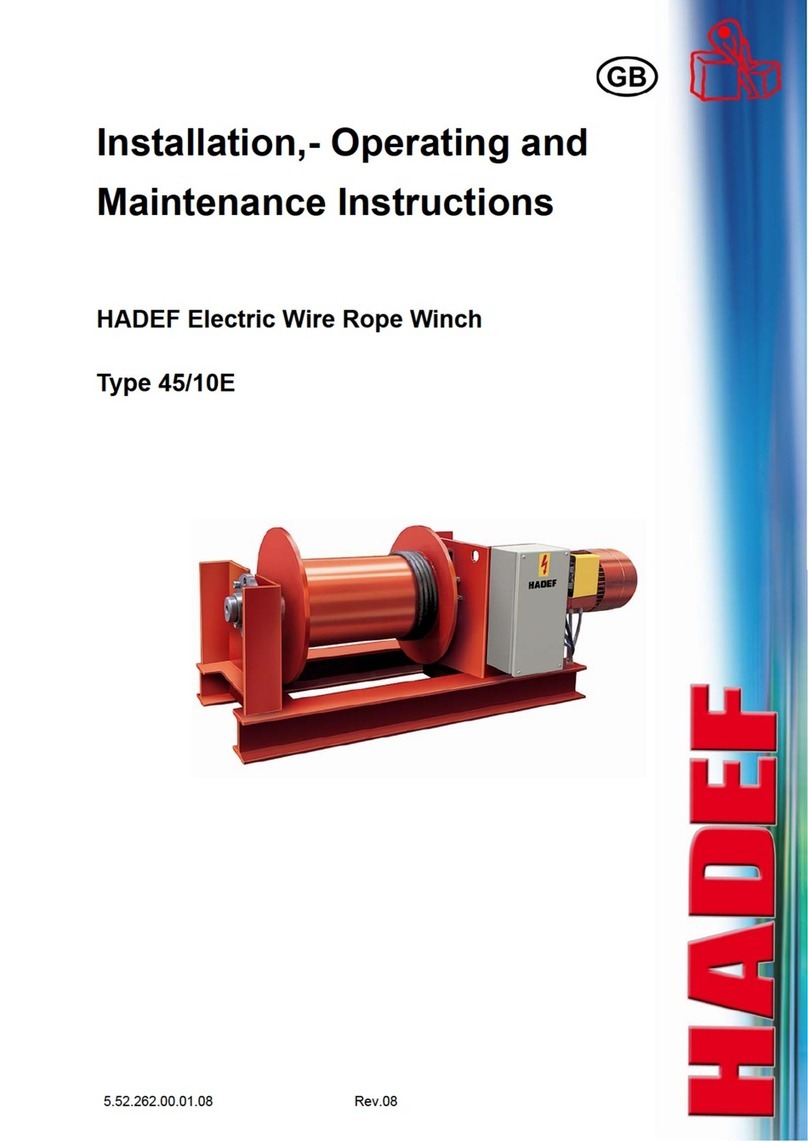
HADEF 42/87P Assembly instructions

5.52.291.00.01.01 Rev.01
Pos:1.1 /1_HADEF/---TITELSEITE/Symbole/Ländersymbol @ 0\mod_1171286564146 _52.docx @ 55 @ @ 1
Pos:1.2 /1_HADEF/---TITELSEITE/Allgemein/Titel- BA@ 0\mod_1171286931725_52. docx @ 57 @ @1
Pos:1.3 /1_HADEF/---TITELSEITE/Allgemein/HADEF-Bezeichnung@ 0\mod_117128 9923124_0.docx @ 69 @ @ 1
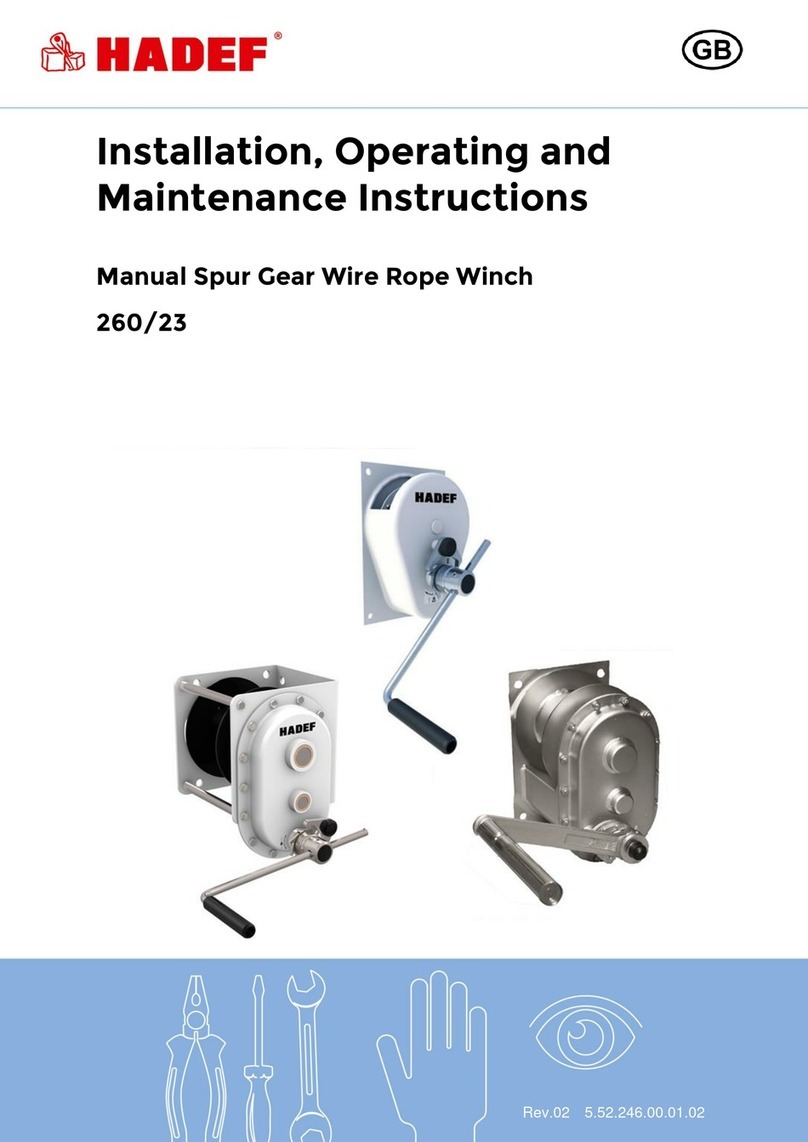
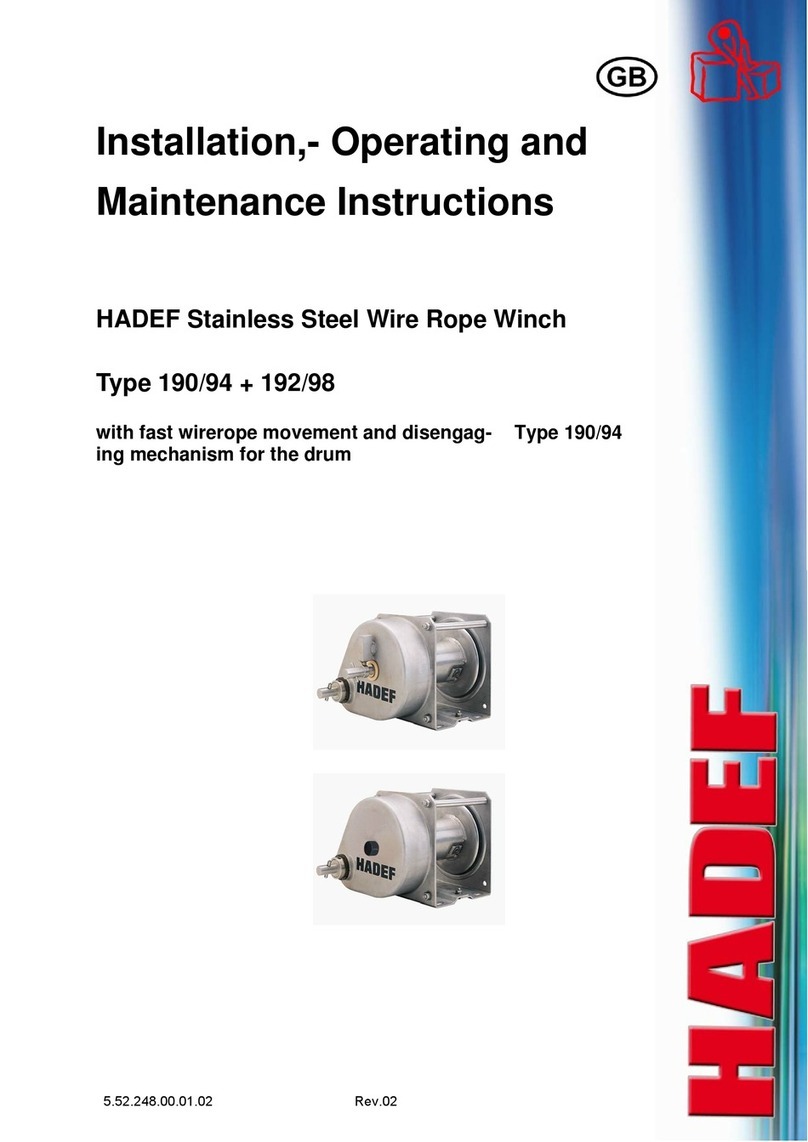
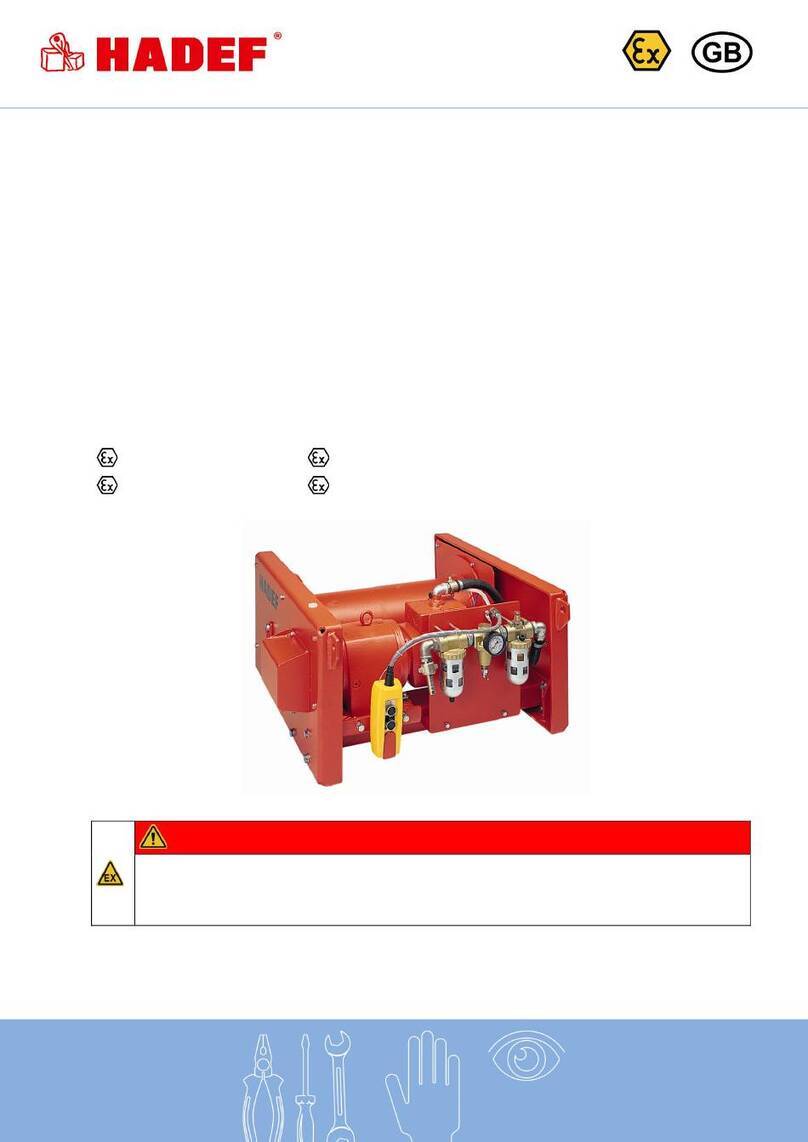
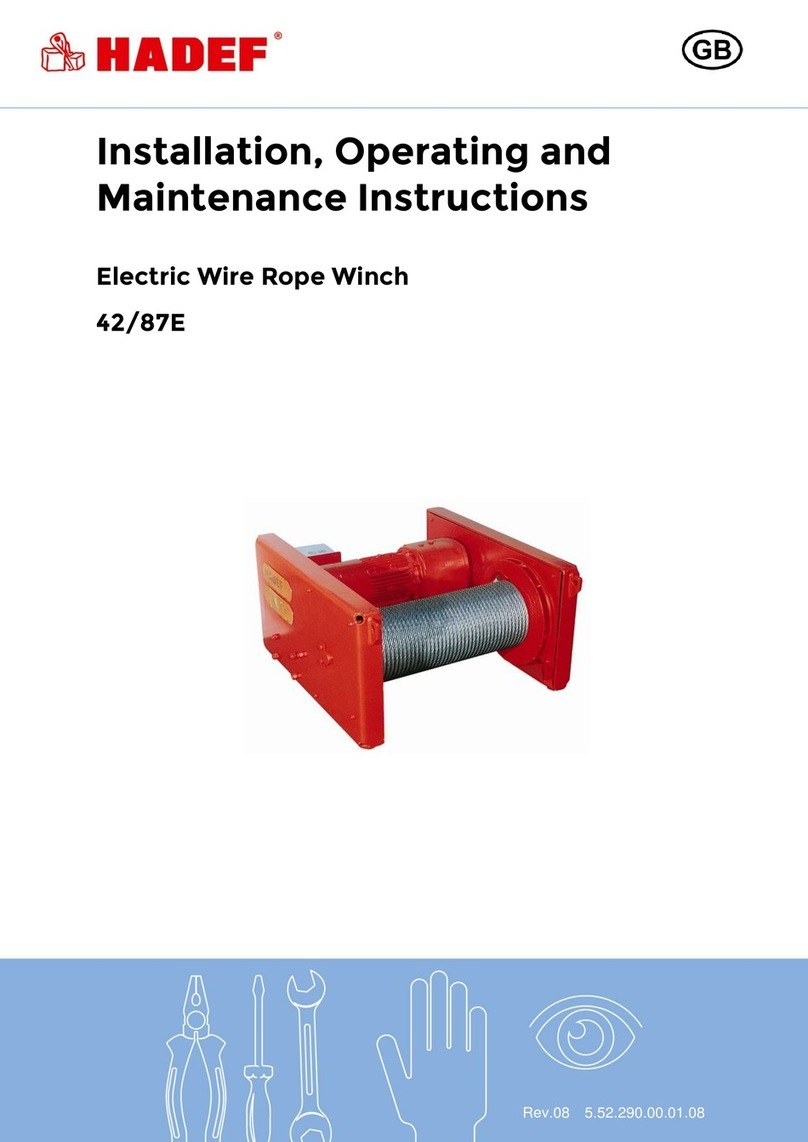
HADEF Pneumatic Wire Rope Winch
Type 42/87P
Pos:1.4 /1_HADEF/---TITELSEITE/Sonderausführunge n/leer-Standard @ 0\mo d_1172063198918_52.doc x @ 206 @ @ 1
Pos:1.5 /1_HADEF/---TITELSEITE/Sonderausführunge n/leer-Standard @ 0\mo d_1172063198918_52.doc x @ 206 @ @ 1
Pos:1.6 /1_HADEF/---TITELSEITE/Abbildung/42/87P@ 2\mod_12868690 22833_0.docx @ 16038 @ @ 1
Installation,- Operating and
Maintenance Instructions

Information
2 5.52.291.00.01.01
Pos:2 /1_HADEF/---ALLGEMEIN/Allgemein/2.unvollständige Maschine/HINWEIS- unvollständige Masch. -Montagean leitung @ 1\mod_1260449997 342_52.docx @ 11373 @ @ 1
NOTICE!
The installation or mounting instructions for incomplete machines you’ll find in chapter “Installation”
Pos:3 /1_HADEF/---ALLGEMEIN/Allgemein/3.Copyright/Copyrightf. BA's @ 0\mod_1171286454687_52. docx @ 54 @ @ 1
o
©by Heinrich de Fries GmbH
Heinrich de Fries GmbH, Gauss Str. 20, D-40235 Düsseldorf
Heinrich De Fries GmbH will be named HADEF in the following text.
Original operating- and maintenance instructions in German language.
Translation in other languages is made of the German original.
A copy may be requested in writing or is available for download on www.hadef.com
Subject to changes.
Pos:4 /1_HADEF/---ALLGEMEIN/Allgemein/4.Inhaltsverzeichnis/InhaltsverzeichnisÜ1-2@ 0\mod_1171286846268_ 52.docx @ 56 @ @ 1
Table of Contents
1Information..........................................................................................4
1.1 Indications to determine the used part of the theoretical usage life............................4
2Safety...................................................................................................5
2.1 Warning notice and symbols............................................................................................5
2.2 Duty of care of the owner..................................................................................................5
2.3 Requirements for the operating personnel.....................................................................6
2.4 Appropriate use.................................................................................................................6
2.5 Basic safety measures......................................................................................................7
3Transport and Storage.......................................................................8
3.1 Transport............................................................................................................................8
3.2 Safety device for transport...............................................................................................8
3.3 Storage ...............................................................................................................................8
4Description..........................................................................................9
4.1 Areas of application ..........................................................................................................9
4.2 Design.................................................................................................................................9
4.3 Functions............................................................................................................................9
4.4 Important components......................................................................................................9
5Technical data...................................................................................11
6Installation.........................................................................................12
6.1 Installation of winch........................................................................................................12
6.2 Selection of wire ropes ...................................................................................................12
6.3 Wire rope fastening.........................................................................................................12
6.4 Winding up of wire rope..................................................................................................13
6.5 Wire rope deflection........................................................................................................13
6.6 Tools.................................................................................................................................14
6.7 Table of screws................................................................................................................15
7Operation...........................................................................................16
7.1 Disengaging clutch (as option)......................................................................................17
8Operation...........................................................................................18
9Commissioning.................................................................................19

Information
5.52.291.00.01.01 3
9.1 General.............................................................................................................................19
9.2 Compressed air connection...........................................................................................19
9.3 Gear ..................................................................................................................................20
9.4 Wire rope..........................................................................................................................20
9.5 Limit switch for wire rope path (as option)................................................................... 20
9.6 Slack rope switch (as option).........................................................................................20
10 Safety check ..................................................................................... 22
11 Functional test.................................................................................. 23
11.1 Checks before the initial start-up...................................................................................23
12 Maintenance...................................................................................... 24
12.1 General.............................................................................................................................24
12.2 Monitoring........................................................................................................................24
12.3 Pneumatic motor.............................................................................................................24
12.4 Overload protection by pressure limiting valve........................................................... 24
12.5 Limit switch for wire rope path (as option)................................................................... 25
12.6 Slack rope switch (as option).........................................................................................25
13 Inspection ......................................................................................... 27
13.1 General Overhaul for motor-driven units......................................................................27
13.2 Periodic checks...............................................................................................................27
13.3 Wire rope..........................................................................................................................27
13.4 Inspection intervals.........................................................................................................27
13.5 Roller chain......................................................................................................................28
13.6 Chain wheel .....................................................................................................................28
14 Service............................................................................................... 29
14.1 Wire rope..........................................................................................................................29
14.2 Gear ..................................................................................................................................29
14.1 Chain drive.......................................................................................................................30
14.2 Cleaning ...........................................................................................................................30
14.3 Pneumatic motor.............................................................................................................31
14.4 Lubricant selection .........................................................................................................31
14.5 Lubricant for food industry – selection (as option*)....................................................31
15 Trouble .............................................................................................. 32
16 Remedy ............................................................................................. 33
17 Decommissioning ............................................................................ 34
17.1 Temporary decommissioning ........................................................................................34
17.2 Final decommissioning/disposal................................................................................... 34
18 Additional documents...................................................................... 35
18.1 Pneumatic connections diagram...................................................................................35
Pos: 5.1 /1_HADEF/1-- INFORMATION/*Ü1*/ #.Kapitel - Informatio n @ 0\mod_1174470941082_5 2.docx @ 811 @ @ 1

Information
4 5.52.291.00.01.01
1 Information
Pos: 5.2.1 /1_HADEF/1- -INFORMATION/Allg emein/*Information* /01.Information @ 0\mod_1176734820982_52.doc x @ 4653 @ @ 1
The products meet European Union requirements, in particular the EU Machine Directive (2006/42/EG).
The entire company works acc. to a certified quality assurance system as per ISO 9001.
The production of components at our work is subject to strict, intermediate checks.
After assembly, each product is subject to a final test with overload.
For the operation of hoists, the accident prevention regulations BGV D8, BGV D6 and BGR 500 apply in
Germany, amongst others.
The stated performance of the devices and meeting any warranty claims require adherence to all instructions
in this manual.
Before delivery, all products are packed properly. Check the goods after receipt for any damage caused
during transport. Report any damage immediately to the forwarding agent.
This manual allows a safe and efficiently use of equipment. Images of this manual are for a principle
understanding and can be different from the real design.
Pos:5.2.2 /1_HADEF/---ALLGEMEIN/Hinweise/Prüfungen/HINWEIS- VorgeschriebenePr üfungen @ 0\mod_117447206 7892_52.docx @ 821 @ @ 1
NOTICE!
We refer to the prescribed equipment tests before initial start-up, before putting back into operation and the
regular periodic inspections.
In other countries any additional national regulations must be observed.
Pos: 5.3.1 /1_HADEF/1- -INFORMATION/Allg emein/*Hinweise the or.Nutzung -E+P*/ 02.Hinweise theor. Nutzu ng @ 0\mod_117577643436 6_52.docx @ 3429 @ @ 1
1.1 Indications to determine the used part of the theoretical usage life.
For motor driven units.
The equipment (rope hoists, chain hoists, winches as well as crane hoisting units) are classified in drive
groups (duty classification) according to their intended mode of operation, running times and load collectives
and dimensioned according to the requirements derived from these. (I.e. DIN 15020, ISO 4301/1, FEM
1.001, FEM 9.511). They are thus only designed for a limited period of use with regard to the overall
dimensioning and certification.
After the total period of use as elapsed, measures must be taken where parts are checked and exchanged
as per indication by the manufacturer. After that a new maximum usage period is determined. See also the
accident prevention regulations BGV D 8, winches, lifting and pulling devices.
Pos:5.3.2 /1_HADEF/---ALLGEMEIN/Hinweise/HINWEIS- Generalüber holung nur durch Hadef @ 0\ mod_1176794916616_52. docx @ 4672 @ @ 1
NOTICE!
Commitment
A general overhaul may only be performed by HADEF or by a specialized company, authorized by HADEF.
Pos: 6.1 /1_HADEF/2-- SICHERHEIT/*Ü1*/ #. Kapitel - Sicherhei t@ 0\ mod_1172054959462_52.d ocx @ 172 @ @ 1

Safety
5.52.291.00.01.01 5
2 Safety
Pos: 6.2.1 /1_HADEF/2- -SICHERHEIT/Allge mein/Warnhinweise + Sy mbole/01.Warnhi nweise + Symbole @ 0\mod_11720505 13996_52.docx @ 165 @ @ 1
2.1 Warning notice and symbols
Warnings and notice are shown as follows in these instructions:
DANGER! This means that there is a high risk that leads, if it is not avoided, to death or severe injury.
WARNING! This means that there is a risk that could lead, if it is not avoided, to death or severe injury.
CAUTION! This means that there is little risk that could lead, if it is not avoided, to slight injury or damage to the device or its
surrounding.
NOTICE! Gives advice for use and other useful information.
Danger from electricity.
Danger from explosive area.
Pos: 6.2.2.1 /1_HADEF/ 2--SICHERHEIT/A llgemein/Sorgfalts pflicht des Betreiber s/04.Sorgfaltspf licht des Betreibers @ 0\mod_1172050137593_52.doc x @ 162 @ @1
2.2 Duty of care of the owner
The unit was designed and built following a risk analysis and careful selection of the harmonized standards
that are to be complied with, as well as other technical specifications. It therefore represents state-of-the-art
technology and provides the highest degree of safety.
Our delivery includes the hoist supplied beginning at its suspension and ending at the load hook and if
supplied with control, the control line/hose that leads to the hoist. Further operating material, tools, load
attaching devices as well as main energy supply lines must be assembled according to the valid rules and
regulations. For explosion-proof equipment, all these parts must be approved for use in area prone to
explosion, or they must be suitable for use in area prone to explosion. The owner is responsible for this.
However, in everyday operation this degree of safety can only be achieved if all measures required are
taken. It falls within the duty of care of the owner/user of the devices to plan these measures and to check
that they are being complied with.
Complete the operating and installation instructions by any instructions (regarding supervision or
notifications)that are important for the special kind of use of the equipment, i.e. regarding organization of
work, work flow and human resources.
In particular, the owner/user must ensure that:
The unit is only used appropriately.
The device is only operated in a fault-free, fully functional condition, and the safety components, in
particular, are checked regularly to ensure that it is functioning properly.
The required personal protective equipment for the operators, service and repair personnel is available
and is used.
The operating instructions are always available at the location where the equipment is used and that they
are legible and complete.
The unit is only operated, serviced and repaired by qualified and authorized personnel.
This personnel is regularly trained in all applicable matters regarding safety at work and environmental
protection, and that they are familiar with the operating manual and, in particular, the safety instructions it
contains.
Any safety and warning signs on the devices are not removed and remain legible.
Devices for use in area prone to explosion must (from customer's side) be earthed with a shunting
resistor of < 106Ωagainst earth.
Pos:6.2.2.2 /1_HADEF/---ALLGEMEIN/Hinweise/WARNUNG - Keine konstuktiven Änderungen @ 0\mod_117679 7173443_52.doc x @ 4704 @ @ 1
WARNING!
It is not allowed to make constructive changes of the equipment!
Pos: 6.2.3 /1_HADEF/2- -SICHERHEIT/Allge mein/Anforderungen an da s Bedienpersonal/05. Anforderungen an da s Bedienpersonal @ 0\mod_11 72055544978_52.doc x @ 179 @ @1

Safety
6 5.52.291.00.01.01
2.3 Requirements for the operating personnel
The units may only be operated by qualified persons that are appropriately trained and that are familiar with
it. They must have their employer’s authorisation for operation of the units.
Before starting work, the operating personnel must have read the operating and installation instructions,
especially the chapter "Safety Instructions".
This is especially important for operating personnel that rarely uses the equipment, i.e. for installation or
maintenance work.
DANGER!
In order to avoid severe injury, please pay attention to the following when using the equipment:
Use protective clothes/equipment.
Do not wear long hair hanging down open.
Do not wear rings or other jewellery.
Do not wear clothes that are too big/wide.
Pos: 6.3 /1_HADEF/2-- SICHERHEIT/Bestim mungsgemäße Verwendung/01. Alle (außer 380) @ 2\ mod_1300955165911_52. docx @ 18464 @ @ 1
2.4 Appropriate use
The permitted safe working load of the devices must not be exceeded! An exception can be made during the
load test, carried out by a licensed qualified person in accordance with the accident prevention regulations
UVV BGV D6 before initial operation.
The permitted environmental temperature during equipment operation is –20°C up to +40°C!
Defective devices and load suspension devices must not be used until they have been repaired! Only
original spare parts must be used. Non-compliance will result in any warranty claims becoming void.
Liability and warranty will become void if unauthorized modifications of the units are made by the user!
Pos: 6.4 /1_HADEF/2-- SICHERHEIT/Bestim mungsgemäße Verwendung/04. Alle Winden @ 2\mod_13 00955742974_52.doc x@ 18476@ @ 1
Vertical lifting and lowering of unguided loads, horizontal movement of loads and inclined movement of
loads, movement of flaps, covers etc.
2.4.1 Winches with disengaging clutch (as option)
Only for pulling out the uncharged wire rope
Only for horizontal load
Only for special kinds of use (i.e. lowering of floaters in liquids) when there is no danger for persons or
danger of damage of material.
Pos:6.5 /1_HADEF/---ALLGEMEIN/Hinweise/HINWEIS- BestimmungsgemäßeVerwendung - Personen+ Sachschäden @ 0\mod_11767 99465432_52.doc x @ 4749 @ @1
NOTICE!
If the units are not used appropriately, it is not possible to ensure safe operation.
The owner and operator have sole liability for all personal injury and damage to property arising from
inappropriate use.
Pos:6.6 /1_HADEF/---ALLGEMEIN/Hinweise/GEFAHR- Losreißen,Personentr.,schweb.Lasten, exverboten(E+P) @ 0\mod_1176799462104_52. docx @ 4735 @ @ 1
DANGER!
It is not allowed:
pulling loose of stuck loads, dragging of loads and inclined pulling is not allowed.
in explosive atmosphere, except the unit is especially modified for it and marked by an indication label
to transport people
persons must not stand under a suspended load
Pos: 6.7 /1_HADEF/2-- SICHERHEIT/Grundle gende Sicherheitshin weise/1.Alle (außer 380)@ 2\ mod_1300886479193_52. docx @ 18426 @ @ 1

Safety
5.52.291.00.01.01 7
2.5 Basic safety measures
Observe installation-, operation and maintenance instruction.
Take notice of caution notes at units and in the manual
Observe safety distances.
Take care for a free view on the load.
Only use the hoists appropriately.
The equipment is to be used exclusively for movement of goods. Under no circumstances my persons be
moved.
Never load the devices beyond their working load limit.
Pay attention to the accident prevention regulations (UVV).
Should the hoist be used outside of Germany, please pay attention to the national regulations that apply.
Supporting structures and load-attached devices used in conjunction with this equipment must provide an
adequate safety factor to handle the rated load plus the weight of the equipment. In case of doubt, consult
a structural engineer.
If the equipment has not been used for a period of time, carry out visual checks of all main components
such as chains, load hooks etc. and replace any damaged parts with new, original spare parts before
putting the equipment back into operation!
Do not use a hoist that is defective, pay attention to any abnormal noise it makes during operation.
Stop working immediately in case of disturbances and remedy failures.
Any damage and faults must be reported to a responsible supervisor immediately.
If the unit is put into motion, any persons in the immediate vicinity must be informed by calling to them!
Please pay attention to the regulations for load carrying devices UVV BGR500 for both positive and non-
positive methods of attaching loads.
The lifting tackle or the load must be securely attached to the hook and be seated at the bottom of the
hook.
The safety catch of hooks must be closed.
When charged, the housing may not be in contact somewhere.
Pos: 6.8 /1_HADEF/2-- SICHERHEIT/Grundle gende Sicherheitshin weise/4.Alle elek trischen Geräte @ 2\mod_13 00888638124_52.doc x@ 18438@ @ 1
Check brakes daily before commencing work.
The devices are not suitable for continuous operation. The duty cycles of the motors (see the technical
data chapter) as well as the remaining life time of the equipment in accordance with FEM group and
usage (see calculation of remaining safe working period) must be observed.
Pos:6.9 /1_HADEF/---ALLGEMEIN/Hinweise/WARNUNG- Manipul.Überlast, verschlissene Ketten+Seil e, beschädigte Haken, (E+P+H) @ 0\mod_11768 13964906_52.doc x@ 4789 @ @ 1
WARNING!
The following is not allowed:
to lift another load than the nominal safe working load
to manipulate the sliding clutch if units are equipped with
The use of elongated or damaged chains or wire ropes. Replace them immediately by new, original
parts.
Never loop the load chain around a load nor place or pull the chain over edges.
Never repair damaged load hooks (e.g. by hammering), but replace them by original hooks.
Pos: 7.1 /1_HADEF/3--TRANSPORT/LAGERUNG/*Ü1*/#. Kapitel - Transport und Lagerung @ 0\ mod_1172058584305_52. docx @ 190 @ @ 1

Transport and Storage
8 5.52.291.00.01.01
3 Transport and Storage
Pos:7.2 /1_HADEF/---ALLGEMEIN/Hinweise/VORSICHT- Transport,Lagerung: nicht sachgemäß - keine Haf tung @ 0\mod_1176819827 794_52.docx @ 4910 @ @ 1
CAUTION!
Transport may only be done by qualified personnel. No liability for any damage resulting from improper
transport or improper storage.
Pos: 7.3 /1_HADEF/3--TRANSPORT/LAGERUNG/ Transport und Lagerung/ Transport und Lagerung @ 0\mod_1 172060037462_52.d ocx @ 194 @ @ 1
3.1 Transport
The devices are checked and if so adequately packed before delivery.
Do not throw or drop the equipment.
Use adequate means of transport.
Transport and means of transport must be suitable for the local conditions.
3.2 Safety device for transport
NOTICE!
Should a safety device for transport exist, please remove it before commissioning.
3.3 Storage
Store the equipment at a clean and dry place.
Protect the equipment against dirt, humidity and damage by an appropriate cover.
Protect hooks, wire ropes, chains and brakes against corrosion.
Pos: 8.1 /1_HADEF/4--BESC HREIBUNG/*Ü1*/#.Kapite l - Beschreibung @ 0\mod_11720653 58380_52.docx @ 215 @ @ 1

Description
5.52.291.00.01.01 9
4 Description
Pos: 8.2.1.1 /1_HADEF/4-- BESCHREIBUNG/Allgemein/ Anwendungsbereic he/1.Anwendungsbereic he- Alle (außer 380) @ 2\mod_1291 022296255_52.doc x@ 17584 @ @ 1
4.1 Areas of application
The devices must be as far as possible installed in a covered room.
If they are used in the open, protect the units against the effects of weather such as rain, hail, snow, direct
sunshine, dust, etc. - we recommend to use a cover in parking position. If the device is set up in a
continuously humid environment with strong temperature fluctuations, the correct functionings are
endangered by the forming of condensation.
Ambient temperature: - 20°C up to + 40°C. Humidity: 100 % or less but not under water
Pos: 8.2.1.2 /1_HADEF/4-- BESCHREIBUNG/Allgemein/An wendungsbereic he/2.Zusatz E+P @ 0\mod_11720673 16174_52.docx @ 232 @ @ 1
During longer periods of standstill, corrosion may reduce the function of the brake.
Pos:8.2.1.3 /1_HADEF/---ALLGEMEIN/Hinweise/EX-Schutz/GEFAHR- Einsatz GeräteStandard/EX @ 1\mod_1190281 459161_52.docx @ 7911 @ @ 1
DANGER!
HADEF hoists, in their standard version, are not approved for use in areas that are prone to
explosion.
HADEF supplies special explosion-proof equipment for this purpose which has special EX-name
plates on it stating the EX-classification.
Pos: 8.3.1.1 /1_HADEF/4-- BESCHREIBUNG/Winde + Seilzug/ Aufbau/Aufbau - 42/87P @ 2\mod_1286871744710_52.doc x @ 16050 @ @ 1
4.2 Design
HADEF pneumatic wire rope winches for
stationary use are fitted with holes for installation.
The housing is made of steel plate. The two
housing halves are connected with a torsion-
resistant traverse. Transport eyes are situated at
the upper edges of the housing. The drum is
situated parallell to the drive.
4.2.1 Wire rope exit
The wire rope exit is determined by the
asymmetrical torque of the motor.
rope exit direction A
Pos: 8.3.2 /1_HADEF/4--BESC HREIBUNG/Winde + Sei lzug/Funktionsbeschrei bung/P @ 2\mod_1279615750 279_52.docx @ 14942 @ @ 1
4.3 Functions
The lifting gear are operated by pressing the push buttons on the control switch. The brake which is
integrated prevents the load from being lowered automatically after releasing the control keys.
Pos: 8.3.3.1 /1_HADEF/4-- BESCHREIBUNG/Winde + Sei lzug/Wichtige Bauteile/0 1. 42/87P @ 2\mod_1286872601682_ 52.docx @ 16054 @ @ 1
4.4 Important components
4.4.1 Hoist motor
Pneumatic motos. Operating pressure 6 bar.
4.4.2 Hoist gear
Type 1506 - 4108 - spur gear
Type 5106 - 7104 - planetary gear
NOTICE!
As standard, the gear is filled with oil. For transport reasons, a plug screw is fitted - replace the plug screw
by a ventilation screw (attached) before putting the unit into operation. In other cases the ventilation screw is
already assembled.
Pos: 8.3.3.2 /1_HADEF/4-- BESCHREIBUNG/Winde + Sei lzug/Wichtige Bauteile/0 2. Seilwegbegrenzung sschalter @ 1\mod_124567 6409011_52.doc x@ 1089 5@ @ 1

Description
10 5.52.291.00.01.01
4.4.3 Limit switch
To stop the wire rope path.
Serial winch is a lifting winch.
Pulling winch as option.
Function: Operational and emergency limit switch.
It is possible to connect an external electric limit switch.
Pos: 8.3.3.3 /1_HADEF/4-- BESCHREIBUNG/Winde + Sei lzug/Wichtige Bauteile/0 3. Überlastsicherung - pneum. @ 2\mod_127961692468 4_52.docx @ 14950 @ @ 1
4.4.4 Overload protection
A pressure reducing valve prevents that an overload is lifted.
Pos: 8.3.3.4 /1_HADEF/4-- BESCHREIBUNG/Winde + Sei lzug/Wichtige Bauteile/0 4. Steuerung - pneum. @ 2\mod_127961 7148574_52.docx @ 14954 @ @ 1
4.4.5 Control
Control switch for sensitive direct control or
Indirect control
Winches with limit switch are operated through valves.
4.4.6 Control switch
for precise direct control by button valves
for indirect control by push button valves
control hose with integrated stress-relief rope
Pos: 8.3.3.5 /1_HADEF/4-- BESCHREIBUNG/Winde + Sei lzug/Wichtige Bauteile/0 5. 42/87 Ausrückkupplung @ 1\mod_1245678032588_52. docx @ 10916 @ @ 1
4.4.7 Disengaging clutch (as option)
The disengaging clutch separates the drum from its drive. The clutch is actuated by a hand lever which is
locked by a spring-pin. Before operation, this spring-pin must be pulled by hand and hold until the hand lever
has moved some steps. It engages automatically after the switch operation has ended.
When the clutch is disengaged it is possible to pull the uncharged wire rope off the drum by hand. Should
there be an after-run of the drum, brake it with the foot brake.
CAUTION!
The foot brake must not be used to brake loads! This is not possible (if normal forces act). Unintended
switching is also prevented.
Pos:8.3.3.6 /1_HADEF/---ALLGEMEIN/Hinweise/GEFAHR- Verboten:UnterLast ausrücken, Manipul.a.d. Ausrückvorr. @ 0\mod_1177051175366_52.doc x@ 5051 @ @ 1
DANGER!
The following is not allowed:
Disengaging under load.
Manipulation of the disengaging device.
Pos: 8.3.3.7 /1_HADEF/4-- BESCHREIBUNG/Winde + Sei lzug/Wichtige Bauteile/0 6. Wartungseinheit @ 2\mod_1 279617739630_52.doc x @ 14958 @ @1
4.4.8 Maintenance unit
It serves for the necessary preparation of the operation air so that the pneumatic motor can work troublefree.
If not assembled by the manufacturer, it must be assembled by the customer.
CAUTION!
Should the unit be assembled at the customer, the maintenance unit is supplied without oil.
Before putting the unit into operation, the main air supply line must be cleaned and the oiler of the
maintenance unit must be filled with oil. Should this not be done the unit may be severely damaged.
Pos: 9.1 /1_HADEF/5-- TECHNISCHE DATEN/*Ü1*/ #. Kapitel - Technische Da ten @ 0\mod_1172067180778 _52.docx @ 229 @ @ 1

Technical data
5.52.291.00.01.01 11
5 Technical data
Pos: 9.2 /1_HADEF/5-- TECHNISCHE DATEN/Wi nde + Seilzug/42/87P/1.42/ 87P @ 2\mod_1286873518167 _52.docx @ 16074 @ @ 1
Type capacity
1st
layer
kg
capacity
top layer
kg
Wire rope
storage
1st layer
lage
m
Wire rope
storage
top layer
m
rope
layers
number
Wire rope
speed
digkeit
Lifting/
Lowering
1st layer
m/min
Wire
rope
speed
speed
Lifting/
lower-
ing
top
layer
m/min
nec.
wire
rope ø
mm
nec. min.
breaking
load
kN
Motor-
output
kW
air
consump-
tion
at
6 bar
m³ /min
air
connection
noise
emission *
1 m/ 3 m
distance
tolerance
+2 dB(A)
dB(A)
weight
without
wire rope
approx.
kg
1515 500 320 28 (24) 183 (179) 5 15/28 22/41 6 20 1,8 3,3 R 3/4 " 94/84 75
2309 990 650 30 (25) 151 (145) 4 10/17 1,.5/27 9 40 1,8 3,3 R 3/4 " 94/84 160
2409 1000 650 30 (25) 151 (145) 4 10/17 12,5/27 9 40 1,8 3,3 R 3/4 " 94/84 160
3405 2000 1400 36 (30) 222 (226) 5 5/9 7,5/13,5 12 80 1,8 3,3 R 3/4 " 94/84 260
4107 3200 2000 35 (31) 234 (230) 5 7/12 10/17 16 128 5 5,4 R 1" 94/84 440
5105 5000 3200 39 (35) 260 (259) 5 5/9 7,5/13,5 20 200 5 5,4 R 1" 94/84 600
6105 7500 5000 54 (47) 358 (350) 5 3/5 7,5/13,5 24 300 5 5,4 R 1" 94/84 1000
7104 10000 6300 57 (50) 288 (280) 4 2,5/4 6/10 28 400 5 5,4 R 1" 94/84 1320
Duty classification FEM/ISO 4301 - 1Am/M4, operation pressure 6 bar
values in (...) are valid for grooved drum
* measured at a distance of 1 m from the surface of the unit and 1,6 m over the assembly area (tolerance
+2dB(A))
Pos: 10.1 /1_HADEF/6- -MONTAGE/*Ü1*/#. Kapi tel - Montage @ 0\mod_1172127 582099_52.doc x@ 255 @ @ 1

Installation
12 5.52.291.00.01.01
6 Installation
Pos: 10.2.1.1 /1_HADEF/6- -MONTAGE/Wi nde + Seilzug/Allgemein/01. Allgemein - Alle @ 0\mod_ 1175003277025_52.doc x @ 2819 @ @ 1
Please observe the following points in order to avoid any damage to equipment or injury of person:
Wear safety gloves.
Install the winch on a stable ground.
Make sure attachment surface is flat and that installation is made stress-free, - use shim parts if
necessary.
The winch must be set up and attached in such a way that it cannot change position neither by the load
nor by other influences.
Pos: 10.2.2.1 /1_HADEF/6- -MONTAGE/Wi nde + Seilzug/Schrauben/42/ 87/02.Windenmonta ge 42/87 @ 1\mod_12457440 00215_52.docx @ 10961 @ @ 1
6.1 Installation of winch
Type
Capacity
1st layer
kg
A B C
Ø D /
Anchoring
screws
Strength class
8.8
Number of
screws
1506
1515
1516 500 650 400 - 11/M10 4
2306
2309
2316 990 720 580 - 17/M16 4
2406
2409
2416 1000 720 580 - 17/M16 4
3405
3406
3416 2000 750 725 - 17/M16 4
4107
4108 3200 900 900 - 24/M22 4
5105
5106 5000 1000 1000 - 30/M27 4
6105 7500 1300 1300 100 26/M24 8
7104 10000 1410 1430 100 30/M27 8
Illustration 1
Pos: 10.2.3.1.1 / 1_HADEF/6--MONTAGE/W inde + Seilzug/Drahtsei l/*Allgmein*/03- 1.Seilauswahl-Ü @ 2\mod_1 283498256034_52.doc x @ 15530 @ @ 1
6.2 Selection of wire ropes
Pos: 10.2.3.1.2 / 1_HADEF/6--MONTAGE/W inde + Seilzug/Drahtsei l/*Allgmein*/03- 2.Seilauswahl-Al le-Seil nach EN @ 2\mod_128349 8365267_52.doc x@ 15534 @ @ 1
Wire ropes acc. to EN 12385-4 - Lifting ropes
Pos: 10.2.3.1.3 / 1_HADEF/6--MONTAGE/W inde + Seilzug/Drahtsei l/*Allgmein*/03- 3.Seilauswahl-Al le@ 0\ mod_1175004971345_52. docx @ 2858 @ @ 1
Stainless wire ropes and special wire ropes are available on request.
Diameter and nec. minimum breaking load must be acc. to the data mentioned in the table in chapter
"Technical Data" resp. acc. to the details mentioned on the type plate.
Recommendation of wire ropes
Steel-reinforced wire ropes
For larger pulling rope forces, fibre-core wire ropes can also be used.
For unguided loads, - non-twisting or at least twist-resistant wire ropes.
For several rope layers winded through the drum, - steel-reinforced wire ropes.
Pos:10.2.3.1.4/1_HADEF/---ALLGEMEIN/Hinweise/Seile/WARNUNG - Kunststoffseile verboten@ 0\mod_1 177329455688_52.doc x@ 5 225 @ @1
WARNING!
It is not allowed to use plastic wire ropes or plastic-coated wire ropes.
Pos: 10.2.3.2.1 / 1_HADEF/6--MONTAGE/W inde + Seilzug/Drahtsei l/*Allgmein*/04. Seilbefestigung-al lgmein P @ 2\mod_127986844 3896_52.docx @ 15068 @ @ 1
6.3 Wire rope fastening
The winding direction of the wire rope is determined by the manufacturer.
The winding direction cannot be changed.
Before cutting the wire rope, wrap it firmly with a fine binding wire or strong adhesive tape.
Pos: 10.2.3.3.1. 1 /1_HADEF/6--MONTAGE/ Winde + Seilzug/Drahtsei l/*05.Seilbefes tigung*/42/87/1. 42/87 @ 1\mod_1245759228753_52. docx @ 10976 @ @ 1

Installation
5.52.291.00.01.01 13
6.3.1 Wire rope fastening
The wire rope is fastened with retainer key. The retainer key is attached to the consignment for winches
supplied without wire rope.
Push the wire rope through the hub of the
flanged wheel and through the key pocket.
Pull some centimeters out.
Wrap it completely round the retainer key (1)
Place it back into the key pocket.
Illustration 2
By pulling the wire rope, the retainer key gets
stuck into the pocket and locks the wire rope
safely.
It may be necessary to insert the retainer key a
little bit into the hub with a soft tool before the wire
rope can be loaded.
Illustration 3
Pos: 10.2.3.3.1. 2 /1_HADEF/6--MONTAGE/ Winde + Seilzug/Drahtsei l/*05.Seilbefes tigung*/42/87/2. 42/87 - Ablaufrichtung A @ 2\mod_ 1286894125345_52.doc x @ 16112 @ @ 1
The wire rope feed out direction is determined by
the motor.
See chapter "Installation".
Illustration 4
Pos: 10.2.3.4.1 / 1_HADEF/6--MONTAGE/W inde + Seilzug/Drahtsei l/*Allgmein*/06. Seilaufwicklung-Al le @ 0\mod_1175065250946 _52.docx @ 2900 @ @ 1
6.4 Winding up of wire rope
The wire rope must always be winded up tensioned. When the last wire rope layer is winded onto the drum,
the flanged wheel must exceed the top layer by at least 1 1/2 times of the wire rope diameter.
Pos:10.2.3.4.2/1_HADEF/---ALLGEMEIN/Hinweise/Winden/HINWEIS - 2 Wicklungen auf Tro mmel@ 0\ mod_1177330646284_52. docx @ 5254 @ @ 1
NOTICE!
According to DIN 15020 regulations and to the accident prevention regulations BGV D8, the wire rope
length must be chosen so that at least 2 rope layers remain on the drum when the wire rope is unwinded.
Pos: 10.2.4.1.1 / 1_HADEF/6--MONTAGE/W inde + Seilzug/Seilablen kung/*Seilablenkung* /07.Seilablen kung-allgemein @ 0\mod_1175065 654558_52.docx @ 2913 @ @ 1
6.5 Wire rope deflection
Wire rope pulleys must be installed in a
position centrically to the rope drum.
In order to ensure correct winding up of the
wire rope on the drum, the max. wire rope
deflection angle must not be exceeded.
maximum wire rope deflection angle
4° for standard wire ropes
2° for non-twisting resp. twist-resistant wire
ropes
The minimum dimension (M) from the drum
until the middle of the pulley must be adhered
to.
Illustration 5
Pos:10.2.4.1.2/1_HADEF/---ALLGEMEIN/Hinweise/Winden/HINWEIS - Umlenkrolle Absta nd M- Richtwerte @ 0\mod_1177332963 920_52.docx @ 5276 @ @ 1
NOTICE!
Should the drum be extended and for some models with limit switch, the distance "M" must be increased.
Standard values:
15x 1/2 drum length for standard wire ropes
30x 1/2 drum length for twist-resistant or non-twisting wire ropes
Pos: 10.2.4.2 /1_HADEF/ 6--MONTAGE/Wi nde + Seilzug/Seilablenkun g/*Seilablenkung* /08.Umlenkrolle- Abstand-Tabelle- 42/87 @ 1\mod_124576164 2571_52.docx @ 11004 @ @ 1

Installation
14 5.52.291.00.01.01
6.5.1 Wire rope pulley (provided by the customer)
Table dimension "M" for standard drum length
Type "M "min
m
1506, 1515, 1516 4,3
2306, 2309, 2316 4,5
2406, 2409, 2416 4,5
3405, 3406, 3416 4,6
4107, 4108 5,4
5105, 5106 6,1
6105 8,1
7104 8,8
Pos: 10.3 /1_HADEF/6- -MONTAGE/Werkzeuge/ 42/87P @ 2\mod_12942316 44340_52.docx @ 17947 @ @ 1
6.6 Tools
Pos: 10.4 /1_HADEF/6- -MONTAGE/Schraubentab ellen/Anzugsmo mente M6-M33 @ 2\mod_1288088437 030_52.docx @ 16583 @ @ 1
Capacity Size Tool Use
500 kg
990, 1000, 2000 kg
3200 kg
5000 kg
7500 kg
10000 kg
SW17
SW24
SW32
SW41
SW36
SW41
Winch assembly
Wire rope
assembly
misc.
misc. Pneumatic air
connections
misc.
misc. misc.

Installation
5.52.291.00.01.01 15
6.7 Table of screws
Tighten the screws with tightening moment mentioned in the table
Thread Tightening
moment (Nm) in
property class
8.8 10.9
M 6 10,4 15,3
M 8 25,3 37,2
M 10 51 75
M 12 87 128
M 14 139 205
M 16 214 314
M 18 280 390
M 20 431 615
M 22 530 750
M 24 742 1159
M 27 1000 1400
M 30 1350 1900
M 33 2000 2800
coefficient of friction 0,12 - 0,14 μges
Pos: 11.1 /1_HADEF/7--BEDIENUNG/*Ü1*/#. Kapitel - Bedienung @ 0\mod_1 172647408811_52.d ocx @ 398 @ @1

Operation
16 5.52.291.00.01.01
7 Operation
Pos: 11.2 /1_HADEF/7--BEDIENUNG/Allgemei n/01.Bedienung - Alle @ 0\mod_117 3087534915_52.doc x @ 440 @ @1
Only people that are familiar with the operation of the lifting devices and cranes may be entrusted with their
operation. They must be authorized by the employer for the operation of the equipment. The employer must
ensure that the operating instructions are available near the equipment and that they are accessible for the
operating personnel.
Pos: 11.3 /1_HADEF/7--BEDIENUNG/Allgemei n/01.Bedienung - zus. Alle E+P @ 1\mod_1264760146475_52.doc x@ 117 00 @ @ 1
The shown control switches are only for the optical information. They can be different acc. the delivery.
Pos: 11.4.1 /1_HADEF/7--BEDIENUNG/Druckluft/1.Feinf. Di rektsteuerung @ 1\mod_11857797809 52_52.docx @ 7388 @ @ 1
Direct control
1 Emergency-Stop
2 Lifting
3 Lowering
Illustration 6
Pos: 11.4.2 /1_HADEF/7--BEDIENUNG/Druc kluft/2.Indirekte Druckluftsteuerung @ 1\ mod_1185779560722_52. docx @ 7382 @ @ 1
Indirect pneumatic control
1 Emergency stop
2 lifting
3 lowering
Hoists combined with trolleys have control
switches where push buttons for trolley movement
are added.
Special design units can be supplied upon
request.
Illustration 7
Pos: 11.4.3 /1_HADEF/7--BEDIENUNG/Druc kluft/3.Hängetaster - Tasterfunktion Druckl. @2\mod_13311 29761543_52.docx @ 2147 5 @ @1
Push button functions
Relieved push button = stand still
push button pushed = respective movement
Illustration 8
Red Emergency-Stop button
button pushed = stand still
turn the button clockwise = free functions
Illustration 9
Pos: 11.5.1 /1_HADEF/7--BEDIENUNG/W inde - Zubehör/Ausrückkupp lung/05.Ausrückk upplung - 42/87 @ 1\mod_124576 4463074_52.doc x@ 11032 @ @ 1

Operation
5.52.291.00.01.01 17
7.1 Disengaging clutch (as option)
The drum is disengaged through a switch lever.
The protection cover over the switch element
must not be removed.
Illustration 10
Disengaging
Pull out the locking button (1)
Pull the disengaging lever (2) against spring
tension.
Let the locking button (1) lock in the hole (B1)
and release the locking lever (2).
The drum is disengaged from the driving
mechanism.
Illustration - coupling engaged
Illustration 11
Engaging
Pull out the locking button (1) again and hold
the disengaging lever (2) against spring
tension.
Move the drum by hand and therewith let the
coupling engage again automatically.
Let the locking button lock in the hole (B2).
The drum is connected to its drive.
Illustration - coupling disengaged
Illustration 12
Pos:11.5.2 /1_HADEF/---ALLGEMEIN/Hinweise/GEFAHR- Verboten:Unter Lastausrücken,Manipul.a.d. Ausrückvorr. @ 0\mod_1177051175366_52.doc x@ 5051 @ @ 1
DANGER!
The following is not allowed:
Disengaging under load.
Manipulation of the disengaging device.
Pos: 12.1 /1_HADEF/8- -BETRIEB Nur (E+P)/* Ü1*/#. Kapitel - Betrieb @ 0\ mod_1176390362673_52. docx @ 3901 @ @ 1

Operation
18 5.52.291.00.01.01
8 Operation
Pos: 12.2.1 /1_HADEF/ 8--BETRIEB Nur (E+P) /Allgemein/Elektro+ Druckluft/04.A lleP @ 2\ mod_1279718651144_52. docx @ 14998 @ @ 1
The following, important points must be observed when operating the equipment:
Read the safety instructions.
Never load the devices beyond their working load limit.
The prescribed maintenance intervals must be adhered to.
Pos:12.2.2 /1_HADEF/---ALLGEMEIN/Hinweise/GEFAHR- Losreißen,Personentr.,schweb.Laste n, ex verboten (E+P) @ 0\ mod_1176799462104_52.doc x@ 473 5 @ @1
DANGER!
It is not allowed:
pulling loose of stuck loads, dragging of loads and inclined pulling is not allowed.
in explosive atmosphere, except the unit is especially modified for it and marked by an indication label
to transport people
persons must not stand under a suspended load
Pos: 13.1 /1_HADEF/9-- INBETRIEBNAHME/*Ü1*/ #. Kapitel - Inbetriebnahm e @ 0\mod_1177486166685_52. docx @ 5393 @ @ 1

Commissioning
5.52.291.00.01.01 19
9 Commissioning
Pos: 13.2.1.1 /1_HADEF/ 9--INBETRIEBNA HME/Allgemein/Allge mein/01.Allgemein @ 0\ mod_1172504961658_52. docx @ 355 @ @ 1
9.1 General
Should the unit be used in Germany, please observe the accident prevention regulations, in particular BGV
D8, BGV D 6 and BGR 500 (VBG 9a).
For other countries: Inspections as above. Please observe the national rules and regulations and the
instructions in this manual!
Pos:13.2.1.2/1_HADEF/---ALLGEMEIN/Hinweise/Prüfungen/HINWEIS- Prüfung durch befähigte Pesonen @ 0\ mod_1177339966681_52 .docx @ 5319 @ @ 1
NOTICE!
Hoists up to 1000 kg capacity and without motor-driven trolleys of hoisting unit must be tested by a “qualified
person” before putting into operation for the first time.
Hoists of 1000 kg capacity and up or with more than one motor-driven hoist movement; i.e. lifting and trolley
movement, must be tested by a “licensed qualified person” before putting in operation.
An exception is “hoists ready for operation” acc. To BGV D6 II§25(4) with EU-declaration of conformity.
Definition “qualified person” (former expert)
A “qualified person” has learned, due to occupational training and experience and the job that the person has
done, the skills needed to tests the material for one’s work.
Definition “licensed qualified person” (former approved expert)
A “licensed qualified person” has, due through special occupational training, knowledge about testing of the
material for one’s work and knows the national accident prevention regulations and other prescriptions and
technical regulations. This person must test the material for one’s work regularly with regard to design and
kind of use. The license will be given to qualified person be the approved supervision authorities (ZÜS).
Pos: 13.2.2 /1_HADEF/9- -INBETRIEBNAHME/Al lgemein/Druckluftan schluss/Alle @ 1\mod_1185 782523360_52.doc x@ 744 1@ @ 1
9.2 Compressed air connection
Before commencing work on the equipment, the main air supply line must be closed and secured against
inadvertent opening!
9.2.1 Main connection
The connections must be made according to the pneumatic connection diagram.
Connect to the existent hose nozzle.
The hose must be secured with a hose clamp.
Nominal width of the air connection hose
0,52-0,75 kW - NW 13 mm
1,5 kW - NW 19 mm
2,5 kW - NW 25 mm
If hose length exceeds 15 m, a larger cross section must be selected.
9.2.2 Control hose connection
Control switches with hoses are connected at the factory, unless otherwise agreed.
Pos: 13.2.3.1 /1_HADEF/ 9--INBETRIEBNA HME/Allgemein/Wartungs einheit/Alle Gerät e @ 1\mod_1193055355138_5 2.docx @ 8102 @ @ 1
9.2.3 Maintenance unit
It is important that an automatic maintenance unit, consisting of oiler, filter ,water separator and air pressure
reducer is installed in the main air supply - if not assembled by the manufacturer this must be assembled by
the customer.
It serves for the necessary preparation of the operation air so that the pneumatic motor can work trouble-
free. Installation must be as close as possible to the motor; - in no cases should the distance to the motor
exceed 10 m.
Should higher pressure occur in the supply net, it will be reduced to the operating pressure of 6 bar by the
pressure reducing valve. The oiler enriches the air with oil. Setting of oil addition: approx. 2 drops of oil must
be added per minute.
Pos:13.2.3.2/1_HADEF/---ALLGEMEIN/Hinweise/HINWEIS- KeineGewährleistungdurc h Nichtbeachtung.... @ 1\mod_1193056870530_ 52.docx @ 8119 @ @ 1
NOTICE!
HADEF does not assume any responsibility for damage caused by non-observance of the instructions.
Pos:13.2.3.3/1_HADEF/---ALLGEMEIN/Hinweise/Druckluft/VORSICHT- Wartungseinheiten ohne Öl @ 1\mod_1 259674747751_52.doc x @ 11340 @ @1

Commissioning
20 5.52.291.00.01.01
CAUTION!
Should the unit be assembled at the customer, the maintenance unit is supplied without oil.
Before putting the unit into operation, the main air supply line must be cleaned and the oiler of the
maintenance unit must be filled with oil. Should this not be done the unit may be severely damaged.
Pos:13.2.3.4/1_HADEF/---ALLGEMEIN/Hinweise/Druckluft/VORSICHT- Wartungseinheiten sind nic ht für synthetisches Öl zuge lassen. @ 1\mod_11857839 56354_52.docx @ 7447 @ @ 1
CAUTION!
The maintenance units are not approved for use with synthetic oil.
They must not be connected to compressed air systems which are supplied by compressors with synthetic
lubricants.
Pos: 13.2.4.1 /1_HADEF/ 9--INBETRIEBNA HME/Allgemein/Getri ebe/05.Getriebe - S onstige @ 0\mod_117560072840 6_52.docx @ 3050 @ @ 1
9.3 Gear
Should the gear not be closed, the level of lubricant must be checked before putting the device into
operation.
Pos:13.2.4.2/1_HADEF/---ALLGEMEIN/Hinweise/HINWEIS- Verschluss-Entlüftungsschraube @ 1\mod_1259676576858 _52.docx @ 11347 @ @ 1
NOTICE!
For transport, some gear types are fitted with a plug screw. Replace the plug screw by a ventilation screw
(attached) before putting the unit into operation.
Pos: 13.2.5.1 /1_HADEF/ 9--INBETRIEBNA HME/Allgemein/Drahtsei l/05.Drahtseil @ 0\ mod_1172571056093_52. docx @ 369 @ @ 1
9.4 Wire rope
Wire ropes must be free from corrosion, dirt or damage.
They must be lubricated before commissioning.
No lubrication shortens the lifetime of the wire rope and the maintenance intervals.
Pos:13.2.5.2/1_HADEF/---ALLGEMEIN/Hinweise/Seile/WARNUNG- Kunststoffseile verboten @ 0\mod_1177329455688_52.doc x@ 522 5 @ @1
WARNING!
It is not allowed to use plastic wire ropes or plastic-coated wire ropes.
Pos: 13.2.6.1 /1_HADEF/9-- INBETRIEBNAHME/Allgemein/ Seilwegbegrenzung sschalter E+P/06.Seilwegbe grenzungsschalter @ 0\mod_1 175603073634_52.doc x@ 3064 @ @ 1
9.5 Limit switch for wire rope path (as option)
The limit switch (if exist) must be adjusted before commissioning and after maintenance work has been
made. Intermediate checks for correct function are necessary.
The switching point for the upper load position must be set in such a way that even in case of unfavourable
cable winding the permitted highest load position is not overrunned. In individual cases it may be necessary
for the customer to install an external emergency switch. The limit switch for the lowest load position is
always driven exactly independently of the cable length.
Pos:13.2.6.2/1_HADEF/---ALLGEMEIN/Hinweise/Endschalter/HINWEIS- Genaues Anfahren Endscha lter @ 0\mod_11774870 83967_52.docx @ 5407 @ @ 1
NOTICE!
An exact driving up to the upper end position is only possible in the first wire rope layer with grooved rope
drum.
Exactness decreases with larger wire rope length and several wire rope layers.
Pos: 13.2.7.1 /1_HADEF/ 9--INBETRIEBNA HME/Allgemein/Schlaf fseilschalter E+ P/07.Schlaffseilsc halter @ 0\mod_117576762 2185_52.docx @ 3388 @ @ 1
9.6 Slack rope switch (as option)
In case of slack rope i.e. by setting down of the load, the slack rope switch prevents further unwinding of the
wire rope.
Table of contents
Other HADEF Winch manuals

HADEF
HADEF 42/87E User manual

HADEF
HADEF 220-15 Assembly instructions

HADEF
HADEF 238/10 Assembly instructions

HADEF
HADEF 108/22-EX User manual

HADEF
HADEF 238/10MV User manual

HADEF
HADEF 190/94 Assembly instructions

HADEF
HADEF 238/10-EX User manual

HADEF
HADEF 43/86P Liftboy-EX User manual

HADEF
HADEF 260/23 User manual

HADEF
HADEF 42/87P-EX User manual
Popular Winch manuals by other brands

POWERWINCH
POWERWINCH 235 Installation and operation manual

Harken
Harken 70.2 ST EL Installation and maintenance manual

Cycle Country
Cycle Country POWERMAX 15-0060 owner's manual

Allied Systems
Allied Systems H6H Service manual

Titanium
Titanium Colorado Series manual

Lippert
Lippert Curt installation manual