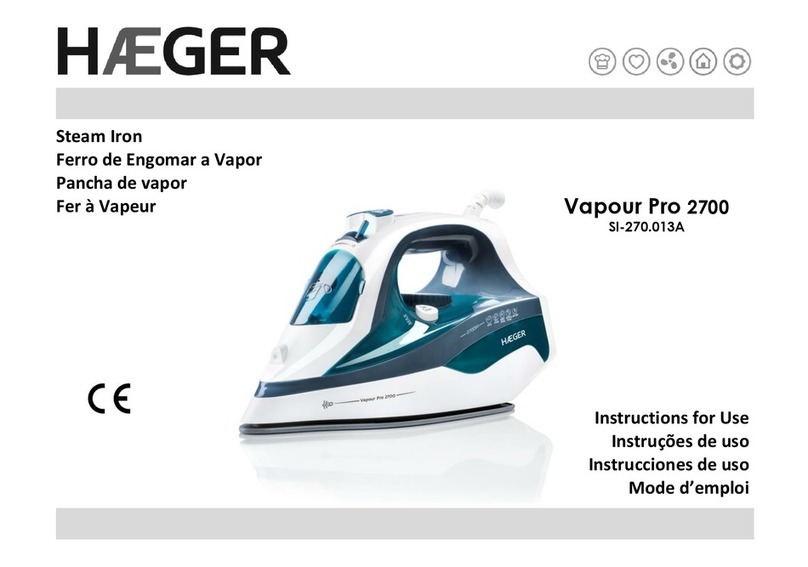
HAEGER Deep Blue Steam User manual

Steam Generator Ironing System
Sistema de passar roupa com gerador de vapor
Sistema de planchado con generador de vapor
Système de repassage avec générateur de vapeur
Σύστημα σιδερώματος γεννήτριας ατμού
Deep Blue Steam SG-22B.001A
Deep White Steam SG-22W.002A
RoHS
User instructions / Instruções de uso
Instrucciones de uso / Mode d’emploi
Οδηγίες χρήστη
Download
Multi-language file

1
4
3
2
5
6
7
8
9
10
12
13
11
14

- 1 -
English
Dear customer
Thank you for having chosen a HÆGER product.
The HÆGER products have been produced to think about the welfare of the consumer privileging the
most raised standards of quality, functionality and assign. We are sure you will be happy with this
appliance.
We assume that the user is familiar with the common procedures of handling household appliances.
Before using the appliance for the first time please read carefully and thoroughly through these
operating instructions and the safety advice, completely familiarising yourself with the appliance.
Retain these instructions for future reference and pass them on to whoever might acquire the
appliance at a future date.
Important Safeguards
When using electrical appliance, basic safety precautions should always be
followed, including the following:
•Read these instructions carefully.
•The appliance has been designed for home use only and must not be used for
commercial or industrial purposes.
Danger for children
•Do not leave the packaging near children because it is potentially dangerous.
•Keep the appliance out of the reach of children and disabled persons when in
use.
•In the event that this appliance is to be disposed of, it is suggested that the
power supply cable is cut off. It is also recommended that all potentially
dangerous components are rendered harmless to prevent children hurting
themselves when playing with the apparatus.
•This appliance can be used by children aged from 8 years and above and
persons with reduced physical, sensory or mental capabilities or lack of
experience and knowledge if they have been given supervision or instruction
concerning use of the appliance in a safe way and understand the hazards
involved. Children shall not play with the appliance. Cleaning and user
maintenance shall not be made by children unless they are older 8 years and
supervised.
•Children must be supervised at all times to ensure they do not play with the
appliance.

- 2 -
Danger due to electricity
•Before plugging the appliance into the mains socket, ensure that the voltage
shown on the rating plate matches the local voltage supply.
•Always connect the iron to an earthed socket.
•Do not immerse the appliance in water or other liquids.
•Do not start ironing if your hands are wet or if you are barefoot.
Danger of damage originating from other causes
•Fill up the tank with water before starting up the appliance. Be sure to unplug
the appliance before pouring water into the tank.
•Turn on the appliance only when it is in working position.
•The appliance may give out a little smoke when used for the first time. This
transitory effect is perfectly normal and is due to the fact that some of
components have been slightly lubricated.
•During use, rest the appliance onto a horizontal surface.
•Never leave the appliance unattended when it is connected to the power
supply.
•The appliance must be used and rested on a stable surface.
•When placing the iron on its stand, ensure that the surface on which the stand
is placed is stable.
•Before leaving the iron unattended, even for a short time, turn off the
appliance, always unplug it and place it on support base.
•Pressing the steam button before the boiler has reached the optimum
temperature or the iron has heated up may cause water to leak from the steam
holes.
•The appliance is not to be used if it has been dropped, if there are visible sign
of damage or if it is leaking. To prevent any accident, all repairs, including the
replacement of the power cord, must be carried out by an Authorised Service
Centre or, in any case, by qualified personnel.
•Do not use the appliance if the power cord appears to be damaged, with parts
showing burns, etc.;
•Do not expose the appliance to atmospheric agents (rain, sun …).

- 3 -
Warning of burns
•Never try to iron garments being worn.
•Do not touch the metal parts of the iron when in operation and for several
minutes after it is turned off since it could cause burns.
•Do not aim the jet of steam towards parts of the body or pets.
Warning –material damage
•We suggest you keep the original box and packaging. The warranty does not
cover any damage resulting from inadequate packaging of the product when
this is sent back to an Authorised Service Centre.
•Remove all protections from the soleplate before using the appliance for the
first time.
•The use of extensions not approved by the manufacturer can result in damage
to property and personal injury.
•Do not use sparkling (carbonated) water.
•When the iron is hot, do not rest it onto the connecting cable or the power
cord. Take special care in ensuring that the cable and the cord do not come
into contact with the soleplate when it is hot.
•Do not pull the power cord to unplug the appliance.
•The appliance must only be cleaned with a soft, slightly damped, cloth after
unplugging the iron and allowing all its parts to cool down. Never use solvents
which may damage the plastic parts.
•To avoid damage and/or contamination of the water tank, do not put perfume,
vinegar, and starch, descaling agents, additives or any other type of chemical
product into the water tank.
•Do not wrap the power cord around the soleplate, especially when the iron is
hot.
•Do not put the soleplate in contact with metal surfaces.
•Put the thermostat knob on MIN before storing the appliance. Turn off the
appliance by pressing the button. Always unplug the power cord and wait for
the iron to cool down.
•The appliance is fitted with a special thermal safety device which prevents the
plate overheating. If any difficulty is experienced in resetting the appliance,
contact your nearest Authorised Assistance Centre.

- 4 -
•We decline any responsibility resulting from misuse or any use other than
those covered in this booklet.
Description
1. Safety lock for carriage
2. Continuous steam selector
3. Steam trigger
4. Cord guard
5. Base unit
6. Anti-scale filter
7. Detachable water tank
8. Temperature pilot lamp
9. Temperature setting knob
10. Heating ceramic soleplate
11. Heat resistant base
12. Cable storage box
13. Power cord
14. Base-Iron Interconnection Cord
Instructions for Use
Using the appliance for the first time
−Before using the appliance for the first time, ensure that it is switched off and unplugged from
the mains power supply.
−Clean the exterior surface of the appliance with a soft, damp cloth and dry thoroughly.
−Do not immerse the appliance in water or any other liquid.
−Note: when using the appliance for the first time, a slight odour and small amount of smoke may
be emitted. This is normal and will soon subside. Ensure that there is sufficient ventilation
around the appliance.
Filling the Water Tank
1. Ensure that the appliance is switched off and unplugged from the mains power supply.
2. Check that the thermostat is set to the “MIN” position.
3. Position the iron on the base unit and remove the water tank by the tank handle and then pull
it out and away.
4. Fill a suitable measuring vessel with water and carefully pour the contents into the water tank.
5. Insert the water tank back into the base unit, until it clicks into position.
NOTE! The appliance operates with tap water. If water hardness is high, it is recommended to use
distilled water in a 50% solution with tap water. Alternatively, it is recommended to use bottled
water. Do not use deionized water.
Waring: Do not fill the water tank with hot water.
Warning: Never add descaling, aromatic, alcoholic or detergent products into the appliance, as this
may damage the appliance or make it unsafe for use.
Note: when add water into the water tank, it is suggested to add water until cover the anti-scale
filter, then wait for around 5 minutes, it gives the anti-scale filter enough time to transfer the hard
water into soft water to prevent calcification.

- 5 -
Temperature selection
First check whether the fabric has a label containing ironing instructions and compare the symbol
with the instructions which follow. If there is no label with instructions, but you know the type of
material, follow the instructions below.
Note: these instructions refer to fabrics which have not been treated with starch or similar
substances. If they have, they should be ironed at a lower temperature.
Label Ironing
instructions
Kind of fabric
Thermostat
Synthetic fabrics, Acetate, Acrylic,
Viscose, Polyamide (Nylon), Viscose
(Rayon), Silk
LOW
Wool
MEDIUM
Cotton
Linen
HIGH
The mark on the label means “do not iron”
Use of the Appliance –Steam Ironing
Before using, make sure the appliance is switched off, it is not plugged in, and the temperature
setting knob (9) is in the "MIN" position.
1. Remove the water tank (7) and fill it with water. Make sure that the water is above the MIN
indication on the water tank.
2. Insert the water tank (7) until it snaps into its original position.
3. Connect the power cable (13) of the appliance to the wall outlet.
4. Turn the temperature setting knob (9) to the desired temperature.
5. When the device is ready for use, press the steam button (3) and start ironing. The steam
setting can be switched off at any time by releasing the steam button (3). By pressing the
continuous steam setting (2), the steam button (3) does not have to be pressed.
6. If the water is finished in the water tank and you have not finished the ironing, remove the
cable from the socket and follow steps 1 through 4 and then continue ironing.
7. When you have finished ironing, turn the temperature setting knob (9) to the "MIN" position
and disconnect the appliance from the socket.
8. Let the appliance cool down and store the power cable (13) and interconnection cord (14) in
the cable storage box (12) before storing the appliance.
IMPORTANT: Before steam ironing, you should ensure that the garment can be steam ironing
according its marked.
•Set the thermostat control dial according to the type of material to be ironed.
•Do not press the steam button and the continuous steam slide button, while the water tank is
empty.

- 6 -
Notes while ironing with steam
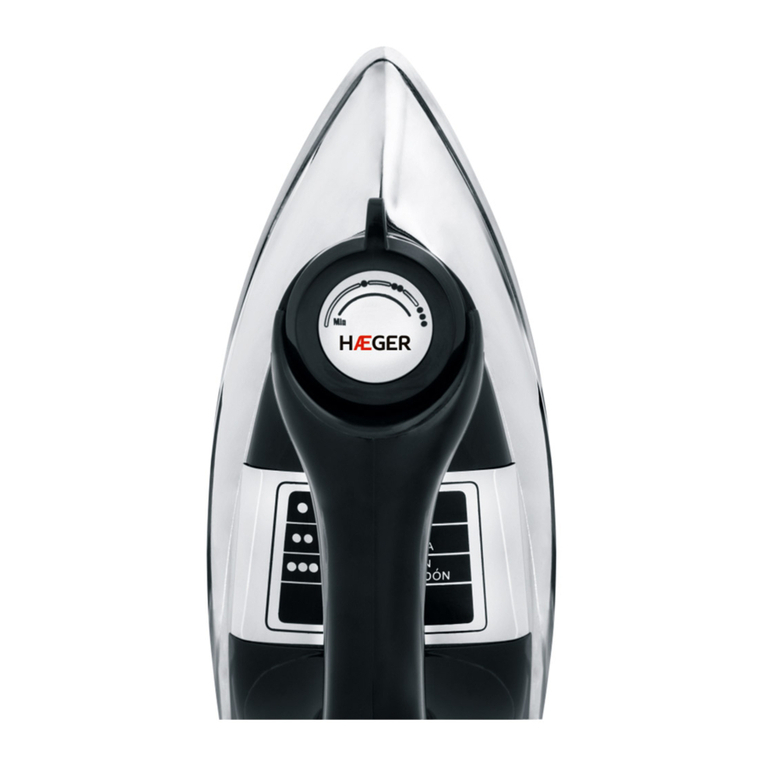
•The temperature setting knob (9) should be in the “●●” or “●●●” position to produce steam.
•If the steam button is operated continuously for more than 30 seconds, drops of water may
come from the steam holes in the plate of the iron. It is recommended that the button is used
for shorter periods.
•During the emission of the steam a vibration is felt coming from the inside of the body, it is the
pump that pumps the water from the tank to the iron.
•During ironing, if the indicator light goes out from time to time, this can be ignored, as it simply
means that the iron is maintaining its correct operating temperature.
•Make sure that the iron is placed on the heat-resistant base (11) when not in use.
•Make sure that the continuous steam setting button (2) is deactivated when placing the iron
on the heat-resistant base.
•Make sure you do not iron the same fabric surface for a long time because it can damage the
fabric.
•The interconnection cord (14) is very hot during use. Do not touch to avoid burns.
Use of the Appliance-Dry Ironing
The water tank (7) does not need water when ironing without steam. If it is full, it can be emptied
or left so that it is ready for the next use with steam.
1. Connect the power cable (13) of the appliance to the wall outlet.
2. Turn the temperature setting knob (9) to the desired temperature. The temperature
indicator light (8) will light up.
3. When the device is ready for use, the temperature indicator (8) will turn off.
4. When you finish ironing, turn the temperature setting knob (9) to the "MIN" position and
disconnect the appliance from the socket.
5. Let the appliance cool down and store the power cable (13) and interconnection cord (14) in
the cable storage box (12) before storing the appliance.
Vertical Steam Ironing
The vertical steam ironing system allows you to use the iron for vertical ironing. This is especially
useful for getting wrinkles out of hanging clothes, curtains etc.
1. Follow steps 1-5 in "Use of the appliance - Steam ironing" section.
2. Hang the garment on a clothes’ hanger and pull the garment tight with one hand.
3. Hold the iron in vertical position with the other hand and press the steam button (3) to iron
the garment.
4. Touch the garment lightly with the soleplate of the iron to remove creases.
5. When you finish ironing, turn the temperature setting knob (9) to the "MIN" position and
disconnect the appliance from the socket.
6. Let the appliance cool down and store the power cable (13) and interconnection cord (14) in
the cable storage box (12) before storing the appliance.

- 7 -
Tips for Better Results
•Divide the articles to be ironed according to the types of material: wool with wool, cotton with
cotton, etc…
•Because the iron heats up much more quickly than it cool down, it is advisable to start with
those fabrics which require lower temperatures and move on to those which require
progressively higher temperatures.
•If the material is made up of more than one type of fibre, always set the temperature to the
fibre which requires less heat. For example, if the material is made up of 70% synthetics and
30% cotton, set the temperature control to position (•) (see table) without steam, that is, the
temperature for synthetic fabrics.
•If you do not know the composition of the article to be ironed, choose a part of the article
which will not be seen. Does test ironing on this part to establish the appropriate temperature
(always start with a relatively low temperature and work up until the ideal temperature is
reached).
•Pure (100%) wool articles can be ironed with the iron set to one of the steam positions. To
avoid pure wool, silk and synthetic materials becoming shiny, it makes good sense to iron them
on the reverse side.
•For other materials, especially velvet, which can become shiny very easily, cover them with a
cloth and iron in one direction only, using light pressure.
•The iron must be kept constantly moving over the fabric.
•It is advised that the steam button is used for short bursts rather than prolonged periods of
time. This can prevent water dripping from the steam holes and can reduce the frequency of
needing to refill the water tank.
Care and maintenance
CAUTION: Before performing any cleaning or maintenance work, make sure that you remove the
power cord from the electrical outlet and that the appliance has cooled down completely.
•Drain the remaining water from the water tank to prevent leakage during cleaning.
•Do not use abrasives or abrasive cleaners and wire to clean the plate or the boiler.
•Keep the soleplate smooth. Avoid contact with hard, metal objects. Do not scratch or damage
the surface of the soleplate.
•Do not place the iron on any metal surface. Only place the iron on the heat-resistant base.
•To prevent scratches and damage the plate, avoid any contact with hard metal objects.
•Wipe the upper part of the appliance with a damp cloth. Do not use abrasives or harsh cleaners
as they may damage the surface of the steam generator.
•Never immerse the appliance in water or nay other liquid. Never hold the iron or the base unit
under the tap.
Storage
•Allow appliance to cool down completely before storing.
•Remove water from the water tank after each use or before storage.
•Place the power cord (13) and the interconnection cord (14) into the cable storage box (12)
before storing.
•Store in a place without humidity, where it is not reachable by children.
- 8 -
Carriage
For easy carriage of the appliance, place the iron on the heat resistant base (11) as well as place the
power cord and the interconnection cord into the cable storage box. Raise the safety lock (1)
upwards until it locks into place. Transfer the appliance by holding it from the handle. Before use,
lower the safety lock down to release the iron.
Change anti-scale cartridge
Replace the water softening filter regularly. At moderate use (twice a week) and depending on the
water hardness in your region the water softening anti-scale filter should be replaced every 3-6
months.
Note: Do not use the unit without the water softening filter!
1. Remove the water tank from the appliance.
2. Pull anti-scale filter upwards and remove it for changing. In order to remove it, firstly unscrew
it and carefully take it out. Disconnect the hose from the filter and connect it to the new filter.
Screw the new filter back to the water tank.
Note: Be careful - there can be water inside the filter body.
3. Install the new water softening filter to its place.
Troubleshooting
Warning: To reduce the risk of fire, electric shock or injury, unplug the appliance from the mains
power supply before troubleshooting.
Problem
Possible causes
Solution
Unit fails to heat up and
steam. Power indicator
light does not illuminate.
Unit is not plugged in.
Plug into Electrical outlet.
Water runs out of the holes
in the soleplate.
Water has condensed in the
pipes because you are using
for the first time or you have
not used it for some time.
Press the steam trigger away
from your ironing board until
the iron produces steam.
The soleplate is not hot
enough.
Wait until the iron soleplate is
hot enough or increase the
temperature of the soleplate.
White streaks come
through the holes in the
soleplate.
The product has a build-up of
scale because the anti-calc
filter has not been changed
regularly.
Change the anti-scale filter.
Brown streaks come
through the holes in the
soleplate and stain the
linen.
You are using chemical
descaling agents or additives
in the water for ironing.
Never add this type of product
in the water tank or in the
steam chamber.
The soleplate is dirty or
brown and may stain the
garment. The clothe sticks
in the soleplate.
You are ironing at too high
temperature.
Adjust the temperature dial to
a lower heat setting.

- 9 -
There is no steam or there
is little steam.
The water tank is empty.
Fill the water tank.
The soleplate is not hot
enough.
Wait until the iron soleplate is
hot enough or increase the
temperature of the soleplate.
Technical Specifications:
Power Supply: ................................220-240V~, 50-60Hz, Class I
Total power:...................................2000-2250W
Water tank capacity:......................1200ml
Conformity CE
This product has been tested and produced according to all relevant current CE guidelines, such as:
-Electromagnetic compatibility Directive 2014/30/EU,
-Low voltage Directive (LVD) Directive 2014/35/EU,
-RoHS 2011/65/EU with its amendments Directive EU 2015/863,
and has been constructed in accordance with the latest safety regulations.
The CE mark attests this product with all relevant directives.
Disposal –Environment policy
Packing
The packaging material is entirely recyclable and marked with the recycling symbol. Follow
local regulations for scrapping. Keep the packaging materials (plastic bags, polystyrene
parts, etc.) out of reach of children, as they are potentially dangerous.
Disposal
This appliance is marked according to the European directive 2012/19/EU on Waste Electrical and
Electronic Equipment (WEEE).
By ensuring this product is disposed of correctly, you will help prevent potential negative
consequences for the environment and human health, which could otherwise be caused by
inappropriate waste handling of this product.
This symbol on the product, or on the documents accompanying the product, indicates
that this appliance may not be treated as household waste. Instead, it shall be handed
over to the applicable collection point for the recycling of electrical and electronic
equipment.
Disposal must be carried out in accordance with local environmental regulations for waste
disposal. For more detailed information about treatment, recovery and recycling of this product,
please contact your local city office, your household waste disposal service or the shop where you
purchased the product.

- 10 -
Warranty
Warranty Terms and Conditions
1. The product is guaranteed for the period stipulated by the legislation where it is used and starts from the
date of original purchase, against manufacturing defects and/or workmanship. The lack of conformity
manifested within the period referred to from the date of delivery of the good shall be presumed to exist on
the date of delivery. After this period, it is for the customer to prove that the lack of conformity existed at
the date of delivery.
2. If, during the warranty period, the product is defective in normal use, the buyer should contact the selling
establishment and send the appliance to the place indicated by the seller.
3. The warranty is only valid upon presentation of the invoice proving the purchase and the completed
warranty certificate (indicating the date of purchase, the name of the dealer, the reference of the model,
and it is also recommended to indicate the serial number and lot number).
4. The importer/seller reserves the right to refuse warranty assistance in the event that such information has
been deleted or altered after the original purchase of the product.
5. The responsibility of the importer/seller includes in particular the costs of repairing and/or replacing the unit
covered by the warranty with the reservation of the right to replace it with an equivalent product, in cases
where it is not possible to repair it.
6. The warranty does not apply to problems that are not directly related to defects in material, design or
workmanship.
7. This product is an appliance and is intended for home use only. The warranty becomes void if the product is
used for professional purposes.
8. The warranty does not cover damage caused by misuse, improper installation, spillage, external factors, or
intentional damage.
9. The warranty does not cover damage resulting from falls, use of excessive force, blows, exposure to extreme
environmental conditions or deterioration caused by the normal use of plastic parts or keyboards, as well as
the use of batteries other than those specified in this manual.
10. The warranty does not cover installation and programming by the dealer. In particular, no claim for
installation and free programming by the reseller may be accepted.
11. The warranty does not cover deficiencies that insignificantly impair the operation of the appliance. Other
costs, such as installation, transportation and travel of the technician are expressly excluded from the
warranty.
12. The applicability of the warranty presupposes that the appliance is shipped complete, protected from any
shock (if possible, in its original packaging) and accompanied by its warranty and proof of purchase.
13. If after verification it is found that there are no grounds for the complaint, or that it is not defective, the
costs relating to the customer shall be charged to the customer. The reseller is authorized to charge these
costs to the customer.
14. The warranty expires when unauthorized persons have attempted to carry out modifications, modifications
or replacements of parts in the appliance.
15. Repairs carried out after the end of the warranty period are subject to costs.
16. This warranty does not affect your legal rights that you may have as a consumer under applicable national
law governing the purchase of products where the product is sold.
17. Warranty Period:
For European Union countries - European Directives (EU) 2019/771 and (EU) 2019/770 apply for European
Union countries on certain aspects of contracts for the purchase and sale of movable property and
transposed into the national laws of their countries.
For other countries outside the European Union - national legislation on consumer rights in their country
applies.

- 11 -
Português
Estimado Cliente
Obrigado por ter escolhido um produto HÆGER.
Os produtos HÆGER foram concebidos a pensar no bem-estar do consumidor, privilegiando os mais
elevados padrões de qualidade, funcionalidade e designe. Estamos certos da sua satisfação pela
aquisição deste produto.
Partimos do princípio de que o utilizador possui conhecimentos gerais sobre o manuseamento com
eletrodomésticos.
Antes da primeira utilização, leia cuidadosa e totalmente estas instruções de utilização e de
segurança e familiarize-se com as funções do aparelho. Guarde estas instruções e, se necessário,
entregue-as a terceiros.
Advertências Importantes
Ao usar aparelhos elétricos, precauções básicas de segurança devem ser sempre
seguidas, incluindo as seguintes:
•Leia cuidadosamente estas instruções.
•O aparelho é destinado apenas ao uso doméstico, não deve ser usado para fim
comercial ou industrial.
Perigo para as crianças
•Não deixe os elementos da embalagem ao alcance de crianças pois constituem
potenciais fontes de perigo.
•Nunca deixe o aparelho em funcionamento ao alcance de crianças ou pessoas
inábeis.
•Quando decidir não utilizar mais o aparelho, recomendamos que corte o cabo
de alimentação para que não possa mais funcionar. Recomendamos que torne
inócuas as suas partes suscetíveis a constituir perigo, principalmente para
crianças que poderiam utilizar o aparelho para brincar.
•Este aparelho pode ser utilizado por crianças com idade a partir de 8 anos e
por pessoas com capacidades físicas, sensoriais ou mentais ou falta de
experiência e conhecimento, se tiverem recebido supervisão ou instruções
relativas à utilização do aparelho de forma segura e entender os riscos
envolvidos. As crianças não devem brincar com o aparelho. Qualquer limpeza
e ou manutenção não deve ser feito por crianças a não ser que tenham idade
superior a 8 anos e sejam supervisionados.
•É necessário certificar-se que as crianças não brinquem com o aparelho.

- 12 -
Perigo devido à eletricidade
•Antes de ligar o aparelho a uma tomada de corrente, certificar-se que a tensão
indicada na etiqueta corresponde àquela da rede local.
•Ligue sempre o aparelho a uma tomada com terra.
•Nunca submerja o aparelho em água ou outros líquidos.
•Não utilize o aparelho se estiver com as mãos molhadas ou com os pés
descalços.
Perigo de danos devidos a outras causas
•Encha o reservatório com água antes de ligar o aparelho. As operações de
enchimento de água devem ser efetuadas com a tomada do cabo de
alimentação desligada do ponto de corrente.
•Ligue o aparelho apenas quando este estiver na posição de trabalho.
•Quando o aparelho for usado pela primeira vez, pode ocorrer que este emane
um pouco de fumaça; não se preocupe, esta ocorrência é perfeitamente
normal pois algumas partes foram ligeiramente lubrificadas, e desaparecerá ao
fim de pouco tempo.
•Durante a utilização deve-se posicionar o aparelho sobre um plano horizontal.
•Não deixe o aparelho sem vigilância enquanto este estiver ligado à rede
elétrica.
•O aparelho deve ser utilizado e deixado em repouso sobre uma superfície
estável.
•Quando o ferro de engomar for colocado sobre seu apoio, certifique-se que a
superfície na qual o apoio foi colocado é estável.
•Se necessitar de se ausentar, mesmo que por pouco tempo posicione sempre
o ferro de engomar na respetiva grelha de apoio, comute o interruptor para a
posição de desligado e em seguida desligue o cabo de alimentação elétrica da
tomada.
•Pressionando-se o botão vapor antes do aparelho ter alcançado a temperatura
ótima ou que o ferro esteja quente, pode fazer com que saia água pelos
orifícios para o vapor.
•O aparelho não deve ser utilizado se tiver caído, se houver sinais de danos
visíveis ou se houver perdas de água. Todas as reparações, inclusive a
substituição do cabo de alimentação, devem ser executadas apenas pelo

- 13 -
Centro de Assistência autorizado ou por pessoa com qualificação similar, de
modo a prevenir qualquer risco.
•Não use o aparelho se o cabo de alimentação estiver danificado, com partes
queimadas, etc. A reparação e a substituição do cabo de alimentação devem
ser efetuadas por um centro de assistência autorizado, de contrário a garantia
perderá a sua validade.
•Não exponha o aparelho a agentes atmosféricos (chuva, sol, etc.).
Aviso relativo a queimaduras
•Nunca tente passar as roupas quando vestidas.
•Não toque as partes metálicas do ferro quando este estiver em funcionamento
e após alguns minutos depois de desligar pois isto pode causar queimaduras.
•Não oriente o jato de vapor para partes do corpo ou para animais domésticos.
Atenção - danos materiais
•Recomenda-se que guarde a embalagem original. A garantia não cobre a
reparação gratuita de quaisquer danos resultantes de embalagem inadequada
do produto no momento do envio do mesmo a um Centro de Assistência
autorizado.
•Antes de utilizar o aparelho pela primeira vez, retire as proteções do gerador
de vapor e do ferro de engomar.
•O uso de extensões elétricas não autorizadas pelo fabricante do aparelho pode
provocar danos e acidentes.
•Não utilize água com gás (com adição de dióxido de carbono).
•Não apoie o ferro de engomar quente no cabo de ligação ou no cabo de
alimentação e preste muita atenção com que estes não entrem em contacto
com a base quente do ferro.
•Nunca desligue a tomada do ponto de corrente puxando-a pelo cabo.
•Após ter desligado a tomada do cabo de alimentação elétrica do ponto de
corrente e após todas as partes terem esfriado, o aparelho poderá ser limpo
exclusivamente com um pano não abrasivo humedecido em água. Nunca use
solventes que danifiquem as partes de plástico.
•Para evitar danos e/ou a contaminação do depósito de água, não ponha no
depósito de água perfume, vinagre, goma, agentes descalcificadores, aditivos
ou qualquer outro tipo de produto químico.

- 14 -
•Não enrole o cabo de alimentação ao redor da base do ferro principalmente
quando o ferro estiver quente.
•Não ponha a base do ferro em contacto com superfícies metálicas.
•Antes de guardar o aparelho, posicione o termóstato em MIN.
•Desligue o aparelho pressionando o botão de ligar/desligar. Desligue sempre a
ficha do cabo de alimentação da tomada de corrente e aguarde que o ferro
esfrie.
•O aparelho está munido de um protetor térmico de segurança que bloqueia o
sobreaquecimento da base. Caso tal inconveniente se verifique, para
restabelecer o funcionamento do aparelho, procure um Centro de Assistência
Autorizado.
•Não se assumem quaisquer tipos de responsabilidade pelo uso incorreto ou
por empregos diferentes daqueles indicados neste manual.
Descrição
1. Trava de segurança para transporte
2. Seletor de vapor contínuo
3. Ativador de vapor
4. Protetor de cabo
5. Unidade base
6. Filtro anticalcário
7. Depósito de água amovível
8. Luz piloto de temperatura
9. Botão de ajuste de temperatura
10. Base de cerâmica
11. Base resistente ao calor
12. Caixa de armazenamento de cabos
13. Cabo de alimentação
14. Cabo de interligação base-ferro
Instruções de utilização
Utilização do aparelho pela primeira vez
−Antes de usar o aparelho pela primeira vez, certifique-se de que está desligado e a ficha retirada
da tomada elétrica.
−Limpe a superfície externa do aparelho com um pano macio e húmido e seque bem.
−Não mergulhe o aparelho em água ou qualquer outro líquido.
−Nota: ao usar o aparelho pela primeira vez, pode ser emitido um leve odor e uma pequena
quantidade de fumaça. Isso é normal e logo passará. Certifique-se de que existe ventilação
suficiente à volta do aparelho.
Encher o depósito de água
1. Certifique-se de que o aparelho está desligado e desconectado da rede elétrica.
2. Verifique se o termostato está na posição “MIN”.
3. Posicione o ferro na unidade base e remova o reservatório de água pela alça do reservatório
e, em seguida, puxe-o para fora.

- 15 -
4. Encha um recipiente de medição adequado com água e despeje cuidadosamente o conteúdo
no tanque de água.
5. Insira o tanque de água de volta na unidade base, até que ele se encaixe na posição.
NOTA! O aparelho funciona com água da torneira. Se a dureza da água for alta, recomenda-se usar
água destilada em uma solução de 50% com água da torneira. Como alternativa, recomenda-se o
uso de água engarrafada. Não use água deionizada.
Atenção: Não encha o depósito de água com água quente.
Aviso: Nunca adicione produtos descalcificantes, aromáticos, alcoólicos ou detergentes no aparelho,
pois podem danificar o aparelho ou torná-lo inseguro para uso.
Observação: ao adicionar água no tanque de água, sugere-se adicionar água até cobrir o filtro
anticalcário, aguarde cerca de 5 minutos, dá ao filtro anticalcário tempo suficiente para transferir a
água dura para a água macia para evitar calcificação.
Seleção de temperatura
Verifique antes de mais, que a peça a ser passada apresenta uma etiqueta com as indicações
referentes ao modo de passar e compare o símbolo indicado na etiqueta com a tabela abaixo. Se
faltar a etiqueta com as instruções de como passar a peça, mas o tipo de tecido é conhecido, siga as
indicações constantes da tabela.
Note que a tabela faz referência a tecidos que não tenham sido tratados com goma ou substâncias
semelhantes. Caso tenham sido, devem ser passados a ferro a uma temperatura inferior.
Instruções para
passar a ferro na
etiqueta
Tipo de tecido
Termóstato
Tecido Sintético, Acetatos, Acrílico,
Viscosa, Poliamida (Nylon),
Viscosa (Rayon), Seda
BAIXO
Lã
MÉDIO
Algodão e Linho
ALTO
A marca na etiqueta significa “não passar”
Utilização do aparelho –Engomar a vapor
Antes de utilizar, certifique-se de que o aparelho está desligado, não está ligado à corrente e que o
botão de regulação da temperatura (9) está na posição "MIN".
1. Retire o depósito de água (7) e encha-o com água. Certifique-se de que a água está acima da
indicação MIN no depósito de água.
2. Insira o depósito de água (7) até encaixar na sua posição original.
3. Ligue o cabo de alimentação (13) do aparelho à tomada de parede.
4. Gire o botão de ajuste de temperatura (9) para a temperatura desejada.

- 16 -
5. Quando o aparelho estiver pronto para uso, pressione o botão de vapor (3) e comece a passar.
A configuração de vapor pode ser desligada a qualquer momento soltando o botão de vapor
(3). Ao pressionar a configuração de vapor contínuo (2), o botão de vapor (3) não precisa ser
pressionado.
6. Se acabou a água no depósito de água e ainda não terminou de engomar, retire o cabo da
tomada e siga os passos 1 a 4 e continue a engomar.
7. Quando acabar de engomar, rode o botão de regulação da temperatura (9) para a posição
"MIN" e desligue o aparelho da tomada.
8. Deixe o aparelho arrefecer e guarde o cabo de alimentação (13) e o cabo de interligação (14)
na caixa de armazenamento de cabos (12) antes de arrumar o aparelho.
IMPORTANTE: Antes de engomar a vapor, deve certificar-se de que a peça pode ser engomada a
vapor de acordo com a marcação.
•Ajuste o botão de controle do termostato de acordo com o tipo de material a ser passado.
•Não pressione o botão de vapor e o botão deslizante de vapor contínuo enquanto o
reservatório de água estiver vazio.
Notas durante o engomar com vapor
•O botão de ajuste de temperatura (9) deve estar na posição “●●” ou “●●●” para produzir
vapor.
•Se o botão de vapor for acionado continuamente por mais de 30 segundos, podem sair gotas
de água dos orifícios de vapor na placa do ferro. Recomenda-se que o botão seja usado por
períodos mais curtos.
•Durante a emissão do vapor sente-se uma vibração vinda do interior do corpo, é a bomba que
bombeia a água do depósito para o ferro.
•Durante o engomar, se a luz indicadora se apagar de vez em quando, isso pode ser ignorado,
pois significa simplesmente que o ferro está a manter a temperatura de funcionamento
correta.
•Certifique-se de que o ferro está colocado na base resistente ao calor (11) quando não estiver
a ser utilizado.
•Certifique-se de que o botão de vapor contínuo (2) está desativado ao colocar o ferro na base
resistente ao calor.
•Certifique-se de não passar a ferro a mesma superfície de tecido por muito tempo, pois isso
pode danificar o tecido.
•O cabo de interligação (14) fica muito quente durante a utilização. Não toque para evitar
queimaduras.
Uso do Aparelho-Engomar a seco
O depósito de água (7) não necessita de água para engomar sem vapor. Se estiver cheio, pode-se
esvaziá-lo ou deixá-lo pronto para o próximo uso com vapor.
1. Ligue o cabo de alimentação (13) do aparelho à tomada de parede.
2. Gire o botão de ajuste de temperatura (9) para a temperatura desejada. A luz indicadora de
temperatura (8) acenderá.
3. Quando o aparelho estiver pronto para uso, o indicador de temperatura (8) se apagará.
4. Quando acabar de engomar, rode o botão de regulação da temperatura (9) para a posição
"MIN" e desligue o aparelho da tomada.

- 17 -
5. Deixe o aparelho esfriar e guarde o cabo de alimentação (13) e o cabo de interligação (14) na
caixa de armazenamento de cabos (12) antes de arrumar o aparelho.
Engomar a vapor numa posição vertical
O sistema de engomar a vapor vertical permite-lhe utilizar o ferro para engomar na vertical. Isso é
especialmente útil para remover rugas de roupas penduradas, cortinas, etc.
1. Siga os passos 1-5 na secção "Utilização do aparelho - Engomar a vapor".
2. Pendure a roupa em um cabide e puxe bem a roupa com uma mão.
3. Segure o ferro na posição vertical com a outra mão e pressione o botão de vapor (3) para
passar a roupa.
4. Toque levemente a peça de roupa com a base do ferro para remover os vincos.
5. Quando acabar de engomar, rode o botão de regulação da temperatura (9) para a posição
"MIN" e desligue o aparelho da tomada.
6. Deixe o aparelho esfriar e guarde o cabo de alimentação (13) e o cabo de interligação (14) na
caixa de armazenamento de cabos (12) antes de guardar o aparelho.
Dicas para obter melhores resultados
•Separe a roupa a ser passada com base no tipo de tecido: lã com lã, algodão com algodão, etc.
•Uma vez que o aquecimento da placa é mais rápido que o seu arrefecimento, aconselha-se
iniciar a passar todos os tecidos que requerem temperaturas mais baixas para então passar
aqueles tecidos que requerem, progressivamente, temperaturas mais elevadas.
•Se o tecido é composto de mais de um tipo de fibra, regule sempre a temperatura para a fibra
que requer menor calor. Por exemplo, se o tecido é composto e 70% de fibras sintéticas e 30%
de algodão, é necessário regular a temperatura na posição (•) (ver tabela) sem vapor, ou seja,
aquela para os tecidos sintéticos.
•Caso não se conheça a composição do tecido da peça a ser passada, procure um ponto do
tecido que não seja visível. Faça um teste passando este ponto e estabelecendo a temperatura
mais adequada (iniciar sempre de uma temperatura relativamente baixa e aumentá-la
gradativamente até alcançar aquela adequada).
•Os tecidos de pura lã (100%) também podem ser passados com o ferro regulado em uma das
posições vapor. Para os tecidos de pura lã, seda e sintéticos, ter o cuidado de passa-los no
avesso para evitar que o tecido passado fique brilhante.
•Para os demais tipos de tecido e, especialmente para o veludo, passa em uma única direção
de maneira a evitar que fiquem brilhantes (com um pano), fazendo uma pressão muito leve.
•O ferro de passar deve ser mantido em constante movimento sobre o tecido a ser passado.
•Aconselha-se que o botão de vapor seja usado para jatos curtos em vez de períodos de tempo
prolongados. Isso pode evitar que a água pingue dos orifícios de vapor e pode reduzir a
frequência de reabastecimento do tanque de água.

- 18 -
Cuidado e manutenção
ATENÇÃO: Antes de realizar qualquer trabalho de limpeza ou manutenção, certifique-se de que
retirou o cabo de alimentação da tomada elétrica e que o aparelho arrefeceu completamente.
•Drene a água restante do reservatório de água para evitar vazamentos durante a limpeza.
•Não utilize abrasivos ou produtos de limpeza abrasivos e fio para limpar a placa ou a caldeira.
•Mantenha a base lisa. Evite o contato com objetos duros de metal. Não arranhe ou danifique
a superfície da base.
•Não coloque o ferro sobre nenhuma superfície metálica. Coloque o ferro apenas na base
resistente ao calor.
•Para evitar arranhões e danos à placa, evite qualquer contato com objetos de metal duro.
•Limpe a parte superior do aparelho com um pano húmido. Não use abrasivos ou produtos de
limpeza agressivos, pois podem danificar a superfície do gerador de vapor.
•Nunca mergulhe o aparelho em água ou qualquer outro líquido. Nunca coloque o ferro ou a
base debaixo da torneira.
Armazenamento
•Deixe o aparelho esfriar completamente antes de guardá-lo.
•Remova a água do reservatório de água após cada uso ou antes do armazenamento.
•Coloque o cabo de alimentação (13) e o cabo de interligação (14) na caixa de armazenamento
de cabos (12) antes de guardar.
•Armazene em local sem umidade, fora do alcance das crianças.
Transporte
Para facilitar o transporte do aparelho, coloque o ferro na base resistente ao calor (11), bem como
coloque o cabo de alimentação e o cabo de interligação na caixa de armazenamento de cabos.
Levante a trava de segurança (1) para cima até que ela trave no lugar. Transfira o aparelho
segurando-o pela pega do ferro. Antes de usar, abaixe a trava de segurança para liberar o ferro.
Troque o filtro anticalcário
Substitua o filtro amaciador de água regularmente. Em uso moderado (duas vezes por semana) e
dependendo da dureza da água em sua região, o filtro anticalcário amaciador de água deve ser
substituído a cada 3-6 meses.
Nota: Não use a unidade sem o filtro amaciador de água!
1. Retire o depósito de água do aparelho.
2. Puxe o filtro anticalcário para cima e remova-o para trocá-lo. Para removê-lo, primeiro
desaparafuse-o e retire-o com cuidado. Desconecte a mangueira do filtro e conecte-a ao novo
filtro. Aparafuse o novo filtro de volta no tanque de água.
Nota: Tenha cuidado - pode haver água dentro do corpo do filtro.
3. Instale o novo filtro amaciador de água em seu lugar.
This manual suits for next models
3
Table of contents
Languages:
Other HAEGER Iron manuals

HAEGER
HAEGER Marbella User manual

HAEGER
HAEGER Dark River 2200 User manual

HAEGER
HAEGER New Tailor 1.2 User manual

HAEGER
HAEGER Vapour Pro 2700 User manual

HAEGER
HAEGER New Tailor 1.2 User manual

HAEGER
HAEGER Ocean Burst 2000 User manual

HAEGER
HAEGER Ultra-Steam 2800 User manual

HAEGER
HAEGER Pro Glider 2600 User manual