Vitek VT-8301 User manual

1
VT-8301
3
8
14
20
Iron
Утюг
26
IM VT-8301.indd 1 29.05.2019 17:23:39

IM VT-8301.indd 2 29.05.2019 17:23:39

3
E N G L I S H
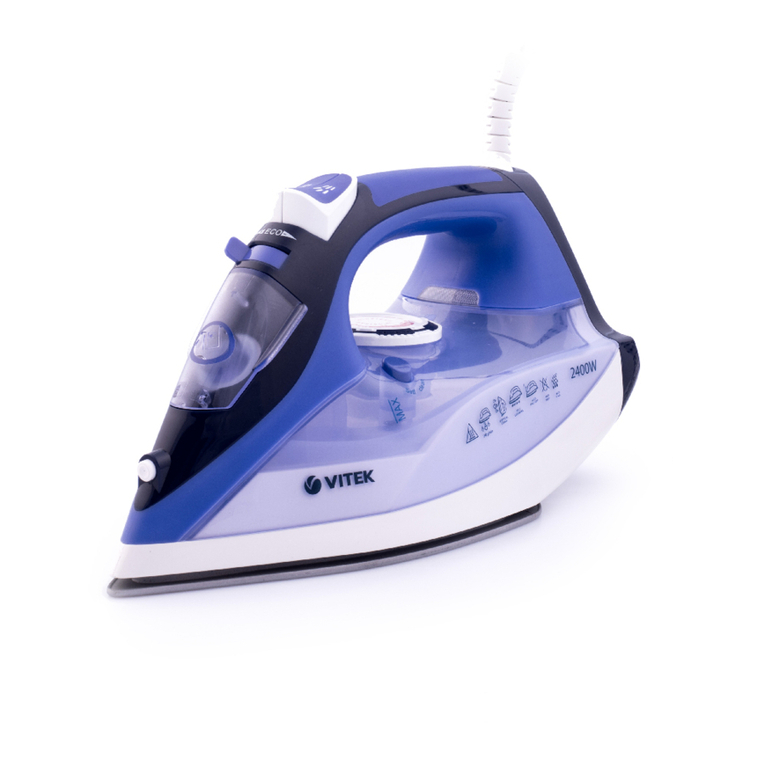
IRON VT-8301
The iron is intended for ironing clothes, bedding
and for vertical steaming of fabrics.
DESCRIPTION
1. Water spray
2. Water inlet lid
3. “Continuous steam supply/self-clean” switch
4. Burst of steam button
5. Water spray button
6. Handle
7. Heating element ON/OFF indicator
8. Power cord protection
9. Iron base
10. Water tank
11. Temperature control knob
12. Maximum water level mark
13. Iron soleplate
14. Beaker
ATTENTION!
For additional protection it is reasonable to
install a residual current device (RCD) with
nominal operation current not exceeding
30 mA, to install RCD, contact a specialist.
SAFETY MEASURES
Before using the electrical unit, read this instruc-
tion manual carefully and keep it for future ref-
erence.
Use the unit for its intended purpose only, as
specified in this manual. Mishandling of the unit
may lead to its breakage and cause harm to the
user or damage to his/her property.
•Before switching the unit on, make sure that
your home mains voltage corresponds to the
unit operating voltage.
•The power cord is equipped with a Euro-
plug; insert it into a socket that has a reliable
grounding connection.
•To avoid fire, do not use adapters for plug-
ging the unit in.
•To avoid mains overloading, provide that no
other electrical appliances with higher power
consumption are connected to the same outlet.
•Do not use the iron outdoors and in places
with high humidity.
•Place the iron on a flat stable surface or use
a stable ironing board.
ATTENTION! The surfaces of the iron get hot
during operation. Keep open skin areas away
from iron hot surfaces or outgoing steam
to avoid burns.
•Do not fill the water tank with scented liquids,
vinegar, starch solution, descaling reagents,
chemicals etc.
•Do not switch the unit on in places where
aerosols are sprayed or highly flammable liq-
uids are used.
•To avoid damaging the soleplate be very care-
ful when ironing clothes with metal zippers or
buttons.
•Make sure that the power cord is not on the
ironing board and it doesn’t touch hot sur-
faces and sharp edges.
•Never leave the unit connected to the mains
unattended. During breaks in operation and
when the iron is cooling down, put the iron on
the base (in a vertical position).
•Before plugging/unplugging the iron, set the
temperature control knob to the minimum
position and switch the continuous steam
supply off.
•Always unplug the iron if you are not using it.
•Always take the power plug out of the mains
socket before filling the water tank with water.
•The water inlet lid should be closed during
ironing.
•To unplug the iron, always hold the power
plug, never pull the power cord.
•To avoid electric shock, do not immerse the
iron, the power cord and the plug into water
or any other liquids.
•Before taking the iron away, let it cool down
completely and pour out the remaining water.
•Pour out water from the water tank only after
unplugging the iron.
•Clean the unit regularly.
•Do not touch the unit body and the power plug
with wet hands.
•Do not allow children to touch the iron body
and the power cord during operation.
•Do not leave children unattended to prevent
using the unit as a toy.
•For children safety reasons do not leave poly-
ethylene bags, used as packaging, unat-
tended.
Attention! Do not allow children to play with
polyethylene bags or packaging film. Danger of
suffocation!
•This unit is not intended for usage by children.
Place the unit out of reach of children during
operation and cooling down.
•The unit is not intended for usage by physi-
cally or mentally disabled persons (including
children) or by persons lacking experience or
IM VT-8301.indd 3 29.05.2019 17:23:39

4
ENGLISH
knowledge if they are not under supervision of
a person who is responsible for their safety or
if they are not instructed by this person on the
usage of the unit.
•Do not use the unit if the power plug or the
power cord is damaged. If the power cord is
damaged, it should be replaced by the manu-
facturer, maintenance service or similar quali-
fied personnel to avoid danger.
•Do not attempt to repair the unit. Do not disas-
semble the unit by yourself, if any malfunction is
detected or after it was dropped, unplug the unit
and apply to any authorized service center from
the contact address list given in the warranty
certificate and on the website www.vitek.ru.
•Transport the unit in the original package only.
•Keep the unit out of reach of children and dis-
abled persons.
THE UNIT IS INTENDED FOR HOUSEHOLD USE
ONLY, ITS COMMERCIAL USAGE AND USAGE
IN PRODUCTION AREAS AND WORK SPACES IS
PROHIBITED.
BEFORE THE FIRST USE
After unit transportation or storage at low
temperature keep it for at least three hours
at room temperature before switching on.
•Unpack the iron; remove the protection from
the soleplate (13), if any.
•Check the unit for damages, do not use the
iron in case of damages.
•Before switching the iron on, make sure that
your home mains voltage corresponds to the
iron operating voltage.
•The unit is intended for operation from an AC
power network with the frequency of 50 or
60 Hz. The unit does not need any additional
settings for operating with the required rated
frequency.
•There may be water residue in the tank (10),
this is normal, as the iron has undergone fac-
tory quality control.
Note:
– While the first switching on the heating ele-
ment of the iron burns, therefore occurrence
of foreign smell and a small amount of smoke
is possible, it is normal.
Control knobs, indications and symbols
•The continuous steam supply knob (3) has
3 fixed positions:
– – steam supply is off;
– – steam supply is on;
– – «double steam»
and one unfixed position:
– – self-clean.
•Burst of steam button (4) – press the button to
activate the additional steam supply function.
•Water spray button (5) – press the button to
activate the water spray function for dampen-
ing the fabrics.
•Heating element ON/OFF indicator (7) – when
the indicator lights up, the iron soleplate is
heating up.
•Temperature control knob (11) – allows to set
the iron soleplate temperature depending on
the type of fabric (see the table below). The
knob is in the position «MIN» – the iron is off.
•«MAX» maximum water level mark (12).
WATER SELECTION
You can use tap water to fill the water tank (10).
If tap water is hard, use distilled or demineralized
water, this will prolong service life of the iron.
Note:
– Do not fill the water tank (10) with scented
liquids, vinegar, starch solution, descaling
reagents, chemical agents etc.
FILLING THE WATER TANK
Before filling the iron with water, make sure that
it is unplugged.
•Set the temperature control knob (11) to the
position «MIN», and the continuous steam
supply knob (3) to the position – continu-
ous steam supply is off.
•Open the water inlet lid (2).
•Open the water inlet lid (2) and pour water into
the water tank (10) using the beaker (14) and
then close the lid (2) tight.
Notes:
– Do not exceed the «MAX» mark (12).
– If you need to refill water during ironing,
always switch the iron off at first and unplug it.
– After you finish ironing, switch the iron off,
wait until it cools down completely, then open
the water inlet lid (2), turn over the iron and
drain the remaining water.
IRONING TEMPERATURE
Before operation, test the heated iron on a piece
of cloth to be sure that the iron soleplate (13) and
the water tank (10) are clean.
IM VT-8301.indd 4 29.05.2019 17:23:39

5
E N G L I S H
•Always check the recommended ironing tem-
perature indicated on the tag before ironing.
•If the item label is marked with the symbol
, do not iron the item.
•If there is no tag with recommended ironing
temperature, but you know the type of fab-
ric, use the following table to determine the
proper temperature.
Ironing temperature table
Icons Fabric type (temperature)
do not iron
•Synthetics, nylon, acryl, polyester
(low temperature)
•• Silk/wool (medium temperature)
••• Cotton (high temperature)
МАХ Linen (high temperature)
•This table is only valid for smooth materials.
Fabrics of other types (crimped, raised, etc.)
are best ironed at low temperature.
•Sort items by ironing temperature first: syn-
thetics to synthetics, wool to wool, cotton to
cotton etc.
•The iron heats up faster than it cools down.
For this reason, it is recommended to iron the
items which require low temperature first (for
instance, synthetic fabrics). After that, start
ironing at higher temperature (silk/wool).
Cotton and linen items should be ironed last.
•If an item is made of mixed fabrics, the iron
should be set to the lowest temperature (for
instance, if an item is 60% polyester and 40%
cotton, it should be ironed at temperature
used for polyester ironing «•»).
•If you cannot define the fabric structure, find
a spot that is inconspicuous when the item is
being worn and select the ironing temperature
experimentally (always start with the lowest
temperature and raise it gradually until you get
the desired result).
•Corduroy and other fabrics that become glossy
quickly should be ironed strictly in one direc-
tion (in the direction of the pile) with slight
pressure.
•To avoid appearance of glossy spots on syn-
thetic and silk fabrics, iron them backside.
SETTING THE IRONING TEMPERATURE
•Place the iron on its base (9).
•Insert the power plug into the mains socket.
•Turn the control knob (11) to set the required
ironing temperature: «•», «••», «•••» or
«MAX», depending on the type of fabric, the
indicator (7) will light up.
•Once the temperature of the soleplate (13)
reaches the set point, the indicator (7) will go
out and you can start ironing.
Note:
– If you are ironing at high temperature but you
need to switch to lower temperature, wait until
the soleplate temperature decreases and the
indicator (7) lights up, and only then you may
start ironing.
WATER SPRAY
•You can dampen the fabric by pressing the
water spray button (5) several times.
•Make sure that there is enough water in the
water tank (10).
DRY IRONING
•Place the iron on its base (9).
•Insert the power plug into the mains
socket.
•Set the continuous steam supply knob (3) to
the position – the steam supply is off.
•Turn the control knob (11) to set the required
ironing temperature: «•», «••», «•••» or
«MAX», depending on the type of fabric, the
indicator (7) will light up.
•Once the temperature of the soleplate (13)
reaches the set point, the indicator (7) will go
out and you can start ironing.
•After you finish ironing, set the temperature
control knob (11) to the “MIN” position.
•Pull the power plug out of the mains socket
and let the iron cool down completely.
STEAM IRONING
While steam ironing it is necessary to set the iron-
ing temperature «•••», «МАХ».
•Place the iron on its base (9).
•Set the continuous steam supply knob (3) to
the position – the steam supply is off.
•Insert the power plug into the mains socket.
•Make sure that there is enough water in the
water tank (10).
•Turn the control knob (11) to set the required
ironing temperature: «•••» or «MAX», the
pilot lamp (7) will light up.
•When the soleplate (13) reaches the set tem-
perature, the indicator (7) will go out, you can
start ironing.
IM VT-8301.indd 5 29.05.2019 17:23:40
Table of contents
Languages:
Other Vitek Iron manuals

Vitek
Vitek VT-8360 User manual

Vitek
Vitek VT-1252 User manual

Vitek
Vitek Magic VT-1232 User manual

Vitek
Vitek VT-1227 User manual

Vitek
Vitek VT-1246 VT User manual

Vitek
Vitek VT-8316 User manual

Vitek
Vitek VT-8324 User manual

Vitek
Vitek VT-8303 VT User manual

Vitek
Vitek VT-1247 VT User manual

Vitek
Vitek VT-8321 User manual

Vitek
Vitek Magic VT-1232 User manual

Vitek
Vitek VT-1201 User manual

Vitek
Vitek VT-8331 User manual

Vitek
Vitek VT-1257 VT User manual

Vitek
Vitek VT-1284 G User manual

Vitek
Vitek VT-8355 User manual

Vitek
Vitek VT-1202 PP User manual

Vitek
Vitek VT-2431 User manual

Vitek
Vitek VT-8335 User manual

Vitek
Vitek VT-1239 B User manual