Haier LE32A300 User manual

Contents
EN-1 TV LED-TFT Owner’s Manual
Please READ this manual carefully before
operating your TV, and retain it for future
reference.
OWNER’S MANUAL
LED-LCD TELEVISION
LE26A300
LE32A300
LE42A300

Contenidos
EN-2 TV LED-TFT Owner’s Manual
Contenidos
Fije la contraseña................................................................ 16
Bloqueo de Programas..................................................... 16
Guía Parental........................................................................ 16
Eliminación del bloqueo.................................................. 16
Conguración del Computador........................17
Menú rápido.......................................................17
Modo USB...........................................................17
Para utilizar el dispositivo USB ..................................... 17
Cuando conecte/remueva el dispositivo USB.......... 18
Operando el dispositivo USB ......................................... 18
Mostrando una imagen ................................................... 18
Tocando música ................................................................. 19
Mostrando una película................................................... 19
Mantención 20
Especicaciones 20
Formato 21
Resolución de Problemas 21
Advertencia 3
Instrucciones de Seguridad
Importantes 3
Introducción 4
Controls ................................................................4
Opciones de Conexión ........................................5
Control Remoto....................................................6
Instalación 7
Conexiones Externas del equipo........................7
Accesorios................................................................................7
Conexión de la antena.........................................................7
Elija su conexión....................................................................8
Conectando un equipo de video.....................................8
Instalación de la fuente externa AV................................8
Conexión con el jugador de DVD....................................8
Conectando a DTV (televisión digital)...........................9
Conectando a salida de audio digital ............................9
Conectando a un computador...................................... 10
Entrada HDMI y DVI........................................................... 11
Operación 11
Encendiendo/Apagando el Televisor.......................... 11
Seleccione el Menú de Idiomas .................................... 11
Seleccione la fuente de entrada ................................... 12
Menú de Imagen................................................12
Cómo seleccionar el modo de imagen....................... 12
Cómo personalizar su propio estado de imagen.... 12
Menú de sonido .................................................13
Cómo seleccionar el modo de sonido........................ 13
Como personalizar su propio estado de sonido..... 13
Menú de canales ................................................14
Sintonización automática ............................................... 14
Sintonización Manual DTV.............................................. 14
Saltos de Canal.................................................................... 15
Sintonización de canales análogos.............................. 15
Guía de programas............................................................ 15
Menú de funciones ............................................15
Menú de bloqueo ..............................................16

Warning/Safety
TV LED-TFT Owner’s Manual EN-3
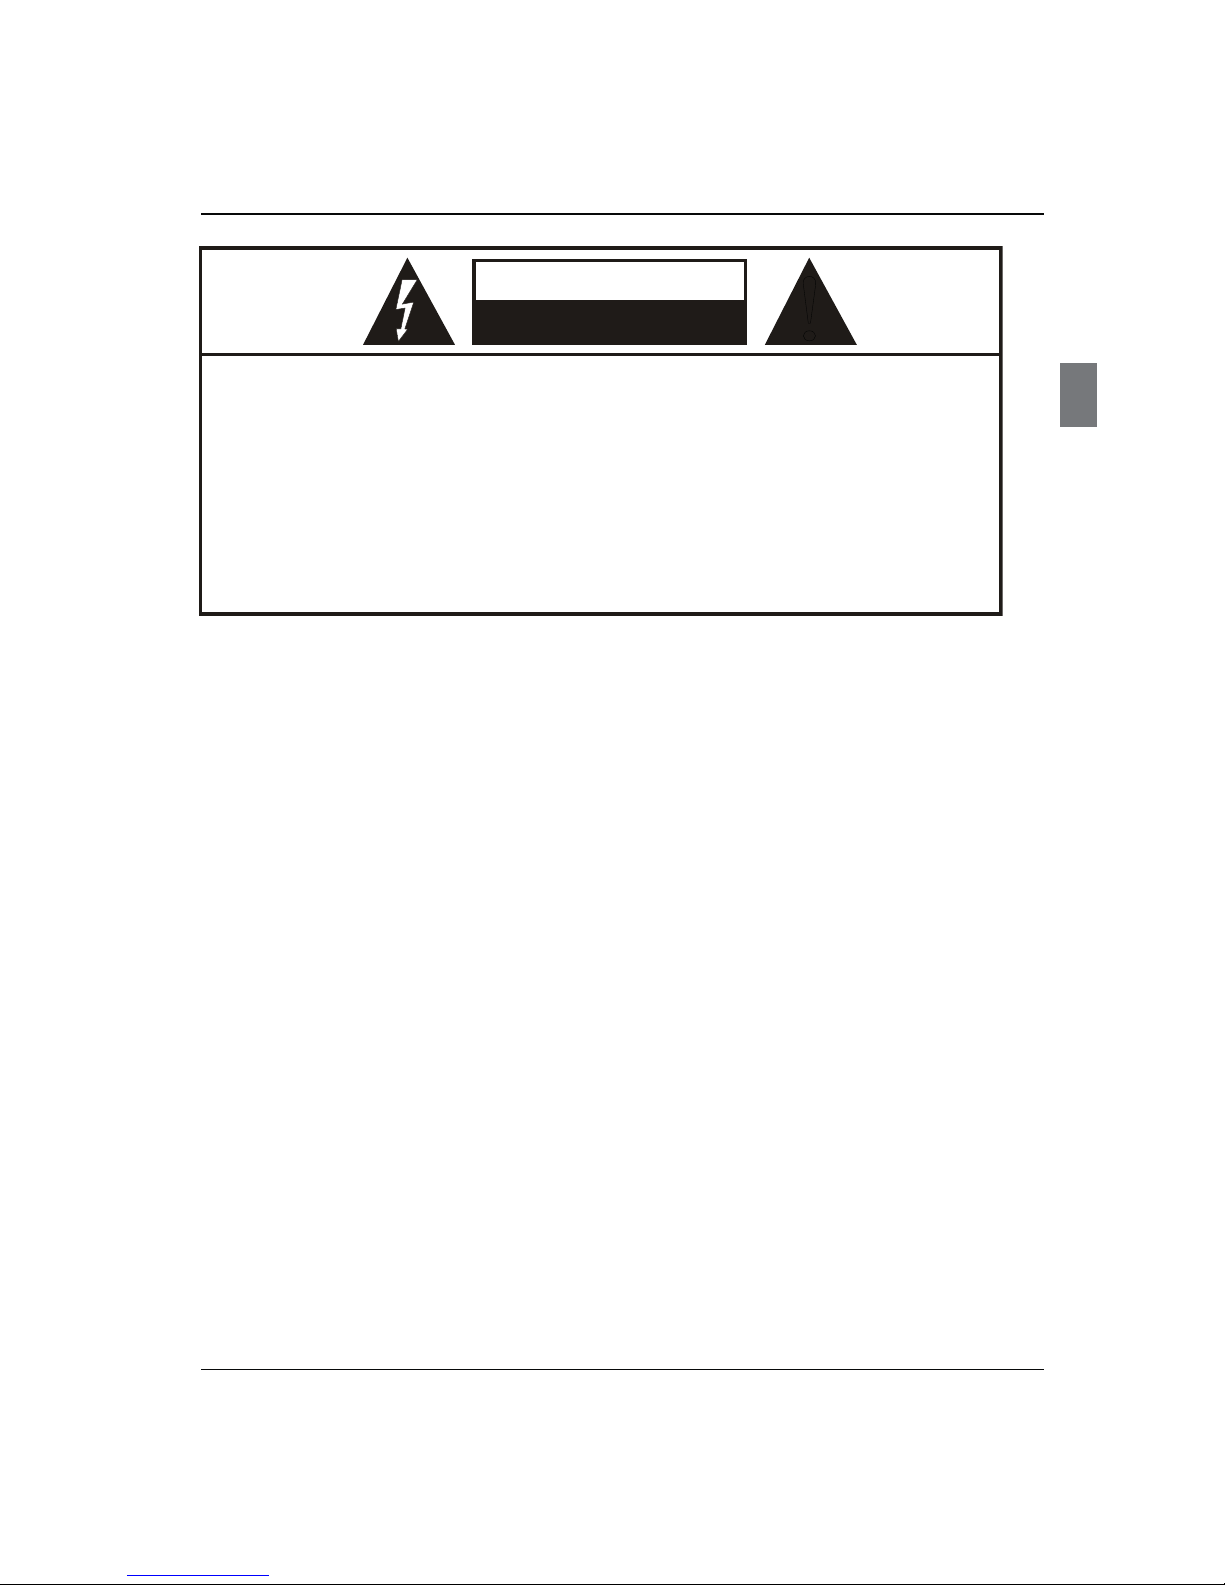
WARNING
!
WARNING:
TO REDUCE THE RISK OF ELECTRIC SHOCK DO NOT REMOVE COVER (OR BACK). NO USER SERVICEABLE PARTS
INSIDE. REFER TO QUALIFIED SERVICE PERSONNEL.
*
To avoid electric hazards, it is strongly suggested that the back cover not be opened, as there is no any
accessory inside the casing.
*
lf necessary, please contact authorized after-sales services.
*
A lighting ash mark in a triangle: A potentially hazardous situation, which, if not avoided, could result in
serious injury by high voltage.
*
An exclamation mark in a triangle: Major part or accessory of which technical specications must be followed if
it is to be replaced.
RISK ELECTRIC SHOCK
DO NOT OPEN
WARNING: To avoid fire or electric hazards, never place your television receiver in an area with heavy moisture.
Attention should be paid to avoid accidental scratches or impacts onto the screen.
CAUTION:
Please read this manual carefully before using your television and keep this manual in a good place for future•
reference.
To achieve the best performance of your television, read this User’s Manual carefully and properly store it for future•
reference.
Information of screen displays and figures in the User’s Manual may vary due to technical innovations.•
Unauthorized disassembly of this product is prohibited.•
Important Safety Instructions
1.The product should be tightly xed to avoid drop damages and even re.
2.To avoid re hazards, do not use this product under direct sunlight or closely to heat sources.
3.Do not locate the product close to water or oil, which may cause re hazards.
4.Unplug the power supply and antenna of the product when there is a rainstorm, especially thunderstorm.
5.Do not use damaged or worn electric plugs, and keep electric cord away from heat sources to avoid electric shocks or
re hazards.
6.Do not connect excessive sockets in parallel or share the same socket by multiple plugs to avoid re hazards.
7.The product must be placed on a solid and stable surface to avoid collapse.
8.Unanthorized disassembly of the television is prohibited to avoid electric shocks or re hazards, contact authorized
aftersales serivce if technical serivce is needed.
9.Keep the product away from a transformer or heat source to avoid re hazards.
10.Disconnect the product from power supply and contact authorized after-sales service if abnormal sound is heard in
the product.
11.Do not use or store inammable materials near the product to avoid explosion or re hazards.
12.Do not place the product in a humid area to avoid re hazards.
13.The antenna of the product should be away from electric cable to avoid electric shocks.
14.Never touch the plug when your hand is wet as this might cause electric shocks.
15.Always make sure that the television is well plugged as poor electric connection might cause re.
16.When antenna is used, measures should be taken to prevent water from owing down along the cable into the
television.
17.Unplug the television, use soft fabric, never chemicals, if you are going to make cleaning of the product, Make sure
that no water drops in the product.
18.The plug and electric cable must be kept clean to avoid electric shocks or re hazards.
19.Disconnect the television from power supply and antenna when there is a rainstorm or thunderstorm to avoid
electric shocks or re hazards.
20.Disconnect the television from power supply to avoid electric shocks or re hazards in a long vocation.

Introduction
EN-4 TV LED-TFT Owner’s Manual
Introduction
Controls
This is a simplied representation of the TV front panel, side panel control buttons and side inputs.
TV Side panel controls
MENU
CH
VOL
INPUT
1INPUT Press this key to open/close signal source
options menu.
2MENU Menu display. Press to access the on-screen
menu display.
3VOL +/-
Press to adjust the volume. In the MENU screen,
these buttons serve as right/left buttons.
4CH +/-
Press to scan through channels.To scan quickly
through channels, press and hold down either
+/- . In the MENU screen, these buttons serve
as up/down buttons.
5POWER Press to turn on and o theTV.

Introduction
TV LED-TFT Owner’s Manual EN-5
1Component
IN
Connect a componentVideo/Audio device to
these jacks.
2PC IN Connect a video cable from a computer to this
jack.
3HDMI IN Connect a HDMI device to receive digital audio
and uncompressed digital video.
4AV IN Connect Video/Audio out from an Video/Audio
device to these jacks.
5ANT IN(AIR) Connect cable or antenna signal to theTV, either
directly or through your cable box.
6ANT
IN(CABLE)
Connect cable or antenna signal to theTV, either
directly or through your cable box.
7AV OUT Video/Audio output terminal.
8Headphone
jack
Headphone audio output terminal.
9DIGIAL AUDIO
OUT(OPTICAL) Connect various types of digital audio equipment.
0USB jack
Connect USB storage device to this jack.
Connection Options
TV Terminals

Introduction
EN-6 TV LED-TFT Owner’s Manual
Remote control
The remote control cannot be operated unless the batteries are properly loaded.
When using the remote control, aim it at the remote sensor on the TV.
1Power Press to turn on and o the TV.
2INPUT Show the input source.
3MTS/SAP Select MONO, STEREO, SAP.
4CCD (closed caption) Select a closed caption option.
5P.SIZE
Select the aspect ratio.
6H.LOCK Hotel Lock button.
7tCVUUPO Press to select digital channels. For example, to enter “54-3”,
QSFTTiwitwBOEiw
8MUTE Switches the sound on or o.
9VOLUME UP/DOWN Press to adjust the volume.
0MENU Press to open the on-screen menu.
A5IVNCTUJDL6Q%PXO
Left/Right)
Allows you to navigate the on-screen menus and adjust the
system settings to your preference.
BSOUND Press to cycle through dierent sound settings.
C$PMPSCVUUPO
Press to operate the Functions in GUIDE/Program Edit/Block
Program/USB.
D
G
I
X
5IVOCTUJDL64# Allows you to navigate the on-screen menus in USB function,and
17 for Previous, 34 for Next;
EREV Fast Reverse (Only for USB).
FENTER Conrm button (Only for USB).
H1MBZ1BVTFCVUUPO (Only for USB).
JUSB Press this key for quick switching of streaming media.
KDNR Digital Noise Reduction.
L4-&&1CVUUPO Press to display the sleep timer option.
MCH.LIST Open the channel list in TV.
NFAVORITE Open the favourite channel list in TV.
O/VNCFSCVUUPOT Press to change a channel.
PINFO Show Informations about the programs.
QQ.VIEW Press to jump back and forth between two channels.
RCHANNEL UP/DOWN Channel selection(up/down).
SQ.MENU Adjust some functions in common use.
TOK
Accesses the highlighted item in the on-screen menu.
UPICTURE Press repeatedly to cycle through the available picture modes.
VFWD
Fast forward(Only for USB).
WGUIDE
Display the guide when you are watching digital channels.
YEXIT Clears all on-screen displays .
ZREPEAT Replay a music or movie.
[ZOOM
Press to magnify/minify an image.

Installation
TV LED-TFT Owner’s Manual EN-7
Installation
External Equipment Connections
Accessories
Remote control Owner’s manual Alkaline battery (AAA) x2
Antenna Connection
Over-the-air TV reception quality will depend on your antenna type, antenna location and antenna positioning.
ANT IN
VHF Antenna
UHF Antenna
Turn clockwise to tighten
Bronze Wire
Be careful not to bend the bronze wire
when connecting the antenna.
Bronze Wire
Multi-family Dwellings/Apartments
(Connect to wall antenna socket)
Wall Antenna
Socket
RF Coaxial Wire (75 ohm)
Single-family Dwellings /Houses
(Connect to wall jack for outdoor antenna)
Outdoor Antenna
To improve the picture quality in a poor signal
area, please purchase a signal amplifier and install
properly.
If the antenna needs to be split for two TV’s, install a
“2-Way Signal Splitter”in the connections.
To install the antenna properly please contact a
professional in your area.
Note
All cables shown are not included with the TV.❏
PLAY/PAUSE
REV
REPEAT
GUIDE
MTS/SAP
CCD ARC
FREEZE
ETER
STPUS REC
PREV ET
CLIST
FAVRITE
TV
ST
IPUT
MUTE
VL C
MEU
SLEE DP ISPLAY
EIT
RECALL
PICTURE AUDI PC DMI
CALE VCR AUD
DVD
ANT IN

Installation
EN-8 TV LED-TFT Owner’s Manual
Choose Your Connection
There are several ways to connect your television,
depending on the components you want to connect
and the quality of the signal you want to achieve. The
following are examples of some dierent ways to
connect your TV with dierent input sources.
Connecting a VCR
To avoid picture noise (interference), leave an adequate
distance between the VCR and TV.
Connection Option 1
Set VCR output switch to channel 3 or 4 and then tune
the TV to the same channel number.
Connection Option 2
Connect the audio and video cables from the VCR’sA
output jacks to the TV input jacks, as shown in the
figure. When connecting the TV to VCR, match the
jack colors (Video = yellow, Audio Left = white, and
Audio Right = red). If you connect a S-VIDEO output
from VCR to the S-VIDEO input, the picture quality is
improved, compared to connecting a regular VCR to
the VIDEO input.
Insert a video tape into the VCR and press
BPLAY on
the VCR. (Refer to the VCR owner’s manual.)
Select the input source using the
CINPUT button on
the remote control, and then press
/
button to
select the source, press OK button to confirm.
External AV Source Setup
How to connect
Connect the audio and video cables from the•
external equipment’s output jacks to the TV input
jacks, as shown in the figure.
When connecting the TV to external equipment,•
match the jack colors (Video = yellow, Audio Left =
white, and Audio Right = red).
How to use
Select the input source using theAINPUT button on
the remote control.
Press
B
/
button to select the desired source.
Press
COK button to confirm.
Operate the corresponding external equipment.
D
Connecting a DVD player
How to connect
Connect the DVD video outputs (COMPONENT) toA
the Y Pb Pr jacks on the TV and connect the DVD
audio outputs to the YPbPr Audio IN jacks on the TV,

Installation
TV LED-TFT Owner’s Manual EN-9
as shown in the figure.
How to use
Turn on the DVD player, insert a DVD disc.A
UseBINPUT button on the remote control to select
component mode.
Press
CPLAY button on external equipment for
program play.
Refer to the DVD player’s manual for operating
D
instructions.
Component Input ports■
To get better picture quality, connect a DVD player to
the component input ports as shown below.
Component ports on the TV Y Pb Pr
Video output ports on DVD
player
Y
Y
Y
Y
Pb
B-Y
Cb
PB
Pr
R-Y
Cr
PR
Connecting a DTV (digital TV)
This TV can receive Digital Over-the-air/Cable signals
without an external digital set-top box. However, if you do
receive Digital signals from a digital set-top box or other
digital external device, refer to the figure as shown below.
This TV supports HDCP (High-bandwidth Digital
Contents Protection) protocol for Digital Contents
(480p,720p,1080i).
How to connect
Use the TV’s COMPONENT, HDMI jack for video•
connections, depending on your set-top box
connector. Then, make the corresponding audio
connections.
How to use
Turn on the digital set-top box. (Refer to the owner’sA
manual for the digital set-top box.)
Use INPUT on the remote control to select
B
COMPONENT, HDMI source.
Signal COMPONENT HDMI
480i Yes Yes
480p Yes Yes
720p Yes Yes
1080i Yes Yes
1080p Yes Yes
Connecting a digital audio output
Send the TV’s audio to external audio equipment (stereo
system) via the Digital Audio Output (Optical) port.
How to connect
Connect one end of an optical cable to the TV DigitalA
Audio (Optical) Output port.
Connect the other end of the optical cable to the
B
digital audio (optical) input on the audio equipment.
See the external audio equipment instruction
manual for operation.

Installation
EN-10 TV LED-TFT Owner’s Manual
Note
When connecting with external audio equipments,❏
such as amplifers or speakers, please turn the TV
speakers o.
!
Caution:
Do not look into the optical output port. Looking•
at the laser beam may damage your vision.
Connecting a computer
How to connect
To get the best picture quality, adjust the PC graphicsA
card to 1280s1024.
Use the TV’s VGA or DVI (Digital Visual Interface)B
and AUDIO IN port for computer connections,
depending on your computer connector.
If the graphic card on the computer does not•
output analog and digital RGB simultaneously,
connect only one of either PC IN or HDMI IN to
display the VGA on the TV.
If the graphic card on the computer does output•
analog and digital RGB simultaneously, set the TV
to either VGA or HDMI.
Then, make the corresponding audio connection. If
C
using a sound card, adjust the PC sound as required.
How to use
Turn on the computer and the TV.A
Use INPUT on the remote control to select PC orB
HDMI source.
Check the image on your TV. There may be noise
C
associated with the resolution, vertical pattern,
contrast or brightness in PC mode. If noise is present,
change the PC to another resolution, change the
refresh rate to another rate or adjust the brightness
and contrast on the menu until the picture is clear.
If the refresh rate of the PC graphic card can not be
changed, change the PC graphic card or consult the
manufacturer of the PC graphic card.
Note
Avoid keeping a fixed image on the TV’s screen❏
for a long period of time. The fixed image may
become permanently imprinted on the screen.
The synchronization input form for Horizontal and❏
Vertical frequencies is separate.

Installation/Operation
TV LED-TFT Owner’s Manual EN-11
HDMI and DVI input
When the source device (DVD player or Set Top Box)
supports HDMI
How To Connect
Connect the source device to HDMI port of this TVA
with an HDMI cable (not supplied with this product).
No separated audio connection is necessary.
B
How To Use
If the source device supports Auto HDMI function,•
the output resolution of the source device will be
automatically set to 1280s720p.
If the source device does not support Auto HDMI,•
you need to set the output resolution appropriately.
To get the best picture quality, adjust the output
resolution of the source device to 1280s720p.
Select HDMI input source in input source option of•
Selecting Main source menu.
When the source device (DVD player or Set Top Box)
supports DVI
How To Connect
Connect the source device to HDMI port of this TVA
with a DVI-to-HDMI cable (not supplied with this
product).
A separated audio connection is necessary.
B
If the source device has an analog audio outputC
connector, connect the source device audio output to
DVI AUDIO In port located on the side of PC port.
How To Use
If the source device supports Auto DVI function,•
the output resolution of the source device will be
automatically set to 1280s720p.
If the source device does not support Auto DVI, you•
need to set the output resolution appropriately.
To get the best picture quality, adjust the output
resolution of the source device to 1280s720p.
Press the•INPUT button to select HDMI input source
in input source option of Selecting Main source
menu.
Operation
In the manual, the OSD (on screen display) may be
dierent from your TV’s, because it is just an example to
help you with the TV operation.
There are several options you might need to set up in
order for your TV to work properly. Read the instructions
that follow.
Switching On/O the TV set
First, connect power cord correctly.A
Select the viewing source by usingBINPUT button on
the remote control.
When finished using the TV, press
CPOWER button on
the remote control. The TV reverts to standby mode.
If you intend to be away on vacation, disconnect the
D
power plug from the wall power outlet.
Note
If the TV in power on , the screen show information❏
according the type of input signal. If there is no
signal, “No Signal”will display on the screen.
Choose the Menu Language
When you start using your set for the first time, you must
select the language which will be used for displaying
menus and indications.
Choose
ATV Input and then press MENU button.
Press
B
/
button to select Function menu.
PressC
/OK button and then use
/
button to
select OSD Language.
PressD
/
button to select language.
(English etc.)

Operation
EN-12 TV LED-TFT Owner’s Manual
Choose the Input source
Change the picture source so you can watch your TV, Be
sure any other devices are connected to your TV.
PressAINPUT button to enter the Input Source menu
and then use
/
button to select the desired
items (Air, Cable, AV, Component, PC, HDMI1, HDMI2,
HDMI3,HDMI4, USB).
PressBOK button to confirm .
Picture Menu
The TV menu gives you an overview of the menus you
can select.
Note
Depending on the input signal, one or more menu❏
items may not be selectable.
How to select picture mode
The picture mode provides the pre-defined images
settings:
Standard, Mild, Dynamic and User
.
Press
AMENU button and then use
/
button to
select Picture menu.
Press
B
/
OK
button and then use
/
button to
select Picture Mode.
Press
C
/
button to select the option
Standard,
Mild, Dynamic and User
.
You can also press PICTURE button on the remote control
to select the option Standard, Mild, Dynamic and User.
How to customize your own picture status
PressAMENU button and then use
/
button to
select Picture menu.
Press
B
/OK
button and then use
/
button to
select the desired items.
Press
C
/
button to adjust the setting.
Picture Mode❖
Select the mode of picture:
Standard, Mild, Dynamic
and User
.
Contrast❖
This will adjust the intensity of bright parts in the
picture but keep the dark parts unchanged.
Brightness❖
This will adjust the light output of the complete
picture, which will mainly aect the darker areas of
the picture.
Color❖
This will adjust the saturation level of the colors to suit
your personal preference.
Tint❖
Allows you to select the color mix (Tine) of the picture.
Sharpness❖
This will adjust the sharpness of fine details in the
picture.
Note
The picture options can only be adjusted in the❏
User mode. The other picture modes are preset.
DNR❖
Automatically lters out and reduces the image

Operation
TV LED-TFT Owner’s Manual EN-13
select Sound menu.
Press
B
/OK
button and then use
/
button to
select desired items.
Press
C
/
button to adjust the setting.
Sound Mode:❖To adjust the audio mode:
Standard, Music, Theater and User.
Equalizer:❖To adjust the equalizer.
Use
/
button to select desired items,
Press
/
button to adjust the setting.
Balance:❖Adjust to emphasize left or right speaker
balance.
AVL:❖To adjust the audio volume
On or O.
SPDIF Mode:❖
To adjust the SPDIF output: On or O.
Surround:❖The surround sound feature expands
the audio listening eld wider and deeper to create
exceptional sound quality from the TV's speakers
.
MTS/SAP :This TV can receive MTS stereo programs
and SAP (Secondary Audio Program) that accompanies
the stereo program, if the station transmits an additional
sound signal as well as the original one.
When having selected MTS/SAP button on the remote
control, this TV can only receive the signal when the TV
station transmits the proper signals.
Mono sound is automatically received if the broadcast is only
in Mono, even though Stereo or SAP has been selected.
Select Mono if you want to listen to mono sound during
stereo/ SAP broadcasting. Stereo or SAP can be received
in a Analog channel.
Use
AMTS/SAP button to select your desired MTS
mode in a analog signal.
Each time you press•
MTS/SAP
button, Mono,
Stereo or SAP appear. If other languages are
available on the digital signal, select them with the
noise and improves picture quality when receiving
weak video signals: On or O.
Color temperature❖
This will increase or decrease Warm (red) and Cool
(blue) colors to suit personal preferences.
Select Cool to give the white colors a blue tint,
Standard to give the white colors a neutral tint, Warm
to give the white colors a red tint.
Dynamic Contrast❖
To adjust the dynamic contrast: O/Low/Medium/
Strong.
Backlight❖
To adjust the brightness of Backlight.
Sound menu
How to select sound mode
PressAMENU button and then use
/
button to
select Sound menu.
Press
B
/OK
button and then use
/
button to
select Sound Mode.
PressC
/
button to select the option Standard,
Music, Theater and User.
You can also press•SOUND button on the remote
control to select the Audio Mode: Standard, Music,
Theater and User.
How to Customize your own sound
status
PressAMENU button and then use
/
button to

Operation
EN-14 TV LED-TFT Owner’s Manual
MTS/SAP
button.
PressBEXIT button to save and return to TV viewing.
Channel menu
Display channel menu by pressing INPUT button then
use
/
button to select the source of Air or Cable
item.
Press
AMENU button and then use
/
button to
select Channel menu.
Press
B
/ OK button to enter the menu and then
use
/
button to select the desired option.
Auto Tuning
PressAMENU button and then use
/
button to
select Channel menu.
Press
B
/ OK button and then use
/
button
to select Auto Tuning, then press OK the menu
opens.
Note
All channels now available will be automatically❏
preset in order .After the search has nished, the
rst program number will display on the screen.
This search automatically adds only the active channels
in your area to the TV's memory.
It deletes any channels on which there is no broadcast or
a poor signal.
The channels found are automatically saved.
DTV Manual Tuning
PressA
/ OK button and then use
/
button
to select DTV Manual Tuning, then press OK the
menu opens.
Press
B
/
button to select the channel , press OK
to search.
Channel Skip
PressA
/ OK button and then use
/
button
to select Channel Skip, then press OK the menu
opens.
Press
B
/
button to select the channel , and then
press OK button to select. the channel with a check
icon is a skipped channel.
Skip

Operation
TV LED-TFT Owner’s Manual EN-15
Analog Channel Fine Tune
You can add a label to a channel to make it easier to nd.
Press
A
/ OK button and then use
/
button
to select Analog Channel Fine Tune , then press OK
the menu opens.
Press
B
/
button to select the channel, press OK
and then press
/
to adjust channel frequency.
Programme Guide
Press to display the programme infomation.
You can also press GUIDE button on the remote control
to select the Programme Guide option.
Function Menu
OSD Language: To select the menu language.
Aspect Ratio : Press
/
button to select the Full
Screen/4:3/Auto/Cinema/Zoom.
Time: Press
/ OK button the following menu appears
on the screen.
Auto Synchronization : Press
/
button to select
On or O. When Auto mode on, the time can not be
adjusted. Select O, you can operate to set the time
manually.
Date: Press
/
button to select the position and digits
button to set the date.
Time:Press
/
button to select the position and digits
button to set the time.
Timer: Press
/
button to select On or O. To select
O, the time can not be adjusted.
On Time:Set a time for the TV to turn on.
O Time: Set a time for the TV to turn o.
Sleep Timer: Set a time for the TV to turn o
automatically. You can select: O, 5 Minutes, 10 Minutes,
15 Minutes, 30 Minutes, 45 Minutes, 60 Minutes, 90
Minutes, 120 Minutes, 180 Minutes and 240 Minutes.
Time Zone: Press
/
to select your Time Zone: North/
Brasilia/Northeast/F.Noronha/AM(West)/Acre/M.Grosso.
Closed Caption: Press
/
button to select Analog
Closed Caption/Digital Closed Caption, if select the
Digital Closed Caption, you can press
/
button to
select language1/language2/O .

Operation
EN-16 TV LED-TFT Owner’s Manual
Restore Factory Default: To restore to the factory
default.
Lock Menu
Parental Control can be used to block specific channels,
ratings and other viewing soure.
Press
AMENU button and then use
/
button to
selcet Lock menu.
Press
B
/OK
button and then press digits button to
input the digits( The initial password is 0000) . The
menu will display as follows:
Set Password
Press OK to enter the submenu , press digits button to
input the number of 0-9 twice in the New Password and
Conrm Password. Then you can change the password
when you input the same number twice.
Block Program
Press
OK
button to enter the submenu, then press
/
button to select a channel you want to blocked,
press the OK button on the remote control the channel
will blocked, press the OK button again to cancel.
Parental Guidance
Press
/OK
button to selcet Parental Guidance. Press
/
button to select O or 10-18 to limit the age of
children who will watch TV.
Clear Lock
Press
/OK
buttonto selcet Clear Lock , all lock options
wil be cleared.
PC Set
The TV can be used as a display, and you may adjust
relevant settings. Press INPUT to switch the signal input
to PC mode.
Press
AMENU button to display the screen main
menu, press
/
to select the Picture menu.
Press
B
/OK
button and then use
/
button to
select Adjust.
Press
C
/OK
button to select the Adjust menu as
shown in the below gure.
Press
D
/
button to select the option to be
adjusted and Press
/
to adjust it.
Auto Adjust: This is used to reset the default setting
parameters (After the operation, Auto Adjusting will be
display on the screen).
Horizontal Pos. : Horizontal position of picture can be
adjusted in this item.
Vertical Pos.: Vertical position of picture can be
adjusted in this item.
Clock: This is used for adjusting H Position and V
Position as well as relative parameters in PC modes.

Operation
TV LED-TFT Owner’s Manual EN-17
Phase : This is used for adjusting the phase of pixel clock
in PC mode.
Quick Menu
Press Q.MENU button to enter, This function includes
some usual oprations about Picture,Sound,Color
Tempeature, Sleep Timer, Aspect Ratio and Backlight.
USB MODE
Note
The diagrams in the following section are❏
schematic and only for your reference. Please see
the actual product if necessary.
TO USE THE USB DEVICE
Supported file formats:A
Photo: *.jpg,*.bmp;t
Music: *.mp3,*.wma;t
Movie: *.AVI,*.mpg,*.DAT,*.TS,*.MOV,*.mp4,*.VOB;t
Note
Due to the particularity of file cording, some files❏
may be unable to read.
The USB Movie player can surpport codes as❏
MPEG2, MPEG2_HD,MPEG4,MPEG4_HD,H.264.
Some movie les may not be played naturally
when its coding doesn't include in the codes
upwards.
Supported equipment:
B
Support the USB ash disks that supports Mass
Storage Protocol and whose file system is FAT32.
If USB equipment could not be identified due
to unsupported file system, please format the
equipment to the above-mentioned file system.
To achieve smooth playing, ensure the following:
C
The file code rate should be lower than 300KB/S;t
Due to the limitation of USB signal transmissiont
distance, it is recommended not to use USB patch
cord, in case of using the cord, make sure that its
length is not over 1m;
Use high-speed USB equipment in conformityt
with USB2.0 full speed Interface Standard; If USB
equipment in conformity with USB1.1 full speed
Interface Standard is used, the playing may be
unsmooth.
When connecting/removing the USB
device
PressAINPUT on the remote control unit to select
USB option.
Insert USB equipment into corresponding USB
B
interface 2s after starting the system.
After entering the system menu, press
C/on the
remote control unit to select the require USB files,
press OK button to confirm the selection and enter
the file list relative to the selection.
PressD/on the remote control unit to select the
required file, press ENTER button to enter the selected
file.
To exit the streaming media playing system andE
watch a TV program, you must press EXIT button to
return to the streaming media main menu at first (to
protect equipment), and then press INPUT to select
AIR or Cable to return to the TV mode.
Note
While playing the USB, pressEXIT button repeatly,
the screen picture will return to USB main interface,
and only at this time you can switch corresponding
signal sources by pressing INPUT again.
Please do not unplug the USB device when the
connected USB storage device is working. When such
device is suddenly separated or unplugged, the stored
files or the USB storage device may be damaged.
Operating the USB device

Operation
EN-18 TV LED-TFT Owner’s Manual
PressA/to scroll through main menu or submenu
and select your desired option.
Press
BOK to confirm your selection.
Press
C/to achieve the FWD (fast forward) and
REV (fast back) of the option being played.
Press
Dto play, and press it again to pause playing.
PressEZOOM to magnify pictures.
PressFEXIT repeatedly to return to the main menu.
Note
You can choose the photos and music in dierent❏
files to play together.
Playing a Picture
After entering USB main interface, pressARed button
to select PHOTO item.
Press
B//to select your required le that you
want to play.
Press
CENTER /OK to confirm the selection and enter
the picture file list.
Photo
Photo Music Movie
PressD//to select the picture you want to
play, press ENTER/OK to confirm, and then press
button to play the pictures.
If you want to pause the picture which is beingE
palyed, press the button again.
Press ZOOM to magnify the picture.
Press / to select the last or next picture.
To exit playing, just press
FEXIT repeatedly.
Note
The menu display varies with the photo name and❏
pixel in your equipment.
Playing Music
After entering USB main interface, pressAGreen
button to select MUSIC item.
Press
B//to select your required le that you
want to play.
Press
CENTER/OK to confirm the selection and enter
the music file list.
Press
D//and ENTER/OK button to select the
music you want to play, then press button to
play the music.
Press /to achieve the REV (fast back) and FWD
(fast forward) of the music being played.
Press / to select the last or next music.
To return to the main menu, just pressEEXIT
repeatedly.
Note
You can enjoy the music and the picture at the❏
same time.
Playing a Movie
Atter entering USB main interface, pressAYellow
button to select Movie item.

Operation/Maintenance
TV LED-TFT Owner’s Manual EN-19
PressB//to select your required le that you
want to play.
Press
CENTER/OK to confirm the selection and enter
the movie file list.
PressD//and ENTER/OK button to select
the movie you want to play, and then press
button to play the movie.
Press / to select the last or next movie.
To exit playing, just press
EEXIT repeatedly.
Maintenance
Maintenance
Early malfunctions can be prevented. Careful and regular
cleaning can extend the amount of time you will have
your new TV. Be sure to turn the power o and unplug
the power cord before you begin any cleaning.
Cleaning the Screen
Here’s a great way to keep the dust o your screenA
for a while. Wet a soft cloth in a mixture of lukewarm
water and a little fabric softener or dish washing
detergent. Wring the cloth until it’s almost dry, and
then use it to wipe the screen.
Make sure the excess water is o the screen, and
B
then let it air-dry before you turn on your TV.
Cleaning the Cabinet
To remove dirt or dust, wipe the cabinet with a soft, dry,
lint-free cloth. Please be sure not to use a wet cloth.
Extended Absence
If you expect to leave your TV dormant for a long time
(such as a vacation), it’s a good idea to unplug the power
cord to protect against possible damage from lightning
or power surges.
Specification
Basic specification and parameter
Resolution
(Dot)
26'' 32'' 42''
1366 s768 1920 s1080
Power ~110-240V , 50/60Hz
Color System PAL, NTSC, ISDB-T
Sound system N, M
Video input USB, AV(CVBS), YPbPr/YCbCr,
HDMI or DVI, VGA
Environmental
condition
Operating temperature
range: +5°C - +35°C
Operating humidity range:
20%-80%
Storage Temperature:
-15°C~+45°C
Storage Humidity: 5%-90%,
non-condensing
If the storage temperature is
lower than 0 °C, please first
lays the machine aside after
in the operating temperature
environment carries on
restores 2 hours, then
electrifies the use again,
protects your television not
to receive the damage.
Accessories
Owner's manual x1
Remote control x1
Alkaline battery x2
MODEL Power
Consumption
Net Size(LxWxH) Net Weight
26" 75W
654x160x487mm
6.6Kg

Specication/Format/Troubleshooting
EN-20 TV LED-TFT Owner’s Manual
32" 100W
788x210x559mm
11.5Kg
42'' 150W
1022x220x704mm
19.0Kg
Note
Design and specifications are subject to change❏
without notice. The dimension in this manual is a
approximation.
Format
Input Format Fefresh
Frequency(Hz)
HDTV/SDTV
(YPbPr)
480i/480p
60
576i/576p
50
720p
50/60
1080i/1080p
50/60
HDMI
480i/480p
60
576i/576p
50
720p
50/60
1080i/1080p
50/60
PC
640x480/800x600/
1024x768
60/75
1280x960
60
1280x1024
60/75
1360x768
60
DVI
640x480/800x600/
1024x768
60/75
1280x960
60
1280x1024
60/75
1360x768
60
Troubleshooting
Troubleshooting
For the sake of time and cost, it is strongly
recommended that you check out the problem by
yourself according to the instructions listed hereunder
before contacting the after-sales service for technical
assistance.
No picture,
no sound
Verify if the television is properly
plugged.
Verify if the television is properly
supplied power.
Verify if electricity is available.
Blank screen
Verify if correct signals are input.
Press INPUT button to change
signal input to TV input.
Restart the television of power
supply is interrupted.
No sound
Press Mute button and verify if
Mute mode is set.
Switch to other channel and verify
if the same problem happens.
Press VOL+ button to see if the
problem can be solved.
Poor sound Verify if sound system is correct.
No picture
in some
channel
Verify if correct channel is selected.
Adjust the antenna.
Make adjustments by Fine Tune
and Manual Scan.
No color
for some
channel
program
(black and
white)
Verify if the same problem exists in
other channels.
Check out of picture and sound
systems.
Refer to relative instructions in the
Manual for color adjust.
Spots with
some or all
pictures
Verify if the antenna is correctly
connected.
Verify if the antenna is in good
condition.
Make fine adjustment of channel.
Horizontal/
vertical bars
or picture
shaking
Check for local interference such
as an electrical appliance or power
tool.
This manual suits for next models
2
Table of contents
Languages:
Other Haier LCD TV manuals

Haier
Haier LE50K6500UA User manual

Haier
Haier HL15B User manual

Haier
Haier LEB42A300 User manual

Haier
Haier L26A8A-A1 User manual

Haier
Haier LE32K6500DA User manual

Haier
Haier LE42A300 User manual

Haier
Haier L39Z10A User manual

Haier
Haier LV-2610P User manual

Haier
Haier LE28M600C User manual

Haier
Haier HL24XK2 User manual

Haier
Haier L19M3 User manual

Haier
Haier LE19B13200 User manual

Haier
Haier ULT-26E User manual

Haier
Haier L1510A-C User manual

Haier
Haier LET40T3 User manual

Haier
Haier HL26P2a User manual

Haier
Haier LE26B13200 User manual

Haier
Haier LED46T3 User manual

Haier
Haier HL26R - 26" LCD TV User manual

Haier
Haier L22M3 User manual