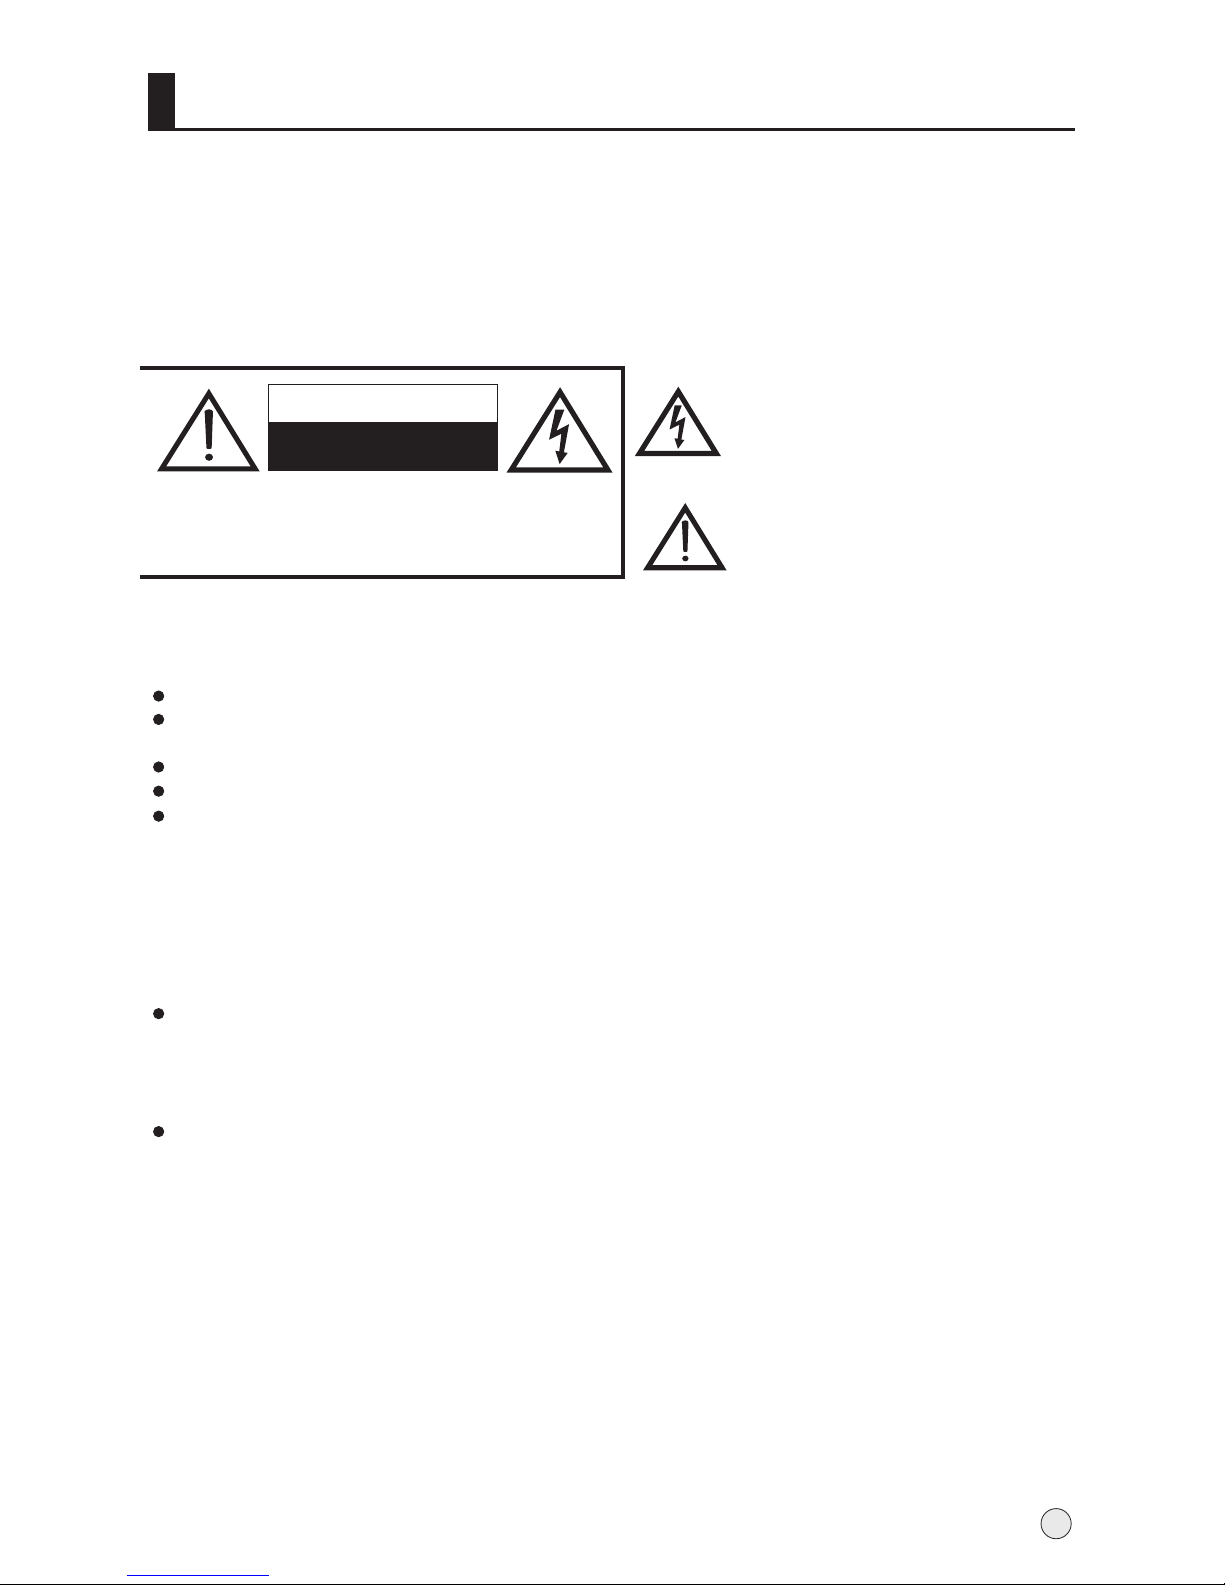
Haier LR47T1 User manual

MODELS: LR42T1
LR47T1
LCD TELEVISION
OWNER`S MANUAL
Please READ thismanual carefully before
operating your TV, and retain it for future
reference.

Congratulations on yourpurchase, and welcome to the family !
Dear Haier product owner:
Thank you for your confidence in Haier. You`veselected one of the
best-built, best-backed products available today. We`ll do everything
in our powerto keep you happy with yourpurchase for many years to
come.
As a member of the Haier family, you`re entitled to protection by
one of themost comprehensive warranties and outstanding service
networks in theindustry.
thanks for investingin a Haier product.
""
""

CONTENTCONTENT
BEFORE OPERATING
Warning..............................................................................................................1
Important Safety Instructions..............................................................................2
Buttons and interface location........................................................................... 4
Remote controller .............................................................................................6
keys of Remote control ......................................................................................7
External equipment connections........................................................................8
BASIC OPERATING
Switching on/off the TV set................................................................................13
Choose the Menu language............................................................................. 13
Choose the Input Source ................................................................................. 13
Searching Channel............................................................................................14
Watching TV Program........................................................................................17
Picture Control Functions................................................................................. .18
Sound Control Functions....................................................................................20
Timer Functions..................................................................................................22
Function Menu...................................................................................................23
Adjust Menu.......................................................................................................26
Lock Setup ........................................................................................................27
OTHERS
Others functions................................................................................................29
Maintenance......................................................................................................30
Troubleshooting.................................................................................................31
Specifications ...................................................................................................32
Format..............................................................................................................33
Accessories
Remote controller User's manual Alkaline battery
(AAA) 2 Power cable
REC
TIMESHIFT
ENTER
ZOOM
HELP
PIP
SWAP
PIC.SIZE
DISPLAY
I/II
SCAN
OK
SHUTTLE
H.LOCK
SLEEP
MENU
TV/AV
RETURN
USB
ZOOM/MOVE
TIME.SKIP
PSM
SM
Q.VIEW
STILL
-/--
CH-
CH+
VO
L
-
VOL+
S
CH.EDIT

WARNING
WARNING
RISK OF ELECTRIC SHOCK
DO NOT OPEN
TO REDUCE THE RISK OF ELECTRIC SHOCK DO NOT REMOVE
COVER (OR BACK). NO USER SERVICEABLE PARTS INSIDE.
REFER TO QUALIFIED SERVICE PERSONNEL.
Explanation for signs
Dear Users:
Above all,please accept oursincere appreciation foryour choice ofHaier TV; and for
the sake ofmaking you easierto read instructionsand use TV, the company will explain in
detail the signsappeared in theinstructions as follows:
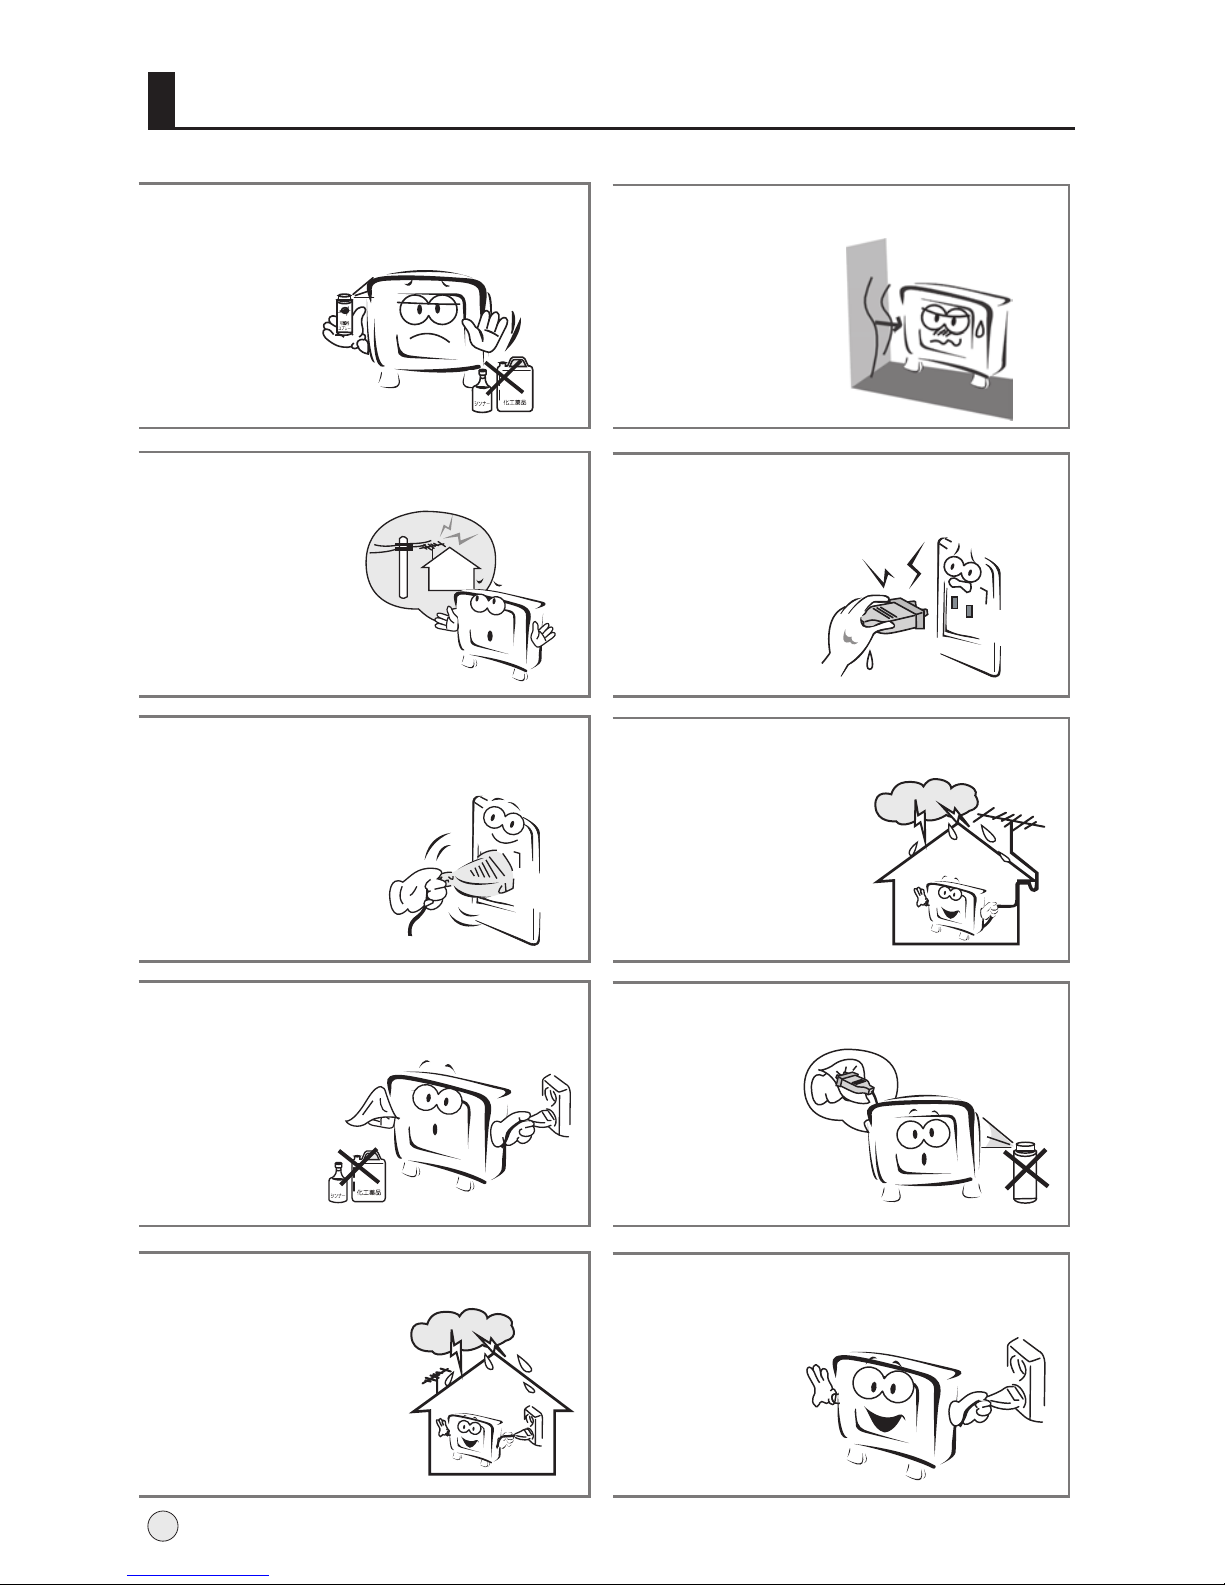
Warning instructions:
Keep the TV from droppingor spraying waterto prevent fire,electric shock orother dangers.
Do not putthe container withwater (vase, cup,makeup box etc.)on the TV (including the
frame); do notput naked firesources on theequipment, such asburning candles.
Do not removethe earthing pinof plug.
Do not openthe rear coverby yourself foravoiding the electricshock.
Make sure thereis no otheradditional spare partinside the shell.
If you cannot put theplug into thesocket, please contactprofessional electricians anddo
not remove itby yourself.
Installation:
Maintaining Good Ventilation
If you useLCD TV chassis (optional accessory),please leave atleast 10cm spacingfrom
the top, leftand right sidesof the TV; and 6cmfrom the bottom;7cm from theback. Andif
you choose otherinstallation method, makesure there isat least 10cmspacing from thetop,
bottom, left andright sides ofthe TV; and not lessthan 1.9cm fromthe back.
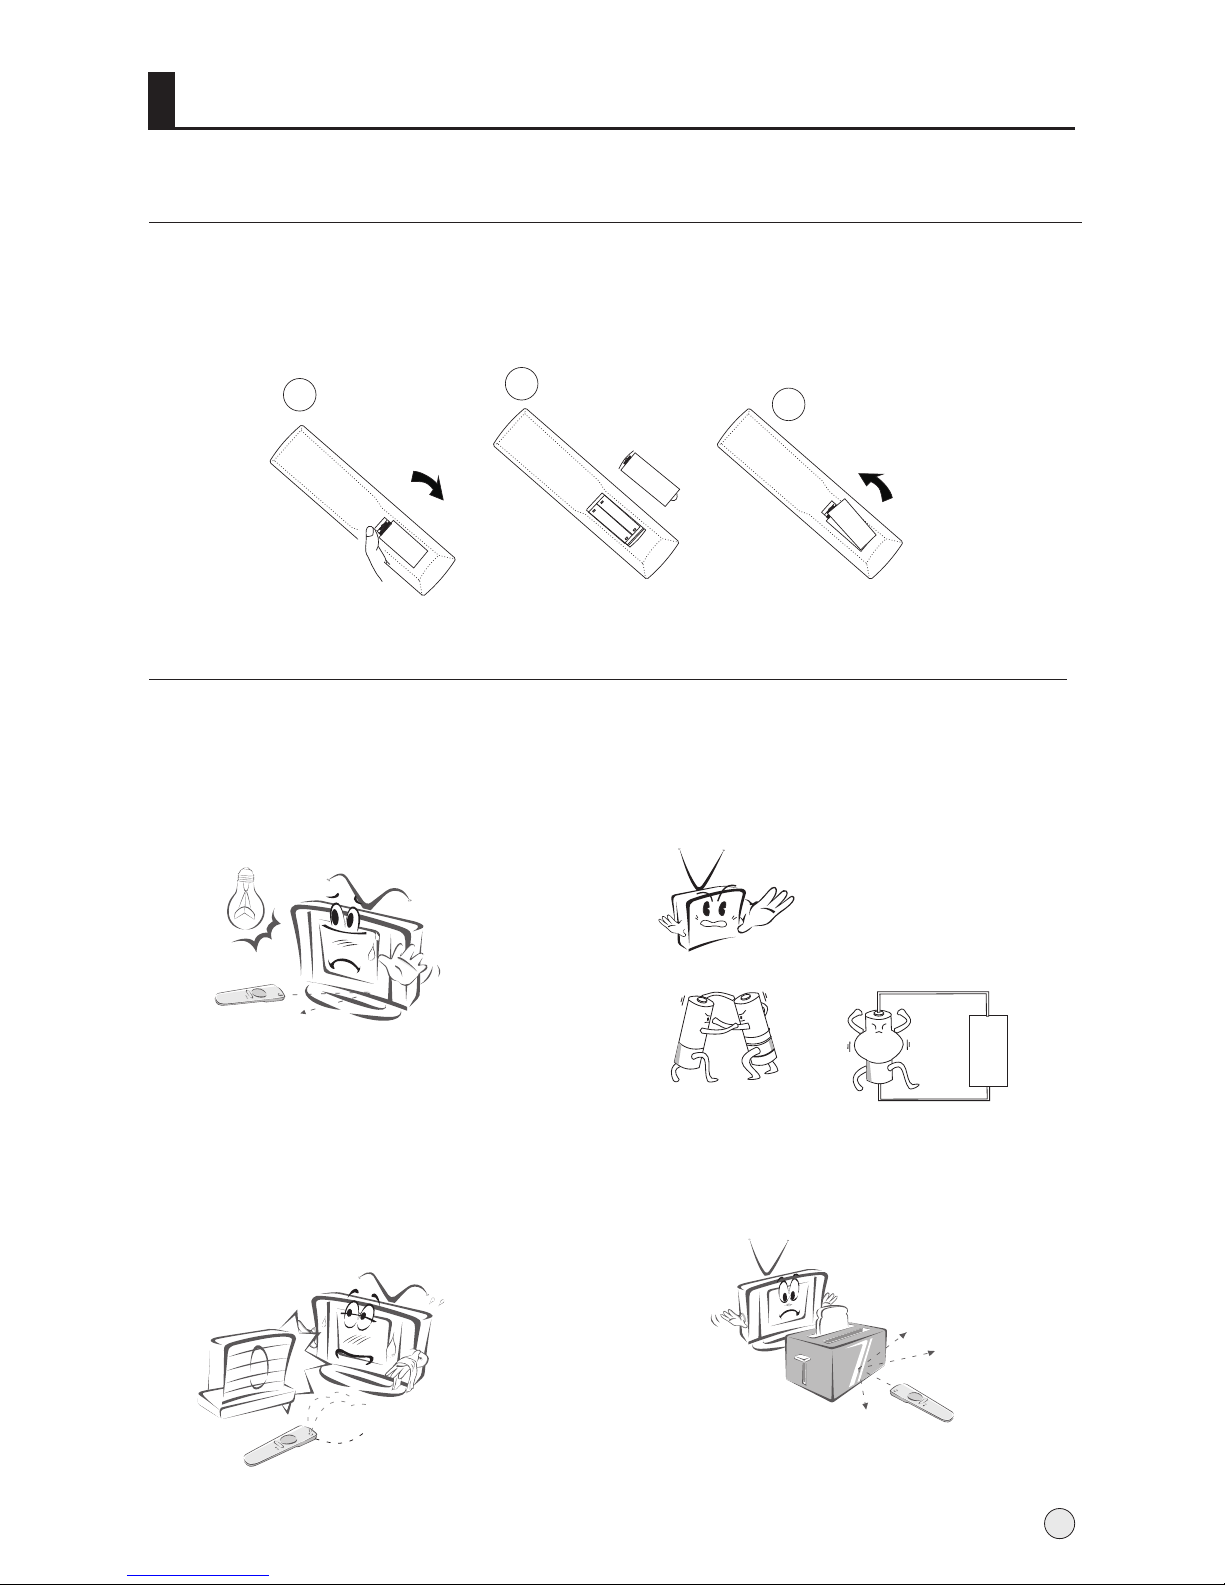
Avoid the installation ofthe product nearthe equipment withelectromagnetic wave
radiation which willresult in interferenceto TV picture and sound;therefore you mustbear
in mind thatkeep the videoequipment away fromthe product.
Important Safety Instructions
The symbol remindsyou that this
place has veryimportant components;
therefore, if youneed to replace it or
perform other operations,please refer
to relevant technicalinstructions.
The symbol remindsyou that there
may be highvoltage here, so please
be careful lestyou are exposed to
electric shock.
1

Important Safety Instructions
Attentions
Phenomena Inspection
Dark spots on
the screen
The TV is manufactured withtechnology of extrahigh precision,
however there possiblyis pixel lossor light spoton the screen
sometimes. This is not aproblem.
Burn-in
Do not makethe still picturesdisplay too longbecause it probably
bring permanent burn-inon the TV screen (stillpictures include
signs, video games,computer figures, electronictexts and the
pictures displaying inthe mode of4: 3).
If there ispermanent burn-in onthe TV screen caused byusing
still pictures whichaffect the quality of picture,it is notin the
scope of maintenanceservice.
The product doesnot apply todisplay still picturesfor a longtime.
The equipment appliesto be usedin the placewith relatively weakelectromagnetic
interference. If theequipment is usedin the placewith strong electromagneticfield or
input signals forelectric noise covering,there would befluctuations in picturesand
sounds, noise orother interference phenomena.Therefore please put the equipment
in the placefar away fromstrong electromagnetic fieldfor the purposeof avoiding
damages to theequipment.
Since LCD TV is onekind of high-precisiondisplay equipment, hencethere would be
black screen, blurredscreen, stand-by orother similar phenomenawhen it isunder
lighting stroke orimpact of highstrength static.At this moment,you should turn off
and turn onthe TV; and if thephenomena disappear afterthe on-off, it would notbe
considered as malfunction.
2

Important Safety Instructions
The product should be tightly fixed to avoid
drop damages and even fire.
To avoid fire hazards, do not use this
product under direct sunlight or closely
to heat sources.
Do not locate the product close to water
or oil, which may cause fire hazards.
Unplug the power supply and antenna of
the product when there is a rainstorm,
especially
Thunderstorm.
Do not use damaged or worn electric plugs
and keep electric cord away from heat sources
to avoid electric shocks or fire hazards.
Do not connect excessive sockets in parallel
or share the same socket by multiple plugs
to avoid fire hazards.
The product must be placed on a solid and
stable surface to avoid collapse.
Unauthorized disassembly of the television
is prohibited to avoid electric shocks or fire
hazards. Contact
authorized after-sales
service if technical
service is needed.
Keep the product away from a transformer
or heat source to avoid fire hazards.
Disconnect the product from power supply
and contact authorized after-sales service
if abnormal sound is heard in the product.
3

Important Safety Instructions
Don't use or store inflammable materials
near the product to avoid explosion or fire
hazards.
Don't place the product in a humid area to
avoid fire hazards.
The antenna of the product should be away
from electric cable to avoid
electric shocks.
Never touch the plug when your hand is wet
as this might cause electric shocks.
Always make sure that the televisionis well
plugged as poor electric
connection might cause fire.
When antenna is used, measures should be
taken to prevent water
from flowing down
along the cable into
the television.
Unplug the television, use soft fabric, never
chemicals, if you are going to make
cleaning of the product.
Make sure that no
water drops in the
product.
The plug and electric cable must be kept
clean to avoid electric
shocks or fire
hazards.
Disconnect the television from power supply
and antenna when there is a
rainstorm or thunderstorm
to avoid electric shocks
or fire hazards.
Disconnect the television from power supply
to avoid electric shocks or fire
hazards in a long
vocation.
4

Front panel Control
- This is a simplified representation of front panel.
- Here shownmay be somewhat different from your TV.
Buttons and interface location
1. TV/AV button
2. MENU button
3. VOL-/+ : Volume decrease/increase,adjusting the menu
4. CH-/+ : Channel numberdecrease/ increase
Remote Sensor
Indicator
TV/AV
MENU
VOL+
VOL-
CH+
CH-
1
2
3
4
USB jack
Right audio
HDMI jack
Power
Left audio
Video
5

Buttons and interface location
Rear panel Control
1HDMI Input Connnect a signalto HDMI/DVI
2PC Input
3
4AV1
5
6
7
9
Connect the monitoroutput connector froma PC tothe jack
Component Input Connect a componentvideo/audiodevice to thesejacks.
Input Connect audio/video outfrom an audio/videodevice to thesejacks.
S-Video Input Connect S-Video out from aS-Video device to these jacks.
Earphone jack Earphone Audio output terminal
Antenna Input Connect cable orantenna signals tothe TV, either directlyor
through your cablebox.
Video/Audio output terminal
Connect ordinary video/audioor other applianceaudio input terminals.
8Input Connect audio/video outfrom an audio/videodevice to thesejacks.AV2
6

Remote controller
Precautions
Battery loading
1.Slide open the cover of the battery compartment on the back of the remote controller.
2.Load two 7# (AAA)alkaline batteries in the compartment. (plus and minus poles to
respective mark)
3.Replace the cover of the battery compartment.
Make sure that there is no obstacle
between the remote controller and
television set.
As strong light may interfere the
signals, change your position to
operate the remote controller if
the television cannot be turned
on or off as you expect.
Keep the remote controller away from
heat source or humid area to ensure
effective performance of the remote
controller.
Make sure that two AAA alkaline
batteries are loaded. The batteries must
be of the same type. The batteries must
be located properly. The batteries are not
rechargeable.
3
12
7

REC
TIME SHIFT
ENTER
ZOOM
HELP
PIP
SWAP
PIC.SIZE
DISPLAY
I/II
SCAN
OK
SHUTTLE
H.LOCK
SLEEP
MENU
TV/AV
RETURN
USB
ZOOM/MOVE
TIME.SKIP
PSM
SM
Q.VIEW
STILL
-/--
CH-
CH+
VO
L
-
VOL+
S
CH.EDIT
Keys of remote control
STILL Picture static
I/II (NICAM)(No available)
MUTE
Switches the soundon or off
Power Off/Standby
any other programmed
equipment off.
SCAN
Program scan button
DISPLAY
Display ON/OFF
SLEEP
Displaying sleep time,adjustable
PIP(No available)
Digits
Program direct option(whenedit
program, every presscan set
different sign byturns among the
digits and signon top of them)
TV/AV
Input source display
Sound UP/DOWN
Lock button
(enter the LockSet menu)
Channel list button
are not available
CHANNEL select
are not available
Note:
This User's Manualcovers the functionsof the remotecontroller, includingCH+/-,
VOL-/+, MENU, TV/AV and POWER keysfor control ofprogram up, programdown,
volume decrease, volumeincrease, menu, TV/AV and power ON/OFF.
MENU
main menu entry, menu exitor
return to nexthigher level menu.
- The remote controller cannotbe operated unlessthe batteries areproperly loaded.
Function introduction
- When usingthe remote control,aim it atthe remote control sensor on the TV.
SWAP
(No available)
USB
USB system ON/OFF.
(No available)
ZOOM/MOVE (No available)
TIME SHIFT
See
USB system buttons (No available)
CHANNEL UP/DOWN
Selects available channels
found with auto program.
OK button
PSM
Selects the pictureappropriate
for the program'scharacter.
SSM
Selects the soundappropriate
for the program'scharacter.
REC(record)
Press REC button to startrecording
program, Press REC button to exit
again.
LIGHT
Press the lightbutton, white LED
will be ON,release this key, white
LED will beOFF.
Q.VIEW
Switch the currentchannel to the last
channel you haveviewed, or switch
the other sourceto TV.
PICTURE SIZE
Changes the aspectratio
TIME.SKIP button
SHUTTLE button
8

External Equipment Connections
Note
* It is recommended that you'd better use 75
* Don't bind antenna cable and electric wire together.
coaxial cable to remove the
disturbance caused by airwave.
outdoor
antenna
(not supply)
300 twin-lead cable
Antenna adapter
75 coaxial cable
Plug
(additional purchase)
Antenna input
75 standard
coaxial type
- Antenna or Cable Service without a Cable Box Connections
- For optimum picture quality, adjust antenna direction if needed.
To improve picture quality in a poor signal area, purchase
and install a signal amplifier.
If the antenna needs to be split for two Tv`s, install a 2-
WaySignal Splitter in the connections.
If the antenna is not installed properly, contact your dealer
for assistance.
(not supply)
9

External Equipment Connections
NOTE: Allcables shown are not included withthe TV.
Choose Your Connection
There are severalways to connectyour television, dependingon the componentsyou
want to connectand the qualityof the signalyou want toachieve. The following are
examples of someways to connectyour TV.
Choose the connectionwhich is bestfor you.
VCR Connection
Connection Option 1
Set VCR outputswitch to channel3 or 4and then tunethe TV to the samechannel number.
Connection Option 2
1. Connect theaudio and videocables from theVCR's output jacksto the TV input jacks,as
shown in thefigure.
When connecting theTV to VCR, match thejack colors (Video = yellow, Audio Left = white,
and AudioRight = red).
If you connectan S-VIDEO outputfrom VCR tothe S-VIDEO input,the picture quality is
improved; compared toconnecting a regularVCR to theVideo input.
2. Insert avideo tape intothe VCR andpress PLAY on the VCR. (Referto the VCR owner`s
manual.)
3. Select theinput source withusing the TV/AV button on theremote control, and then
press CH+/- buttonto select thesource, press theVOL+ button toconfirm.
- To avoid picture noise (interference), leavean adequate distancebetween the VCRand TV.
10

External Equipment Connections
DVD Setup
How to connect
1. Connect the DVD video outputs (Y, Pb/Cb,
Pr/Cr) to the COMPONENT (Y, Pb/Cb, Pr/Cr)
input jacks on the TV and connect the DVD
audio outputs to theAUDIO jacks on the TV,
as shown in the figure.
2. If your DVD only has an S-Video output jack,
connect this to the S-VIDEO inputon the TV
and Connect the DVD audio outputs to the AV IN
jacks on the TV, as shown in the figure.
NOTE: If your DVD player does not have
component video output, use S-Video.
How to use
1. Turn on the DVD player, insert a DVD.
2. Use the S-Video button on the remote
control to select S-VIDEO or YPbPr/YCbCr
mode.
3. Press Play button on external equipment
for program play.
4. Refer to the DVD player's manual for
operating instructions.
HDMI or DVI Setup
-To watch digitally broadcast programs,
purchase and connect a digital set-top
box.
How to connect
Use the TV`s COMPONENT (Y, Pb/Cb,
Pr/Cr) IN jacks, VGAor HDMI port for
video connections, depending on your
set-top box connections available.
Then, make the corresponding audio
connections.
How to use
1. Turn on the digital set-top box.
(Refer to the owner`s manual for the digital set-top box.)
2. Use TV/AV on the remote control to select VGA or HDMI
(Y, Pb/Cb, Pr/Cr) mode.
3. Press Play button on external equipment for program play.
11
DVD
or

External Equipment Connections
PC Setup
How to connect
1. Use the TV`s PC INport for video connections.
2. Then, make the corresponding audioconnection. If usinga sound card,adjust the PC
sound as required.
How to use
1. Turnon the PCand the TV.
2. Turnon the displayby pressing the POWER button on the TV's remote control.
3. Use TV/AV on the remotecontrol to selectVGA source.
4. Check theimage on yourTV.
There may benoise associated
with the resolution,vertical pattern,
contrast or brightnessin PC mode.
If noise ispresent, change thePC
mode to anotherresolution, change
the refresh rateto another rateor
adjust the brightnessand contrast
on the menuuntil the pictureis clear.
If the refreshrate of thePC graphic
card can notbe changed, changethe
PC graphic cardor consult the
manufacturer of thePC graphic card.
NOTES:
1 Avoid keeping a fixed image onthe TV's
screen for along period ofTime. The fixed
image may becomepermanently imprinted
on the screen.
2 The synchronization input form for Horizontal andVertical frequenciesis separate.
3 To obtain the best picture, do not play the YPbPr, HDMI or VGAsource at thesame
time.
The TV has a specialsignal output capability which allows
you to hookup a secondTV or monitor.
Connect the secondTV or monitor to the TV`s AV OUT.
See the OperatingManual of thesecond TV or monitor for
further details regardingthat device`s input settings.
Notes:
YPbPr, VGA, HDMI, S-Video input sources cannot be used
for Monitor out.
When connecting withexternal audio equipments, such
as amplifers orspeakers, please turn the TV speakers off.
Monitor Out Setup
12

Power source
TO USE AC POWER SOURCE
Use theAC polarized linecord provided for
operation onAC. Insert theAC cordplug into
a standard polarizedAC outlet.
NOTES:
Never connect theAC linecord plug toother
than the specifiedvoltage. Use theattached power
cord only.
If the polarizedAC corddoes not fitinto a non-
polarized ACoutlet, do notattempt to fileor cut
the blade. Itis the user`sresponsibility to have
an electrician replacethe obsolete outlet.
If you causea static dischargewhen touching
the unit andthe unit failsto function, simply
unplug the unitfrom theAC outlet andplug it
back in. The unit shouldreturn to normaloperation.
Polarized ACCord Plug.
Polarized AC Cord Plug
AC Outlet
Wider Hole
and Blade
You can connect a set of headphones to your set if you wish to watch a
TV programme withoutdisturbing the other people in theroom.
Connecting Headphones
Note
Prolonged use of headphones at a high volume
may damage yourhearing.
You will not receivesound from the speakers
when you connectheadphones to thesystem.
Plug a setof headphones into the 3.5mm
mini-jack socket onthe rear panel of the set.
External Equipment Connections
13

Switching ON/OFF the TV set
In the manual, the OSD (on screen display) may be different from your TV`s
because it is just an example to help you with the TV operation.
Switching ON/OFF the TV set
1first, connect power cord correctly and the power indicator will light.
Press POWER button on the remote control again.2
3If you want to exchange to standing by status, please press down POWER button on the
remote controller.
Disconnect the power supply or unplug the television if it is intended to completely cease the
television performance.
4
1 Press MENU and VOL+/-button to selectthe Function menu.
2Press CH+/-button toselect Language.
3Select a particularlanguage by pressingVOL+/- button
repeatedly.
Youcan choose one of two languages.(Chinese or English)
4When you aresatisfied with yourchoice, press MENU
button to returnto normal viewing.
When you startusing your setfor the firstTime, youmust select the language which will be
used for displayingmenus and indications.
Choose the Menu Language
Choose the Input Source
If you hopeto enjoy thepicture from theexternal input source,
before to selectthe source, youneed to connectthe devices,
otherwise, when youselect the source,the none orno signal
will appears onthe screen.
Press TV/AV button on remote control, the menu appears
on the screen.Then press CH+/- to selectthe TV item,
and press VOL+/-to ensure it.
Source
Before watching TV program, youneed to ensure
your TV inTV mode.
14
menu
OK
OK
OK

This TV set has three methods to set channels, which are respectively full automatic,
manual search fine tune.
In this section, how to use the remote control to set channel is explained. You can
also use buttons on the TV set to set channel.
Automatic search
1Press MENU button and then use VOL+/- button to select
Tuner menu.
Note : When the Tuning Lock is setting as Off, it is selectable.
""
2Press CH+/- button to select "Auto Search" item.
3
Press CH+/- button to select "Auto Search" option.
5Press VOL+/- or OK button to ensure it, and then press
VOL+ button to select OK option, and then press OK button
to start automatic search function work.
After the search has finished, all channels now playing program
will be automatically preset in order and backtrack the 0 channel.
6If to cancel, press MENU button to stop automatic search
function.
Press VOL+ button to enter the submenu.
4
Searching Channel
15
menu
OK
OK
OK
menu
menu
OK
menu
OK
OK
CANCEL
menu
OK
OK
OK
Channel Exchange
1Press MENU buttonand then use VOL+/- button to
select Tuner menu.
Press VOL+ to enter the submenu.
4Press CH+/- button to select the ToChannel item,
and use VOL+/- button to set the desired channel
number.
5When you aresatisfied with your choice, press
CH+/- button to select Exchange item, and then
press VOL+ button to confirm, at this time, the
Exchange OK! will display on the screen.
""
2Press CH+/- button to select "Exchange" item.
3
""
menu
OK
CANCEL
OK

Channel Edit
1
Press VOL+ to enter the submenu.
4Press CH+/- button to select the item to , and
press VOL+/- button to adjust the item to select.
Press MENU button and then use VOL+/- button to
select Tuner menu.
adjust
""
2Press CH+/- button to select "Channel Edit" item.
3
Searching Channel
Search
Fine tune
Color System
Sound System
Skip
If excessive channelsignal of unwantedprograms are
received in localarea, manual search function is recommended.
If the pictureand/or sound arepoor, tryusing the FineTune feature.
Do not usethis feature unlessreception is poor.
After the programsare presetting, youcan skip someprograms
so that toselect your favoritechannels only.
Press VOL-/+ buttonto set Skip as On.
Press CH+/- buttonto select Searchoption, and use VOL+/-
button to start searching.
When searching successfullyfor the channel, the Manual
search stopping automaticallyand save to the current
channel.
Press VOL-/+ buttonrepeatedly to carryout fine tune, till the best
picture and soundare obtained, then loosen the button.
Press CH+/- buttonto select "Color System", then press
VOL-/+ button toselect the correctcolor system. In general,
you can setit as "AUTO".
Press CH+/- buttonto select "Sound System", then press
VOL-/+ button toselect the correctsound system.
If you want to recover the skipped channel
1. Use Direct-digitChoosing button toselect the numberof the
channel to be recovered.
2. Do theabove steps again.
3. Press VOL+/-button to setSkip as Off.
16
menu
Down Up
menu
OK
OK
OK

Watching TV Program
You can watch TV program in a presetting channel.
How to select the desired program
1Using "Program number" buttons.
Directly enter the channel number with the numeric keypad on the remote control.
If to select channel numbers of double-digit or three-figure ,press continuously the
numeric buttons in three second.
2Using CH+/- button.
Press the CH+ button to select a channel number in number increasing direction.
Press the CH- button to select a channel number in number decreasing direction.
How to select the desired sound
Press VOL+/- button on the remote or the front of the
TV set to adjust the volume level. The range is 0~100.
When the volume button are pressed the volume level is
displayed automatically on the TV screen.
Volume
To select the TV mode
Before watching TV program, you may ensure your TV in TV mode.
Press TV/AV button to select TV mode.
Quick program view
1Suppose the channelnumber you usedjust now is8 and thechannel
number you areusing is 18(as shown inthe figure).
If you want to return to the last watched program channel 8, you can
simply press theQ.View button.
If you want to return to channel 18, press the button again. Use this
function, you caneasily change betweenthe channel youare using and
the channel youused lastTimer.
2
3
This function enables quick swap to the last watched program.
Shuttle function
Press SHUTTLE button about 3 second, and the display Channel Stored
on the screen, at the time, you may operate other, then if you scan over
program, you may press again shuttle button to return to the setting
program.
Shuttle function enablesquick swap tosetting program.
Channel Stored
17
This manual suits for next models
1
Table of contents
Other Haier LCD TV manuals

Haier
Haier LE32B8500T User manual

Haier
Haier HL32D1 User manual

Haier
Haier LE32G650A User manual

Haier
Haier L20AV6-A0 User manual

Haier
Haier HLH26BB User manual

Haier
Haier LE32T1000 User manual

Haier
Haier LD1510A User manual

Haier
Haier LE40K6000 User manual

Haier
Haier LE28M600 User manual

Haier
Haier LT22R3CW User manual

Haier
Haier L37A10A User manual

Haier
Haier TFT-LCD User manual

Haier
Haier L32M9 User manual

Haier
Haier LE32B7500 User manual

Haier
Haier HLC22XSLW2 User manual

Haier
Haier HL22R - 22" LCD TV User manual

Haier
Haier HLC24XLP2 User manual

Haier
Haier HL22F2 User manual

Haier
Haier HL24XD2 User manual

Haier
Haier L3248 User manual