When no buttons or doors are operated for 30 seconds, all
the LEDs on display panel turn o.
When a button is pressed or a door opened, the LEDs on
display panel illuminate.
CONTROL PANEL LOCK
The control panel is automatically locked after 30 seconds.
To change any settings the control panel must be unlocked.
To unlock the control panel:
•Press and Hold the Conrm Selection buttom for
3 seconds.
NOTE: The light around the Conrm Selection
button will illuminate to indicate that the control
panel is locked.
To lock the control panel:
•Press and Hold the Conrm Selection button for
3 seconds.
DOOR ALARM
When the refrigerator door is open for more than 2 minutes,
the Door Open alarm will sound. The alarm can be silenced
by closing the door. If the door is left open for longer than
7 minutes, the light inside the refrigerator will automatically
switch o.
TEMPERATURE CONTROLS
The temperature range for the refrigerator compartment is
34°F to 42°F (1°C to 6°C). The temperature range for the
freezer compartment is -6°F to 4°F (-21°C to -16°C).
The refrigerator compartment is preset to the
recommended temperature of 37°F (5°C) and the freezer
compartment is preset to the recommended temperature of
0°F (-18°C). When the refrigerator is rst plugged in, the
display will show the recommended temperature settings.
IMPORTANT:
•The recommended setting should be correct for
normal household refrigerator use.
•When the refrigerator is rst turned on, it may take
up to 12 hours to cool to the preset temperatures.
Wait 24 hours for your refrigerator to cool completely
before adding food. If you add food before the
refrigerator has cooled completely, your food may
spoil.
•If the temperature is too warm or too cold in the
refrigerator or freezer, rst check the air vents to be
sure they are not blocked before adjusting the
controls.
ADJUSTING CONTROLS
Except when starting the refrigerator, do not adjust either
control more than one setting at a time. Wait 24 hours
between adjustments for the temperature to stabilize.
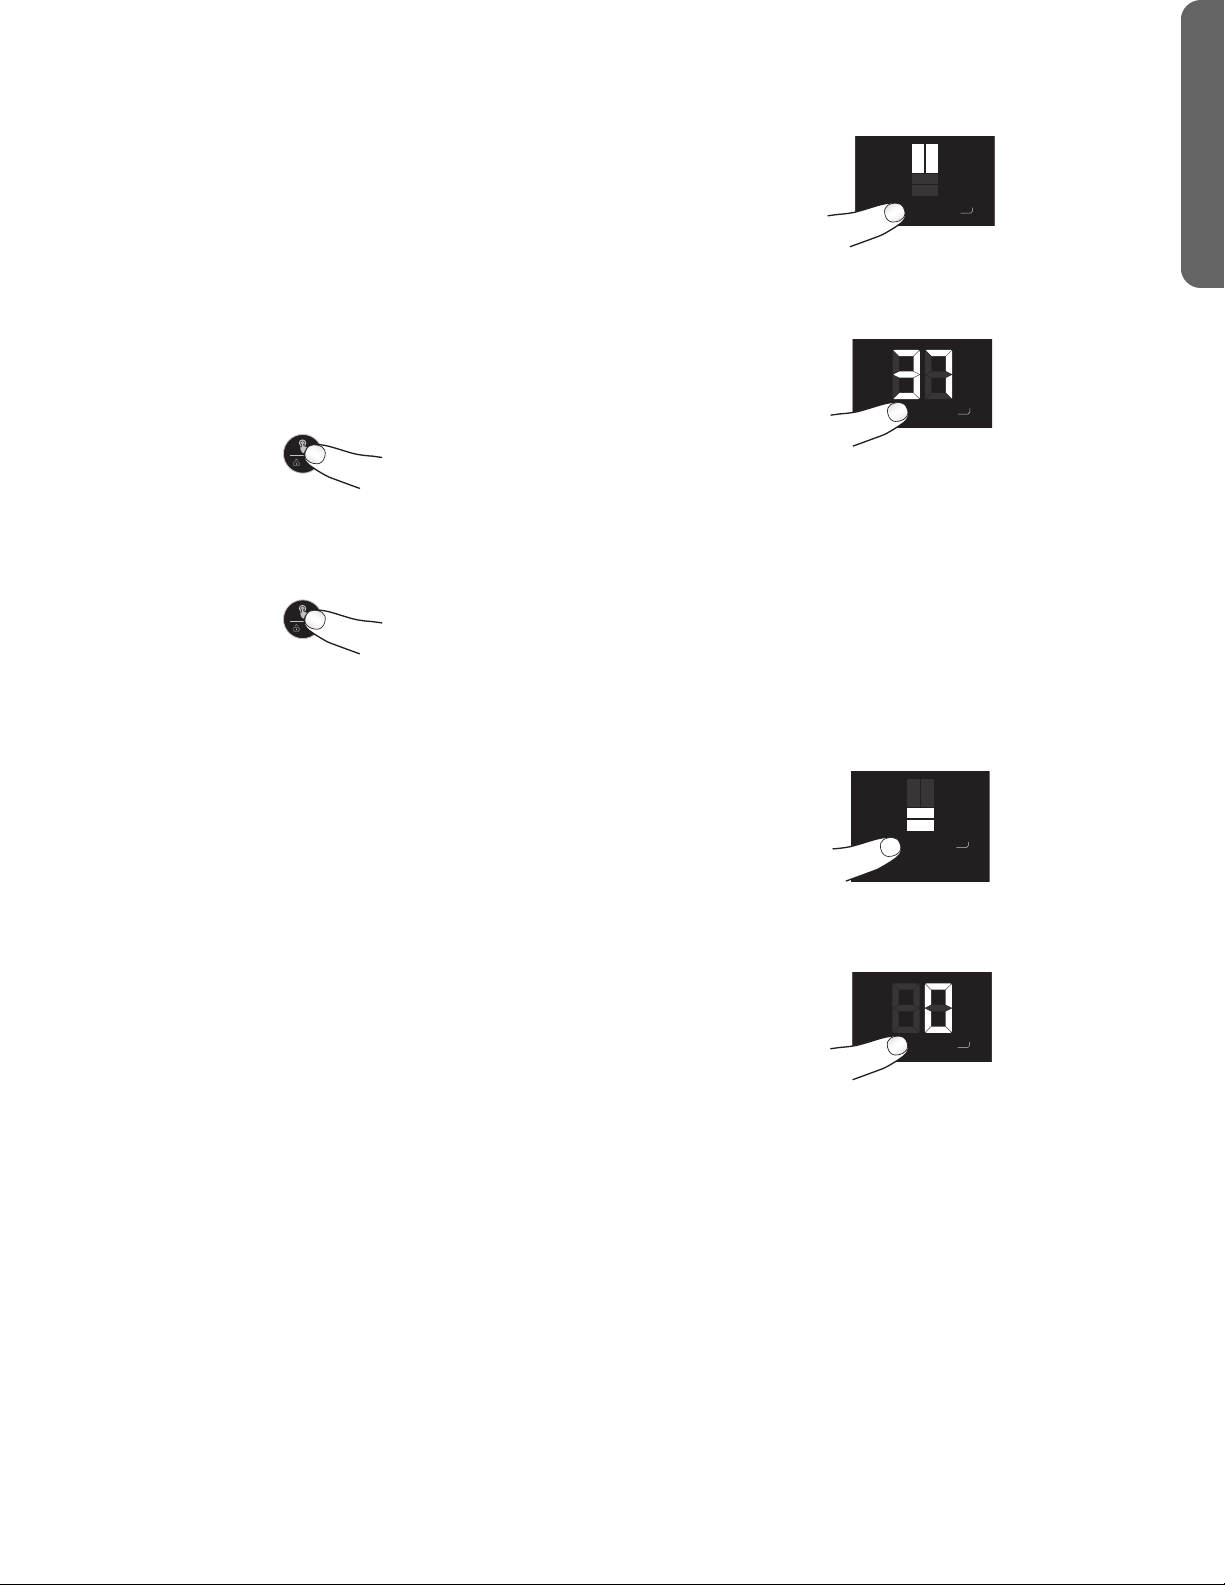
To adjust the refrigerator temperature:
1. If locked, unlock the control panel by pressing and
holding the Conrm Selection button for 3 seconds.
2. Press TEMP ZONE until the Refrigerator Compartment
Indicator lights up.
The current temperature setting is displayed.
3. Press TEMP SET to adjust the temperature.
The temperature increases by one degree with each
press of Temp Set.
4. Press Conrm Selection button.
If you do not press the Conrm Selection button after
5 seconds the control will return to the previous set
temperature.
To adjust the freezer temperature:
1. If locked, unlock the control panel by pressing and
holding the Conrm Selection button for 3 seconds.
2. Press Temp Zone until the Freezer Compartment
Indicator lights up.
The current temperature setting is displayed.
3. Press TEMP SET to adjust the temperature.
The temperature increases by one degree with each
press of Temp Set.
4. Press Conrm Selection button.
If you do not press the Conrm Selection button after
5 seconds the control will return to the previous set
temperature.
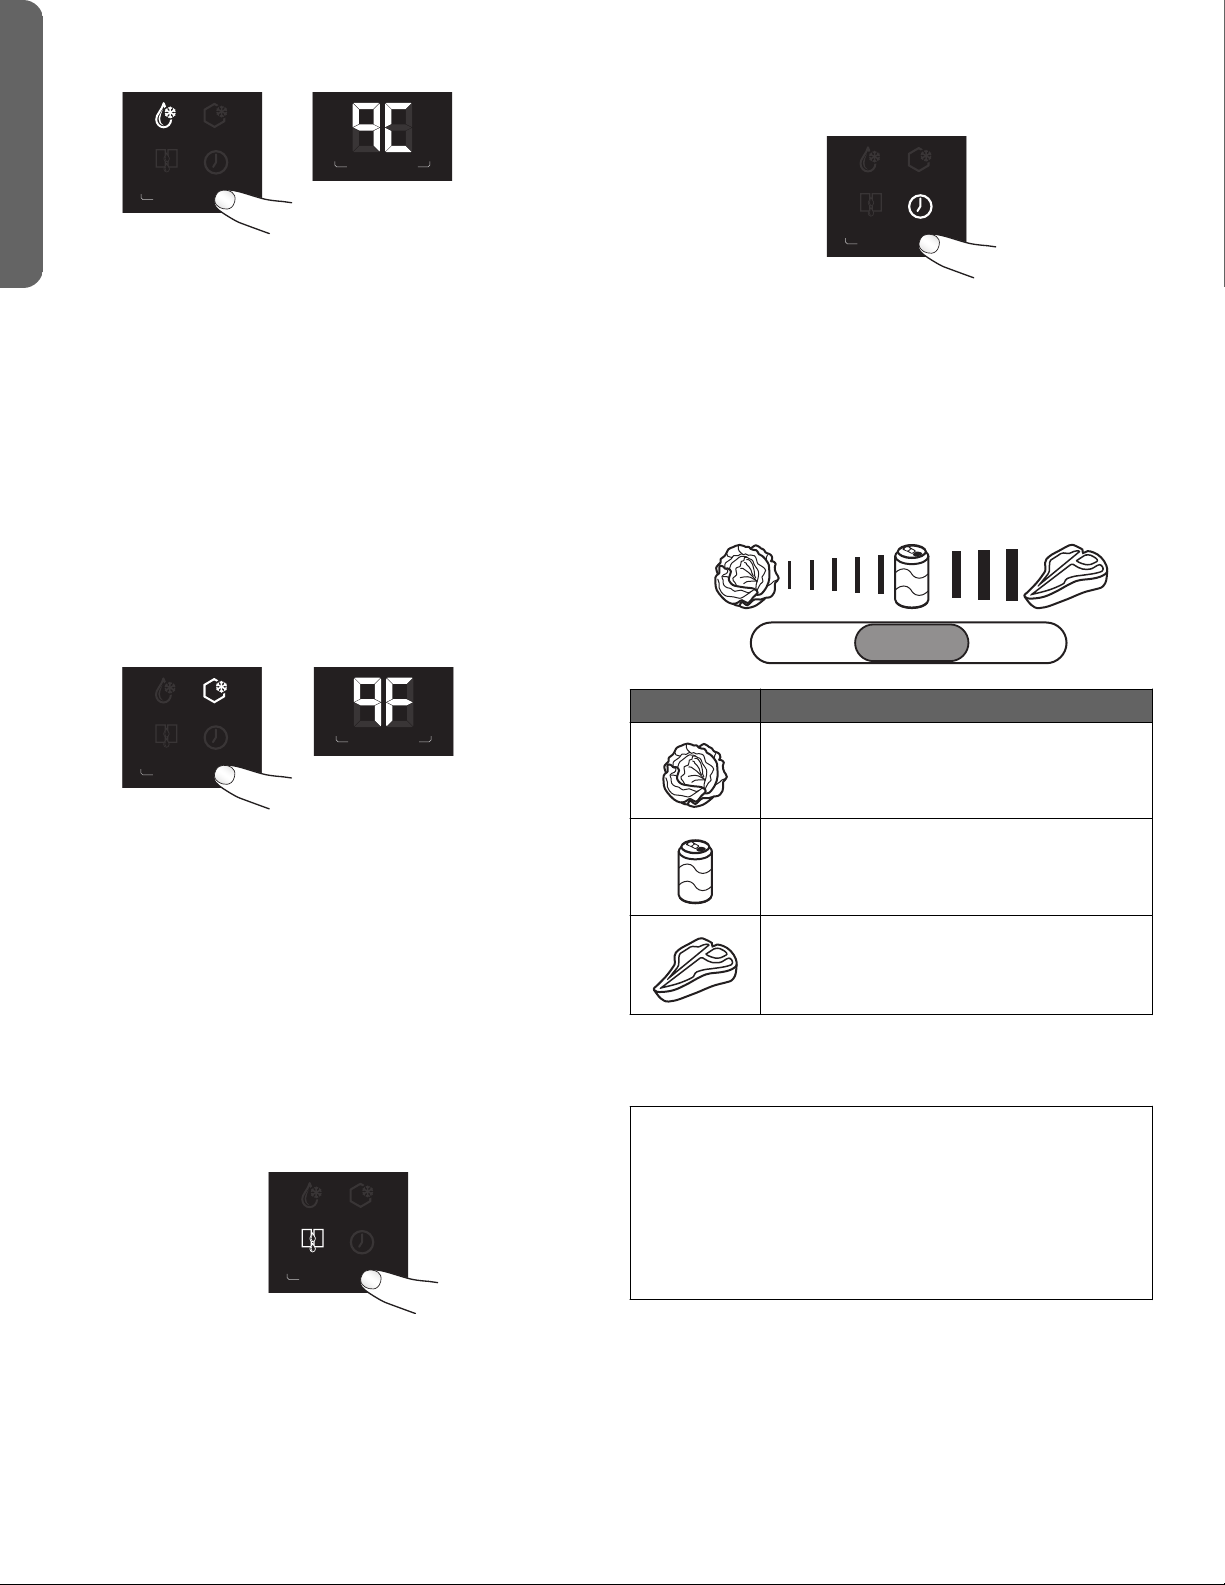
QUICK COOL
The Quick Cool function accelerates the cooling of fresh
food and protects the foods already stored from undesirable
warming.
1. If locked, unlock the control panel by pressing and
holding the Conrm Selection button for 3 seconds.
2. Press FUNCTION SET until the Quick Cool Indicator
starts to blink.
7
ENGLISH