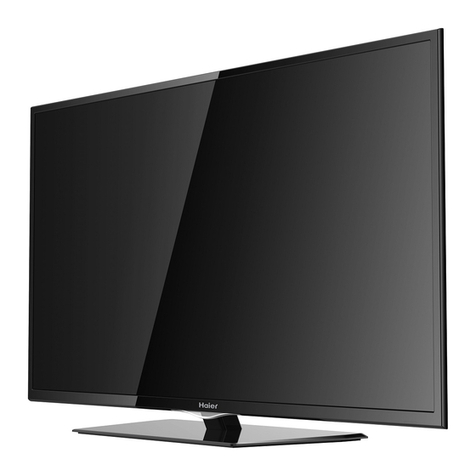
Haier 39G2000 User manual

Haiet
Inspired Living
User Manual
MODELS:
39G2000


EnergyStar
This
product
qualifies
for
ENERGY
STAR
in
the
factory
default
setting andthis is
the
setting in
which
power
savings
will
beachieved. Changing
the
factory
default
picture setting
or
enabling
other
features
will
increase
power
consumption
that
could exceed
the
limits necessary
to
qualify
for
ENERGY
STAR
rating.
SYMBOL
SA 1965
SA1966
SYMBOL
DEFINITION
DANGEROUS
VOLTAGE:
The
lightning
flash
with
arrowheadsymbol,
within
an equilateral
triangle,
is
intended
to
alert
the
user
to
the
presence
of
uninsulated"dangerousvoltage"
within
the
product'senclosure
that
maybe
of
sufficient
magnitude
to
constitute a risk
of
electrical shock
to
persons.
INSTRUCTIONS:
The exclamation
point
within
an equilateral triangle is intended
to
alert
the
user
to
the
presence
of
important
operating
and
maintenance (servicing) instruction in
the
literatureaccompanying
the
appliance.
Apparatus shall
not
beexposed
to
dripping
or
splashing and
no
objectsfilled
with
liquids, such
as
vases, shall be
placed
on
the
apparatus.
Batteries installed warning
Caution
-Danger
of
explosion
if
battery
is
incorrectly replaced. Replace
only
with
the
same
or
equivalenttype.
The batteries(batterypack
or
batteriesinstalled) shall
not
beexposed
to
excessive heatsuch
as
sunshine,fire
or
the
like.
FOR
YOUR
SAFETY
Before operating
the
"TV,
please read this manual
thoroughly.
This manual should be retained
for
future reference.
FCC
Class
BRadio Frequency Interference Statement
WARNING:
(FOR
FCC
CERTIFIED
MODELS)
NOTE:
This
equipment
has been tested
and
found
to
comply
with
the
limits
for
a
Class
Bdigital device,pursuant
to
Part 15
of
the
FCC
Rules.These limitsaredesigned
to
provide reasonable protection against harmful
interference in a residential installation.This
equipment
generates,
uses
and
can radiate radiofrequencyenergy,
and
if
not
installed and used in accordance
with
the
instructions, maycause harmfulinterference
to
radio
communications.However,thereis
no
guarantee
that
interference
will
not
occur
in
a particular installation.lfthis
equipment
doescause harmful interference
to
radio
or
television reception, which can be determined
by
turning
the
equipment
off
and on,
the
useris encouraged
to
try
to
correct
the
interference
by
one
or
more
of
the
following
measures:
1.
Reorient
or
relocate
the
receiving antenna.
2.
Increase
the
separation between
the
equipment
and receiver.
3.
Connect
the
equipment
into
an
outlet
on
a circuit
different
from
that
to
which
the
receiver is connected.
4.
Consult
the
dealer
or
an experienced
radionv
technician forhelp.
NOTICE
1.
The changes
or
modifications
not
expresslyapproved
by
the
party
responsible
for
compliance
could
void
the
user's
authority
to
operate
the
equipment.
2.
Shielded interfacecables and
AC
power
cord,
if
any,
must
beused in order
to
comply
with
the
emission limits.
3.
The manufactureris
not
responsible
for
anyradio
or
"TV
interferencecaused
by
unauthorized modification
to
this equipment.
It
is
the
responsibilities
of
the
user
to
correct such interference.
WARNING:
Topreventfire
or
shockhazard,
do
not
expose
the
TV
to
rain
or
moisture. Dangerously
high
voltages are present
inside
the
TV.
Do
not
open
the
cabinet. Refer servicing
to
qualifiedpersonnel only.
1

PRECAUTIONS
AND
REMINDERS
Place
uniton
even
surfaces.
__
~Q_\
Unplug immediately
if
malfunction like novideo/audio
occurs,
or
smoke
and
bad
odor
comefrom
TV.
Don'tthrowanyobjectinsidethe
TV
boxlikemetals orother
flammable materials.
Don't
place
the
TV
in confined
spaces
orinaboxwhen using it.
l~l~JI
•
n=n!
w/
~
Noticefor
Remote
Control
Avoid Dropping
Unplug Immediately
If
other
foreign materials
are
put
inside
TV
boxor
if
the
TV
fell down.
Prohibit/Avoidopening
TV
cabinet.
Remember
to
unplugtheACcord
from the
AC
outletbefore
cleaning.
Do
not
use
liquid
cleaners
or
aerosol
cleaners
to
clean
thedisplay.
8
1~~1
Make
sure
to
unplugthe unit
when notin
use
foralong period
of
time
(days).
Avoid Liquids
!£
l
Do notcoverorblockanyvents
and
openings. Inadequate
ventilation mayshorten thelife
of
thedisplayunit
and
cause
overheating.
Avoid directsunlight,dusty,
humidand smoky
areas
.
Call
service
personnel
to
clean
the
internal part
of
the
TV
once a
year.
Do not
place
thedisplay
near
water,
such
as
bathtub,
washbasin,
kitchen sink, laundrytub,
swimming poolorinadamp
basement.
Avoid
Aerosol
Cleaners

IMPORTANT
SAFETY
INSTRUCTIONS
Read
beforeoperating equipment.
• To reduce
the
risk
of
electricshock
or
component
damage,switch
off
the
power
beforeconnecting
other
components
to
your
TV.
•
Read
these instructions.
• Keep these instructions.
• Heed all warnings.
• Followall instructions.
• Do
not
use thisapparatus nearwater.
• Clean
only
with
a
dry
cloth.
• Do
not
block
anyventilationopenings. Install in accordance
with
the
manufacturer's instructions.
• Do
not
install near
any
heatsources such
as
radiators, heatregisters,stoves,
or
other
apparatus (including
amplifiers)
that
produce heat.
• Do
not
defeat
the
safetypurpose
of
the
polarized
or
grounding-type
plug.A polarized
plug
has
two
blades
and
a
third
grounding
prong.The
wide
blade
or
the
third
prong
are provided
for
your
safety.
If
the
provided plugdoes
not
fit
into
your
outlet, consultanelectrician
for
replacement
of
the
obsoleteoutlet.
• Protect
the
power
cord
from
beingwalked
on
or
pinched,particularly
at
plugs,convenience receptacles, and
the
point
where
they
exit
from
the
apparatus.
• Onlyuse attachments/accessories specified
by
the
manufacturer.
•
Use
only
with
the
cart,stand,
tripod,
bracket,
or
table
specified
by
the
manufacturer,
or
sold
with
the
apparatus. When acartis used, use caution
when
moving
the
cart/apparatuscombination
to
avoid
injury
from
tip-over.
• Unplug
this
apparatus
during
lightning
storms
or
when
unused
for
long
periods
of
time.
• Refer all servicing
to
qualified service personnel. Servicing
is
required
when
the
apparatus has been
damaged in
any
way,such
as
when
the
power-supplycord
or
plug
is
damaged,
liquid
has been spilled
or
objects
havefallen
into
the
apparatus,
the
apparatus
has
beenexposed
to
rain
or
moisture,does
not
operatenormally
or
has been dropped.
• Unplug
the
power
cord beforecleaning
your
TV.
• When
moving
your
TV
from
anarea
of
low
temperature
to
an area
of
high
temperature, condensation
may
form
in
the
housing.
Wait
before
turning
on
your
TV
to
avoid causing fire, electric shock,
or
component
damage.
• Adistance
of
at
least
three
feet should bemaintained between
your
TV
and
any
heatsource, such
as
a radiator,
heater,oven, amplifieretc. Do
not
install
your
TVclose
to
smoke. Operating
your
TV close
to
smoke
or
moisture
may
cause fire
or
electric shock.
• Slots and openings in
the
backand
bottom
of
the
cabinetare provided
for
ventilation.To ensure reliable
operation
of
your
TV and
to
protect
it
from overheating, besure these openingsare
not
blocked
or
covered.
Do
not
place
your
TV
in
a bookcase
or
cabinet unless
proper
ventilation is provided.
• Neverpush
any
object
into
the
slots
and
openings
on
your
TV
cabinet. Do
not
place anyobjects
on
the
top
of
your
TV.
Doing so
could
short circuitparts causing afire
or
electricshock. Never spill liquids
on
your
TV.
• YourTVshould
be
operated
only
from
the
type
of
power
source indicated
on
the
label.
If
you are
not
sure
of
the
type
of
power
supplied
to
your
home, consult
your
dealer
or
local
power
company.
• Do
not
apply
pressure
or
throw
objects
at
your
TV.
This maycompromise
the
integrity
of
the
display. The
manufacturer's warrantydoes
not
cover userabuse
or
improper
installations.
• The
power
cord mustbereplaced
when
usingdifferentvoltagethan
the
voltagespecified.Formoreinformation,
contact
your
dealer.
• When connected
to
a
power
outlet,
power
is
always
flowing
into
your
TV.
To
totally
disconnectpower,
unplug
the
power
cord.
• Do
not
overload
power
strips andextension cords. Overloading can result
in
fire
or
electricshock.
• The wall socket should be installed near
your
TV
and
easily accessible.
• Only
power
of
the
marked voltagecan
be
used
for
your
TV.
Any
other
voltage
than
the
specified voltage
may
cause fire
or
electricshock.
• Do
not
touch
the
power
cord during lightning.Toavoidelectric shock, avoid handling
the
power
cord
during
electrical storms.
• Unplug
your
TV
during
a
lightning
storm
or
when
it
will
not
beused
for
long
period
of
time.
This will
protect
your
TV
from
damage
due
to
power
surges.
• Do
not
attempt
to
repair
or
service
your
TV
yourself. Opening
or
removing
the
backcover mayexpose you
to
high
voltages, electricshock, and
other
hazards.
If
repairis required, contact
your
dealerand referall servicing
to
qualified service personnel.
3
o
WARNING:
Keep
your
TV away
from
moisture. Do
not
expose
your
TV
to
rain
or
moisture.lfwater
penetrates
into
your
TV,
unplug
the
power
cord
and
contact
your
dealer.Continuoususe
in
thiscase
may
result
in
fire
or
electric
shock.
o Do
not
use
your
TV
if
anyabnormalityoccurs.
If
anysmoke
or
odor
becomes apparent,
unplug
the
power
cord
and
contact
your
dealer immediately. Do
not
try
to
repair
your
TVyourself.
o Avoid using
dropped
or
damaged appliances.
If
your
TV
is
dropped
and
the
housingis damaged,
the
internal
components mayfunction abnormally.
Unplug
the
power
cord immediatelyandcontact
your
dealer
for
repair.
Continued use
of
your
TV
may
cause fire
or
electricshock.
o Do
not
install
your
TV
in an area
with
heavy
dust
or
high
humidity.Operating
your
TV in environments
with
heavy
dust
or
high
humidity
maycause fire
or
electricshock.
o Followinstructions
for
moving
your
TV.
Ensure
that
the
power
cord and
any
other
cablesare
unplugged
before
moving
your
TV.
o When
unplugging
your
TV,
hold
the
AC/DC
power
adapter,
not
the
cord. Pulling
on
the
power
cord maydamage
the
wires inside
the
cord andcause fire
or
electric shock.When
your
TV will
not
be used
for
an extended period
of
time,
unplug
the
power
cord.
o To reduce risk
of
electricshock,
do
not
touch
the
connector
with
wet
hands.
o Insert batteries in accordance
with
instructions. Incorrectpolarities
may
cause
the
batteries
to
leakwhich can
damage
the
remote control
or
injure
the
operator. Do
not
expose batteries
to
excessive heatsuch
as
sunshine,
fire
or
the
like.
o
If
any
of
the
following
occurs,contact
the
dealer:
-The
power
cord fails
or
frays.
-Liquid sprays
or
any
object
drops
into
your
TV.
-Your
TV
is
exposed
to
rain
or
other
moisture.
-Your
TV
is
dropped
or
damaged
in
anyway.
-The
performance
of
your
TV
changes substantially.
o This apparatusshall
not
beexposed
to
dripping
or
splashing and
no
objectsfilled
with
liquids, such
as
vases,
shall be placed
on
the
apparatus.
o The mains
plug
or
appliance coupleris used
as
the
disconnectdevice,
the
disconnectdeviceshall remain readily
operable.
o CAUTION- These servicing instructions are
for
use
by
qualified service personnel only.To reduce
the
risk
of
electric shock,
do
not
perform anyservicing
other
than
that
contained in
the
operating instructions unless you
are qualified
to
do
so.
o
Outdoor
Antenna Grounding
-If
an outside antenna
is
connected
to
the
receiver,
be
sure
the
antenna system
is
grounded
so
as
to
providesomeprotectionagainstvoltagesurges and
built
up
staticcharges. Section 810
ofthe
National ElectricCode, ANSI/NFPA No. 70-1984, provides information
with
respect
to
proper
grounding
ofthe
mats and supporting structure
grounding
of
the
lead-in
wire
to
an antenna discharge unit,size
of
grounding
connectors, location
of
antennadischarge unit,connection
to
grounding
electrodesand requirements
for
the
grounding
electrode.
See
Figure below.
EXAMPLE
OF
ANTENNA GROUNDING
AS
PER
NATIONAL
ELECTRICAL
CODE
Note
to
the
CATV
system installer:This reminder
is
provided
to
call
the
CATV
system installer's
attention
to
Article
820-40
of
the
NEC
that
provides guidelinesfor
proper
grounding
and, in particular, specifies
that
the
cable
ground
shall beconnected
to
the
6 English
grounding
system
ofthe
building,
as
close
to
the
point
of
cable
entry
as
practical.Please, makesure
to
connect
the
power
plug
to
the
wall
outlet
socketafterconnecting
the
TV
to
the
adapter!
4

SAVE
THESE
INSTRUCTIONS
Thankyou
for
purchasing this Haier product.This easy-to-use manual will guideyou in
getting
the
best use
of
your product. Remember
to
record
the
model and serial number.
They are
on
the
label
on
back
of
the
unit.
Model
number
Serial
number
Date
of
purchase
Staple
your
receipt
to
your
manual. You will need
it
to
obtain warranty service
5

TABLE
OF
CONTENTS
FOR
YOUR
SAFETY'
.....
I I
••••••
I I
••••••
I I
••••••
I I
••••••
I I
•••••••
I
•••••••
I
••••••
I I • • • 1
PRECAUTIONS
AND
REMINDERS
.....................................................
2
IMPORTANT
SAFETY'
INSTRUCTIONS
.................................................
3
PREPARATION
..........................
I
•••••••
I
••••••
I I
••••••
I I
••••••
I I
•••••••
I
•••
7
ATIACHING
THE
STAND
••••••..............•••••••••••••..............•••••••••••••••.....
7
PREPARING
YOUR
LCD
1V
FOR
WALL
MOUNTING
•••••••••...............•••••••••••••......
7
TURNING
ON
THE
lV
.......................................................................
7
PERIPHERAL
CONNECTION
AND
CONTROLS
.........................................
8
PERIPHERAL
CONNECTION
..................................................................
8
SIDE
CONTROL
I I
•••••••••••••••••••••••••
I I
•••••••••••••••••••••••••
I I
••••••••••••••••••••
8
MAKING
CONNECTIONS.
I
•••••••
I
•••••••
I
•••••••
I
•••••••
I
•••••••
I
•••••••
I
•••••••
I
•••
9
CONNECTING
TO
AN
ANTENNA/CABLE
WALL
JACK
.........................................
9
CONNECTING
EXTERNAL
AUDIONIDEO
DEVICE
............................................
9
CONNECTING
HEADPHONES
••..............•••••••••••••..............•••••••••••••••.....
9
CONNECTING
DIGITAL
AUDIO
DEVICE
.......•••••••••••••..............•••••••••••••.•.....
9
OPERATING
INSTRUCTIONS
....
I I
•••
I
••
I I
•••
I
••
I I
••
I I
••
I I
••
I
•••
I I
••
I
•••
I I
••••••
I I
••
10
USING
THE
REMOTE
CONTROL
............................................................
10
INITIAL
SETUP
............................................................................
11
INPUT
SOURCE
...........................................................................
11
NAVIGATING
THE
ON-SCREEN
MENU
......................................................
11
PICTURE
..................................................................................
12
AUDIO
...........••••••••••••...............•••••••••••••...............•••••••••••••....
12
CHANNEL
.......•••••••••••••..............•••••••••••••................•••••••••••••....
13
SETUP
............•••••••••••••...............•••••••••••••...............•••••••••••••...
13
LOCK
.............•••••••••••••..............•••••••••••••................•••••••••••••...
14
MEDIA
...........•••••••••••••..............•••••••••••••................••••••••••••....
16
TIPS
.............•••••••••••••..............•••••••••••••................•••••••••••••....
17
LEGAL
NOTICES
.•••••••••••••..............•••••••••••••..............•••••••••••••••....
17
PRODUCT
SPECIFICATION
..........................................................
18
TROUBLESHOOTING
...............................................................
19
WARRANTY'
.. ................................................. ........ .............
20
WARNING
........................................................................
21
6

PREPARATION
IMPORTANT:
Do
not
apply
pressure
to
the
screen display
area which
may
compromise
the
integrity
of
the
display.
The manufacturer'swarrantydoes
not
cover userabuse
or
improper
installations.
ATTACHING
THE
STAND
IMPORTANT:
The stand
of
the
TV
must
be assembled
prior
to
usage.
1.
Place
TV
unit
face
down
on a
soft
and
flat surface
(blanket, foam,cloth,etc.)
to
prevent
any
damage
to
the
TV.
2. Fix
the
stand
to
the
bottom
of
the
TV
with
the
four
B4x16F
mm
screws.
~.,
"'
B4x16mm
(4pcs)
PREPARING
YOUR
LCD
TV
FOR
WALL
MOUNTING
We
suggest
that
you
keep
your
TV
at
least 2.36 inches
(60 mm)
from
the
wall
to
preventcable interference.
Before
mounting
your
TV
on
the
wall,
you
need
to
remove
the
stand.
For
your
safety, please use
only
with
a
UL
listedwall
mount
bracket
with
minimum
weight
of
the
1V
without
stand. (Please
see
page 18
for
the
weight
of
the
TV.)
Toattacha wall
mount
bracket
to
your
TV:
1.
Remove
the
screws holding
your
TV
to
the
stand.
2.
Remove
the
stand
from
your
TV.
3.
Secure
the
wall
mount
bracket
to
the
back
of
your
1V
using
four
screws
(see
page18
for
the
size
of
the
screws). Follow
the
instructions
of
the
usermanual
that
came
with
the
wall
mount
bracket
to
install.
~ /
• •
. -
I D
.
c::::::J
i
. .
"'
~ ~
NOTE
The
wall
mount
bracketand
the
screws are
not
Included.
7
TURNING
ON
THE
TV
1.
Install
the
stand
and
place
the
TV
on
a solid surface.
itll·U·
• Ensure
that
the
TV
is
placed
in
a position
to
allow
free
flow
of
air. Do
not
cover
the
ventilation
openings
on
the
backcover.
• To preventanyunsafesituations,
no
nakedflamesources,
such
as
lighted candles, should
be
placed
on
or
in
the
vicinity.
• Avoid heat, directsunlightand exposure
to
rain
or
water.
The
equipment
shall
not
be exposed
to
dripping
or
splashing.
2. Connect
the
antenna cable
or
cableTV cable
to
the
ANT
IN
aerial socket
on
the
back
of
the
TV
set.
See
"CONNECTING
TO
AN
ANTENNA/CABLE
WALL
JACK'
'
on
page9.
3.
Remote control:
Remove
the
cover
ofthe
batterycompartment.
Insert
the
2supplied batteries (Type
AAA
1.SV).
4.
Power:
Plug
the
cord
into
a
working
power
outlet.
~
-!'
.. ..
....
,
""
""
~~
0
. .
.
41f!Jl
~
~
A I'
5.
Turn
the
1Von:
Press
C)
on
the
remotecontrol
or
POWER
button
on
the
side control panel
of
the
TV.

PERIPHERAL
CONNECTION
AND
CONTROLS
PERIPHERAL
CONNECTION
UNDER
CONTROL
INPUT
MENU
VOL+
VOL-
CH+
CH·
POWER
II t . l
~
I
:.l..U.!laJ
I
nnw
IIt . !
ol
I
f:1!I.ilil
Connectheadphones
to
thisjack.
1 HEADPHONE When headphones are inserted,
Press
to
select
the
input
source.
1 INPUT
Press
the
VOL+
button
to
change
to
the
TVspeakers
will
be
muted.
the
selected
input
source.
Connect acoaxial
audio
cable
2 COAXIAL
from
a sound bar,stereo system, 2 MENU
Press
to
open
or
close
the
on-screen
menu.
receiver, etc. 3
VOL+
Press
to
increase
the
volume
level.
3 L Connect
the
audio
cables
for
a
R
component
or
composite device. 4 VOL-
Press
to
decrease
the
volume
level.
Connect
the
video
cable
for
a
4 VIDEO composite device. 5 CH+
Press
to
go
to
the
next
channel in
the
channel list.
5
YPbPr
Connect
the
video
cables
for
a
component
device. 6 CH-
Press
to
go
to
the
previouschannel
in
the
channel list.
Connect HDMI devices
to
these
6 HDMI1 jacks. An HDMI cable carries
both
video
andsound.You
do
not
need
7
HDMI2
to
makean
audio
connection
for
an HDMI device. Note:The HDMI3
8 HDMI3(MHL)
port
is MHLenabled.
Press
to
turn
the
TV
on
or
off
{standbymode).When
the
TV
is off,
7 POWER
power
still flows
through
it.
To
completelydisconnectpower,
unplug
the
power
cord.
9
VGA
Connect
the
videocable
from
a
computer.
10
PC
AUDIO
Connect
the
audiocable
from
a
computer.
11
RF
Connect an antenna
or
cableTV
cable
to
thisjack.
Inserta
USB
storage device
to
the
USB
USB
port
to
view
JPEG
photos,
12 and listen
to
MP3 music.
{See
page 16
for
more
information.)
8

MAKING CONNECTIONS
CONNECTING
TO
AN
ANTENNA/CABLE
WALL
JACK
CONNECTING
EXTERNAL
AUDIONIDEO
DEVICE
Using
HOM/
cable
(best)
ktlt·U+
·An
HDMI cablecarries
both
video
and
audio.You
do
not
need
to
use anyaudio cables.
• You can connect MHLdevices,such
as
the
Roku
Streaming
Stickand compatible
mobile
phonesand tablets
to
the
HDMI3(MHL) port.A
USB
to
HDMI cable
is
required
to
connecta
mobile
phone
or
tablet
to
the
TV.
Please check
the
documentation
of
your
device.
Using
component
cables
(better)
9
Using
compositecable (good)
@@@
L R VIDEO/Y
ktll·U+
·Cables
are often color-coded
to
matchcolor-coded jacks.
CONNECTING
HEADPHONES
0 NOTE
Turn
off
the
1V
and external
dev
ices before
makingconnections.
To
play
from
the
externaldevice:
1. Turn on
the
TV
and
the
connecteddevice.
2.
Press
INPUT
to
open the
input
source list, then press
.1..
/
'f'
to
highlight
the
input
to
which
the
devicewas
connected and press
OK
to
switch.
• SelectTV
to
watch
1V
from
the
RF
input.
• Select
HDMI1,
HDMI3(MHL),or
HDMI2
to
play
from
a deviceconnected
to
the
HDMI1,
HDMI3(MHL),
or
HDMI2
input.
• SelectComposite
to
play
from
the
device
connected
to
the
COMPOSITE input.
• Select
Component
to
play
from
the
device
connected
to
the
COMPONENT input.

OPERATING
INSTRUCTIONS
USING THE
REMOTE
CONTROL
Item Descriptions
Power
Press
to
turn
the
TV
on
or
off. When
your
TV
is
off,
power
still flows
through
it.To
completely
disconnect power,
unplug
the
power
cord.
INPUT
Press
to
open
the
input
source list.
USB
Press
to
switch
to
USB
input
(USB
multimedia
mode).
cc
Press
this key
to
select
the
CC
,ON
or
OFF
mode
and
CC
on
Mute.
HOME
Switch
to
the
HDMI3(MHL)
input,
lfthe
Roku
Streaming Stickis connected, press this
button
to
return
to
the
Roku
home
screen.
0-9/•
Press
to
enteraTVchannel
number
number
(Press
"."to
choose
the
sub-channel).
RECALL
Press
to
switch
to
lastviewedchannel.
VOL+NOL-
Press
VOL+
or
VOL-
to
adjust
volume
level.
MUTE
Press
to
switch
the
sound
on
or
off.
MENU
Press
to
open
or
close
the
on-screen menu.
CH+/CH-
Press
CH+
or
CH-
to
changeTV channels.
BACK
Return
to
the
previous menu.
If
the
Roku
Streaming Stickis connected, press this
button
to
go
back
to
the
previousscreen.
DISPLAY
Press
to
display
the
information
window.
EXIT
Press
to
exit
the
menu
or
on
screen display
(OSD).
SAP
Press
to
switch sounds:
SAP,
Stereo,
Mono
for
ATV,
or
switch
audio
language
for
DTV.
SLEEP
Press
to
set
the
sleeptimer.
WIDE
Press
to
adjust
the
picture
aspect ratio.
AUDIO
Press
to
switch
the
audio
mode.
PICTURE
Press
to
switch
the
picture mode.
OK
Enter
the
selected
option
or
perform
the
selected operation.
CH.LIST
Press
to
display
the
Channel List.
FAVORITE
Press
to
display
the
Favorite List.
J..
/?
;
..,.
;
~
Use
the
arrow
buttons
to
move
around in
menus.
PLAY
Press
to
startplaying
the
MEDIA,
or
to
pause
playing.(Used
for
models
with
MEDIA
function
only).
REV
Press
to
fast reverse MP3 playbackin Music
mode.
FWD
Press
to
fastforward MP3 playback
in
Music
mode.
Enterelectronic
program
guide.
If
the
Roku
* Streaming Stickis connected, press this
button
to
view
more
options.
10

INITIAL
SETUP
The first
time
you
turn
on
your
TV,
the
setupwizard
will
guide
you
through
setting
up
basic settings
including
the
menu
language,
time
zone,
and
TV
signal source.
1.
Press
<!)
to
turn
on
the
TV.
Thesetupwizard screen
opens. Press
OK
to
start
the
wizard.
2.
Press
J;J'f
to
selectHome
Mode
or
Store Mode,
then
press
~
to
continue.
Note: Home
mode
is
energy
saving mode,store
mode
is
vivid
mode.
3.
Press
J;.J'f
to
select
your
language,
then
press
~
to
continue.
English
4.
Press
Ji../'f
to
select
your
time
zone,
then
press
~
to
continue.
: .. . ..
Mountain
5.
Press
Ji../'f
to
select
your
tuner
type,
then
press ~
to
startchannel scan.
. . .
Cable
11
•
Air
-Set
the
signal
type
to
antenna.When set
to
Air,
the
TVcan receive analog and
digital
(ATSC)
broadcasting signals.
• Cable-Set
the
signal
type
to
cable.When set
to
Cable,
the
TV
can receive analog
and
QAM
broadcasting signals.
6. The
auto
channel scan usuallytakes a
few
minutes
to
complete
but
can take
up
to
20 minutes.You can
cancel
the
channelscan
by
pressing
EXIT
.
k"'d·Hi
•During initialsetup,
press
..,..
to
return
to
theprevious
screen
and
press
EXIT
to
exitthe initial setup.
INPUT
SOURCE
Press
INPUT
to
open
the
input
source list,
then
press
J;./'f
to
highl
i
ght
an
input
and press
OK
to
sw
i
tch
.
INPUT
-
-
m:ll-
HDM11
m:ll-
HDMI2
m:ll-
HDM
I3(MHL)
PC
USB
NAVIGATING
THE
ON-SCREEN
MENU
1.
Press
MENU
to
open
the
on-screen
menu.
2.
Press
Ji../'f
to
select
the
main
menu
(Picture/
Audio/Channel/Setup/Lock),
then
press
OK
or
~
to
enter
the
sub-menu.
3.
Press
Ji../'f
to
highlight
a sub-menu item,
then
press
..,..,~
to
adjust
the
setting
or
select
the
desired
option.
4.
Press
EXIT
to
close
the
on-screen menu.
k•:t·Hi
•
Press
MENU
to
return
to
theprevious menu.
lfthe
ma
in
menu
is
displayed,pressing
MENU
will closetheon-
screen
menu.

PICTURE
liiiii
Picture Mode Energy Saving
Picture Brightness
50
G"
Audio Contrast
50
Color
50
~
Channel
Tint
50
Sharpness 50
*Setup ColorTemperature Cool
ij
Lock
Picture
Mode-
Select
the
picturemode.You can select:
•
Standard-
Astandard picture.Thecontrast,
brightness,and sharpness are moderatelyincreased.
• Vivid
-A
bright
and vivid picture.The contrast,
brightness,
and
sharpnessaresignificantlyincreased.
• Mild
-A
soft
picture.The brightness,contrastand
sharpness level are lowered.
•
User-
Customized picture.Picturesettings such
as
brightness,contrast,
and
colorare manually
adjusted.
• EnergySaving
-The
backlightbrightness is
decreased
to
save energy.
i'il[·ii·
• Manuallyadjusting picturesettings will automatically
change
the
Picture
Mode
toUser.
Brightness-Adjust
the
brightness
of
the
dark
areas
of
the
picture.
Press
<1111111
to
darken
the
picture.
Press
~
to
brighten
the
picture.
Contrast-Adjust
the
brightness
of
the
light
areas
of
the
picture.
Press
<1111111
to
decrease
the
contrast.
Press
~
to
increase
the
contrast.
Color-
Adjust
the
colorintensity
of
the
picture.
Tint-
Adjust
the
color
balance
of
the
picture.
Press
<1111111
to
increase
the
red tones.
Press~
to
increase
the
green
tones.
Sharpness-Adjust
the
colordetails
of
picture.
Press
<1111111
to
soften
the
picture.
Press
~
to
sharpen
the
picture.
ColorTemperature-
Selectthe
colortemperature.You
can select:
• Normal -Give
the
white
color
a neutral
tint.
• Warm -Give
the
white
color
a reddish
tint.
•
Cool-
Give
the
white
colora bluish
tint.
AUDIO
~
Sound Mode Standard
Picture Balance 0
~
Bass 50
Audio Treble
50
~
Channel
AutoVolume Level
Off
Surround Sound
off
*Setup Audio Language English
eLock Digital Audio OutputMode
Raw
Accessibility
Sound
Mode-
Select
the
sound mode.You can select:
• Standard -Balanced
treble
and bass.This setting is
good
for
watchingstandard
TV
broadcasts.
•
Music-
Increase
the
treble
and
bass
and
preserve
the
originalsound.Thissetting is
good
for
listening
to
a musical program.
•
Theater-
Moderatelydecreaseand enhance
treble
and bass
for
a rich soundexperience.
•
News-
Balancetreble and bass. This setting is
good
for
watching
a newsprogram.
•
User-
Let
you
manuallyadjustsound settings.
c•a·H•
• Manuallyadjustingaudiosettings
will
automatically
change
the
Sound
Mode
to User.
Balance-Adjust
the
balancebetween
the
left
and
right
audio
channels.
Bass-Adjust
the
low
frequencysound.Press.,..
to
decrease bass.
Press
~
to
increase
the
bass.
Treble-
Adjust
the
high
frequencysound.
Press
.,..
to
decreasetreble.
Press
~
to
increase
the
treble.
AutoVolume
Level-
Adjust
the
volume
to
keep
the
volume
levelconsistent
when
switchingchannels
or
when
switching
from
a
TV
show
to
acommercial.You
can selectOn/Off.
SurroundSound -Activate
or
deactivate
the
surround
soundfunction.
Audio Language-Selectan alternateaudio language,
if
available.You can select English/Spanish/French.
(Digital channelsonly)
DigitalAudio OutputMode
-Select
digital
audio
output
type.You can select:
•
Off-
Set
digital
audio
output
off.
•
Raw-
Pass
through
the
originaldigital audiosound.
•
PCM-
Output
audio
in
2-channel stereo.
Accessibility -
Press
OK
button
to
enter
sub-menu:
• Video Description
-Select
On
or
Off.
• Voice Guidance -SelectOn
or
Off.
• Speed
-Select
Slow/Medium/Fast.
•
Volume-
Select Low/Middle/High.
• Pitch
-Select
Low/Middle/High.

CHANNEL
Air/Cable -Select
the
signaltype.
o
Air-
Set
the
signal type
to
antenna.When set
to
Air,
the
1V
can receiveanalog and digital (ATSQ
broadcastingsignals.
o Cable -Set
the
signal
type
to
cable.When set
to
Cable,
the
1V
can receive analog andQAM
broadcastingsignals.
Auto
Scan
-
Press
OK
to
start
the
auto
channel scan.
Favorite-
Manuallyadd and skipchannels
in
your
favoritechannel list.
Channel
Skip-
Manuallyadd andskipchannels in
your
channel list.
Channel
Number-
Select
the
channel
that
you
want
to
assign acustomized label.
Channel
Label-
Label a channel
to
make
it
easier
to
identify.
~
Picture
~
Audio
~
Channel
1lr
Setup
aLock
•
••••••
1.
Press
OK
to
label
the
selectedchannel.
2.
Press
_,..
1~
to
select
the
entry
field.
-
·n
3.
Press
Ji..
l"'f
to
select
the
desired character
for
a field.
4.
Press
OK afterall
the
desired characters areentered.
13
SETUP
Menu
Language-
Select on-screen display
menu
language.You can select
English/Fran~ais/Espariol.
Asped
Ratio-
Select
the
displaymode.You can select:
o Normal -Display
the
original4:3 aspect ratio
with
vertical blackbars
on
the
left
and
right
ofthe
image.
o
Wide-
Use this
option
to
view
content
recorded
in
a
16:9 (wide-screen) aspect ratio.
o Zoom -Expand
the
image
to
fill
the
screen.The
top
and
bottom
of
the
image
may
be
cropped.
o Cinema
-Stretch
the
image
at
the
edges,
but
keeps
aclear image
in
the
center.
Blue Screen-SelectOn
or
Off.
Time-
Adjust
the
time
settings.
o Time
Zone-
Select
your
time
zone.
o Sleep
Timer-
Set
the
amount
of
time
before
the
1V
automaticallyturnsoff.
o DaylightSaving
Time-
SelectOn
(if
your
viewing
area observes DaylightSaving Time)
or
Off
(if
your
viewing
area does
not
observe DaylightSaving Time).
o
Clock-
Set
the
dateand
time
.
Restore Default
-Reset
all settings
to
the
factorydefaults.
ClosedCaption
-Adjust
the
closed captioning settings.
CC
Mode-Select closed captioning mode.You can
select:
•
CC
Off-
Turn
off
closed captioning.
o
CC
On
-Turn
on
closed captioning.
o
CC
on
Mute-
Turn
on
closed captioning
when
the
soundis muted.

Analog
CC-
Selectanalog closed captioning mode.
Digital
CC-
Select digital closed captioning mode.
Option
-Customize
digitalclosed captioning
settings.
Mode-
Select Custom
to
customize
below
settings
or
selectDefault
to
use defaultsettings.
Font
Style-
Select
font
style. You can select
Default/Font
0-Font
7.
Font
Size-
Select
font
size. You can select
Default/
Normal/Large/Small.
FontEdge
Style-
Select
font
edgestyle.You can
select Default/None/Raised/Depressed/Uniform/
LeftShadow/RightShadow.
FontEdge
Color-
Select
font
edgecolor.You can
select Default/Black/White/Red/Green/Blue/Yellow/
Magenta/Cyan.
FG
Color-
Select
font
color.You can select
Default/
White/Black/Red/Green/Blue/Yellow/Magenta/
Cyan.
BG
Color-
Selectbackground color.You can select
Default/Black/White/Red/Green/Blue/Yellow
Magenta/Cyan.
FG
Opacity-
Select
font
opacity.You can select
Default/Solid/Flashing/Translucent/Transparent.
BG
Opacity-
Selectbackground opacity. You can
select Default/Solid/Flashing/Translucent/
Transparent.
CEC
-Press
to
enter
CEC
submenu.
LOCK
1.
Press
OK
or
~
to
enter
password.
2.
Use
the
number
buttons
on
the
remote control
to
enter
your
4-digit
password.The
default
password is
"0000".
3.
After
the
correct password
is
entered,
the
Locksub-
menu
screen opens.
Change Password -
Press
OK
to
seta
new
4-digit
password.
EnterOld Password -Enter
your
old
4-digit
password.
Enter NewPassword -Enter
your
new
4-digit
password.
ConfirmPassword -Enter
your
new
4-digit
password
again
to
confirm.
System
Lock-
Turn
the
US
and Canada rating limits
on
or
off.
14


MEDIA
The
USB
Media Playerallowsyou
to
connect
a
USB
device
to
your
1V
and
playmusic
or
photos
.
1. Connectyour
USB
device
to
the
USB
port
on
the
rear
ofthelV
.
2.
Press
INPUT
and
select
USB,
or
press
USB
on
the
remote
control
to
switch
to
USB
input.
3. Press
<IIIII
/..,
to
highlight
Photo
or
Music,
then
press
OK
.
Press
<11111
/..,.
to
highli
ght
C,
then
press
OK
to
vi
ew
the
files orfolders.
4. Press
<11111
/
..,.
/
li.
/T
to
select
the
file
that
you
want
to
play, then press OK.
5.
To
navigate
the
playback, press
<11111/..,.
to
highlight
an
option
on
the
operation banner,
then
press
OK
to
execute.
Photo
1. Press
<11111
/..,.
to
highli
ght
an
option,
then
press
OK
to
execute.
• Select
II,.
or
press~~
on
the
remote control
to
pauseor resume slide
show
playback.
• Select
1+11
to
display
the
previous photo.
• SelectII+!
to
display
the
next photo.
• Select•
stop
slide
show
play back.
• Select0
to
change
repeat
mode
.You can
se
l
ect
RepeatOne/RepeatALUNone.
• Select
.f.J
to
play
the
music
In
the
currentfolder.
To
stop
the
music playback, highlight
r.1
and press
OK again.
• Select
~
to
display
the
play list. Press
EXIT
to
close
the
list.
• Select6
to
show
file information such
as
file name,
rlesolution,size,
date
and
time. Press
OK
to
close
the
information screen.
• Selecto
to
rotate
the
photo
go•
clockwise.
• Select0
to
rotate
the
photo
go
• counterclockwise.
• Select
~
to
zoom
in
on
the
photo
.
• Select ~
to
zoom
out
on
the
photo
.
•
Select•:•toviewazoomed
photo
.
Press
<11111
/
...
/li./T
on
the
remotecontrol
to
move and view
the
photo
in detail. Press
EXIT
to
exit.
Music
Music P
RI!peai.AL.L
JJ
00511'413
00:00:20
-00:03:40
• • • •
~
• 0 Q
PIWll8
1.
Press
<11111
/..,.
to
highlight
an
option,
then
press
OK
to
execute.
• Select I~ or press
~I
on
the
remotecontrol
to
pause
or
resume music playback.
• Select
+II
or
press
+II
on
the
remote control
to
fast
reversemusicplayback.
• Select
........
or
press
........
on
the
remotecontrol
to
fast
forward musicplayback.
• Select
1+11
to
play
the
previousmusicfile.
• Select
11+1
to
play
the
next
mus
ic file.
• Select•
to
stop
mus
ic playback.
• Select
~'.#to
changerepeat mode.
You
can select
Repeat One/Repeat
ALL/None.
• Select
li
to
display
the
song list. Press
EXIT
to
close
the
songlist.
1-j:i.)ii
16
•
In
photo
and
music
mode,
press
EXIT
to
close
the
operationbanner,
and
press
OK
to
open
it again.
•
In
music mode, beforepressing
<IIIII
/...
to
adjust
the
vo
l
ume
level, press
EXIT
to
close
the
operat
i
on
banner
first.

TIPS
Care
of
the
screen
Do
not
rub
or
strike
the
screen
with
anything hard
as
this
may
scratch, mar,
or
damage
the
screen
permanently.
Unplug
the
power
cord beforecleaning
the
screen.Dust
the
TV
by
wiping
the
screen
and
the
cabinet
with
a soft,
clean
cloth.lfthe
screen requires additional cleaning,
use a clean,
damp
cloth. Do
not
use liquid cleaners
or
aerosol cleaners.
Mobile
telephonewarning
To avoid disturbances
in
picture and sound,
malfunctioning
of
your
TV
or
even damage
to
the
TV,
keep
your
mobile
telephone away from
the
TV.
End
of
life
diredives
Weare paying a
lot
of
attention
to
produce
environmentallyfriendly products. Your
new
television
containsmaterials,
which
can be recycled and reused.
At
the
end
of
its life,specialized companies can
dismantle
the
discarded receiver
to
collect
the
reusable materials and
to
minimize
the
amount
of
materials
to
bedisposed of.
Please ensure
you
dispose
of
your
old
receiver
according
to
local regulations. Haieris
committed
to
safely recycling electronic productsand
product
materials.
Please
checkfor a local recycling location
in
the
UnitedStates at:
1800RECYCLING.COM.
17
LEGAL
NOTICES
Modifications
The
FCC
requires
the
user
to
be
notified
that
any
changes
or
modificationsmade
to
this
device
that
are
not
expresslyapproved
by
our
company
may
void
the
user's
authority
to
operate
the
equipment.
Cables
Connections
to
thisdevice
must
be made
with
shielded
cables
with
metallic
RF/EMI
connector hoods
to
maintain compliance
with
FCC
Rules
and Regulations.
Canada ICES-003 statement
This
Class
Bdigital apparatuscomplies
with
Canadian
ICES-003.
StandardTelevision Receiving
Apparatus-
Appareil
de
reception television ordinaire,Canada
BETS-
7/NTMR-7.
Canadian notice
This
Class
Bdigital apparatus meetsall requirements
of
the
Canadian Interference-Causing Equipment
Regulations.
Avis Canadian
Cat apparel numerous
de
Ia
classed Brespected toutes
les
exigencies
du
reglementsur
le
materiel brouilleur
du
Canada.
HIOH-I:IEFINITION
MULTIMEDIA
INTERFACE
HDMI,
the
HDMIIogo,
and
High-Definition Multimedia
Interface are trademarks
or
registered trademarks
of
HDMI Licensing
LCC
in
the
UnitedStates and
other
countries.

PRODUCT
SPECIFICATION
NOTE
• This model complies
with
the
specifications listed below.
• Designs and specificationsare subject
to
change
without
notice.
• This model may
not
be
compatible
with
features
and/or
specifications
that
may
be
added
in
the
future.
Model 39G2000
DISPLAY
Viewable 38.5"(97.Scm)
Television System
NTSC,ATSC
Channel Coverage
NTSC:
CH2-CH69 (Antenna}/CH1-CH135 (Cable)
ATSC:
CH2-CH69 (Antenna)/CH1-CH135 (Cable)
CONNECTIONS
Rear
Connectors HEADPHONE
COAXIAL
L
R
VIDEO
YPbPr
HDMI1
HDMI2
HDMI3(MHL)
Side Connectors
RF
USB
PC
PC
AUDIO
WEIGHT
&
DIMENSION
Dimensions
with
Stand (Wx Hx
D)
34.9"X 21.4"X 7,9
Dimensions
without
Stand
rw
X HX
D)
34.9"X 19.9"X
3.3R
Weight
with
Stand 13.7lbs
Weight
without
Stand 13.Sibs
WALL
MOUNTING
Wall
Mount
Pattern
(H
x
V)
200x
100
mm
Screw
type
M6x10
POWER
PowerConsumption 70W
Standby <O.SW
Mains Power 120V-60Hz
Audio
Power 6W+6W
Ambient
Temperature
41"F-
95"F
PACKAGE
CONTENTS
Package Contents
TVunitx
1
TVstand
x2
Remote controlx 1
Screwsx4
User manualx 1
Batteryx
2
Registration cardx 1
18
Table of contents
Other Haier TV manuals

Haier
Haier BH2404D User manual

Haier
Haier LE32D2320 User manual

Haier
Haier 29FA1 User manual

Haier
Haier HL26ATB User manual

Haier
Haier LE22C2380 User manual

Haier
Haier NS-F20C User manual

Haier
Haier LE32C800C User manual

Haier
Haier 21F9B-S User manual

Haier
Haier LE32K6000D User manual

Haier
Haier LE46T3 User manual