logo
Brands
  1. Home
  2. •
  3. Brands
  4. •
  5. Haier
  6. •
  7. Washer
  8. •
  9. Haier HWM75-826NZP User manual

Haier HWM75-826NZP User manual

Other Haier Washer manuals

Haier HWMP60TLF User manual

Haier

Haier HWMP60TLF User manual

Haier HW-A1470 User manual

Haier

Haier HW-A1470 User manual

Haier HW80-B1439N User manual

Haier

Haier HW80-B1439N User manual

Haier HW60-1402D User manual

Haier

Haier HW60-1402D User manual

Haier HWF75AW3 User manual

Haier

Haier HWF75AW3 User manual

Haier HWM65-1128NZP User manual

Haier

Haier HWM65-1128NZP User manual

Haier HWM150-0523S User manual

Haier

Haier HWM150-0523S User manual

Haier HWM80-113S User manual

Haier

Haier HWM80-113S User manual

Haier HW-B1470 User manual

Haier

Haier HW-B1470 User manual

Haier XQS70-98 User manual

Haier

Haier XQS70-98 User manual

Haier HWF90BW1 User manual

Haier

Haier HWF90BW1 User manual

Haier HW120-BP14959S8 User manual

Haier

Haier HW120-BP14959S8 User manual

Haier HWM95-987S User manual

Haier

Haier HWM95-987S User manual

Haier LAV User manual

Haier

Haier LAV User manual

Haier HW80-B14979 User manual

Haier

Haier HW80-B14979 User manual

Haier JW-PK60A User manual

Haier

Haier JW-PK60A User manual

Haier W-465 User manual

Haier

Haier W-465 User manual

Haier HBF601 User guide

Haier

Haier HBF601 User guide

Haier GWT950AW Assembly instructions

Haier

Haier GWT950AW Assembly instructions

Haier HVS1200 User manual

Haier

Haier HVS1200 User manual

Haier GWT560BW User manual

Haier

Haier GWT560BW User manual

Haier XQJ70-31 User manual

Haier

Haier XQJ70-31 User manual

Haier HW70-F1201 User manual

Haier

Haier HW70-F1201 User manual

Haier XQBM22-C User manual

Haier

Haier XQBM22-C User manual

Popular Washer manuals by other brands

Samsung WF8508NMW8 null

Samsung

Samsung WF8508NMW8 null

Samsung WF-B105AV null

Samsung

Samsung WF-B105AV null

Akai AWM1050WF null

Akai

Akai AWM1050WF null

Tricity Bendix AW 1000 W Operating & installation instructions

Tricity Bendix

Tricity Bendix AW 1000 W Operating & installation instructions

Panasonic NA-F60L5WRB operating instructions

Panasonic

Panasonic NA-F60L5WRB operating instructions

GE WSLP1500 Dimensions and installation information

GE

GE WSLP1500 Dimensions and installation information

Electrolux EWF1284EDW Service manual

Electrolux

Electrolux EWF1284EDW Service manual

LG TV2516DV3B owner's manual

LG

LG TV2516DV3B owner's manual

LG TH2517DSAV owner's manual

LG

LG TH2517DSAV owner's manual

VESTEL CMH-XL 7510 TE user manual

VESTEL

VESTEL CMH-XL 7510 TE user manual

AEG 74335 User information

AEG

AEG 74335 User information

Johnson JWF721A user manual

Johnson

Johnson JWF721A user manual

Beko WTE7604XLW0 owner's manual

Beko

Beko WTE7604XLW0 owner's manual

Danby DTT100A1WDB Owner's use and care guide

Danby

Danby DTT100A1WDB Owner's use and care guide

Amica WA 14 Ex operating instructions

Amica

Amica WA 14 Ex operating instructions

Daewoo DWD-F1222 instruction manual

Daewoo

Daewoo DWD-F1222 instruction manual

Bosch WAS28461AU instruction manual

Bosch

Bosch WAS28461AU instruction manual

Miele PW 6080 Vario manual

Miele

Miele PW 6080 Vario manual

https://manuals.online logo
https://manuals.online logoBrands
  • About & Mission
  • Contact us
  • Privacy Policy
  • Terms and Conditions

Copyright 2026 Manuals.Online. All Rights Reserved.

MODEL
Please readthismanualcarefullybefore
operatingyour washingmachineand retain
itforfuturereference.
HWM75-826NZP
FULLYAUTOMATICTOP LOADING
WASHING MACHINE
USER S MANUAL
0030514051
CONTENTS
Installation &adjustment
Bef
ore washing
Operation
Cleaning orMaintenance
Packinglist
Specification
5
5
5
6
6
9
10
10
11
9
10
14
17
18
Balancewashing machine
Install the bottomplate
Usageofthe drain hose
Inletpipe connection
Checkthe following beforewashing
Usageofthe detergent
Loading yourlaundry
Explanation ofbuttons
Trouble-shooting 15
Productoverview
Safetyprecautions
1
2
2
4
Description ofsymbols
Warning
Forbidden
Safetywarning
2
3
E-wasteGuidelineManual 19
Productoverview
Outertub cover
Toplid component
Innertub
Pulsator
Detergent box
Baseframe
Lint filter
Adjustablefoot(2pieces)
Controlpanel seat
Cabinet
Waterinletvalve
Hook
Fixedfoot2pieces
Handle
Drainhose
Powercord
Back cover
Frontcontrol panel
Pleaseunderstandthe shapesof thewashingmachine andaccessoriesmaybe
different fromthe sketchfiguresinthismanual duetoproduct improvement.
Safetyprecautions
2
Descriptionofsymbols
Warningsign
Forbidden sign
Safetywarning
Contentsmarkedwiththissymbolarerelatedtothesafeuseof
theproduct andthepersonalsafetyoftheuser.
Pleaseoperateinaccordancetothecontentsofthismanual,to
avoidharmtotheuserordamagetothemachine itself.
Contentsmarkedwiththissymbolindicateoperationsoractions
thatshouldnotbeundertakenbytheuser.
Performing ofsuchactionsmayresult an injury totheuseror
damage tomachine itself,andvoidwarranty.
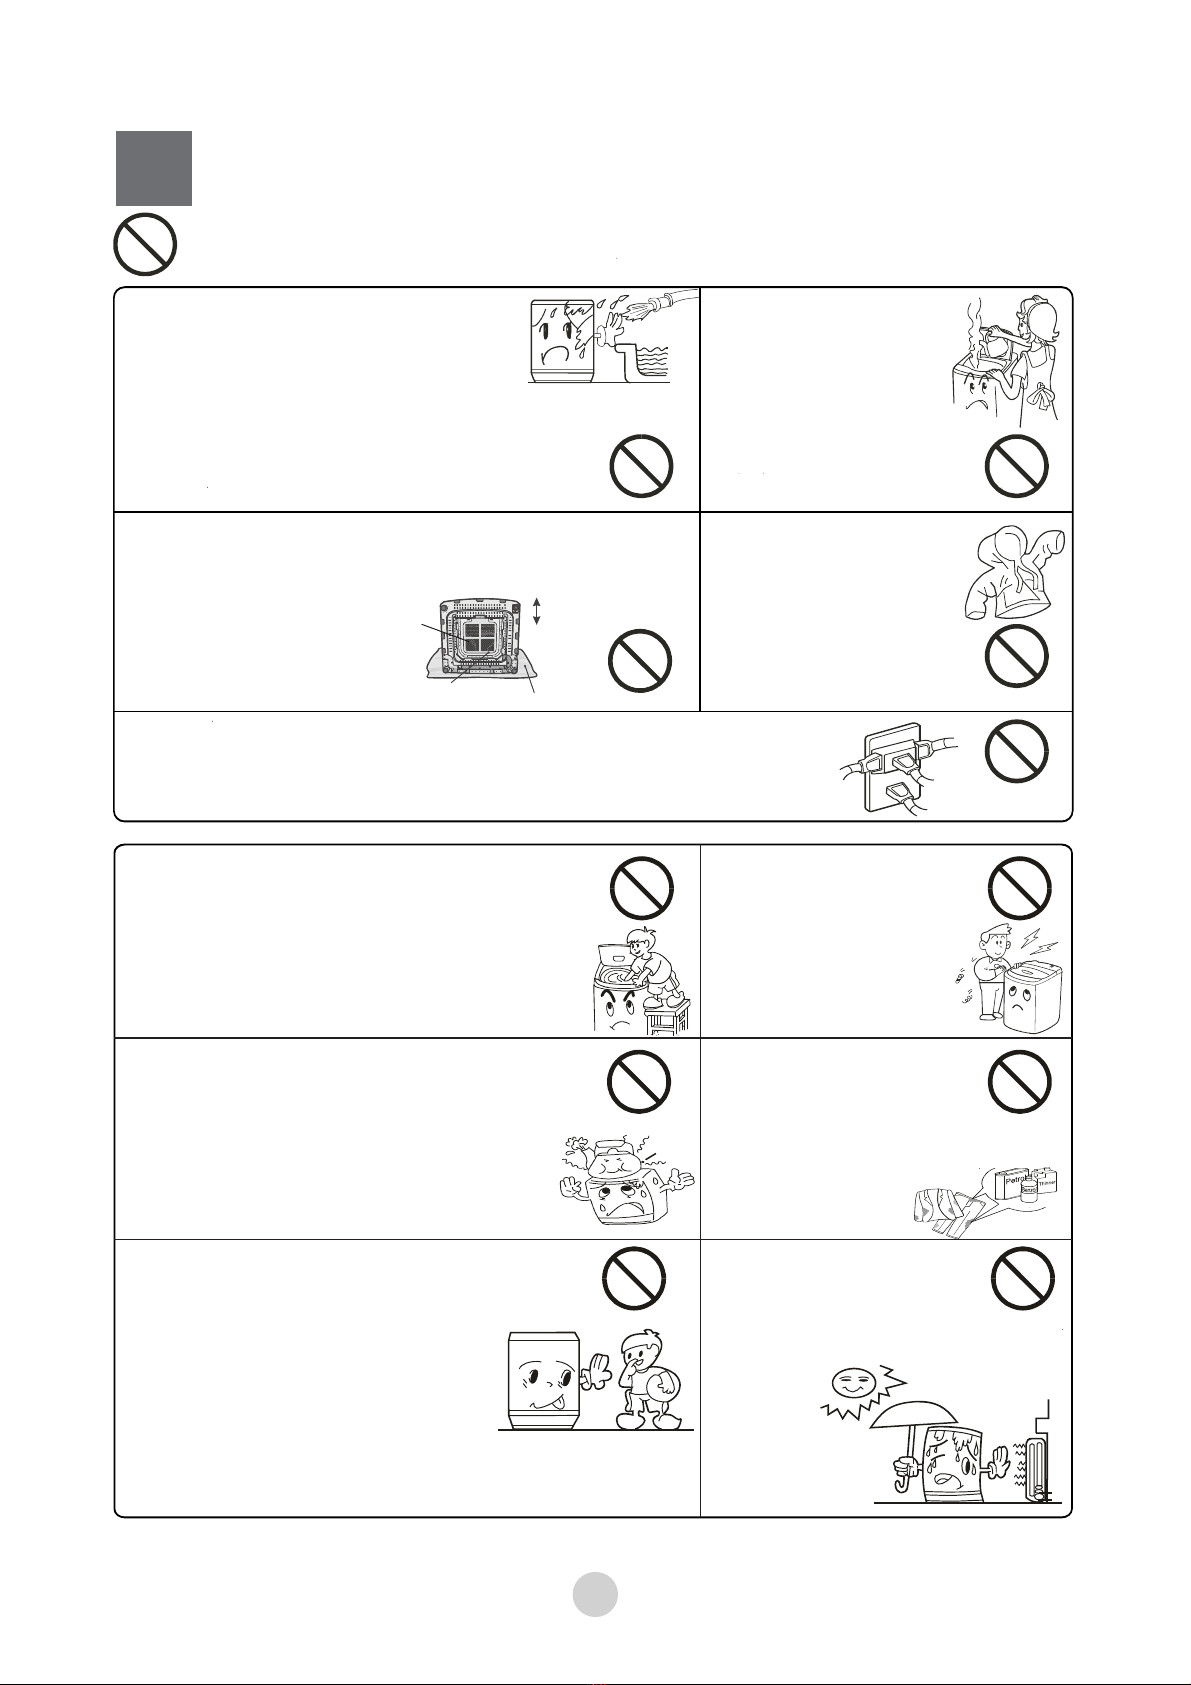
Pleasecheck powersocket conditiontoensureithasbeenearthed correctlypriorto
installationtoensureyoursafety
Aseparate, earthed powersocketis
requiredforthepowersupply.
Hold theplug-notthe electriccable-when
unpluggingthe washing machine.
Donotinsertorremovethe powerplug with
wethands.
The powerplug should be accessible after
the machineinstallation.
Thisapplianceisintendedtobe usedin
householdand similarapplicationssuchas:
staffkitchen areasinshops,officeand
otherworkingenvironments;
farm houses;
byclientsinhotels,motelsand other
residential type environments;
bedand breakfast typeenvironments;
areasforcommunal usein blocks of flats
orinlaunderettes.
Warning
Ensurethe plugisremoved andthe taps
turnedoff inthefollowing cases.Power
failure,cleaning,moving,installation
andwhen not in use.
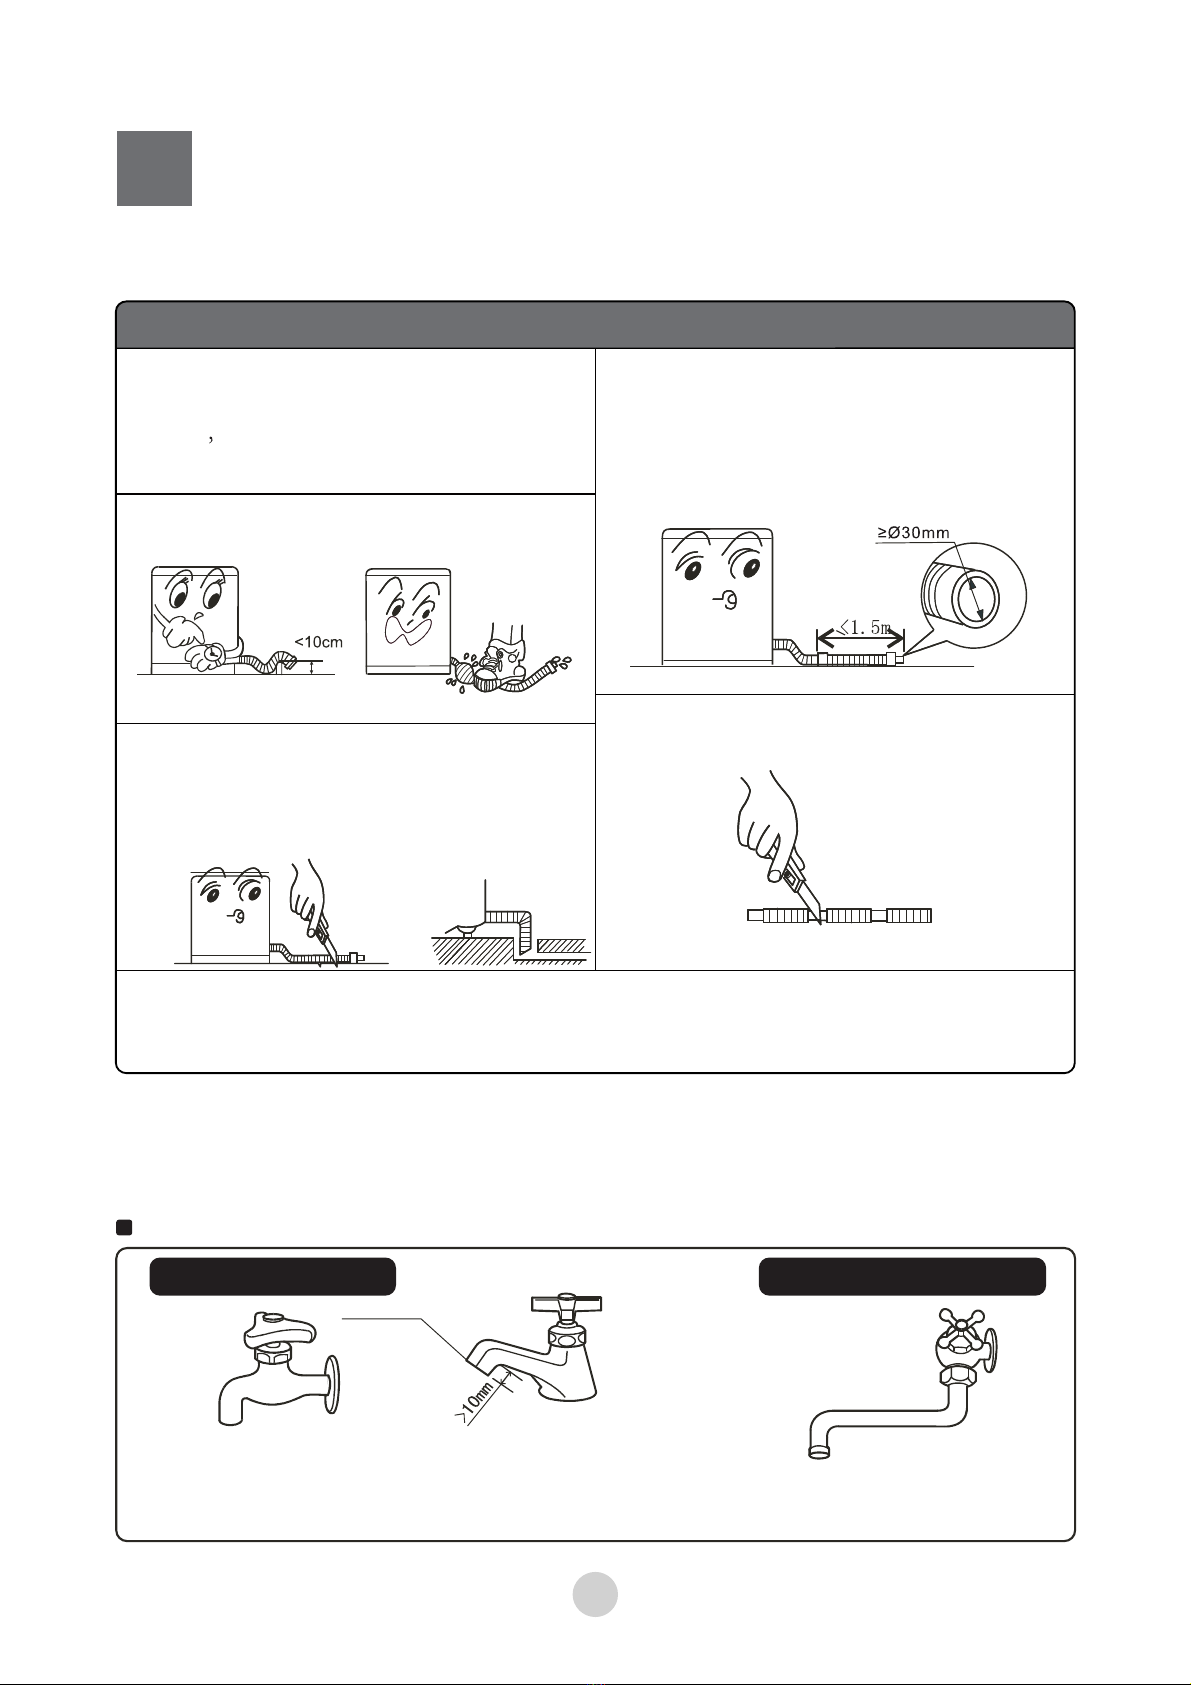
The new hose-setssupplied withthe
appliancearetobeused and thatold
hose-setsshould not be reused.
The rated washing capacity,spinning
capaciy,Themax. and min.inlet
waterpressurereferto
specification page.
If thesupplycordisdamaged, it
must bereplaced bythe manufacturer,
itsserviceagent orsimilarlyqualified
personsinordertoavoidahazard.
CAUTION:If this applianceissupplied
fromacordextension set orelectrical
portableoutlet device,thecordextension
set orelectricalportableoutlet device
must bepositioned sothat it is not
subject tosplashingoringress of
moisture.
Safetyprecautions
3
Ifyou areusinganextension cordor
aportableelectricaloutlet
device(not recommended),ensurethatit ispositioned sothat
it doesnotcomeintocontactwithwaterormoisture.
Do notwash
water-proofclothing
asthismayaffect
load balanceduring
spincycle(s).
Forbidden
Thisapplianceisnot intendedforuse
by
persons(including children)withreduced
physical,sensoryormental
capabilities,orlackof experience
and knowledge, unlesstheyhave
beengiven supervision or
instruction byapersonresponsible
fortheirsafety.Children should besupervised to
ensurethat theydonot playwiththe appliance.
Donot takeapart,
repairoralterthe
machine by
yourself.
Donot leavehotorheavy itemsonlid
orcontrolpanel asthismaycause
damagetothewasherormakethe
washerunsafetooperate.
Donot washlaundry
withchemicalsorother
volatilematerials(suchas
petrol,solventsorthinners)
asthiscausedamage
tothe machine.
Keep washeraway
fromheat sources
suchasheater,
stovesordirect sunlight.
Back
Front
Bottomplate
Soft object
Do notblockthe ventilationholeswithcarpet.
Ensurecarpetdoesnotobstructthe opening under
the baseofthe cabinet.
Theventilation
holesat the bottom
Do notconnecttohot
waterhigherthan
50°C.
The maximuminlet
waterpressurereferto
specification pape.
Do notinstallthisappliancein a
damporwetenvironment.Donot
leavewetlaundry on the control
panel orspraywaterdirectlyonto
thisappliance,asthismaycausethe
washertomalfunctionorcausean
electrical fault.
Donot leavehotorheavy stuffonlid
orcontrolpanel asthismaycause
damagetothewasherormakethe
washerunsafetooperate.
Safetyprecautions
4
Ifpowercordorotherpartsof thismachinebecomedamagedorfaulty,please
contact aechniciantohaveitrepaired.Donot attempt repairsbyyourselfasthismay
causepersonalharmorvoidwarranty.
Smart hinge
Thewashingmachinewhoselid canbeopened duringwaterextraction,that it takes
15sormoreforcompletestopofwater-extractingchambertub.Thenewhose-sets
suppliedwiththeappliancearetobeusedandthatold hose-setsshould
notbereused
Thewashingmachinewhoselid canbeopened duringwaterextraction,that it takes15s
ormoreforcompletestop of water-extractingchambertub.
Thenewhose-setssuppliedwiththeappliancearetobe used and thatoldhose-sets
shouldnotbereused
Safetywarning
Pleaseremoveitemsuchascoins,
button,sandandothersolidmaterials
fromclothing beforewashing.
Checkthatwaterfaucetsareopen
afterconnectiontomachine,prior
tooperation and thatpipesare
connected correctly.
Pleaseuselow suds/HighEfficiency
washingpowder.
Smart hinge
Smarthingepreventssudden closing ofthedoor.Doorisheavy,becarefulwhile
closingof thedoor.
Donot letyourhandsoranyothermaterialbecaught
belowdoor. It mightcauseinjury ordamage.
Doorclosing timeisdependentonambient temperature.
Themorehigherthe ambient temperature,themore
shorterthedoorclosing timeandviceversa. Smart Closing
Doorperformsbest whenlidisclosed fromfullopen condition.
Pleaseinstall andadjustthemachineaccordingtothedirectionscontainedinthis
manual.Itisvery importanttofollowthesedirectionsforthesafeoperationof the
machine,andtoensureyourmachine operatescorrectly.
Installation &Adjustment
5
Back
Front
Screw
Bottomplat
e Carpet
Donotinstall thismachine on an incline greaterthan 2°.Installing machine on an
angle oron rough ground will resultin unstable running orstoppage ofthe
machine.Pleaseadjustitbythe following method:
1.Confirmitislevel
2.Liftup the side ofthe leg slightlyand twistthe adjustable leg.
Balancewashing machine
Installthebottomplate
Thepurposeof thebottom plateis tosuppress noise
fromthewashing machineduringoperation.
Steps:
2. Placethe plateontothebottom ofthemachine.
3. Useascrewdriver totightenthescrew (inaccessory
bag)securing thepanel tobottomof thewasher.
4. Oncethescrew is tight andthe panelissecure, return
thewashertoits standing position.
1. Lay thewasheron its back, onanonabrasivesurface.
Note:Thedistancebetweenthe washing machine
andwall:atleast20 mm.
Installation &Adjustment
Usageofthe drainhose
Inletpipeconnection
1.The heightofthedrainhoseshallbeless
than 10cm, orthedrainage will notbe
smooth andcostsuchlong timethatthe
machine maystopatmidway.
2.Do nottrampleorpress the drainhose.
3.Ifthedrainhoseistoolong, cutitat mid
point.Tomakesmoothdrainage,cutthe
frontend ofthe hoseslantingly.
4.Ifextradrainhoseisneeded,please
makeseparatepurchase.The inner
diameterofthe extrahoseshallnot
less than 30mm,andthelengthshall
not exceed1.5m.
5.Iftheextrahoseistoolong, cutiteither
atAoratBpoint.
Note: heinstructionsforappliancesconnected tothe watermainsbydetachable
hose-setsshall statethat thenew hose-setssupplied withtheapplianceareto
beusedand thatold hose-setsshould not be reused.
AB
The newhose-sets supplied with the appliance are tobe used andthat old
hose-sets
should not be reused.
Confirm the waterfaucet
It is required that thefront end shall be longerthan 10mm.
The exit end faceof the faucet shall beflat and smooth. Ifnot please file itto avoid
leakage.
The exitend face ofthe faucet
waterfaucet,suitable waterfaucet, notsuitable
6
Thedrainageshallbesmoothwith thedrain hose.
Installation &Adjustment
Connectionbetweenthe waterinlethose jointerandthe waterfaucet
1.Press the lowerend of the lock leverand pushdown the slider. Take off the water
inlet hose jointerromthe waterinlet hosecomponent.See to Figure 1.
2.Take off the nameplate. Make sure the threading is 4mm above theuppersurface
of the nut. See toFigure 6.If thethreading is less than4mmabovetheupper
surfaceof thenut. please loosen the screws.
3.Loosen the screwtill the waterfaucet can be accessed. Put the jointerof thewater
inlet hose on thefaucet. See to Figure 2.(If thefaucetis too large
andthe jointer
can not be set on thewaterfaucet,please loosen the fourscrews and take out the
bushing inthe jointer.The frontend of the faucet must be smooth, otherwise it may
leak water. See to Figure 3.)
4.Fastenthe four screws evenly. SeetoFigure 4.
5.Twistthe fasteningnut, SeetoFigure 5. After installation, the threadingis
less than 2mm abovetheupper surfaceof the nut. SeetoFigure 6.
About4mm before
twisting
About less than
2mm aftertwisting
Lock level
Waterinlethose
Slider
Waterinlethosejointer
Screw knife
Nameplate
Screw
Bushing
Screw nut
Figure1 Figure2 Figure3
Figure4 Figure5 Figure6
Connectionbetweenthe waterinlethose andthe washer
1.Donottakeoffthe waterabsorption cushion.
Pleasecheck ifthe cushion isdroppedor
damaged beforeeach usage.
Ifithappens
please contactourafter-saledepartment
immediately.
2.Putthe nutof the waterinlethose on the
valve jointer.
3.Fastenthe nut.Swing itgentlytoconfirmifit’s suitable.
nutof thewater inlethose
jointerof thewaterinletvalve
waterabsorption cushion
7