manuals.online logo
Brands
  1. Home
  2. •
  3. Brands
  4. •
  5. Haier
  6. •
  7. Water Heater
  8. •
  9. Haier FCD-JTLD100 User manual

Haier FCD-JTLD100 User manual

Sea-ox King
Haier Household Electric Water Heater
Please read this manual before usage
Retain it for future reference
0040502123
vc:
FCD-JTLD80
FCD-JTLD100
FCD-JTLD120
FCD-JTLD150
Dear users,
Thanks for choosing Haier waterheater product.
Haier products havegood quality andexcellent performance. Tofacilitate you to use
the product, pleaseread the manual and operate accordingly. Please retainit for future
reference.
The international star service ofHaier Group will always accompany you.No matter
what kind ofproblems you meet in usage, pleasecontact with the local after -sales
service agent. We are at your service allthe time. Thanks again for choosing Haier
Product.
The water heater you purchasedmay not full comply with themanual due to the
improvement of product.We apologize for the inconvenience occurred therefrom.
Contents
Before use
Using instructions
FAQ
FAQ
Packing list
Features
Electric circuit diagram
Using methods
Technicalparameters
Dimension diagram
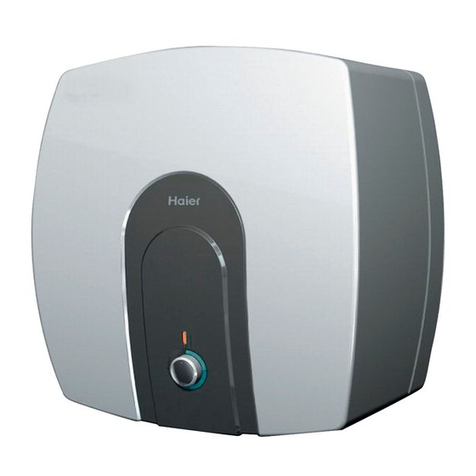
Appearance and components
1
1
2-3
4
5
10
7-8
Precautions during use 7
Safety precautions
Setting environment
Technical data
Cleaning and maintenance 8
Special hints
Precautions during installation
5
6
Installation instructions
Installation methods 6-7
8
9
9
10
See to thephysical product for the appearance, coloror pattern.
1
Features
Features
Electric circuit diagram
1. Safety
2. Durability
High quality and reliability due to 3-layer inner tank enamel technology employed in
inner tank production.
3. Convenient operation
75 fixed temperature heating means it will stop heating automatically when the water
temperature reaches 75 .
4. Multiple uses
Enclosed structure with several outlets can supply hot water to several places like the
washroom, kitchen etc(the hot water from it isnot drinkable).
It is suitable for residential houses, enterprises, and service trades like beauty parlors
or hairdressers forsupplying hot water.
5. Nice molding,space-saving.
The water heateryou bought is the improved model of the seriesproduct. Please use it
according to theUser's Manual.
High-quality heat proofstainless steel electric heating element, safe and reliable,
overtemperature protection, overpressure protection of tank.
The shell adopts dusting anticorrosiontreatment, handsome and durable enamel tank.
L
NE
BT
HL
EH
MT
L: Brown wire
N:Blue wire
temperature limiter
Thermostat
eating indicator
EH: Heating element
E:Yellow/green wire
MT:High
BT:
HL:H
Connected to inner tank
10
FAQ
FAQ
Phenomenon Please check Solutions
No water outlet
Cold water outletonly
If the watersupply system stops supplying
water or thewater pressure is too low
If the wateroutlet is blocked.
If the hotwater valve is turned on.
If the watertemperature is adjusted properly
If the thermostatfails
Heating time istoo short
If the pressureof tap water is stable
If the temperaturelimiter is activated due
to dry heating
Failed thermostat
The amount and
temperature of the
water delivered are
not stable.
Do not heatafter the
power is turnedon
(the heating lamp
does not illuminate)
The heating indicator
lamp stays on
Water is coming from
the relief valve
Overly high pressure(>0.7MPa)
or temperature (>99 )
Check
Check and clear
Adjust again
Call the service
department
Continue to heat
Check
Call the service
department
Call the service
department
Call the service
department
2
Check if the ammeter and wirediameter are
in accordance with the rated current of the
water heater. Please have themchecked by
an experienced electricianif necessary.
The product isonly available for alternating
current.
Be sure touse a separate socket (never use
a multifunctional socket) which is reliably
grounded and complies with national
standards. Dirt on the metal pins of the
power plug shall be wiped off regularly to
avoid fire orother accidents.
To prevent being burned, please do not face
the shower nozzle towards your body while
turning the watervalve.
Á¢¼´
ÓÃÓÚÏ´
Ô¡
²»
¿É
ÒÔ
²»
¿É
ÒÔ
Á¢
¼´ÓÃ
ÓÚ
Ï´
Ô¡
If the power cord of the water heater is
damaged, be sure to have it replaced by an
after-sales service technician with a special
cord .
Description of the symbols
This symbol indicates actions you shall never do! Neglecting these instructions
may cause personalinjury or even death.
This symbol indicatesinstructions you must observe! Neglecting these
instructions may causepersonal injury or damage to yourhouse or property.
Safety precautions
Note: the allowed error range of above parameters is 10%.
8
9
Heat preservation
layer
Magnesium
anode rod
Temperature
tube
Check valve
Blowdown port
Safety valve
Hot water
outlet valve
Hot water
outlet valve
Indicator
lamp
Shell
Enamel inner tank
Infall
Appearance and components
Fig.3
493mm
290mm
145mm
a1
b1
c1 d1
Appearance and components
521mm
Dimension diagram
Dimension diagram
Appearance and components
Dimension diagram
Model
FCD-JTLD80
Volume
a1 b1 c1 d1
120L
150L
210mm
125mm
125mm
187mm
770mm
920mm
1070mm
1359mm
80L
100L
Net
weight
29kg
33kg
37kg
47kg
FCD-JTLD100
FCD-JTLD120
FCD-JTLD150
210mm
210mm
210mm
187mm
187mm
187mm 125mm
125mm
3
Set the power socket of the water heater
in a dry position away from water. Never
insert or pull the power plug with wet
hands to avoid electric shock, injury or
other accidents.
Before initial use after installation, please
first fully fill water and then switch on the
power. If it is powered when the tank is
not full of water, this may cause
overheating of the heating element.
Children must use under the supervision
of an adult.
²»ÐÐ
£¡
²»
ÐÐ
During winter in cold areas, if the heater
is not used for a long period, please
unscrew the blow down nut to drain the
water to avoid damage caused by icing.
Please remember to fill it with water
before turning on the power when it is
used again. The hot water tube may be
relatively long due to the installation
location of the water heater. Please drain
the cold water before use each time to
avoid getting coldwater.
Do not use electrical products with
damaged power cords or loose power
sockets and plugs. Otherwise electric
shock, short circuit, fire or other
accidents may occur. Please make sure
the plug fitstightly with the socket.
Safety precautions
Description of the symbols
This symbol indicates actions you shall never do! Neglecting these instructions
may cause personalinjury or even death.
This symbol indicatesinstructions you must observe! Neglecting these
instructions may causepersonal injury or damage to yourhouse or property.
NO
Technical parameters
8
Using method
Cleaning and maintenance Technical parameters
Using method
The rated temperature of the waterheater is 75 . The indicator lamps will illuminate in
heating state. When it reaches the rated temperature, the power will be turned off and
the indicator lampswill go out.
Large amount of water will come out from the drain hose of the relief valve if the
pressure of the tap water is higher than 0.7MPa. This is caused by overly high water
pressure. Please call the after-sales service center. Water or vapor will come from the
drain hose of the relief valve if the temperature of water inside the inner tank exceeds
. It is reducing temperature by relieving pressure as the temperature is too high.
Please call the after-sales service centerin this case. Please keep away from the drain
hose during useto avoid scalding.
99
Cleaning and maintenance
To clean the outside: Disconnect the power supply before cleaning the water heater.
Wipe it lightly with a piece of wet cloth dipped in a little neutral detergent other than
gasoline or othersolutions. Then, wipe it witha piece of dry cloth and keep the shelldry.
Do not clean it with detergent containing abrasives (e.g. toothpaste), acid, chemical
solvents (e.g. alcohol)or polish.
To clean the inside: To keep the water heater working efficiently, the heating elements
and the inner tank should be cleaned once every three years. Take care not to damage
the protection coating outside the heating element and inside the inner tank. The
magnesium anode rod should be replaced periodically according to local water quality
and the usinghabits.
To clean the inner tank: Blowdown procedure: disconnect the power supply, turn off the
inlet valve andturn on the relief valve to relieve pressure. Whenno water comes from it,
turn off all the water outlet valves. Remove the drain hose of the relief valve together
with the double nipple. Then, unscrew the blowdown nut. Connect the drain hose with
double nipple on the blowdown port (put the other end of the drain hose in the sewer
inlet). Turn on any one of the water outlets to conduct blowdown. Clean water coming
out of the drain hose indicates the dirt in the inner tank has been totally discharged.
Install all the components in their original places. Note: the water inlet valve should be
turned on severaltimes to rinse the dirt atthe bottom of the inner tankduring blowdown.
Note:Please deal withsimple issues by referring to theattached before calling a
service person.
Statement:Maintenance or repairwork can only be performed byqualified service persons.
Improper methods maycause serious accidents or property damage.Make sure
to unplug thewater heater before you intend toopen the water heater or repairit.
Rated voltage/ Rated Rated pressure Waterproof Dimension/Weight/ Tap water pressure
Frequency power grade Volume
220V~/50Hz 2000W 0.7MPa IPX4 See to Figure3 no less than 0.05MPa
230V~/50Hz 2150W 0.7MPa IPX4 See toFigure 3 no less than 0.05MPa

4
²»Òª°²×°ÓÚÎÞ·¨ÅÅË®µÄµØ·½
Setting environment
Description of the symbols
This symbol indicates actions you shall never do! Neglecting these instructions
may cause personalinjury or even death.
This symbol indicates instructions you must observe! Neglecting these
instructions may causepersonal injury or damage to your house or property.
Do not install it outdoor. Do not installit in a place without
drainage.
Do not placeit in a cold environment
where it tendsto freeze. The tank
and the tubesmay break if water in it
freezes. This may cause leakageand
scalding.
If drain hose is connected, please
connect it to the inlet of the sewer to
avoid polluting bysplashing.
7
Safety valve
(Fig. 2)
Mount the relief valve on the water heater with position as
shown in Fig. 1 Fit the double nipple in the relief hole of the
relief valve and then screw one end of the drain hose onto
the double nipple (as shown on Fig. 2). When the water
heater is powered on, a small amount of water may drip out
of the drain hose. This is a normal phenomenon caused by
expansion of water inside the water heater. The relief hole
must be keptunblocked.
The drain hose can be cut short or extended as necessary.
Connect the other end of the drain hose to the sewage drain
to avoid pollutingby splashing. The drain hose connecting
.
Installation methods
Precautions during use Using methods
Installation methods
Connection and use of safety valve:
the relief valve should be installed in a continuous downward direction and in a frost-
free environment.
Be sure to check and confirm that the tank is fully filled with water, that there is no
leakage from any joints, and that the power supply complies with the requirements
before switching onthe power.
Precautions during use
Toavoid damage, never turn on thepower before the inner tank isfully filled with water.
Toavoid scalding, adjust the water temperatureto an appropriate degree before use.
Water over 50 can result inscalding.
The relief valve should be checked once every two weeks during use. The method: turn
the small handle of the relief valve. It is normal if there is water flowing from it. If not,
please contact localafter-sales service center.
The product is a water heater of enclosed type. It can supply hot water to several
locations such asbathroom (bathtub, hand wash basin, showernozzle) and kitchen.
If the waterheater is not to be usedfor an extended period or ifit is to be repaired, please
turn off the inlet valve and turn on the relief valve to relieve pressure. Then, open the
water outlet and blowdown port to drain the water in the inner tank. Before reusing, to
avoid injury or accidents, it is recommended to turnon the hot water valve before turning
on the power of the water heater. In this way youcan discharge air in the pipeline. At this
time, please do not smoke or light other open flames near the open valve. Meanwhile,
carefully check that all the components of the water heater are in good condition. It can
be put into use after allof these are confirmed. Note: the other end of the drain hosemay
not be higher than the pressure relief hole of the relief valve. The drain hose should be
inserted into thefloor drain or other places tofacilitate draining.
Please ask a service person toconduct safety examinations regularly. Remove the scale
on the heating element in time.Check the consumption of the magnesium anode rod and
replace it ina timely manner if it istoo seriously worn.
Please don't put the inflammable substance,such as gasoline and so on,near the water
heater,or elseit may cause fire or otheraccidents.
1.
2.
3.
4.
5.
6.
7.
Using methods
In initial use after installation, it must be fully filled with water before turning on the
power.
In first use, as the inner tank is empty, you must turn on the tap and one of the water
outlets. Wait until water comesout continuously (it indicates the tank
is full) andthen turn off the water outlet.
Check all thejoints for leakage. After that,plug in the power cord.
from water outlets
Instruction
manual
(Copy)
(Copy)
Check
valve
(Pc)
Pipe fitting
Components
Quantity
Model
Electric
water heater
(Set)
Relief valve /
drain hose
(Set)
3/4 airproof
met
(Copy)
2
2
2
2
Packing list Special hints
Packing list
Special hints
Be sure to disconnect the power supply before performing any maintenance or repair
work on it.Only professionals should be allowed toadjust or repair the water
Make sure the water heater is fully filled with water before turning on the power.
Otherwise malfunction of the heating element may occur. Please make sure the power
socket complies with applicable national standards and is reliably grounded. Never use
the water heaterwithout reliable earthing.
The water heater is fitted with a relief valve. To ensure safety, please do not change its
installation location andnever block its outlet.
When the ambient temperature is under0 , the piping may be damageddue to freezing
of water in it and cause the water heater to malfunction. So you shall drain the water in
the tank to avoid freezing. If the water heater is not to be used for a period of over 1
month,
If the electrical water heater is seriously soaked with water, it must be examined and
repaired by atechnician authorized by the manufacturer beforeit is put into use again.
Scale can be formed in the water tank after long periods of use. Besides, water quality
may change due to ageing of the water pipe. After you wash rice or vegetables with
water from thewater heater, please rinse themwith clean tap water.
Do not place flammables such as gasoline near the water heater to avoid fire or other
accidents.
please unplug thepower cord and drain the watertank.
56
Installation methodsPrecautions during installation
Be sure to have it installedby the installation staff from the after-sales servicecenter of
the manufacturer ora center authorized by them. Itadopts floorstanding installation.
Locate the water heater and install all the pipes with a tap water tube (PP-R pipe is
recommended) according to the dimension diagram and the user's requirements.
Mount the relief valve and other accessories according to Fig. 1. Remember to use
Teflonseal tape to avoid leakage.
To facilitate installation and dismantling of the water heater, it is recommended to fit a
G1/2 at the suitable location on the water inlet pipe and outlet pipe
separately. Confirm the positions needing water supply and connect the water inlet
pipe, outlet pipesand tap water pipes to thelocations separately.
Note:The hot waterpipe shall not be too longto reduce the heat losses.
When installing the water heater, please reserve certain space to facilitate future
maintenance and repair. Fig. 1 is only a reference installation schematic of pipelines.
In specific installations,the actual situation of the usershould be considered.
flexible nut
Installation methods
Precautions during installation
City water inletpressure shall not be less than0.05 MPa.
Electric water heater shall be installed indoors with ambient temperature above 0 . The
pipes shall be collectively laid. Hotwater outlet shall not be too far from use points. In case
farer than 8m, hot water pipe shall havea thermal insulation to minimize heatloss.
Electric water heater shall be located in a place easy for use,maintenance and with a floor
drainer. Incase the tank or pipes leak,nearby or lower facilities shall notbe damaged.
Power socket for water heater shall be in a dry place free of water splash. (splash-proof
box is preferred).
Do not confuse inlet and outlet water pipes. Safety valve shall be installed at designated
position with norandom modification.
Connection and useof the check valve:
Connect the checkvalve with G1/2 connection screw accordingto the arrow on it.
Fig.1
Hot water outlet
Safety vaive
Indicator lamp
Check valve
Blowdown port
Hot water
outlet valve Cold water
outlet valve

This manual suits for next models

3

Other Haier Water Heater manuals

Haier FCD-JTMG50-III User manual

Haier

Haier FCD-JTMG50-III User manual

Haier HP200M3 Specification sheet

Haier

Haier HP200M3 Specification sheet

Haier ES15V-M1 User manual

Haier

Haier ES15V-M1 User manual

Haier Little Sea-ox FCD-JTSA50-III User manual

Haier

Haier Little Sea-ox FCD-JTSA50-III User manual

Haier HP200M2 Manual

Haier

Haier HP200M2 Manual

Haier Little Sea-ox FCD-JTSA50-III User manual

Haier

Haier Little Sea-ox FCD-JTSA50-III User manual

Haier EI35M(AE) Guide

Haier

Haier EI35M(AE) Guide

Haier HP200S1 Specification sheet

Haier

Haier HP200S1 Specification sheet

Haier FCD-JTH40-III User manual

Haier

Haier FCD-JTH40-III User manual

Haier FCD-JTHC80A-III (E), FCD-JTHC100A-III (E) User manual

Haier

Haier FCD-JTHC80A-III (E), FCD-JTHC100A-III (E) User manual

Haier FCD-6.6 User manual

Haier

Haier FCD-6.6 User manual

Haier ES100V-R1(H) User manual

Haier

Haier ES100V-R1(H) User manual

Haier FCD-JTLD100 User manual

Haier

Haier FCD-JTLD100 User manual

Haier Little Sea-ox FCD-JTHC80A-III (E) User manual

Haier

Haier Little Sea-ox FCD-JTHC80A-III (E) User manual

Haier ES15V-Q1(R) User manual

Haier

Haier ES15V-Q1(R) User manual

Haier HR-SC User manual

Haier

Haier HR-SC User manual

Haier ES50V-R1

Haier

Haier ES50V-R1

Haier QBJ1-130A58E User manual

Haier

Haier QBJ1-130A58E User manual

Haier GV150REMB User manual

Haier

Haier GV150REMB User manual

Haier FCD-JLD245 User manual

Haier

Haier FCD-JLD245 User manual

Haier ES35HH1 (R)

Haier

Haier ES35HH1 (R)

Haier DSF80B E User manual

Haier

Haier DSF80B E User manual

Haier ES25V-M1 User manual

Haier

Haier ES25V-M1 User manual

Haier ES50V-F1(EU) User manual

Haier

Haier ES50V-F1(EU) User manual

Popular Water Heater manuals by other brands

Webasto Thermo Pro 50 Eco Operation manual

Webasto

Webasto Thermo Pro 50 Eco Operation manual

State Water Heaters Select Dairy Barn SRESS00406 Specifications

State Water Heaters

State Water Heaters Select Dairy Barn SRESS00406 Specifications

Bosch BSS250E-2 Installation and user guide

Bosch

Bosch BSS250E-2 Installation and user guide

Eldom Invest 72324NMB TECHNICAL DESCRIPTION MANUAL FOR INSTALLATION, OPERATION AND MAINTENANCE WARRANTY AND WARRANTY CONDI

Eldom Invest

Eldom Invest 72324NMB TECHNICAL DESCRIPTION MANUAL FOR INSTALLATION, OPERATION AND MAINTENANCE WARRANTY AND WARRANTY CONDI

Bosch 940ESO manual

Bosch

Bosch 940ESO manual

Ariston 65 DRY manual

Ariston

Ariston 65 DRY manual

ALLIANCE ALLWH3.2kW Technical manual

ALLIANCE

ALLIANCE ALLWH3.2kW Technical manual

Bosch Greentherm T9800 SEC 160/199 Installation and operating instructions

Bosch

Bosch Greentherm T9800 SEC 160/199 Installation and operating instructions

Paloma PTG-74X Use & care manual

Paloma

Paloma PTG-74X Use & care manual

A.O. Smith ProMax Direct-Vent GDV-40 Specification sheet

A.O. Smith

A.O. Smith ProMax Direct-Vent GDV-40 Specification sheet

Rheem PROE20 1 RH POU Use & care manual

Rheem

Rheem PROE20 1 RH POU Use & care manual

Bosch AQUASTAR 125B LPL   operati Installation and operating instructions

Bosch

Bosch AQUASTAR 125B LPL operati Installation and operating instructions

Morco F-11E Installation and user manual

Morco

Morco F-11E Installation and user manual

Kenmore THE ECONOMIZER 153.333346 owner's manual

Kenmore

Kenmore THE ECONOMIZER 153.333346 owner's manual

Rinnai Sensei N-Series Service Presentation

Rinnai

Rinnai Sensei N-Series Service Presentation

Kenmore 153.313340 owner's manual

Kenmore

Kenmore 153.313340 owner's manual

Fresh DOLPHIN 189.75 manual

Fresh

Fresh DOLPHIN 189.75 manual

Siemens DE 628M Series operating instructions

Siemens

Siemens DE 628M Series operating instructions

manuals.online logo
manuals.online logoBrands
  • About & Mission
  • Contact us
  • Privacy Policy
  • Terms and Conditions

Copyright 2025 Manuals.Online. All Rights Reserved.