Hama 00062762 User manual

00062762-02.05
Hama GmbH & Co KG
Postfach 80
86651 Monheim/Germany
Tel. +49 (0)9091/502-0
Fax +49 (0)9091/502-274
www.hama.de
www.hama.de
00062762bda 15.02.2005 13:09 Uhr Seite 2

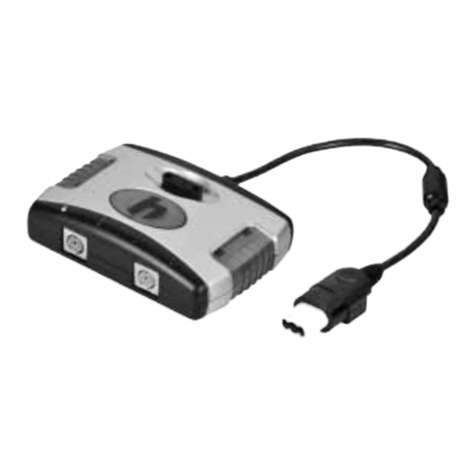
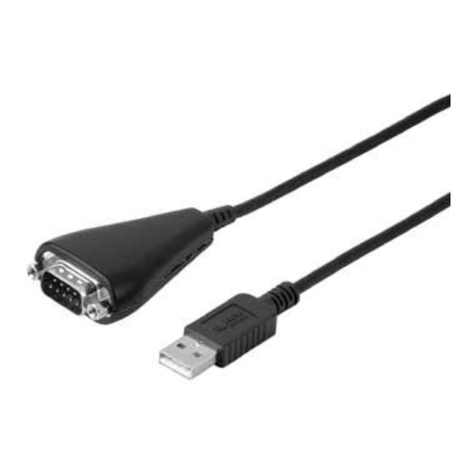
Playstation®Controller
Adapter
00062762
00062762bda 15.02.2005 13:09 Uhr Seite 3

lInstallationsanleitung
Einen Playstation Controller an eine Microsoft
Xbox anschließen:
Wenn Sie einen Playstation Controller an eine
Microsoft Xbox anschließen wollen, müssen Sie
zuerst den Controller mit dem 3in1 Controller Adap-
ter verbinden. Wenn dieser Schritt abgeschlossen
ist schließen Sie bitte den 3in1 Controller Adapter
an die Microsoft Xbox an.
Einen Playstation Controller an einen Nintendo
Gamecube anschließen:
Wenn Sie einen Playstation Controller an einen Nin-
tendo Gamecube anschließen wollen, müssen Sie
zuerst den Controller mit dem 3in1 Controller Adap-
ter verbinden. Wenn dieser Schritt abgeschlossen
ist schließen Sie bitte den 3in1 Controller Adapter
an den Nintendo Gamecube an.
Einen Playstation Controller an den PC anschließen:
Installieren Sie bitte den Treiber, der sich auf der
beiliegenden CD befindet, bevor Sie den 3in1 Con-
troller Adapter an den PC anschließen.
Windows XP:
Legen Sie die Treiber CD in das CD-Rom Laufwerk
Ihres PCs ein. Die Installation sollte nun automa-
tisch beginnen. Wenn dies nicht der Fall ist, öffnen
Sie bitte das entsprechende CD-Rom Laufwerk im
Arbeitsplatz und führen Sie die Datei „en-3 std
setup.exe“ aus. Nun erscheint das Installations
Menü. Fahren Sie bitte mit <Weiter> fort. Wenn Sie
das nächste erscheinende Fenster mit <Weiter>
bestätigen wird der Treiber automatisch installiert.
Mit <Finish> wird die Installation abgeschlossen.
Verbinden Sie jetzt Ihren Playstation Controller mit
dem 3in1 Controller Adapter. Stecken Sie nun den
USB Stecker des 3in1 Controller Adapter in eine
Freie USB – Buchse Ihres PCs. Der Controller Adap-
ter wird nun automatisch installiert. Ob der Adapter
ordnungsgemäß in das System eingebunden wurde,
können Sie im Gerätemanager unter „Eingabegerä-
te“ überprüfen, dort muss der Eintrag „HID-konfor-
mer Gamecontroller“ ohne gelbes Ausrufezeichen
vorhanden sein. Die ordnungsgemäße Funktion des
Adapters können Sie testen, indem Sie unter Start >
Systemsteuerung (Im klassischen Startmenü Start
> Einstellungen > Systemsteuerung) > Drucker und
andere Hardware (In der klassischen Ansicht auf >
Gamecontroller) auf Gamecontroller klicken. In
dem erscheinenden Fenster sollte der Eintrag „3in1
Conversation Box“ vorhanden sein und sich unter
Status ein „OK“ befinden. Markieren Sie nun den
Eintrag „3in1 Conversation Box“ und klicken Sie mit
der Maus auf „Eigenschaften“. Nun erscheint ein
neues Fenster, in diesem können Sie den Controller
testen. Die Stärke des „Force Feedback Effektes“
können sie verändern, indem Sie auf den Reiter
„Effect Page“ klicken. In diesem Fenster können Sie
nun die gewünschte Stärke wählen. Ihre Einstellun-
gen bestätigen Sie mit > OK. Der Adapter ist jetzt
ordnungsgemäß installiert und kann verwendet
werden.
Windows 2000:
Legen Sie die Treiber CD in das CD-Rom Laufwerk
Ihres PCs ein. Die Installation sollte nun automa-
tisch beginnen. Wenn dies nicht der Fall ist, öffnen
Sie bitte das entsprechende CD-Rom Laufwerk im
Arbeitsplatz und führen Sie die Datei „en-3 std
setup.exe“ aus. Nun erscheint das Installations
Menü. Fahren Sie bitte mit <Weiter> fort. Wenn Sie
das nächste erscheinende Fenster mit <Weiter>
bestätigen wird der Treiber automatisch installiert.
Mit <Finish> wird die Installation abgeschlossen.
Verbinden Sie jetzt Ihren Playstation Controller mit
dem 3in1 Controller Adapter. Stecken Sie nun den
USB Stecker des 3in1 Controller Adapter in eine
Freie USB – Buchse Ihres PCs. Der Controller Adap-
ter wird nun automatisch installiert. Ob der Adapter
ordnungsgemäß in das System eingebunden wurde,
können Sie im Gerätemanager unter „Eingabegerä-
te“ überprüfen, dort muss der Eintrag „HID-konfor-
mer Gamecontroller“ ohne gelbes Ausrufezeichen
vorhanden sein. Die ordnungsgemäße Funktion des
Adapters können Sie testen, indem Sie unter Start >
Einstellungen > Systemsteuerung auf Gamecontrol-
ler klicken. In dem erscheinenden Fenster sollte der
Eintrag „3in1 Conversation Box“ vorhanden sein
und sich unter Status ein „OK“ befinden. Markieren
Sie nun den Eintrag „3in1 Conversation Box“ und
klicken Sie mit der Maus auf „Eigenschaften“. Nun
erscheint ein neues Fenster, in diesem können Sie
den Controller testen. Die Stärke des „Force Feedb-
ack Effektes“ können Sie verändern, indem Sie auf
den Reiter „Effect Page“ klicken. In diesem Fenster
können Sie nun die gewünschte Stärke wählen.
Ihre Einstellungen bestätigen Sie mit > OK. Der
Adapter ist jetzt ordnungsgemäß installiert und
kann verwendet werden.
00062762bda 15.02.2005 13:09 Uhr Seite 4

Windows Me:
Legen Sie die Treiber CD in das CD-Rom Laufwerk
Ihres PCs ein. Die Installation sollte nun automa-
tisch beginnen. Wenn dies nicht der Fall ist, öffnen
Sie bitte das entsprechende CD-Rom Laufwerk im
Arbeitsplatz und führen Sie die Datei „en-3 std
setup.exe“ aus. Nun erscheint das Installations
Menü. Fahren Sie bitte mit <Weiter> fort. Nach dem
das nächste Fenster ebenfalls mit <Weiter>
bestätigt wird, installiert sich der Treiber automa-
tisch. Mit <Finish> wird die Installation automatisch
abgeschlossen. Verbinden Sie jetzt Ihren Playstati-
on Controller mit dem 3in1 Controller Adapter.
Stecken Sie nun den USB Stecker des 3in1 Control-
ler Adapter in eine Freie USB – Buchse Ihres PCs.
Der Controller wird nach dem Einstecken automa-
tisch installiert.
Ob der Adapter ordnungsgemäß in das System ein-
gebunden wurde, können Sie im Gerätemanager
unter „HID“ überprüfen, dort muss der Eintrag
„USB-HID“ ohne gelbes Ausrufezeichen vorhanden
sein. Die korrekte Funktion des Controller Adapters
können Sie überprüfen, indem Sie unter Start > Ein-
stellungen > Systemsteuerung > Gamecontroller
nachsehen. Dort muss sich der Eintrag „3in1 Con-
versation Box“ befinden. Der Status dieses Gerätes
sollte auf „OK“ stehen. Markieren Sie nun den Ein-
trag „ 3in1 Conversation Box“ und klicken Sie mit
der Maus auf „Eigenschaften“. Nun erscheint ein
neues Fenster, in diesem können Sie den Controller
testen. Die Stärke des „Force Feedback Effektes“
können Sie verändern indem Sie auf den Reiter
„Effect Page“ klicken. In diesem Fenster können Sie
nun die gewünschte Stärke wählen. Ihre Einstellun-
gen bestätigen Sie mit > OK. Der Adapter ist jetzt
ordnungsgemäß installiert und kann verwendet
werden.
Windows 98SE:
Legen Sie die Treiber CD in das CD-Rom Laufwerk
Ihres PCs ein. Die Installation sollte nun automa-
tisch beginnen. Wenn dies nicht der Fall ist, öffnen
Sie bitte das entsprechende CD-Rom Laufwerk im
Arbeitsplatz und führen Sie die Datei „en-3 std
setup.exe“ aus. Nun erscheint das Installations
Menü. Fahren Sie bitte mit <Weiter> fort. Nach dem
das nächste Fenster ebenfalls mit <Weiter>
bestätigt wird, installiert sich der Treiber automa-
tisch. Mit <Finish> wird die Installation automatisch
abgeschlossen. Verbinden Sie jetzt Ihren Playstati-
on Controller mit dem 3in1 Controller Adapter.
Stecken Sie nun den USB Stecker des 3in1 Control-
ler Adapter in eine Freie USB – Buchse Ihres PCs.
Wenn Sie den Controller Adapter eingesteckt haben
erscheint der „Hardware-Assistent“ und sucht
nach neuen Treibern für „USB HID (Human Interfa-
ce Device)“ <Weiter>. Markieren Sie „Nach dem
besten Treiber für das Gerät suchen (empfohlen)“
Weiter > Weiter > Weiter. Sie werden nun aufge-
fordert die Windows98 CD in das CD-Rom Laufwerk
einzulegen. Legen Sie bitte die Windows98 CD ein
und bestätigen Sie mit <OK>. Bei manchen
Betriebssystemversionen kann es vorkommen, dass
eine Treiber-Datei die sich bereits auf dem PC
befindet durch eine ältere Version ersetzt werden
soll. Sollte dies der Fall sein bestätigen Sie die
Frage ob die neuere Datei beibehalten werden soll
mit <Ja>. Mit Fertigstellen wird die Installation
abgeschlossen. Ob der Adapter ordnungsgemäß in
das System eingebunden wurde, können Sie im
Gerätemanager unter „HID“ überprüfen, dort muss
der Eintrag „USB-HID“ ohne gelbes Ausrufezeichen
vorhanden sein. Die korrekte Funktion des Control-
ler Adapters können Sie überprüfen, indem Sie
unter Start > Einstellungen > Systemsteuerung >
Gamecontroller nachsehen. Dort muss sich der Ein-
trag „3in1 Conversation Box“ befinden. Der Status
dieses Gerätes sollte auf „OK“ stehen. Markieren
Sie nun den Eintrag „3in1 Conversation Box“ und
klicken Sie mit der Maus auf „Eigenschaften“. Nun
erscheint ein neues Fenster, in diesem können Sie
den Controller testen. Die Stärke des „Force Feedb-
ack Effektes“ können Sie verändern, indem Sie auf
den Reiter „Effect Page“ klicken. In diesem Fenster
können Sie nun die gewünschte Stärke wählen.
Ihre Einstellungen bestätigen Sie mit > OK. Der
Adapter ist jetzt ordnungsgemäß installiert und
kann verwendet werden.
00062762bda 15.02.2005 13:09 Uhr Seite 5

To connect a Playstation controller to a Microsoft
Xbox:
If you want to connect a Playstation controller to a
Microsoft Xbox, you have to connect the controller
to the 3in1 controller adapter first. Please connect
the 3in1 controller adapter to the Microsoft Xbox
afterwards.
To connect a Playstation controller to a Nintendo
Gamecube:
If you want to connect a Playstation controller to a
Nintendo Gamecube, you have to connect the con-
troller to the 3in1 controller adapter first. Please
connect the 3in1 controller adapter to the Nintendo
Gamecube afterwards.
To connect a Playstation controller to the PC:
Please install the driver which is to be found on the
enclosed CD before you connect the 3in1 controller
adapter.
Windows XP:
Insert the driver CD in the CD-Rom drive of your PC.
The installation should begin automatically now. If
this is not the case, please open the corresponding
CD-Rom drive via My Computer and run the “en-
3std setup.exe” file. The installation menu appears
now. Please continue with <Continue/Next>. If you
confirm the window which appears now with <Con-
tinue/Next>, the driver will be installed automatical-
ly. The installation is finished with <Finish>.
Connect your Playstation controller to the 3in1 con-
troller adapter now. Put the USB plug of the 3in1
controller adapter into a free USB socket of your PC
now. The controller adapter is now installed auto-
matically. In the Device Manager under “Input
Devices”, you can check whether the adapter has
been properly integrated into the system; there the
entry “HID-Compliant Game Controllers” must
appear without a yellow exclamation point. You can
check whether the adapter is functioning properly
by clicking Game Controllers under Start > Control
Panel > (in the traditional view Start > Settings >
Control Panel) > Printer and Other Hardware (in the
traditional view > Game Controllers). In the win-
dow which appears now, the entry “3in1 Conversa-
tion Box” should appear. The status should be set
to “OK”. Select the entry “3in1 Conversation Box”
now and click with the mouse “Properties”. A new
window appears now in which you can test the
controller. You can change the force of the “Force
Feedback Effect” by clicking the tab “Effect Page”.
In this window you can now select the desired
force. Confirm your settings with > OK. Now, the
adapter is installed properly and can be used.
Windows 2000:
Insert the driver CD in the CD-Rom drive of your PC.
The installation should begin automatically now. If
this is not the case, please open the corresponding
CD-Rom drive via My Computer and run the “en-3
std setup.exe” file. The installation menu appears
now. Please continue with <Continue/Next>. If you
confirm the window which appears now with <Con-
tinue/Next>, the driver will be installed automatical-
ly. The installation is finished with <Finish>.
Connect your Playstation controller to the 3in1 con-
troller adapter now. Put the USB plug of the 3in1
controller adapter into a free USB socket of your PC
now. The controller adapter is now installed auto-
matically. In the Device Manager under “Input
Devices”, you can check whether the adapter has
been properly integrated into the system; there the
entry “HID-Compliant Game Controllers” must
appear without a yellow exclamation point. You can
check whether the adapter is functioning properly
by clicking Game Controllers under > Start > Set-
tings > Control Panel. In the window which appears
now, the entry “3in1 Conversation Box” should
appear. The status should be set to “OK”. Select the
entry “3in1 Conversation Box” now and click with
the mouse “Properties”. A new window appears
now in which you can test the controller. You can
change the force of the “Force Feedback Effect” by
clicking the tab “Effect Page”. In this window you
can now select the desired force. Confirm your set-
tings with > OK. Now, the adapter is installed pro-
perly and can be used.
L Installation instructions
00062762bda 15.02.2005 13:09 Uhr Seite 6

Windows Me:
Insert the driver CD in the CD-Rom drive of your PC.
The installation should begin automatically now. If
this is not the case, please open the corresponding
CD-Rom drive via My Computer and run the “en-3
std setup.exe” file. The installation menu appears
now. Please continue with <Continue/Next>. If you
confirm the window which appears now also with
<Continue/Next>, the driver will be installed auto-
matically. The installation is automatically finished
with <Finish>. Connect your Playstation controller
to the 3in1 controller adapter now. Put the USB plug
of the 3in1 controller adapter into a free USB socket
of your PC now. The controller is installed automati-
cally once it is connected. In the Device Manager
under “HID”, you can check whether the adapter
has been properly integrated into the system; there
the entry “USB-HID” must appear without a yellow
exclamation point. Under Start > Settings > Control
Panel > Game Controllers you can check whether
the controller adapter is functioning properly. The
entry “3in1 Conversation Box” has to appear there.
The state should be set to “OK”. Select the entry
“3in1 Conversation Box” now and click with the
mouse “Properties”. A new window appears now in
which you can test the controller. You can change
the force of the “Force Feedback Effect” by clicking
the tab “Effect Page”. In this window you can sel-
ect the desired force now. Confirm your settings
with > OK. Now, the adapter is installed properly
and can be used.
Windows 98SE:
Insert the driver CD in the CD-Rom drive of your PC.
The installation should begin automatically now. If
this is not the case, please open the corresponding
CD-Rom drive via My Computer and run the “en-3
std setup.exe” file. The installation menu appears
now. Please continue with <Continue/Next>. If you
confirm the window which appears now with <Con-
tinue/Next>, the driver will be installed automatical-
ly. The installation is automatically finished with
<Finish>. Connect your Playstation controller to the
3in1 controller adapter now. Put the USB plug of the
3in1 controller adapter into a free USB socket of
your PC now. When you have plugged the controller
adapter into, the “Hardware Assistant” appears
and searches for new drivers for “USB HID (Human
Interface Device)”<Continue/Next>.
Select “Search for the best driver for your device
(recommended)” Continue/Next > Continue/Next >
Continue/Next. Now you are asked to insert the
Windows98 CD in the CD-Rom drive. Please insert
the Windows98 CD and confirm with <OK>. When it
comes to certain operating system versions, it can
happen that a driver file which is already on the PC
is to be replaced by an older version. If this is the
case, please confirm the question if the newer file
is to be kept with <Yes>. The installation is finished
with <Finish>. In the Device Manager under “HID”,
you can check whether the adapter has been pro-
perly integrated into the system; there the entry
“USB-HID” must appear without a yellow exclama-
tion point. Under Start > Settings > Control Panel >
Game Controllers you can check whether the con-
troller adapter is functioning properly. The entry
“3in1 Conversation Box” has to appear there. The
state should be set to “OK”. Select the entry “3in1
Conversation Box” now and click with the mouse
“Properties”. A new window appears now in which
you can test the controller. You can change the
force of the “Force Feedback Effect” by clicking the
tab “Effect Page”. In this window you can now sel-
ect the desired force. Confirm your settings with >
OK. Now, the adapter is installed properly and can
be used.
00062762bda 15.02.2005 13:09 Uhr Seite 7

Connecter un contrôleur Playstation à Microsoft
Xbox :
Si vous voulez connecter un contrôleur Playstation
à Microsoft Xbox, vous devez raccorder le con-
trôleur à l’adaptateur contrôleur 3en1 dans un pre-
mier temps. Veuillez connecter l’adaptateur con-
trôleur 3en1 à Microsoft Xbox après.
Connecter un contrôleur Playstation à Nintendo
Gamecube :
Si vous voulez connecter un contrôleur Playstation
à Nintendo Gamecube, vous devez raccorder le
contrôleur à l’adaptateur contrôleur 3en1 dans un
premier temps. Veuillez connecter l’adaptateur con-
trôleur 3en1 à Nintendo Gamecube après.
Connecter un contrôleur Playstation au PC :
Veuillez installer le pilote fourni sur le CD inclus
avant de connecter l’adaptateur contrôleur 3en1 au
PC.
Windows XP :
Insérez le CD de pilotes dans le lecteur de CD-Rom
de votre PC. Maintenant, l’installation devrait com-
mencer automatiquement. Si cela n’est pas le cas,
veuillez ouvrir le lecteur de CD-Rom approprié via le
Poste de travail, puis lancez le fichier « en-3 std
setup.exe ». Maintenant, le menu d’installation
apparaît. Veuillez continuer avec <Suivant>. Si vous
confirmez la fenêtre apparaissant maintenant avec
<Suivant>, le pilote sera installé automatiquement.
L’installation est terminée avec <Finish>. Connectez
maintenant votre contrôleur Playstation à l’adapta-
teur contrôleur 3en1. Mettez maintenant la fiche
USB de l’adaptateur contrôleur 3en1 dans une libre
borne USB de votre PC. Maintenant, l’adaptateur
contrôleur est installé automatiquement. Si l’adap-
tateur a correctement été intégré dans le système,
vous pouvez le vérifier dans le gestionnaire de péri-
phérique sous « Périphériques d’entrée » ; il faut
que l’entrée « Contrôleur de jeux HID conforme» y
figure sans point d’exclamation jaune. Vous pouvez
tester le bon fonctionnement de l’adaptateur en cli-
quant sur Contrôleur de jeux sous Démarrer > Pan-
neau de configuration > (dans l’affichage classique
> Démarrer > Paramètres > Panneau de configura-
tion) > Imprimante et autre périphérie (dans l’af-
fichage classique sur > Contrôleur de jeux). Dans
la fenêtre apparaissant maintenant, l’entrée « 3in1
Conversation Box » devrait être affichée. L’état
devrait indiquer « OK ». Cochez maintenant l’entrée
« 3in1 Conversation Box » et cliquez avec la souris
sur « Propriétés ». Maintenant, une nouvelle fenêtre
apparaît ; dans cette fenêtre vous pouvez tester le
contrôleur. Vous pouvez modifier la force de l’effet
« Force Feedback » en cliquant sur l’onglet « Effect
Page ». Dans cette fenêtre, vous pouvez sélec-
tionner la force souhaitée. Veuillez confirmer vos
réglages avec > OK. Maintenant, l’adaptateur est
correctement installé et peut être utilisé.
Windows 2000 :
Insérez le CD de pilotes dans le lecteur de CD-Rom
de votre PC. Maintenant, l’installation devrait com-
mencer automatiquement. Si cela n’est pas le cas,
veuillez ouvrir le lecteur de CD-Rom approprié via le
Poste de travail, puis lancez le fichier « en-3 std
setup.exe ». Maintenant, le menu d’installation
apparaît. Veuillez continuer avec <Suivant>. Si vous
confirmez la fenêtre apparaissant maintenant avec
<Suivant>, le pilote sera installé automatiquement.
L’installation est terminée avec <Finish>. Connectez
maintenant votre contrôleur Playstation à l’adapta-
teur contrôleur 3en1. Mettez maintenant la fiche
USB de l’adaptateur contrôleur 3en1 dans une libre
borne USB de votre PC. Maintenant, l’adaptateur
contrôleur est installé automatiquement. Si l’adap-
tateur a correctement été intégré dans le système,
vous pouvez le vérifier dans le gestionnaire de péri-
phérique sous « Périphériques d’entrée » ; il faut
que l’entrée « Contrôleur de jeux HID conforme » y
figure sans point d’exclamation jaune. Vous pouvez
tester le bon fonctionnement de l’adaptateur en cli-
quant sur Contrôleur de jeux sous Démarrer >
Paramètres > Panneau de configuration. Dans la
fenêtre apparaissant maintenant, l’entrée « 3in1
Conversation Box » devrait être affichée. L’état
devrait indiquer « OK ». Cochez maintenant l’entrée
« 3in1 Conversation Box » et cliquez avec la souris
sur « Propriétés ». Maintenant, une nouvelle fenêtre
apparaît ; dans cette fenêtre vous pouvez tester le
contrôleur. Vous pouvez modifier la force de l’effet
« Force Feedback » en cliquant sur l’onglet « Effect
Page ». Dans cette fenêtre, vous pouvez sélec-
tionner la force souhaitée. Veuillez confirmer vos
réglages avec > OK. Maintenant, l’adaptateur est
correctement installé et peut être utilisé.
¬ Instructions d’installation
00062762bda 15.02.2005 13:09 Uhr Seite 8

Windows Me :
Insérez le CD de pilotes dans le lecteur de CD-Rom
de votre PC. Maintenant, l’installation devrait com-
mencer automatiquement. Si cela n’est pas le cas,
veuillez ouvrir le lecteur de CD-Rom approprié via le
Poste de travail, puis lancez le fichier « en-3 std
setup.exe ». Maintenant, le menu d’installation
apparaît. Veuillez continuer avec <Suivant>. Si vous
confirmez la fenêtre apparaissant maintenant avec
<Suivant>, le pilote sera installé automatiquement.
L’installation est terminée avec <Finish>. Connectez
maintenant votre contrôleur Playstation à l’adapta-
teur contrôleur 3en1. Mettez maintenant la fiche
USB de l’adaptateur contrôleur 3en1 dans une libre
borne USB de votre PC. Maintenant, le contrôleur
est installé automatiquement.
Si l’adaptateur a correctement été intégré dans le
système, vous pouvez le vérifier dans le gestionnai-
re de périphérique sous « HID » ; il faut que l’entrée
« USB-HID » y figure sans point d’exclamation
jaune. Vous pouvez tester le bon fonctionnement de
l’adaptateur contrôleur en consultant Démarrer >
Paramètres > Panneau de configuration > Con-
trôleur de jeux. L’entrée « 3en1 Conversation Box »
doit y être affichée. L’état devrait indiquer « OK » .
Cochez maintenant l’entrée « 3in1 Conversation
Box » et cliquez avec la souris sur « Propriétés ».
Maintenant, une nouvelle fenêtre apparaît ; dans
cette fenêtre vous pouvez tester le contrôleur. Vous
pouvez modifier la force de l’effet « Force Feedback »
en cliquant sur l’onglet « Effect Page ». Dans cette
fenêtre, vous pouvez sélectionner la force sou-
haitée. Veuillez confirmer vos réglages avec > OK.
Maintenant, l’adaptateur est correctement installé
et peut être utilisé.
Windows 98SE :
Insérez le CD de pilotes dans le lecteur de CD-Rom
de votre PC. Maintenant, l’installation devrait com-
mencer automatiquement. Si cela n’est pas le cas,
veuillez ouvrir le lecteur de CD-Rom approprié via le
Poste de travail, puis lancez le fichier « en-3 std
setup.exe ». Maintenant, le menu d’installation
apparaît. Veuillez continuer avec <Suivant>. Si vous
confirmez la fenêtre apparaissant maintenant avec
<Suivant>, le pilote sera installé automatiquement.
L’installation est automatiquement terminée avec
<Finish>. Connectez maintenant votre contrôleur
Playstation à l’adaptateur contrôleur 3en1. Mettez
maintenant la fiche USB de l’adaptateur contrôleur
3en1 dans une libre borne USB de votre PC. Quand
vous avez branché l’adaptateur contrôleur, l’assi-
stant Ajout de nouveau matériel apparaît et recher-
che de nouveaux pilotes pour « USB HID (Human
Interface Device) »<Suivant>. Cochez « Recher-
cher le meilleur pilote pour le périphérique
(recommandé) » Suivant > Suivant > Suivant. On
vous demande maintenant d’insérer le CD Windo-
ws98 dans le lecteur de CD-Rom. Veuillez insérer le
CD Windows98 et confirmez avec <OK>. Quant à
quelques versions de systèmes d’exploitation, il
peut arriver qu’un fichier de pilote qui se trouve
déjà sur le PC doit être remplacé par une version
plus ancienne. Dans ce cas, nous vous prions de
confirmer la question de savoir si ce fichier doit
être gardé avec <Oui>. L’installation est terminée
avec <Terminer>. Si l’adaptateur a correctement
été intégré dans le système, vous pouvez le vérifier
dans le gestionnaire de périphérique sous « HID » ;
il faut que l’entrée « USB-HID » y figure sans point
d’exclamation jaune. Vous pouvez tester le bon fon-
ctionnement de l’adaptateur contrôleur en consul-
tant Démarrer > Paramètres > Panneau de configu-
ration > Contrôleur de jeux. L’entrée « 3in1 Conver-
sation Box » doit y être affichée. L’état devrait indi-
quer « OK » . Cochez maintenant l’entrée « 3in1
Conversation Box » et cliquez avec la souris sur
« Propriétés ». Maintenant, une nouvelle fenêtre
apparaît ; dans cette fenêtre vous pouvez tester le
contrôleur. Vous pouvez modifier la force de l’effet
« Force Feedback » en cliquant sur l’onglet « Effect
Page ». Dans cette fenêtre, vous pouvez sélec-
tionner la force souhaitée. Veuillez confirmer vos
réglages avec > OK. Maintenant, l’adaptateur est
correctement installé et peut être utilisé.
00062762bda 15.02.2005 13:09 Uhr Seite 9
Table of contents
Languages:
Other Hama Adapter manuals

Hama
Hama Nano-Bluetooth-USB-Adapter User manual

Hama
Hama 00200323 User manual

Hama
Hama Electronic 3.6 User manual

Hama
Hama 39785 User manual

Hama
Hama 00053190 User manual

Hama
Hama AA25 USB-IDE/SATA Hard drive Adapter User manual

Hama
Hama 177100 User manual

Hama
Hama MHL-Adapter User manual

Hama
Hama 00054177 User manual

Hama
Hama 53129 User manual

Hama
Hama Nano Bluetooth USB-Adapter User manual

Hama
Hama 00049227 User manual

Hama
Hama 49218 User manual

Hama
Hama 00049046 User manual

Hama
Hama 00049535 User manual

Hama
Hama 53150 User manual

Hama
Hama 00133753 User manual

Hama
Hama 00054184 User manual

Hama
Hama Nano Bluetooth USB-Adapter User manual

Hama
Hama 00049226 User manual