TV-Sendungen anschauen & aufzeichnen
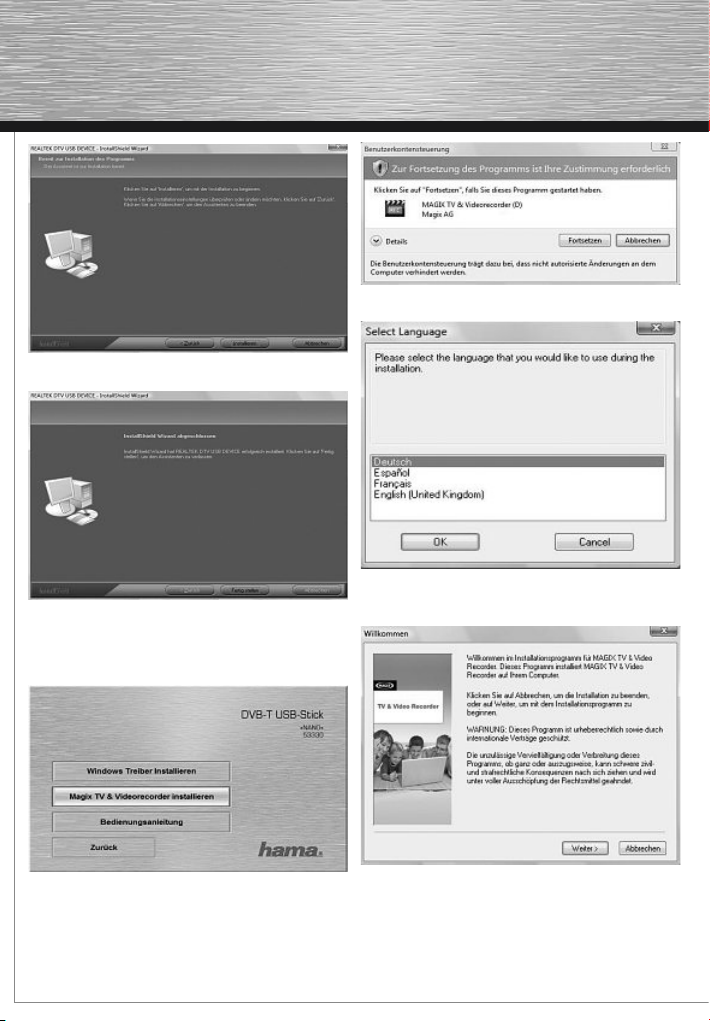
Starten Sie nun MAGIX TV & Video Recorder per
Doppelklick auf da neue Icon auf Ihrem Desktop.
Fernsehen am PC
Schritt 1: Automatische Sendersuche.
Beim ersten Programmstart werden Sie durch einen
Assistenten geführt, der alle TV-Sender über den
automatischen Sender-Suchlauf einstellt bzw. den Nano
DVB-T Dongle einrichtet. Sollte Ihr Sendegebiet in dem
oberen Dropdown-Menü aufgeführt sein, so können Sie
direkt eine voreingestellte Senderliste laden. Wählen Sie
dazu „Vorkonfigurierte Senderliste verwenden“. Wenn
Ihr Sendegebiet dort nicht aufgeführt ist, wählen Sie
im unteren Dropdown-Menü Ihren Aufenthaltsort und
MAGIX TV & Video Recorder sucht automatisch nach
allen verfügbaren Sendern. Wählen Sie dazu
„Sendersuchlauf durchführen“.
Schritt 2: Bild und Ton einstellen.
Falls kein Bild zu sehen ist oder eine Fehlermeldung
erscheint, öffnen Sie über die Schaltfläche „Setup“ den
Einstellungsdialog für den Videorekorder. Hier wählen
Sie den Treiber Ihrer TV- und Ihrer Soundkarte für Bild
und Ton aus und überprüfen die Tonwiedergabe.
Schritt 3: Bequem fernsehen.
Nachdem Sie alle Voreinstellungen vorgenommen
haben, können Sie dank der auch aus der Ferne gut
lesbaren Oberfläche mit Ihrer PC-kompatiblen
Fernbedienung (X10-Standard) bequem vom Sofa aus
Ihr Programm auswählen und genießen.
Tipp: Optional steht Ihnen ein TV-Programmführer mit
automatischem Timer für zeitgesteuerte Aufnahmen zu
Verfügung.
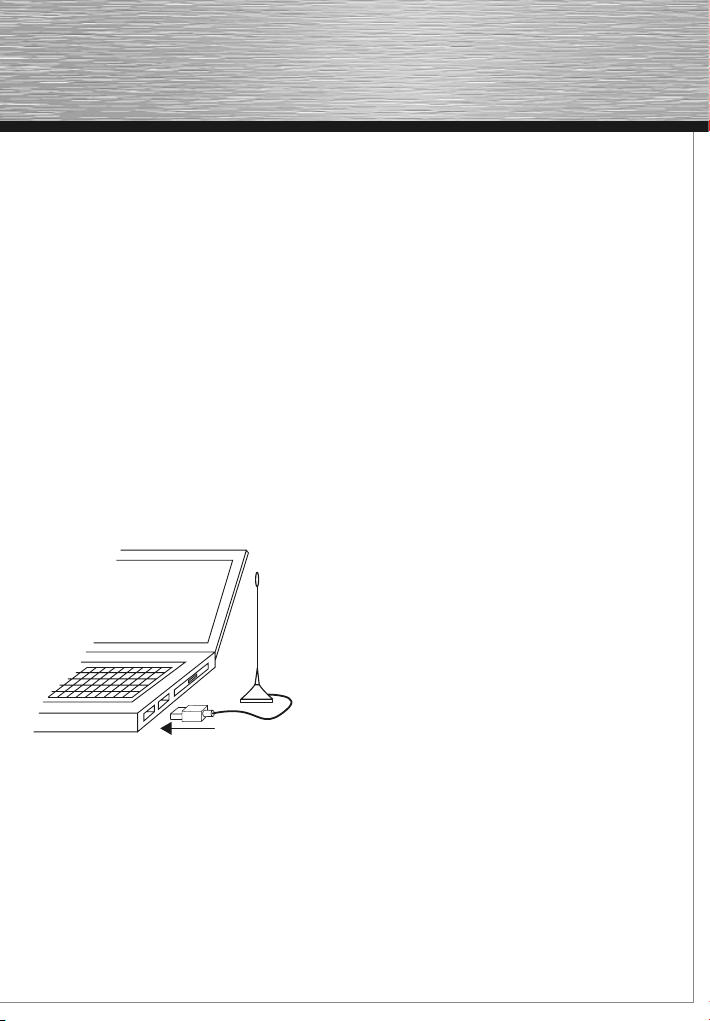
Ausgabe über ein externes Gerät
Mit dem Hama Nano DVB-T Dongle und der mitgeliefer-
ten MAGIX TV & Video Recorder Software verwan-
deln Sie Ihren PC in einen Fernseher. Sie können Ihr
Fernsehprogramm über verschiedene an Ihren Computer
angeschlossene Geräte wie PC-Monitor, Videoprojektor
(Beamer) oder TV-Gerät anzeigen lassen. Schließen Sie
einfach das gewünschte Ausgabegerät an den VGA-
Ausgang (Bildschirmsymbol) Ihrer Grafikkarte an.
Tipp: Beim Anschluss von Videoprojektoren an
Notebooks kann es zur Anzeige „kein Signal“ kommen.
In diesem Fall muss mit der Tastenkombination Fn +
Bildschirmtaste auf den VGA-Ausgang des Laptops
umgeschaltet werden.
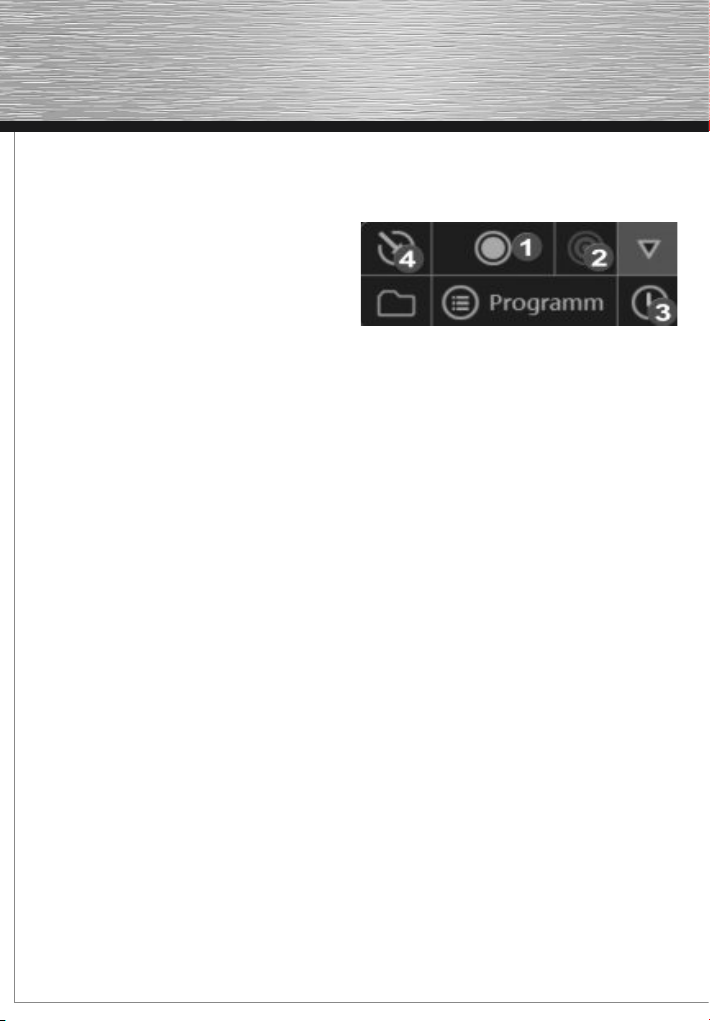
Sendungen aufzeichnen
Zum direkten Umschalten vom TV-Modus in den
Videorekorder-Modus klicken Sie auf das
Videorekorder-Symbol.
1. Sofortaufnahme:
Um das aktuell sichtbare Fernsehprogramm sofort mitzu-
schneiden, starten Sie über die Schaltfläche„Aufnahme“
(1) die Schnellaufnahme. Möchten Sie die Sendung wäh-
rend der Aufnahme weiterhin anschauen, so aktivieren
Sie die„Timeshift“- Option (2).
2. Videorekorder programmieren:
Um den Videorekorder für später zu programmieren
klicken Sie auf „Timer“(3). Hier können Sie den
Videorecorder unter Verwendung der elektronischen
Programmzeitschrift oder manuell programmieren.
•Programmierung über die Programmzeitschrift:
Wählen Sie die gewünschte Sendung aus und kopieren
Sie sie mit der Pfeilschaltfläche nach rechts in die Auf-
nahmeliste. Jetzt wird die Sendung in der Aufnahmeliste
vorgemerkt.
•Manuelle Programmierung:
Um den Videorekorder manuell einzustellen wählen Sie
die Schaltfläche „Manuelle Programmierung“.
3. Aufnahmen gleich auf CD & DVD brennen:
Brennen Sie die aufgenommene Sendung direkt nach
Ende der Aufnahme automatisch auf das gewünschte
Zielmedium, indem Sie den Punkt „Disc-Projekt sofort
nach der Aufnahme brennen“(4) aktivieren. Unter
„Setup“ > „Bearbeitung nach der Aufnahme“ können
Sie zusätzlich das gewünschte Zielmedium und weitere
Bearbeitungseinstellungen wie die automatische Entfer-
nung von Werbeblöcken auswählen.
8