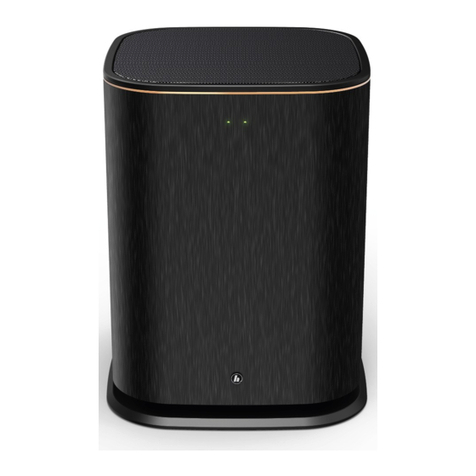
Hama SW01M User manual

F
D
GB
E
Quick Guide
Kurzanleitung
Notice d’utilisation
Instrucciones breves
Краткое руководство
Istruzioni brevi
Beknopte bedieningsinstructies
Σύντομες οδηγίες
Krótka instrukcja obsługi
Rövid útmutató
Stručný návod
Stručný návod
Instruções resumidas
Kısa kullanımkılavuzu
Instrucțiuni scurte
Snabbguide
Lyhyt ohje
Kort vejledning
Kortveiledning
Subwoofer
Subwoofer
RUS
PL
P
I
H
TR
FIN
NL
CZ
RO
DK
GR
SK
S
N
00054845
(SW01M)
QUICK GUIDE
KURZANLEITUNG

Technical data/
Technische Daten
Subwoofer
6.5" Downre
Driver/
Treiber
1
Acoustic Material/
Material Klangkörper Aluminum
Amplier Class/
Amplier-Klasse D
WiFi Frequency range/
Frequenzbereich
20–420 Hz
Adjustable low-pass lter/
Einstellbarer Tiefpass Filter
20-180Hz, 20-240Hz, 20-320Hz, 20-420Hz
Power Supply
AC Input 100-240V,50/60Hz
Connectivity/
Konnektivität
LAN (10/100), WiFi 2.4 GHz(b/g/n) /5GHz (a/n),USB (Update only), AUXIN, HF
IN (Cinch), LF IN (Cinch)
Encryption/
Verschlüsselung
WEP,WPA,WPA2, WPS
Power Consumption/
Stromaufnahme Operation/ Betrieb <100 WStandby <2W
Dimension (W xHxD)/
Größe (B xHxT) 23.5 x30x23.5 cm
Package Content/
Verpackungsinhalt Subwoofer,Power cord, Short Manual
Further information and features areavailable on/
WeitereInformationen und Features nden Sie hier
www.hama.com -> 00054845

B
A
12
1
3
11
13
14
12
9
2
8
15
10
5
4
7
6

LED indicator
LED Indicator Description
POWER LED
Constant red light The device is now in standby mode.
Flashes red The device has no Internet connection.
Flashes green The device is now in setup mode. (Initial setup via UNDOK
may now commence.)
Constant green light The Internet connection was successfully established.
MODE LED
Constant green light The device is now in AUX IN mode.
Constant blue light The device is now in HF IN mode.
Constant yellow light The device is now in LF IN mode.
Constant red light The device is now in Multi-room mode.
Off No source was selected.
CLIP LED Constant red light Subwoofer is overloaded.
Note: Minimise the volume until the LED goes out.
Verhalten der LED-Anzeige
LED Zustand Beschreibung
POWER LED
Leuchtet dauerhaft rot Gerät bendet sich im Standby-Modus.
Blinkt rot Gerät hat keine Internetverbindung.
Blinkt grün Gerät bendet sich im Setup Modus. (Die Ersteinrichtung
über UNDOK kann nun vorgenommen werden.)
Leuchtet dauerhaft grün Internetverbindung wurde erfolgreich hergestellt.
MODE LED
Leuchtet dauerhaft grün Gerät bendet sich im AUX IN Modus.
Leuchtet dauerhaft blau Gerät bendet sich im HF IN Modus.
Leuchtet dauerhaft gelb Gerät bendet sich im LF IN Modus.
Leuchtet dauerhaft rot Gerät bendet sich im Multiroom Modus.
Aus Es wurde keine Quelle ausgewählt.
CLIP LED Leuchtet dauerhaft rot Subwoofer ist übersteuert.
Hinweis: Lautstärke minimieren, bis die LED erlischt.


2
GQuick Guide
Controls and Displays
Front
1. Power status LED
2. Mode status LED
Rear
1. Clip (overload) status LED
2. Standby/Volume*
3. Volume status LED
4. Frequency controller
5. [MODE] button
6. [RESET] button
7. [LED] switch
8. Update port
9. AUX-In socket
10. LAN connection
11. HF IN socket
12. LF IN socket
13. [POWER] switch
14. Mains lead
15. Ambient lighting
Note
*The rotary control has adual function. By turning the
rotary control, you can adjust the volume. By pressing
the rotary control, you can set the device to standby
mode or wake up the device from standby mode.
!
Important note -Quick Guide:
•This is aquick guide to provideyou withthe
most importantbasic information, such as safety
warnings andhow to getstartedusingthe
product.
•Forthe sake of protecting the environmentand
saving valuable resources, Hama dispenseswitha
printedinstruction manual and provides this only
in the form of aPDF le available fordownload.
•Thecomplete instruction manual is availableat:
www.hama.com -> 00054845->Downloads
•Save theinstructionmanual to your computer’s
hard drivefor future reference, or print it out if
necessary.
1. Explanation of Warning Symbols and Notes
Warning
This symbol is used to indicate safety instructions or to
draw your attention to specichazards and risks.
Note
This symbol is used to indicate additional information or
important notes.
Risk of electric shock
This symbol indicates product parts energized with a
dangerous voltage of sucient magnitude to constitute
arisk of electric shock.
2. Package Contents
•Subwoofer
•Power cable
•Quick guide
3. Safety Notes
•The product is intended for private, non-commercial use
only.
•Protect the product from dirt, moistureand overheating
and use it in dry rooms only.
•As with all electrical devices, this device should be kept
out of the reach of children.
•Do not drop the product and do not expose it to any
major shocks.
•Do not operate the product outside the power limits
given in the specications.
•Keep the packaging material out of the reach of children
due to the risk of suffocation.
•Dispose of packaging material immediately according to
locally applicable regulations.
•Do not modify the device in any way.Doing so voids the
warranty.

3
Risk of electric shock
•Do not open the device or continue to operate it if it
becomes damaged.
•Do not use the product if the AC adapter,adapter
cable or power cable is damaged.
•Do not attempt to service or repair the device
yourself.Leave any service work to qualied experts.
3.Positioning the subwoofer in the room
Place the subwoofer on a at, stable surface that
withstands vibrations. To get the best sound quality,the
subwoofer should be placed on the oor.
4. Before getting started
Notes on use
The subwoofer is operated additionally using the UNDOK
app and your smartphone.
Note
Adetailed description of the UNDOK app and
the fullscope of functions can be found in our
UNDOK guide at:
www.hama.com->00054845->Downloads
Setting up anetwork connection
4.1 LAN (wired network)
•Connect aLAN connection of your router to the LAN
connection (10) on your subwoofer.Todothis, you will
requireanEthernet cable, which is not included in the
delivery.
•Make surethat the router is on and working properly,
and that you have an Internet connection.
•See the operating instructions for your router regarding a
properly functioning LAN connection.
•Then proceed as described in point 5, 'Getting Started'.
4.2 WLAN (wireless network)
•Make surethat the router is on and working properly,
and that you have an Internet connection.
•Activate your router’sWLAN function.
•See the operating instructions for your router regarding a
properly functioning WLAN connection.
•Then proceed as described in point 5, 'Getting Started'.
5. Getting started
Warning
•Only connect the product to asocket that has been
approved for the device. The electrical socket must
always be easily accessible.
•Disconnect the product from the power supply using
the on/off switch –ifthis is not available, unplug the
power cordfromthe socket.
•When using amulti-socket power strip, make sure
that the sum power draw of all the connected devices
does not exceed its maximum throughput rating.
•If you will not be using the product for along period
of time, disconnect it from mains power.
5.1 Turning on the product
•Connect the power cable of the subwoofer to aproperly
installed socket.
•Move the [POWER] switch (13) to the ON position.
•The Power status LED (1) is lit red.
•Press [STANDBY/VOLUME] (2) to switch on the
subwoofer.
Note –Turningonfor the rst time
•When switched on for the rst time, the subwoofer is
in SETUP mode.
•The Power status LED (1) begins to ash green.
•Youcan set up the device using the UNDOK app.
6.Volume control
Turn the [STANDBY/VOLUME] rotary control (2) to the left/
right to decrease/increase the volume.
7.Ambient lighting
Note
In order to use the ambient lighting, the subwoofer
must be on. (See Section 5)
•Move the [LED] switch (7) to the ON position to switch
on the ambient lighting (15).
•Move the [LED] switch (7) to the OFF position to switch
off the ambient lighting (15).

4
8. UNDOK –everything in the palm of your hand
The UNDOK app, developed by Frontier Silicon, gives you
full control of radios and speakers from your smartphone.
Whether you aresetting up the device for the rst time,
specifying settings for the equaliser and multi-room, or
managing your favourite stations –the UNDOK app lets
you access all the features from your smartphone or tablet,
thereby offering you greater convenience.
8.1 Interface/layout of the UNDOK home screen
1
2
3
4
5
7
6
1Update the audio system list
2Preview for ungrouped radios
3Set up new audio system
4Icon for managing an existing multi-room
group
5Create anew multi-room group with this
device
6Check for system update for all devices
7Further information, such as app info, change
app theme, and data logging
8.2 First-time setup of the device with UNDOK
The rst time you switch on an UNDOK-enabled product
from Hama, or when you have set it to the factory settings,
it creates amicroaccess point –aseparate WiFi network
that you can connect to with your tablet or smartphone.
Note
•The UNDOK app uses the language selected in your
smartphone’ssystem.
8.2.1 Procedure for iOS users
•Open the UNDOK app on your iPhone or iPad.
•Tapthe Set up audio system menu item.
•Make surethat the subwoofer is in SETUP mode. Set the
product to the factory settings, if necessary.Conrm the
query with Next.
•The UNDOK app now prompts you to connect to the
product’sWiFi network using the iPhone/iPad settings
–todoso, switch to the system settings on your iPhone
and select the WiFi network (for example, Setup Hama
DIR3120LED). Then return to the UNDOK app and tap
Next.
•Now choose aname for the subwoofer (for example,
Oce DIR3120) and conrm your entry with Next.
•The various network conguration options arethen
offered to you (whereapplicable, WiFi, WPS and
Ethernet). Tapthe desired method; the UNDOK app
switches to the next window.
•Depending on the selected method, you can now select
and congurethe desired WiFi network, set up aWPS
connection or set up the connection using aLAN cable.
•Finally,the subwoofer connects to the network; by
tapping Start using my audio system, you will be able to
use the device in the UNDOK app.
•The network connection LED indicator (1) is now
constantly lit.

5
8.2.2 Procedure for Android users
•Open the UNDOK app on your tablet or smartphone.
•Tapthe Set up audio system menu item.
•Make surethat the subwoofer is in SETUP mode Set the
product to the factory settings, if necessary.Conrm the
query with Next.
•On the following page, you will nd alist of all
available WiFi networks as well as the suggested
audio systems; the Hama product (for example, Setup
Hama DIR3120LED) should be listed here. Tapthe
corresponding WiFi network.
•Now choose aname for the subwoofer (for example,
Oce DIR3120) and conrm your entry with Next.
•The various network conguration options arethen
offered to you (whereapplicable, WiFi, WPS and
Ethernet). Tapthe desired method; the UNDOK app
switches to the next window.
•Depending on the selected method, you can now select
and congurethe desired WiFi network, set up aWPS
connection or set up the connection using aLAN cable.
•Finally,the subwoofer connects to the network; by
tapping Start using my audio system, you will be able to
use the device in the UNDOK app.
•The network connection LED indicator (1) is now
constantly lit.
9.Connection via Auxiliary Input
Youcan use the analogue audio input (AUX) to connect
mobile devices (for example, smartphone, tablet PC, MP3
player,etc.) as well as older analogue sources (CD/DVD
player etc.) to the subwoofer and play their audio signals
using the subwoofer.
Note
•Switch off the subwoofer beforeconnecting a
terminal device.
•Do not bend or crush the cable.
•Connect your terminal device to the AUX socket (9) on
the subwoofer using a3.5-mm audio cable (jack cable).
•Activate the Auxiliary Input mode by repeatedly pressing
[MODE] (5).
•The Mode status LED (2) is lit green.
10. High Level input (HF IN)
The High Level input allows you to connect your existing
sound system to the subwoofer,inorder to expand a2.0
sound system into a2.1 sound system, for example.
Note
•Switch off the subwoofer beforeconnecting aterminal
device.
•Do not bend or crush the cable.
•Connect your terminal device to the HF IN socket (11) on
the subwoofer using a3.5-mm RCAcable.
•Activate the HF IN mode by repeatedly pressing [MODE]
(5).
•The Mode status LED (2) is lit blue.
11. Low Level input (LF IN)
The LowLevel input allows you to connect an amplier
with subwoofer output to the subwoofer,for example.
Note
•Switch off the subwoofer beforeconnecting aterminal
device.
•Do not bend or crush the cable.
•Connect your terminal device to the LF IN socket (12) on
the subwoofer using a3.5-mm RCAcable.
•Activate the LF IN mode by repeatedly pressing [MODE]
(5).
•The Mode status LED (2) is lit yellow.
12. Multi-room
The subwoofer can be integrated as aclient into an
UNDOK Multi-room group.
Moredetailed information can be found in the UNDOK
Guide.
13. Care and Maintenance
•Only clean this product with aslightly damp, lint-free
cloth and do not use aggressive cleaning agents.
•If you do not use the product for along time, turn off
the device and disconnect it from the power supply.
Storeitinaclean, dry place out of direct sunlight.
14. Warranty Disclaimer
Hama GmbH &CoKGassumes no liability and provides no
warranty for damage resulting from improper installation/
mounting, improper use of the product or from failureto
observe the operating instructions and/or safety notes.

6
15. Service and Support
Please contact Hama Product Consulting if you have any
questions about this product.
Hotline: +49 9091 502-115 (German/English)
Further support information can be found here:
www.hama.com
The complete instruction manual is available at:
www.hama.com -> 00054845 -> Downloads
16. Recycling Information
Note on environmental protection:
After the implementation of the European
Directive 2012/19/EU and 2006/66/EU in the
national legal system, the following applies:
Electric and electronic devices as well as batteries
must not be disposed of with household waste. Consumers
areobliged by law to return electrical and electronic
devices as well as batteries at the end of their service lives
to the public collecting points set up for this purpose or
point of sale. Details to this aredened by the national
law of the respective country.This symbol on the product,
the instruction manual or the package indicates that a
product is subject to these regulations. By recycling,
reusing the materials or other forms of utilising old
devices/Batteries, you aremaking an important
contribution to protecting our environment.
17. Declaration of Conformity
Hereby,Hama GmbH &CoKGdeclares that the
radio equipment type [00054845] is in compliance
with Directive 2014/53/EU.The fulltext of the EU
declaration of conformity is available at the following
internet address:
www.hama.com->00054845->Downloads.
Frequency band(s)
WiFi: 2.412 -2.472GHz
WiFi: 5.150 -5.350 GHz
WiFi: 5.470 -5.725 GHz
Maximum radio-frequency
power transmitted
WiFi: 2.4GHz /17dBm (EIRP)
WiFi: 5GHz /16.5dBm (EIRP)
Restrictions or Requirements in
Belgium, Bulgaria, Czech Republic, Denmark, Germany,
Estonia, Ireland, Greece, Spain, France, Croatia, Italy,
Cyprus, Latvia, Lithuania, Luxembourg, Hungary,Malta,
the Netherlands, Austria, Poland, Portugal, Romania,
Slovenia, Slovakia, Finland, Sweden, United Kingdom
Note
If channels 36–64 (frequency 5.150–5.350 GHz) are
used in a5-GHz WLAN, the product may only be used
in closed rooms.

7
DSchnellstartanleitung
Bedienungselemente und Anzeigen
Frontseite
1. STATUS LED Power
2. STATUS LED Modus
Rückseite
1. Status LED Clip (Überlast)
2. Standby/Volume*
3. Status LED Volume
4. Frequenzregler
5. [MODE]-Taste
6. [RESET]-Taste
7. [LED]-Schalter
8. Update Port
9. AUX-In Buchse
10. LAN-Anschluss
11. HF IN-Buchse
12. LF IN-Buchse
13. [POWER]-Schalter
14. Netzzuleitung
15. Ambientebeleuchtung
Hinweis
*Der Drehregler verfügt über eine Doppelfunktion.
Durch Drehen des Reglers wirddie Lautstärke geändert.
Durch Drücken wirddas Gerät in den Standby-Modus
versetzt bzw.aus dem Standby aufgeweckt.
!
Wichtiger Hinweis -Kurzanleitung:
•Dies ist eine Kurzanleitung,die Siemit
denwichtigsten Basis-Informationen wie
Sicherheitshinweisenund der Inbetriebnahme
IhresProduktes versorgt.
•Aus Gründen des Umweltschutzes und der
Einsparung wertvollerRohstoffe verzichtetdie
Firma Hama auf eine gedruckte Langanleitung
undbietetdiese ausschließlich alsPDF-Download
an.
•Die vollständige Langanleitung ist unterder
folgendenInternetadresse verfügbar:
www.hama.com->00054845 ->
Downloads
•SpeichernSie dieLanganleitungzum
Nachschlagen auf Ihrem Computerund drucken
Siediese nachMöglichkeit aus.
1. Erklärung von Warnsymbolen und Hinweisen
Warnung
Wirdverwendet, um Sicherheitshinweise zu
kennzeichnen oder um Aufmerksamkeit auf besondere
Gefahren und Risiken zu lenken.
Hinweis
Wirdverwendet, um zusätzlich Informationen oder
wichtige Hinweise zu kennzeichnen.
Gefahr eines elektrischen Schlages
Dieses Symbol weist auf eine Berührungsgefahr
mit nicht isolierten Teilen des Produktes hin, die
möglicherweise eine gefährliche Spannung von solcher
Höhe führen, dass die Gefahr eines elektrischen Schlags
besteht.
2. Packungsinhalt
•Subwoofer
•Netzkabel
•Kurzanleitung
3. Sicherheitshinweise
•Das Produkt ist für den privaten, nicht-gewerblichen
Haushaltsgebrauch vorgesehen.
•Schützen Sie das Produkt vor Schmutz, Feuchtigkeit und
Überhitzung und verwenden Sie es nur in trockenen
Räumen.
•Dieses Produkt gehört, wie alle elektrischen Produkte,
nicht in Kinderhände!
•Lassen Sie das Produkt nicht fallen und setzen Sie es
keinen heftigen Erschütterungen aus.
•Betreiben Sie das Produkt nicht außerhalbseiner in den
technischen Daten angegebenen Leistungsgrenzen.
•Halten Sie Kinder unbedingt von dem
Verpackungsmaterial fern, es besteht Erstickungsgefahr.
•Entsorgen Sie das Verpackungsmaterial sofort gemäß
den örtlich gültigen Entsorgungsvorschriften.
•Nehmen Sie keine Veränderungen am Gerät vor.Dadurch
verlieren sie jegliche Gewährleistungsansprüche.

8
Gefahr eines elektrischen Schlages
•Öffnen Sie das Produkt nicht und betreiben Sie es bei
Beschädigungen nicht weiter.
•Verwenden Sie das Produkt nicht, wenn der
AC-Adapter,das Adapterkabel oder die Netzleitung
beschädigt sind.
•Versuchen Sie nicht, das Produkt selbst zu warten oder
zu reparieren. Überlassen Sie jegliche Wartungs-arbeit
dem zuständigen Fachpersonal.
3.Positionierung des Subwoofers im Raum
Stellen Sie den Subwoofer auf einer achen, stabilen Fläche
auf,die Vibrationen standhält. Eine Aufstellung auf dem
Fußboden liefert die beste Klangqualität.
4. Vor der Inbetriebnahme
Bedienungshinweise
Die Bedienung des Subwoofers erfolgt zusätzlich auch
mithilfe der UNDOK App über Ihr Smartphone.
Hinweis
Eine ausführliche Beschreibung der
UNDOK-App und des vollen
Funktionsumfangs nden Sie in unserem
UNDOK-Guide unter:
www.hama.com->00054845->Downloads
Netzwerkverbindung einrichten
4.1 LAN (kabelgebundenes Netzwerk)
•Verbinden Sie einen LAN Anschluss Ihres Routers mit
dem LAN Anschluss (10) Ihres Subwoofers. Sie benötigen
dafür ein Ethernet-Kabel, welches nicht zum Lieferumfang
gehört.
•Stellen Sie sicher,dass der Router eingeschaltet ist,
korrekt funktioniert und Verbindung zum Internet besteht.
•Beachten Sie bezüglich einer korrekten Funktion der LAN-
Verbindung die Bedienungsanleitung Ihres Routers.
•Gehen Sie dann wie unter Punkt 5. „Inbetriebnahme“
beschrieben direkt weiter vor.
4.2 WLAN (kabelloses Netzwerk)
•Stellen Sie sicher,dass der Router eingeschaltet ist,
korrekt funktioniert und Verbindung zum Internet besteht.
•Aktivieren Sie die WLAN Funktion Ihres Routers.
•Beachten Sie bezüglich einer korrekten Funktion der
WLAN-Verbindung die Bedienungsanleitung Ihres
Routers.
•Gehen Sie dann wie unter Punkt 5„Inbetriebnahme“
beschrieben weiter vor.
5. Inbetriebnahme
Warnung
•Betreiben Sie das Produkt nur an einer dafür
zugelassenen Steckdose. Die Netzsteckdose muss
jederzeit leicht erreichbar sein.
•Trennen Sie das Produkt mittels des Ein-/Ausschalters
vom Netz –wenn dieser nicht vorhanden ist, ziehen
Sie die Netzleitung aus der Steckdose.
•Achten Sie bei Mehrfachsteckdosen darauf,dass
die angeschlossenen Verbraucher die zulässige
Gesamtleistungsaufnahme nicht überschreiten.
•Trennen Sie das Produkt vom Netz, wenn Sie es
längereZeit nicht benutzen.
5.1 Einschalten
•Verbinden Sie das Netzkabel des Subwoofers mit einer
ordnungsgemäß installierten Steckdose.
•Bewegen Sie den [POWER]-Schalter (13) auf die Position
ON.
•Die Status LED Power (1) leuchtet rot.
•Drücken Sie [STANDBY/VOLUME] (2), um den Subwoofer
einzuschalten.
Hinweis –beim ersten Einschalten
•Beim ersten Einschalten bendet sich der Subwoofer
im SETUP-Modus.
•Die Status-LED Power (1) beginnt grün zu blinken.
•Das Gerät kann mithilfe der UNDOK-App eingerichtet
werden.
6.Lautstärkeregelung
Drehen Sie den Drehregler [STANDBY/VOLUME] (2) nach
links/rechts, um die Lautstärke zu verringern/erhöhen.

9
7.Ambientebeleuchtung
Hinweis
Um die Ambientebeleuchtung zu nutzen, muss sich der
Subwoofer im eingeschalteten Zustand benden. (siehe
Kapitel 5)
•Bewegen Sie den [LED]-Schalter (7) auf die Position ON,
um die Ambientebeleuchtung (15) einzuschalten.
•Bewegen Sie den [LED]-Schalter (7) auf die Position OFF,
um die Ambientebeleuchtung (15) auszuschalten.
8. UNDOK –Alles in Ihrer Hand
Die von Frontier Silicon entwickelte UNDOK-Applikation
(App) bringt Ihnen die volle Kontrolle von Radios und
Speakern auf Ihr Smartphone.
Egal ob bei der Ersteinrichtung des Gerätes, den
Kongurationen von Equalizer und Multiroom oder bei der
Verwaltung Ihrer Lieblingssender –UNDOK bietet Ihnen
alle Features auf dem Smartphone oder Tablet und bietet
Ihnen damit noch mehr Komfort.
8.1 Interface /Aufbau des UNDOK Startbildschirms
1
2
3
4
5
7
6
1Aktualisieren der Audiosystemliste
2Vorschau für ungruppierte Radios
3Neues Audiosystem einrichten
4Verwaltungssymbol für eine bestehende
Multiroom-Gruppe
5Erstellen einer neuen Multiroom-Gruppe mit
diesem Gerät
6Auf Systemaktualisierung aller Geräte prüfen
7
WeitereInformationen wie App-Info,
Theme (Design) der App wechseln und
Datenprotokollierung

10
8.2 Ersteinrichtung des Gerätes mit UNDOK
Alle UNDOK-fähigen Produkte von Hama erzeugen
beim ersten Einschalten, bzw.nachdem Sie diese auf
Werkseinstellungen gesetzt haben, einen sogenannten
Micro-Access-Point –also ein eigenes WLAN-Netz, über
welches Sie sich mit Ihrem Tablet oder Smartphone
verbinden können.
Hinweis
•Die UNDOK-App verwendet die im System Ihres
Smartphones gewählte Sprache.
8.2.1 Vorgehen für iOS-Nutzer
•Öffnen Sie die UNDOK-App auf Ihrem iPhone oder iPad
•Drücken Sie auf den Menüpunkt Audiosystem
einrichten
•Stellen Sie sicher,dass sich der Subwoofer im SETUP-
Modus bendet. Setzen Sie gegebenenfalls das Produkt
auf Werkseinstellung. Bestätigen Sie die Abfrage mit
Weiter
•UNDOK fordert Sie nun auf,sich über die iPhone/iPad-
Einstellungen mit dem WLAN des Produktes zu verbin-
den –wechseln Sie dazu in die Systemeinstellungen des
iPhones und wählen Sie das WLAN-Netzwerk (z.B. Setup
Hama DIR3120LED) aus. Wechseln Sie anschließen
zurück zu UNDOK und Drücken Sie auf Weiter
•Vergeben Sie nun eine gewünschte Bezeichnung für den
Subwoofer (z.B. BüroDIR3120) und bestätigen Sie die
Eingabe mit Weiter.
•Nun stehen Ihnen die verschiedenen Möglichkeiten der
Netzwerkkonguration zur Verfügung (ggf.WLAN, WPS
und Ethernet). Klicken Sie die gewünschte Methode an
und UNDOK wechselt zum nächsten Fenster
•Abhängig von der gewählten Methode, können Sie
nun das gewünschte WLAN-Netzwerk auswählen und
kongurieren, oder eine WPS-Verbindung herstellen.
•Abschließend verbindet sich der Subwoofer mit dem
Netzwerk und Sie können durch Drücken von Mein
Audiosystem verwenden das Gerät in UNDOK
verwenden.
•Die LED-Anzeige (1) der Netzwerkverbindung leuchtet
nun dauerhaft.
8.2.2 Vorgehen für Android-Nutzer
•Öffnen Sie die UNDOK-App auf Ihrem Tablet oder
Smartphone
•Drücken Sie auf den Menüpunkt Audiosystem
einrichten
•Stellen Sie sicher,dass sich der Subwoofer im SETUP-
Modus bendet. Setzen Sie gegebenenfalls das Produkt
auf Werkseinstellung. Bestätigen Sie die Abfrage mit
Weiter
•Auf der folgenden Seite nden Sie eine Liste aller
verfügbaren WLAN-Netzwerke und ebenfalls die
vorgeschlagenen Audiosysteme, hier sollte das Hama-
Produkt (z.B. Setup Hama DIR3120LED) aufgeführt sein.
Drücken Sie auf das entsprechende WLAN-Netzwerk.
•Vergeben Sie nun eine gewünschte Bezeichnung für den
Subwoofer (z.B. BüroDIR3120) und bestätigen Sie die
Eingabe mit Weiter
•Nun stehen Ihnen die verschiedenen Möglichkeiten der
Netzwerkkonguration zur Verfügung (ggf.WLAN, WPS
und Ethernet). Klicken Sie die gewünschte Methode an
und UNDOK wechselt zum nächsten Fenster
•Abhängig von der gewählten Methode, können Sie
nun das gewünschte WLAN-Netzwerk auswählen und
kongurieren, oder eine WPS-Verbindung herstellen.
•Abschließend verbindet sich der Subwoofer mit dem
Netzwerk und Sie können durch Drücken von Mein
Audiosystem verwenden das Gerät in UNDOK
verwenden.
•Die LED-Anzeige (1) der Netzwerkverbindung leuchtet
nun dauerhaft.
9.Verbindung über Auxiliary Input
Über den analogen Audioeingang (AUX) können Sie
mobile Endgeräte (z.B. Smartphone, Tablet PC; MP3-
Player,etc.) und ältereanaloge Quellen (CD-/DVD-
Player etc.) an den Subwoofer anschließen und deren
Audiosignal über den Subwoofer wiedergeben.
Hinweis
•Schalten Sie den Subwoofer aus, bevor Sie ein
Endgerät daran anschließen.
•Knicken und quetschen Sie das Kabel nicht.
•Verbinden Sie Ihr Endgerät über die AUX Buchse (9)
mittels eines 3,5mm Audiokabels (Klinkenkabel) mit dem
Subwoofer.
•Aktivieren Sie durch wiederholtes Drücken von [MODE]
(5) den Betriebsmodus Auxiliary Input.
•Die Status LED Modus (2) leuchtet grün.
10. High Level Input (HF IN)
Über den High Level Input können Sie Ihr bestehendes
Soundsystem mit dem Subwoofer verbinden, um z.B. ein
2.0 Soundsystem auf ein 2.1 Soundsystem zu erweitern.
Hinweis
•Schalten Sie den Subwoofer aus, bevor Sie ein
Endgerät daran anschließen.
•Knicken und quetschen Sie das Kabel nicht.
•Verbinden Sie Ihr Endgerät über die HF IN Buchse (11)
mittels eines 3.5mm Cinchkabels mit dem Subwoofer.
•

11
•Aktivieren Sie durch wiederholtes Drücken von [MODE]
(5) den Betriebsmodus HF IN.
•Die Status LED Modus (2) leuchtet blau.
11. Low Level Input (LF IN)
Über den LowLevel Input können Sie z.B. einen Verstärker
mit Subwoofer Ausgang mit dem Subwoofer verbinden.
Hinweis
•Schalten Sie den Subwoofer aus, bevor Sie ein
Endgerät daran anschließen.
•Knicken und quetschen Sie das Kabel nicht.
•Verbinden Sie Ihr Endgerät über die LF IN Buchse (12)
mittels eines 3.5mm Cinchkabels mit dem Subwoofer.
•Aktivieren Sie durch wiederholtes Drücken von [MODE]
(5) den Betriebsmodus LF IN.
•Die Status LED Modus (2) leuchtet gelb.
12. Multiroom
Der Subwoofer kann in eine UNDOK Multiroom Gruppe als
Client eingebunden werden.
NähereInformationen hierzu nden Sie im UNDOK Guide.
13. Wartung und Pflege
•Reinigen Sie dieses Produkt nur mit einem fusselfreien,
leicht feuchten Tuch und verwenden Sie keine
aggressiven Reiniger.
•Sollten Sie das Produkt längereZeit nicht nutzen,
schalten Sie das Gerät aus und trennen es von der
Stromversorgung. Lagern Sie es an einem sauberen,
trockenen Ort ohne direkte Sonneneinstrahlung.
14. Haftungsausschluss
Die Hama GmbH &CoKGübernimmt keinerlei Haftung
oder Gewährleistung für Schäden, die aus unsachgemäßer
Installation, Montage und unsachgemäßem Gebrauch
des Produktes oder einer Nichtbeachtung der
Bedienungsanleitung und/oder der Sicherheitshinweise
resultieren.
15. Service und Support
Bitte wenden Sie sich bei Fragen zum Produkt gerne an die
Hama-Produktberatung.
Hotline: +49 9091 502-115 (Deu/Eng)
WeitereSupportinformationen nden sie hier:
www.hama.com
Die vollständige Langanleitung ist unter der folgenden
Internetadresse verfügbar:
www.hama.com -> 00054845 -> Downloads
16. Entsorgungshinweise
Hinweis zum Umweltschutz:
Ab dem Zeitpunkt derUmsetzung der europäischen
Richtlinien2012/19/EU und2006/66/EG in
nationales Rechtgiltfolgendes:Elektrischeund
elektronischeGeräte sowie Batteriendürfen nicht
mit dem Hausmüllentsorgtwerden. DerVerbraucherist
gesetzlich verpichtet, elektrischeund elektronische Geräte
sowie Batterien am Ende ihrerLebensdaueranden dafür
eingerichteten, öffentlichenSammelstellenoderandie
Verkaufsstellezurückzugeben. Einzelheiten dazuregelt das
jeweilige Landesrecht.Das Symbol auf dem Produkt, der
Gebrauchsanleitung oder derVerpackung weist auf diese
Bestimmungen hin. Mit derWiederverwertung, der
stoichen Verwertungoderanderen Formender Verwertung
von Altgeräten/Batterien leisten Sieeinenwichtigen Beitrag
zum Schutzunserer Umwelt.
17. Konformitätserklärung
Hiermit erklärt die Hama GmbH &CoKG, dass der
Funkanlagentyp [00054845] der Richtlinie
2014/53/EU entspricht. Der vollständige Text der
EU-Konformitätserklärung ist unter der folgenden
Internetadresse verfügbar:
www.hama.com->00054845->Downloads.
Frequenzband/
Frequenzbänder
WiFi: 2.412 -2.472GHz
WiFi: 5.150 -5.350 GHz
WiFi: 5.470 -5.725 GHz
Abgestrahlte maximale
Sendeleistung
WiFi: 2.4GHz /17dBm (EIRP)
WiFi: 5GHz /16.5dBm (EIRP)
Beschränkungen oder Anforderungen in
Belgien, Bulgarien, Tschechische Republik, Dänemark,
Deutschland, Estland, Irland, Griechenland, Spanien,
Frankreich, Kroatien, Italien, Zypern, Lettland, Litauen,
Luxemburg, Ungarn, Malta, Niederlande, Österreich,
Polen, Portugal, Rumänien, Slowenien, Slowakei, Finnland,
Schweden, Vereinigtes Königreich
Hinweis
Wenn Kanal 36-64 (Kanäle der Frequenz
5150 MHz -5350 MHz) verwendet wird, darf das Gerät
nur in geschlossenen Räumen verwendet werden.

12
FNotice d’utilisation
Éléments de commande et d'affichage
Face avant
1. LED d’état mise sous tension
2. LED d’état mode
Face arrière
1. LED d'état clip (surcharge)
2. Veille /volume*
3. LED d’état volume
4. Régulateur de fréquence
5. Touche [MODE]
6. Touche [RESET]
7. Interrupteur [LED]
8. Port de mise àjour
9. Prise AUX IN
10. Connexion LAN
11. Prise HF IN
12. Prise LF IN
13. Interrupteur [POWER]
14. Câble d’alimentation
15. Éclairage d'ambiance
Remarque
*Le bouton rotatif dispose d’une double fonction.
Tournez le régulateur pour modier le volume. Appuyez
andemettrel'appareil en mode veille ou le réactiver.
!
Remarque importante -Notice
d’utilisation:
•Ceci est un mode d’emploi abrégé :ilvous fournit
des informations de base essentielles, parex.
des consignes de sécuritéetdes informations
concernant la mise en service de votre produit.
•Pour des raisons écologiques et and’économiser
de précieuses matières premières, l’entreprise
Hama renonceàimprimer la versionlongue du
moded’emploi et propose ce dernieruniquement
en téléchargement au format PDF.
•La version intégrale du mode d’emploi est
disponible àl‘adresseInternet suivante :
www.hama.com->00054845 ->
Downloads
•Enregistrez cetteversion longue survotre
ordinateur pour la consulter ultérieurement et
imprimez-la,danslamesuredupossible.
1. Explication des symboles d‘avertissement et des
remarques
Avertissement
Ce symbole est utilisé pour indiquer des consignes de
sécurité ou pour attirer votreattention sur des dangers
et risques particuliers.
Remarque
Ce symbole est utilisé pour indiquer des informations
supplémentaires ou des remarques importantes.
Risque d’électrocution
Ce symbole indique un risque de contact avec des
parties non isolées du produit susceptibles de conduire
un courant électrique capable de provoquer un risque
d‘électrocution.
2. Contenu de l‘emballage
•Caisson de graves
•Cordon d'alimentation
•Notice d’utilisation
3. Consignes de sécurité
•Ce produit est destiné àunusage domestique non
commercial.
•Protégez-le de toute saleté, humidité, surchauffe et
utilisez-le uniquement dans des locaux secs.
•Cet appareil, comme tout appareil électrique, doit être
tenu hors de portée des enfants.
•Protégez-le des secousses violentes et évitez tout choc
ou toute chute.
•N‘utilisez pas le produit au delà des indications
mentionnées dans les caractéristiques techniques.
•Tenez les emballages d‘appareils hors de portée des
enfants, risque d‘étouffement.
•Recyclez les matériaux d‘emballage conformément aux
prescriptions locales en vigueur.
•N’apportez aucune modication àl’appareil. Des
modications vous feraient perdrevos droits de garantie.

13
Risque d’électrocution
•Ne tentez pas d‘ouvrir l‘appareil et cessez de l‘utiliser
en cas de détérioration.
•Cessez de l‘utiliser en cas de détérioration de
l‘adaptateur CA,ducâble adaptateur ou du câble
d‘alimentation.
•Ne tentez pas de réparer l’appareil vous-même ni
d’effectuer des travaux d’entretien. Faites appel àdes
techniciens qualiés pour effectuer tous les travaux
d’entretien.
3.Positionnement du caisson de graves dans la
pièce
Placez le caisson de graves sur une surface plane et stable
qui résiste aux vibrations. Placez l'appareil au sol pour
obtenir une excellente qualité sonore.
4. Avant la mise en service
Consignes d’utilisation
Vous contrôlerez le caisson de graves également avec
l’application UNDOK installée sur votresmartphone.
Remarque
Une description détaillée de
l’application UNDOK et de toutes les
fonctions est disponible dans notre
guide UNDOK sur :
www.hama.com->00054845->Downloads
Établissement de la connexion réseau
4.1 LAN (réseau local)
•Branchez la connexion réseau local (LAN) de votre
routeur au port LAN (10) de votrecaisson de graves.
Vous aurez besoin d'un câble Ethernet pour effectuer
cette connexion ;cecâble n'est pas livré avec le produit.
•Veuillez contrôler que le routeur est bien sous tension,
qu'il fonctionne normalement et que la connexion
internet est bien établie.
•Veuillez consulter le mode d'emploi de votrerouteur
pour toute question concernant la connexion LAN
(réseau local).
•Procédez ensuite comme décrit au point 5. "Mise en
service"
4.2 WiFi (réseau sans fil)
•Veuillez contrôler que le routeur est bien sous tension,
qu'il fonctionne normalement et que la connexion
internet est bien établie.
•Activez la fonction WiFi de votrerouteur.
•Veuillez consulter le mode d'emploi de votrerouteur
pour toute question concernant la connexion WiFi
(réseau sans l).
•Procédez ensuite comme décrit au point 5«Mise en
service ».
5. Mise en service
Avertissement
•Utilisez le produit uniquement branché àune prise
de courant appropriée. La prise de courant doit être
facilement accessible àtout moment.
•Mettez le produit hors tension au moyen de
l’interrupteur On/Off -sicelui-ci n’est pas disponible,
débranchez le câble d’alimentation de la prise de
courant.
•En cas de prises multiples, veillez àceque les
appareils consommateurs branchés ne dépassent pas
la puissance absorbée totale admissible.
•Débranchez l’appareil si vous ne comptez pas
l’utiliser sur une période prolongée.
5.1 Mise sous tension
•Branchez le câble secteur du caisson de graves àune
prise de courant.
•Mettez le sélecteur [POWER] (13) en position ON.
•La LED d’état Power (1) s’allume en rouge.
•Appuyez sur la touche [STANDBY/VOLUME] (2) pour
mettrelecaisson de graves sous tension.
Avertissement
•Lors de la premièremise sous tension, le caisson de
graves se trouve en mode SETUP (conguration).
•La LED d’état Power (1) se met àclignoter en vert.
•L'appareil peut êtreconguré avec l'application
UNDOK.
6.Réglage du volume
Tournez le bouton rotatif [STANDBY/VOLUME] (2) vers la
gauche/droite anderéduire/d'augmenter le volume.

14
7.Éclairage d'ambiance
Remarque
Pour utiliser l'éclairage d'ambiance, le caisson de
graves doit êtreallumé. (voir chapitre5)
•Placez le bouton [LED] (7) sur ON and'activer
l'éclairage d'ambiance (15).
•Placez le bouton [LED] (7) sur OFF andedésactiver
l'éclairage d'ambiance (15).
8. UNDOK –tout est entre vos mains
L’application UNDOK, développée par Frontier Silicon,
vous permet de commander entièrement des radios et des
haut-parleurs depuis votresmartphone.
UNDOK vous propose toutes les fonctions nécessaires
sur votresmartphone ou votretablette et vous offreainsi
une excellente facilité de commande, qu’il s’agisse de
congurer votreappareil pour la premièrefois, de régler
l’égaliseur,l’option multi-pièces ou de gérer vos stations
préférées.
8.1 Interface /disposition de l’écran de démarrage
UNDOK
1
2
3
4
5
7
6
1Actualisation de la liste du système audio
2Aperçu des radios non groupées
3Conguration d’un nouveau système audio
4Icône de gestion pour un groupe multi-pièces
existant
5Création d’un nouveau groupe multi-pièces
avec cet appareil
6Vérication de la mise àjour du système de
tous les appareils
7
Informations supplémentaires (informations
sur l’application, changement du thème
(design) de l’application, enregistrement des
données)

15
8.2 Première configuration de l’appareil avec UNDOK
Lors de leur premièremise sous tension ou après le
rétablissement des paramètres par défaut, tous les
produits de Hama compatibles avec UNDOK génèrent ce
que l’on appelle un micro-point d’accès (MicroAccess
Point) :ils’agit d’un réseau WiFi propreàl’aide duquel
vous pouvez vous connecter avec votresmartphone ou
votretablette.
Remarque
•L’application UNDOK utilise la langue sélectionnée
dans le système de votresmartphone.
8.2.1 Procédure pour les utilisateurs d’iOS
•Ouvrez l’application UNDOK sur votreiPhone ou iPad.
•Appuyez sur l’entrée de menu Congurer un système
audio.
•Assurez-vous que le caisson de graves se trouve en mode
SETUP.Lecas échéant, rétablissez les paramètres par
défaut du produit. Conrmez la requête en cliquant sur
Suivant.
•UNDOK vous demande alors de vous connecter au
réseau WiFi du produit àl’aidedes paramètres de votre
iPhone/iPad :ouvrez les paramètres système de votre
iPhone, puis sélectionnez le réseau WiFi (Setup Hama
DIR3120LED, par exemple). Retournez ensuite sur
UNDOK et cliquez sur Suivant.
•Donnez un nom quelconque au caisson de graves
("Bureau DIR3120" ou autre), puis conrmez votresaisie
en cliquant sur Suivant.
•Différentes possibilités de conguration du réseau (le cas
échéant WiFi, WPS et Ethernet) sont alors disponibles.
Cliquez sur la méthode souhaitée ;UNDOK passe alors à
la fenêtresuivante.
•En fonction de la méthode choisie, vous pouvez
sélectionner et congurer le réseau WiFi souhaité, créer
une connexion WPS ou établir la connexion par câble
LAN.
•Le caisson de graves se connecte alors au réseau et vous
pouvez utiliser l’appareil dans UNDOK en appuyant sur
Utiliser mon système audio.
•Le voyant LED (1) de la connexion au réseau est
désormais allumé en permanence.
8.2.2 Procédure pour les utilisateurs d’Android
•Ouvrez l’application UNDOK sur votresmartphone ou
votretablette.
•Appuyez sur l’entrée de menu Congurer un système
audio.
•Assurez-vous que le caisson de graves se trouve en mode
SETUP.Lecas échéant, rétablissez les paramètres par
défaut du produit. Conrmez la requête en cliquant sur
Suivant.
•Vous trouverez, àlapage suivante, une liste de tous les
réseaux WiFi disponibles ainsi que les systèmes audio
proposés ;leproduit Hama (Setup Hama DIR3120LED
ou autre) devrait y gurer.Sélectionnez le réseau WiFi
concerné.
•Donnez un nom quelconque au caisson de graves
("Bureau DIR3120" ou autre), puis conrmez votresaisie
en cliquant sur Suivant.
•Différentes possibilités de conguration du réseau (le cas
échéant WiFi, WPS et Ethernet) sont alors disponibles.
Cliquez sur la méthode souhaitée ;UNDOK passe alors à
la fenêtresuivante.
•En fonction de la méthode choisie, vous pouvez
sélectionner et congurer le réseau WiFi souhaité, créer
une connexion WPS ou établir la connexion par câble
LAN.
•Le caisson de graves se connecte alors au réseau et vous
pouvez utiliser l’appareil dans UNDOK en appuyant sur
Utiliser mon système audio.
•Le voyant LED (1) de la connexion au réseau est
désormais allumé en permanence.
9.Connexion avec l’entrée AUX
L’entrée audio analogique AUX vous permet de connecter
des appareils mobiles (smartphones, tablettes, lecteurs
MP3, etc...) ainsi que des appareils analogiques plus
anciens (lecteurs CD/DVD, etc...) au caisson de graves et
d'utiliser le caisson de graves comme appareil de lecture.
Remarque
•Mettez le caisson de graves hors tension avant d'y
brancher un appareil.
•Faites attention ànepas plier ni coincer les câbles.
•Branchez votreappareil àlaprise AUX (9) du caisson de
graves àl’aide d'un câble audio de 3,5 mm (câble jack).
•Sélectionnez le mode de service Auxiliary Input en
appuyant plusieurs fois sur la touche [MODE] (5).
•La LED d’état Mode (2) s’allume en vert.
10. High Level Input (HF IN)
La fonction High Level Input vous permet de connecter
votresystème audio existant au caisson de graves, par
exemple pour passer d'un système audio 2.0 àunsystème
audio 2.1.

16
Remarque
•Mettez le caisson de graves hors tension avant d'y
brancher un appareil.
•Faites attention ànepas plier ni coincer les câbles.
•Branchez votreappareil àlaprise HF IN (11) du caisson
de graves àl’aide d'un câble RCAde3,5 mm.
•Sélectionnez le mode de service HF IN en appuyant
plusieurs fois sur la touche [MODE] (5).
•La LED d’état Mode (2) s’allume en bleu.
11. Low Level Input (LF IN)
La fonction LowLevel Input vous permet, par exemple, de
connecter un amplicateur doté d'une sortie de caisson de
graves àvotrecaisson de graves.
Remarque
•Mettez le caisson de graves hors tension avant d'y
brancher un appareil.
•Faites attention ànepas plier ni coincer les câbles.
•Branchez votreappareil àlaprise LF IN (12) du caisson
de graves àl’aide d'un câble RCAde3,5 mm.
•Sélectionnez le mode de service LF IN en appuyant
plusieurs fois sur la touche [MODE] (5).
•La LED d’état Mode (2) s’allume en jaune.
12. Multi-pièces
Le caisson de graves peut êtreintégré àungroupe UNDOK
multi-pièces en tant que client.
Vous trouverez plus de détails àcesujet dans le guide
UNDOK.
13. Nettoyage et entretien
•Nettoyez ce produit uniquement àl’aide d’un chiffon non
pelucheuxlégèrementhumide;évitez toutdétergent agressif.
•Débranchezl‘adaptateur CA de la source de courant si vous
ne comptez pas utiliser l‘appareil pendant un certaintemps.
Entreposez-ledansunlocal sec, propre et protégé des rayons
directs du soleil.
14. Exclusion de garantie
La sociétéHama GmbH &CoKGdécline touteresponsabilité
en cas de dommagesprovoquéspar uneinstallation, un
montage ou uneutilisation non conformes du produit ou
encoreprovoqués par un non respect des consignes du
moded‘emploiet/ou desconsignes de sécurité.
15. Service et assistance
En cas de question concernant le produit, veuillez vous
adresser au service de conseil produits de Hama.
Ligne téléphonique directe :+49 9091 502-115
(allemand/anglais)
Vous trouverez ici de plus amples informations concernant
l‘assistance :www.hama.com
La version intégrale du mode d’emploi est disponible à
l‘adresse Internet suivante :
www.hama.com -> 00054845 -> Downloads
16. Consignes de recyclage
Remarques concernant la protection de
l’environnement:
Conformément àladirective européenne
2012/19/EU et 2006/66/CE, et and‘atteindreun
certain nombred‘objectifs en matièrede
protection de l‘environnement, les règles suivantes
doivent êtreappliquées: Les appareils électriques et
électroniques ainsi que les batteries ne doivent pas être
éliminés avec les déchets ménagers. Le pictogramme
“picto” présent sur le produit, son manuel d‘utilisation ou
son emballage indique que le produit est soumis àcette
réglementation. Le consommateur doit retourner le
produit/la batterie usager aux points de collecte prévus à
cet effet. Il peut aussi le remettreàunrevendeur.En
permettant ennlerecyclage des produits ainsi que les
batteries, le consommateur contribueraàla protection de
notreenvironnement. C‘est un acte écologique.
17. Déclaration de conformité
Le soussigné, Hama GmbH &CoKG, déclare que
l‘équipement radioélectrique du type [00054845]
est conforme àladirective 2014/53/UE. Le texte
complet de la déclaration UE de conformité est disponible
àl‘adresse internet suivante:
www.hama.com->00054845->Downloads.
Bandes de fréquences
WiFi: 2.412 -2.472GHz
WiFi: 5.150 -5.350 GHz
WiFi: 5.470 -5.725 GHz
Puissance de
radiofréquence maximale
WiFi: 2.4GHz /17dBm (EIRP)
WiFi: 5GHz /16.5dBm (EIRP)
Restrictions ou exigences en
Belgique, Bulgarie, République tchèque, Danemark,
Allemagne, Estonie, Irlande, Grèce, Espagne, France,
Croatie, Italie, Chypre, Lettonie, Lituanie, Luxembourg,
Hongrie, Malte, Pays-Bas, Autriche, Pologne, Portugal,
Roumanie, Slovénie, Slovaquie, Finlande, Suède,
Royaume-Uni
Remarque
Si les canaux 36-64 (fréquence 5,150GHz –5,350GHz)
sont employés dans le réseau Wi-Fi 5GHz, ce produit ne
doit êtreutilisé que dans des espaces fermés.
This manual suits for next models
1
Table of contents
Languages:
Other Hama Subwoofer manuals