6. Powering On, Pairing & Mode Selection
1. Turn on the transmitter and receiver.
The LED indicators on both units will flash slowly.
2. The two devices are paired automatically.The LED lights will flash
rapidly.The LED light is always on after pairing is completed.
7.Volume Control
Press the (+) or (-) button on the
transmitter to control the volume.
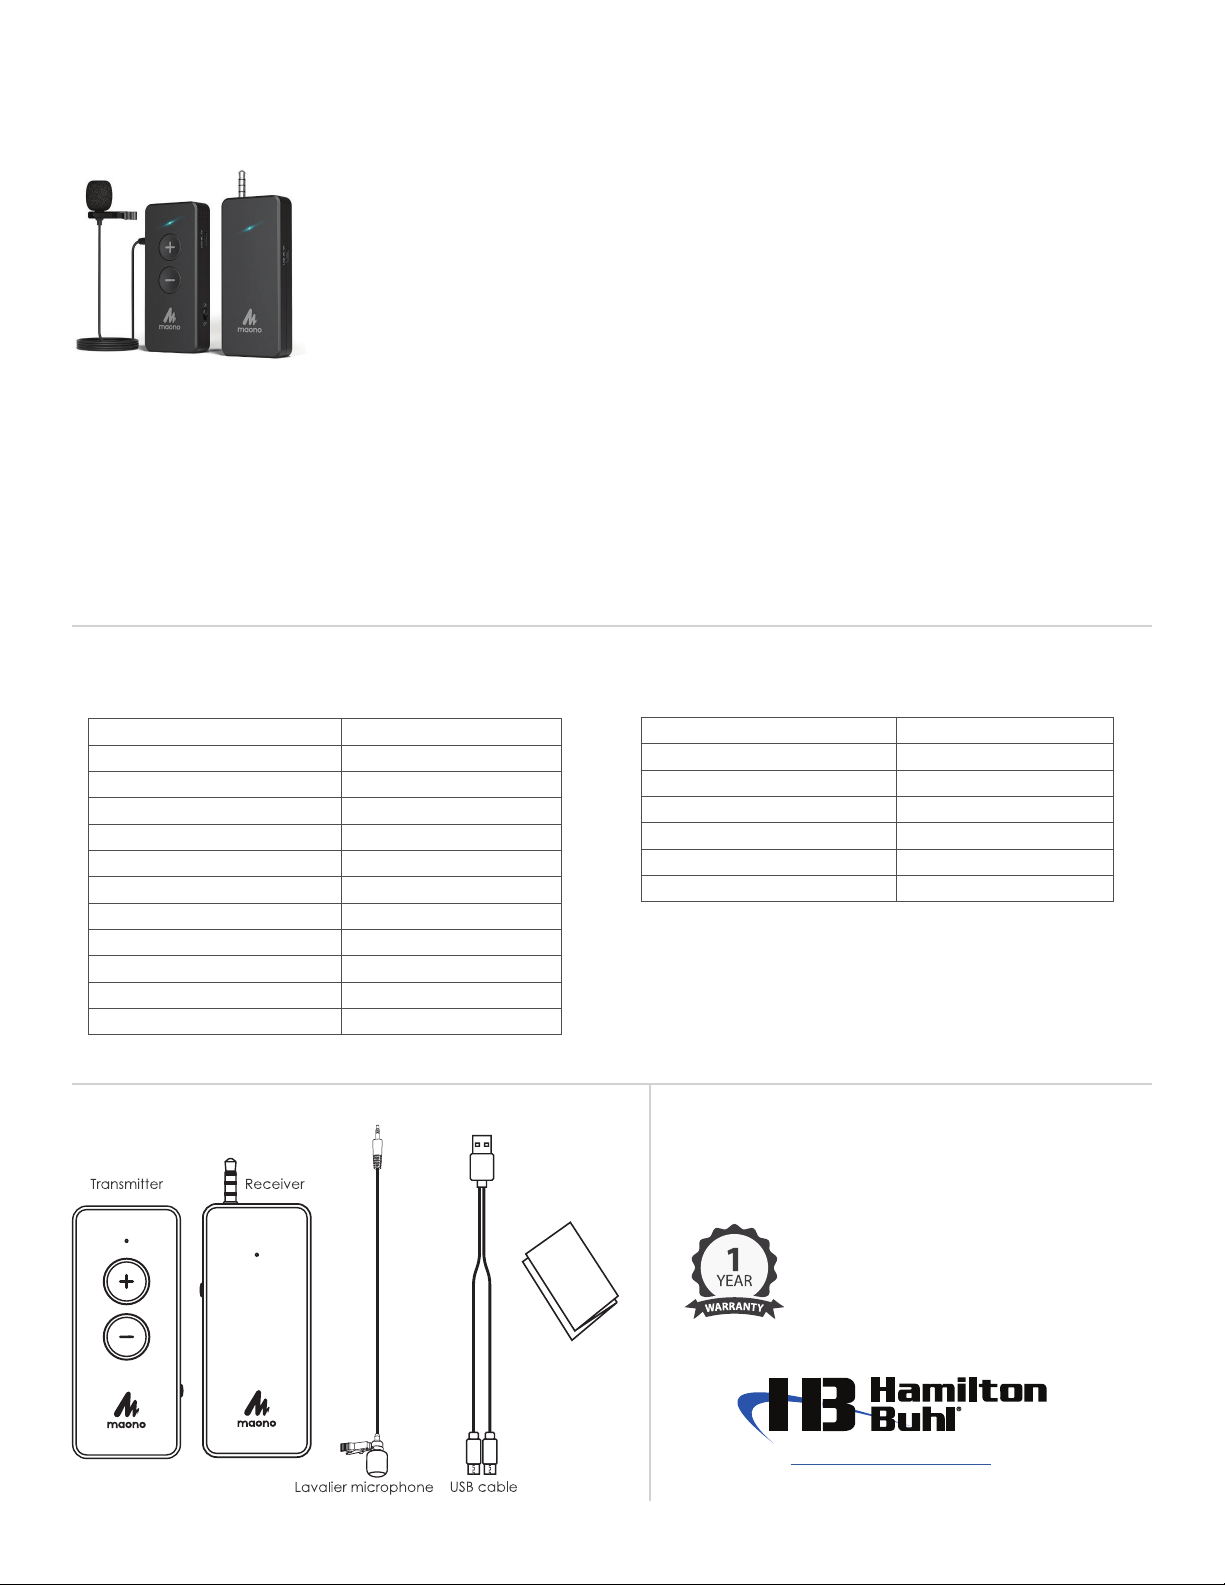
4.Transmitter
8. Using an External Lavalier Microphone
or Audio Source
Insert the included lavalier microphone into the external microphone jack of the
transmitter.
• When an external microphone is connected, the built-in mic of the transmitter
is automatically disabled.After the external mic is removed, the built-in mic is
automatically enabled.
• This microphone jack supports external audio input at the same time. An audio
cable with a 3.5mm TRRS plug is required (not included).
For best performance, use the included lavalier microphone.
9. Charging
Connect the USB ports of the transmitter and receiver with the Micro-USB cable provided
for charging (See diagrams in #4 and #5 above).
10. Precautions/Notes
• Avoid getting the units wet.
• Do not disassemble or modify the wireless microphone in any way.
• Do not use within medical institutions such as hospitals, near electronic
medical equipment, aircrafts, or where radio interference may occur. The
wireless microphone may interfere with other devices and cause damage.
• Thls product is a precision instrument. Do not drop, subject it to impact or
excessive vibration.
• Keep this product away from extreme cold or high temperatures, and away
from humidity.
• Use wireless equipment only in areas where permitted.
• If playback equipment (such as speakers and amplifiers) is placed next to the
microphone during recording, feedback may occur. Move the device further
away from the microphone or reduce the volume.
• If the microphone power is turned off, or the receiver and microphone
transmitter are not connected when starting to record, there may be noise or
no sound. Make sure indicators on the receiver and microphone are lit in blue,
and that the two devices have connected properly, then begin to record.
• Do not let your hands or other objects touch the microphone when recording,
to avoid unwanted noise.
No power Make sure the power switch is on.
No sound during
recording
1. Make sure the Power on/Mode Switch is on.
2. Make sure your phone case does not interfere with the
connection of the input jack.
3. Some camera apps for Android phones and
tablets may not support the external microphone.We then
recommend you download a third-party camera app.
Feedback noise You may get interference when using in an environment with
multiple 2.4G devices.Try to use in a quiet environment so
that low/high frequency noise is not captured by the mic.
Poor transmission 1. Remove any obstacles between the transmitter and receiver
that may interfere with performance.
2. Restart the transmitter and receiver.
11.Troubleshooting
100522
Digital Webcam
with Flexible Gooseneck Stand
5. Receiver
Instructions
This is a plug-and-play webcam/digital camera.If you are running Mac OS x10.4.8 or later, Windows XP, Vista or
Win7/8/10, your computer will automatically recognize the device.
1. Plug the webcam’s USB interface into a USB slot on your computer.Your PC will prompt “found new hardware”
or on Mac will show up as a device in your “Finder” window.
2. Once your system recognizes the new webcam, you can use any third party software such as Skype, MSN
video or iMovie.
3. To focus the camera, rotate the front lens, as desired.
4. Position the base where desired.
Features and Specifications:
• Bendable arm allows for optimal positioning
• Built-in microphone
• Non-slip base
• System: Windows XP, XP2,Vista, Win 7/8/10, Mac OS
x10.4.8 or later & Android 4.0 or above with UVC
• Resolution: 1080 x 720
• Rate: 30 FPS
• Interface Type: USB 2.0 High Speed
• Imaging distance: 30mm ~ Infinity
• 1x IR LED Light: Infrared for shooting at night/low light
• Shutter button: Easy capture for still images
• Captured image format: MJPEG/YUV2 (YUYV)
• Captured video format: AVI,WMV
• Working Temperature: 32°~140°
• Materials: ABS plastic
• Sensor: 1/4” HD CMOS Image
• 5 megapixels
• Cable length: approx. 4’
Shutter
button
Lens cover
rotates to
focus
Infrared
Light
Built-in
microphone
Infrared light
on/off dial