HandyTech SPEED & BRAKE User manual

USER MANUAL
SPEED & BRAKE
SPEED & BRAKE ECO
Mechanical Push&Pull

Congratulations, you have equipped your vehicle with a
HT-SPEED&BRAKE / HT-SPEED&BRAKE ECO acceleration system.
We hope you benefit from its use.
HT-SPEED&BRAKE / HT-SPEED&BRAKE ECO is very easy to use, as indicated in the following
instructions.
Please read these instructions before using the device.
MANUAL SYMBOLS
NOTE
PROCEDURE
PAY ATTENTION –Important information
The manual is composed by 5 chapters and the chapters 3 and 4 are specific for the product use:
1. General information - Pag. 1
2. Safety - Pag. 1
3. Use on vehicle - Pag. 2
4. What to do if … - Pag. 5
5. Maintenance - Pag. 6
Compliant with all relevant characteristics of the MACHINERY DIRECTIVE 2006/42/CE and the
ELECTROMAGNETIC COMPATIBILITY 2014/30/CE.
Instructions made according to standard conformation; changes can be made according to the user's needs and characteristics of the vehicle.
The manufacturer reserves the right to modify the product without notice.

MOD. FT05 rev.01
HT-SPEED&BRAKE&ECO (User Manual) –
Ed. 1- Update: 11/2020
- 1 -
1. General Information
By pushing the lever forward, HT-SPEED & BRAKE / HT-SPEED & BRAKE ECO allows you to slow or stop
the vehicle via a telescopic shaft that connects the lever to the original brake pedal. Pulling the lever back
accelerates the vehicle via a second telescopic shaft that connects the lever to the original accelerator pedal.
The pressure with which you push or pull on the lever allows you to gradually brake or accelerate.
The lever also has two buttons: a black one used as a horn and a red one used to lock the brake (as required
by law); the latter allows you to lock the lever in the complete or partial brake position so you can move the
gear lever. The lever has an ergonomic knob to ensure solid grip.
The original brake and accelerator pedals can be used by able-bodied users.
2. Safety
The system must only be used for the purposes it was created for; any other use is considered as improper.
CARROZZERIA 71 S.r.l. is not liable for any damage caused by incorrect system use.
Explain how the HT-SPEED&BRAKE / HT-SPEED&BRAKE ECO works to anyone who has to work on your
vehicle (car dealer, repair centre, mechanic, etc.), and also to all those who use it.
We recommend giving the phone number of the system installer to the person in charge of carrying out
maintenance and repairs, so that indications can be given if required.
If it is necessary to effectuate maintenance operations and repairs to the vehicle, we advise you to
give to the operator the telephone number of the installer of the system for further indications.
It is advisable, after 2 years, in collaboration with your local Handytech Centre, to check the status of the
whole system and maybe to replace some parts.
Moreover, we remember to you, that out of the warranty period, the maintenance program is at Your
discretion and risk, but the advice is to follow it carefully, because the negligence could cause malfunctions
of the system and could create dangers during the utilization of the device.
Maintenance operations of the device during the warranty period and out the warranty period are to
be borne by the customer.
The manufacturer guarantees the product for 24 months, only if the maintenance operations have been
implemented by an authorized Handytech Dealer.
When using SPEED & BRAKE / SPEED&BRAKE ECO, make sure there are no foreign objects (mat,
etc.) between the two pedals (accelerator and brake) and the floor of the vehicle.
Also make sure that no foreign objects prevent the shafts (brake and accelerator) from sliding for any
reason.
Never use the SPEED & BRAKE lever to pull yourself up, as this could cause excessive play in
the system.

MOD. FT05 rev.01
HT-SPEED&BRAKE&ECO (User Manual) –
Ed. 1- Update: 11/2020
- 2 -
3. Use on vehicle
❑Checks
After having turned on your vehicle, we recommend making sure the system works by pushing it forward
(braking) and pulling back (accelerating).
Press the black button, if present, (Picture 1) to make sure the horn works (after you’ve ascertained that you
are not in an area where traffic laws do not allow it).
Picture 1 Picture 2
Press the red button, if present, to make sure the brake lock (Picture 2) works.
The brake lock works by pushing the SPEED & BRAKE lever all the way and pressing the red button at the
same time. Release the button before you stop pushing the lever.
When the lever is locked, you can use the vehicle’s gear lever.
To release the SPEED & BRAKE lever, simply push it forward and let it go.

MOD. FT05 rev.01
HT-SPEED&BRAKE&ECO (User Manual) –
Ed. 1- Update: 11/2020
- 3 -
❑Putting the vehicle in motion
After having run the checks, push the brake lever forward, press the red button if present and reduce pressure
on the lever before releasing it.
At this point, the lever is locked and you can engage the gear and in case of ECO version, the lever must be
kept in position by the driver.
Vehicle with automatic or sequential manual transmission
Move the gear lever from P or N to D (or other gear) or R, depending on the manoeuvre you need to make.
Then push the lever again, which will automatically release the lock or leave the pressure on the lever (in case
of ECO version) and allow you to move the vehicle.
When you first start using the system, we recommend trying several test brakes to get the hang of how much
pressure to apply to the lever in order to brake gradually.
The vehicle MUST be stopped when you lock the brake.
❑Using the horn
Press the black button to sound the horn. Using the horn is subject to traffic laws.
❑Stopping the vehicle
After using the vehicle and before turning it off, lock the brake as described previously, move the gear lever to
P or N, pull the emergency brake, push the brake lever forward to release the lock.
The brake lock must not be used as an emergency brake, as the vehicle’s original power brake
or, in some cases, even the vehicle’s braking system can have a drop in pressure that do not
ensure the braking system is completely efficient when the vehicle is off. Moreover, in some
vehicles the brake lights stay on when the brake is pressed even when the key is removed.

MOD. FT05 rev.01
HT-SPEED&BRAKE&ECO (User Manual) –
Ed. 1- Update: 11/2020
- 4 -
❑Able-bodied people using the vehicle
The vehicle’s original brake and accelerator can be used normally with your feet.
Let the user know about the SPEED & BRAKE / SPEED & BRAKE ECO system as, in some cases, as shown
in Picture 3, it can partially interfere with the normal driving movements of an able-bodied user.
Picture 3

MOD. FT05 rev.01
HT-SPEED&BRAKE&ECO (User Manual) –
Ed. 1- Update: 11/2020
- 5 -
4. What to do if…...
1. After starting the vehicle's engine, the lever is in a markedly forward position and is very hard to push
Make sure you haven’t accidentally left the lever locked: if you have, release it.
2. The brake lock does not engage when the red button is pressed
There may be an issue with the lock’s electrical system or a mechanical issue; go to a Handytech
Centre to repair the problem.
3. The horn does not sound when the black button is pressed
Make sure the vehicle’s original fuse is intact. If necessary, replace it with one having the same
amperage. Should the problem persist, go to a Handytech Centre.
4. As you use the lever, you notice it has an idle stroke from its home position to when it starts braking.
Go to a Handytech Centre for calibration.
If your system has a problem that is not listed, you must contact your nearest Handytech
Dealer.
MOD. FT05 rev.01
HT-SPEED&BRAKE&ECO (User Manual) –
Ed. 1- Update: 11/2020
- 6 -
MAINTENANCE TO BE DONE EXCLUSIVELY BY HANDYTECH DEALERS
First check: Km. 1,500
•Check if the horn is properly working.
•Check the brake drum operation.
•Check locking and sliding.
•Check the various parts for proper tightness and irregular play.
•Make sure the lever properly rotates on its rotating pin.
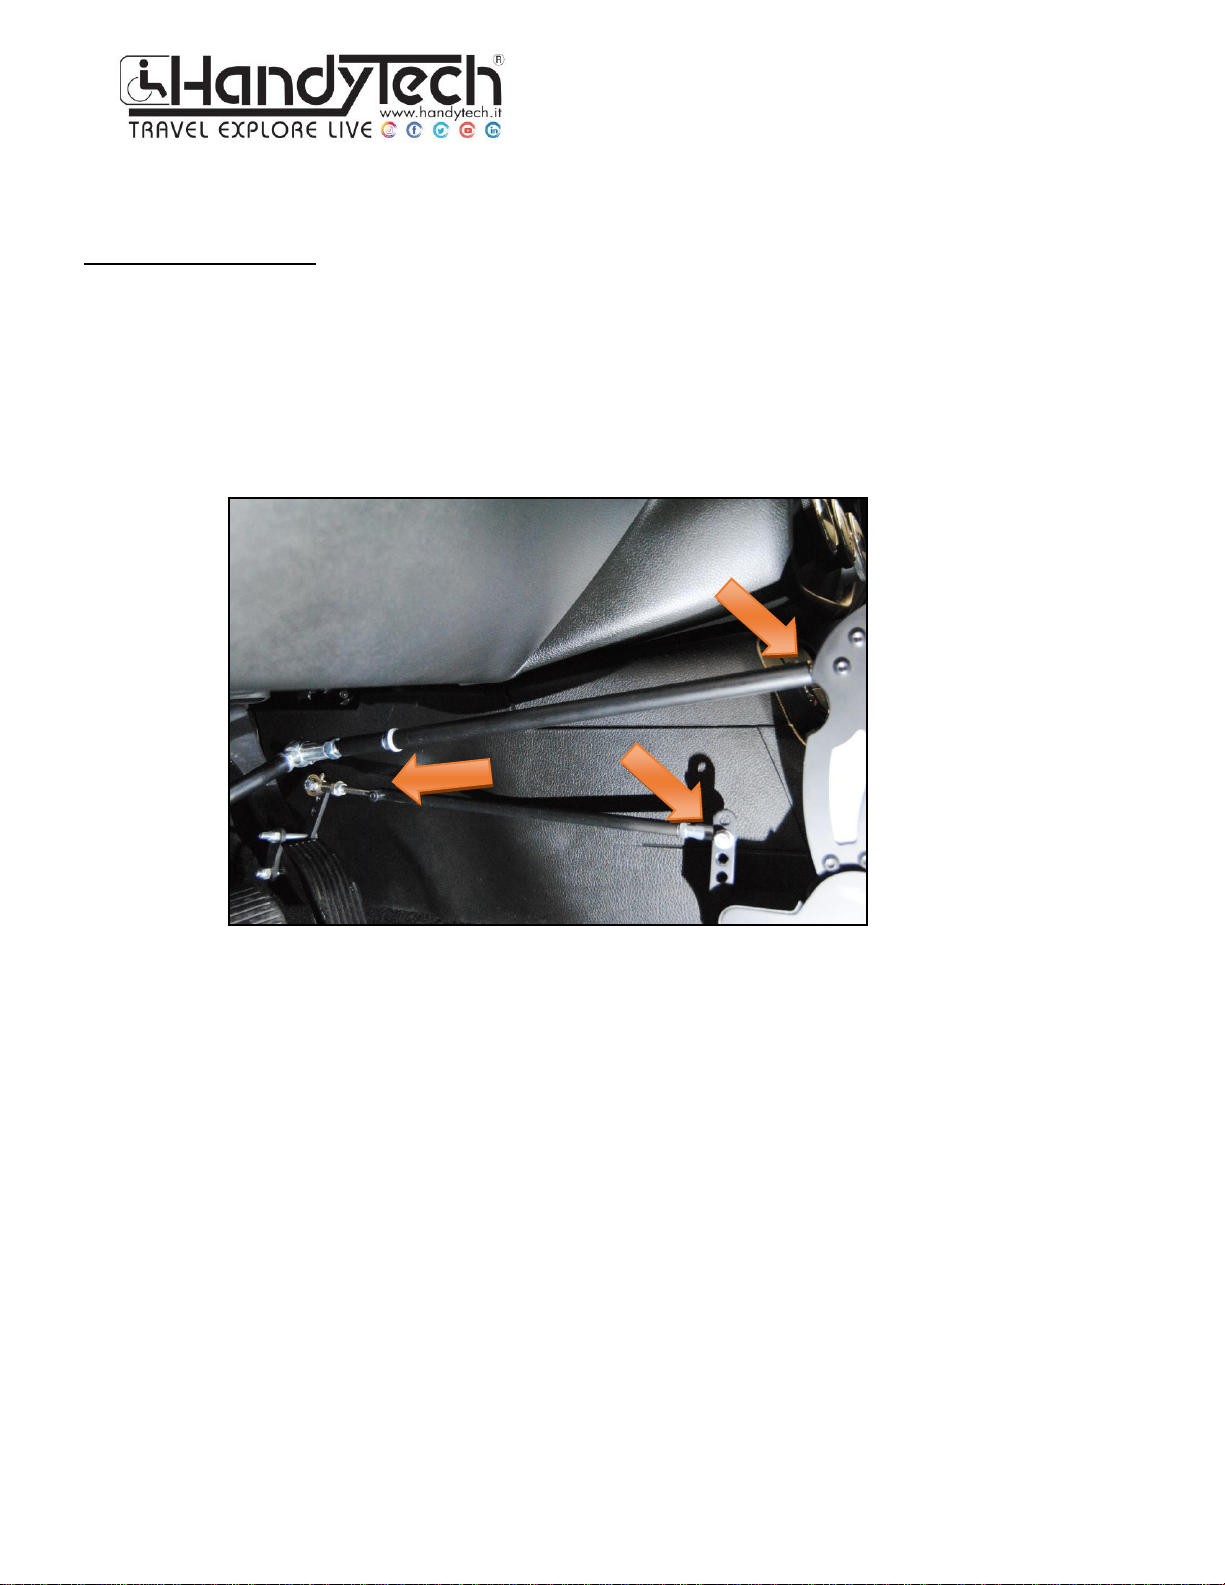
•Check the ball joints at the ends of the telescopic shaft and lubricate them (PHOTO D).
Picture 4
•Check the ball joints for proper sliding and lubricate them.
•Make sure braking is correct. Adjust if necessary.
•Make sure acceleration is correct. Adjust if necessary.
•Check for proper operation as the vehicle is moving.

MOD. FT05 rev.01
HT-SPEED&BRAKE&ECO (User Manual) –
Ed. 1- Update: 11/2020
- 7 -
Subsequent checks
KM. 25,000 (or after 8 months)
•Repeat the checks carried out after 1500 km.
•Check for proper operation as the vehicle is moving.
KM. 50,000 (or after 16 months)
•Repeat the checks carried out after 1500 km.
•In some cases of wear, it is advisable to replace the ball joint that connects the telescopic shaft to the
brake pedal.
•Check for proper operation as the vehicle is moving.
KM. 75,000 (or 24 months)
•Repeat the checks carried out after 1500 km.
•Check for proper operation as the vehicle is moving
100,000 - 125,000 - 150,000 km or at least once a year
•Repeat the checks carried out after 1500 km.
•It is advisable to check the conditions of the parts that are subject to wear (joint balls, sliding rods, etc.),
and replace them if necessary.
•Check for proper operation as the vehicle is moving
Km 175,000 and more
•Repeat the checks carried out after 1500 km.
•It is also advisable, along with your trusted Handytech Centre, to check the system condition and replace
any parts that need to be replaced.
•Check for proper operation as the vehicle is moving
PAY ATTENTION:
After 2 years, it is also advisable, along with your trusted Handytech Centre, to check the system condition and
replace any parts that need to be replaced.
We remind you that once the warranty expires, the maintenance program is at your discretion, but we
recommend following it scrupulously, as neglecting it could cause system anomalies and inconveniences, in
addition to being dangerous while driving.
Any maintenance work on the device shall be fully borne by the customer both when the device is covered by
warranty and not.
WARRANTY: 24 MONTHS OR 80,000 KM
Km displayed at the moment of delivery: ______________

MOD. FT05 rev.01
HT-SPEED&BRAKE&ECO (User Manual) –
Ed. 1- Update: 11/2020
- 8 -
RESERVED TO INSTALLERS
Installer’s Notes
Other useful info

This manual suits for next models
1
Table of contents
Other HandyTech Automobile Accessories manuals

Popular Automobile Accessories manuals by other brands


Rugged Ridge
Rugged Ridge Elite Tail 11226.13 quick start guide

Vision X
Vision X 6.7" ADV Light Cannon Installation instructions & user manual

Menabo
Menabo ACONCAGUA 3.0 TIGERSHARK Fitting instructions

Subaru
Subaru J1010AJ004 installation manual

MRHANDSFREE
MRHANDSFREE Blue Vision II datasheet

Westin
Westin 27-1855 instructions