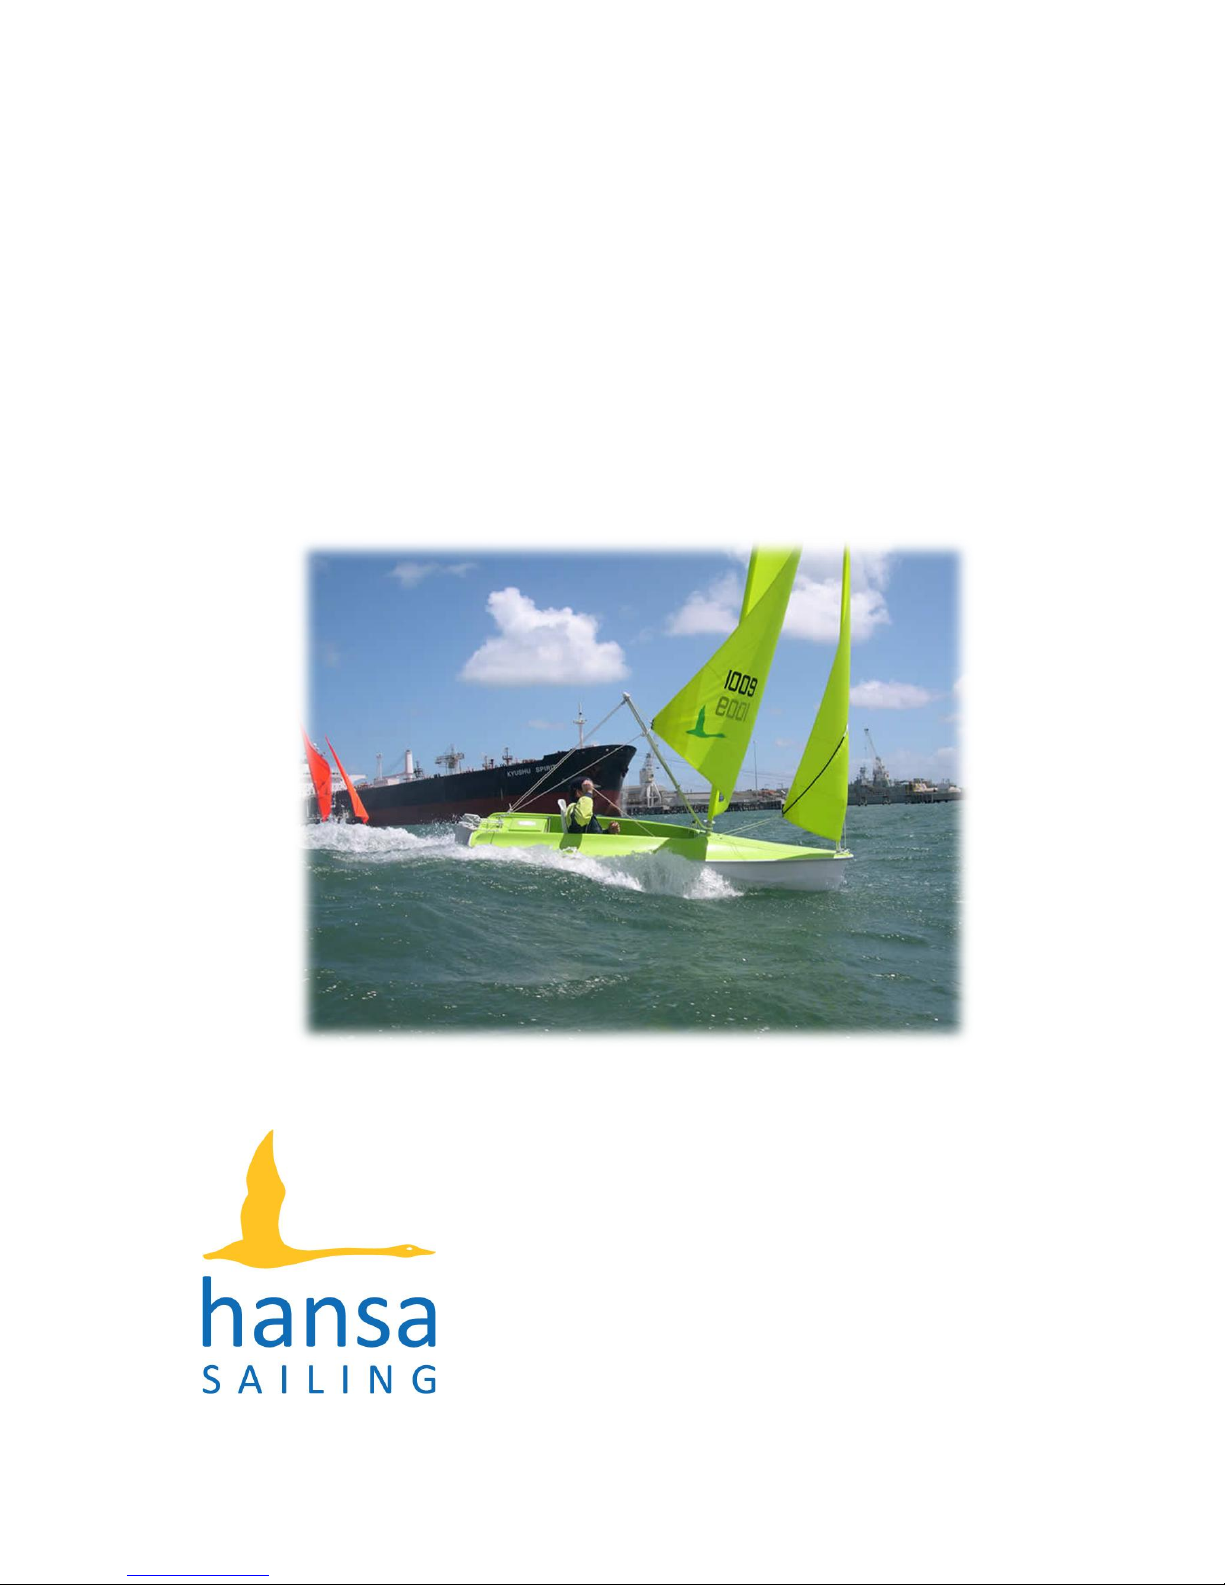
Hansa Sailing Liberty User manual
1
Sail No:
Liberty
Owner’s Manual
Manufactured by
Hansa Sailing Systems Pty Ltd
ABN 56 079 318 031
Head Office: 4/4 Cumberland Avenue
SOUTH NOWRA NSW 2541 AUSTRALIA
Postal: PO Box 5048 NOWRA DC NSW 2541
Telephone: +61 2 4403 0595
Facsimile: +61 2 4403 0598
Email: admin@hansasailing.com
Website: www.hansasailing.com

2
Index
Page:
Introduction
..
..
..
..
..
3
Description of Craft: The Liberty:
Specification
..
..
..
..
5
General
..
..
..
..
..
6
Maintenance
& Repairs ..
..
..
..
7
Safety Recommendations .. ..
..
.. 8
Special Features of the Liberty ..
..
.. 9
How to Rig a Liberty
..
..
..
..
11
Guarantee
..
..
..
..
16
Change of Ownership Form
..
..
..
17

3
Introduction
This manual has been compiled to help you to operate your craft with safety and pleasure. It contains details
of the craft, the equipment supplied or fitted, its systems, and information on its operation and maintenance.
Please read it carefully, and familiarise yourself with the craft before using it.
If this is your first craft, or you are changing to a type of craft you are not familiar with, for your own comfort
and safety, please ensure that you obtain handling and operating experience before assuming command of the
craft. Your dealer or national sailing federation or yacht club will be pleased to advise you of local sailing
schools or competent instructors.
Please keep this manual in a safe place, and hand it over to the new
owner when you sell the craft.
Personal Floatation Devices (PFD’s)
There are many types and variety of buoyancy aids available, manufactured to different sets of standards. The
PFD is a personal item of safety equipment, designed specifically to assist in preserving a person’s life when in
the water. Some PFD’s provides buoyancy to help you float with your head above the water.
All sailors and volunteers should wear a PFD at all times whilst on, or near water.
PFD’s are subject to normal wear and tear. Each one should be checked regularly and if in doubt about its ser-
viceability it should be replaced. If they become wet from salt water they should be hosed down with fresh
water and allowed to dry.
PFD’s and Children
A properly designed PFD of the correct size will keep a child’s mouth and nose clear of the water. A child
should be taught how to put on a device and should be allowed to try it out in the water. It is important that
the child feels comfortable and knows what the PFD is for and how it functions.
Safety Precautions
If sailed with care, this boat is unlikely to capsize in normal use, provided that the sail area is adjusted to suit
the prevailing conditions and the main sheet is not belayed. Whilst Hansa sailing craft have inherent design fea-
tures ensuring maximum stability thereby reducing the chance of capsize, it should be remembered that these
are small sailing vessels and under certain weather, water and sailing conditions sensible precautions should be
taken :
Always reef the sails according to the weather conditions.
Always have a manned safety boat in the sailing area.
Always cancel sailing activities if inclement weather conditions dictate.
Always lock centreboard in position with long centreboard locking pin provided.
Capsize and Man Overboard
Re-boarding after man overboard. In the event of man overboard, use keel handle as a handhold. Board over
the aft port or starboard sides.
Towing
The strong point for towing is the main mast. Pass the tow line through the guide ring at the bow and attach to
the mast with a bowline.
The safety of the sailors should come first under all circumstances.

5
Description of Craft
The Liberty
Specification
Length
3.6 mtrs.
Beam
1.35 mtrs.
Draft
1mtr.
Boat Weight 72 kg
Maximum number of people: 1.
Maximum weight of people 120 kg.
Maximum weight of additional load 30 kg.
Centreboard Weight 72 kg
Sail Plan Mainsail and free standing,` self tacking Jib.
Sail Area Mainsail 4.5 sq. mtrs (unbattened and reefable to .5 sq. mtr).
Jib 1.75 sq. mtr (full roller reefing).
Mast
Main Mast (unstayed 5.6 mtr. Incorporating reefing drum in
foot).
Jib Mast (unstayed 3.5 mtr. Incorporating reefing drum in foot).
Hull
Positive buoyancy.
Heavily rockered for easy manoeuvrability.
Strong construction with solid bonded hull/deck joins.
Seating design keeps helm weight low, plus weighted centre
board makes the boat uncapsizable.
Seating
Fibreglass adjustable seat.
Controls
Steered by manual joystick.
Mainsail is reefed and unreefed by a single hauling line.
Jib is reefed and unreefed by a single hauling line.
Mainsail and Jib controlled by manual mainsheets.
Electric Controls Servo-assist electric controls can be fitted to the Liberty.

6
General
The boat has an engraved plate fitted on the starboard side of forward cockpit,
showing the manufacturer, boat design category, maximum person capacity,
maximum additional load and the CE Mark. The parameters shown on this plate
should not be exceeded.
Steering is by a manual joystick located between the helm’s legs, moving it to the left
to go left and to the right to go right.
The sail area can be reduced or increased whilst under way using a reef furling system
operated by hauling on a single continuous line. (For further information on reefing see:
“How to Rig a 2.3”: page 10 of the Manual).
Included with your Liberty is:
1.
Liberty
11. Foresail (Jib)
2. Main Mast 12. Bobbin
3. Fore Mast 13. Mainsheet
4.
Boom
14. Outhaul
5.
Centreboard
15. Traveller
6. Rudders x 2 16. Painter
7. Rubber Box x 2 17. Jib Sheet with clew sheave
8. Rudder Box Pin x 2 18. Jib strut downhaul
9. Installed reefing system 19. Jib Strut and Claw
10.
Mainsail
20. Boom vang
ITEMS WITH SERVO ASSIST
Installed:
Plus:
main sheet winch Batteries x 2,
jib sheet winch Battery Y Connector,
helm winch Battery Charger (if 240V),
control box Controller
rubber bungs Controller holder

7
Maintenance
It is recommended that the boat is covered when not in use to prevent UV and
other weather damage. A specially designed cover is available from Hansa Sailing
Systems for this purpose.
If sails are to be left furled on the boat when not in use it is recommended that
these are covered using a protective sail sock to prevent UV and other weather
damage. These are available from Hansa Sailing Systems.
Do not let water remain in the boat when not in use. This can accelerate the
deterioration of running rigging, finishes and electrics where applicable.
Winter Storage: Remove electrics, remove sails and fully cover the boat.
Repairs
Contact Hansa Sailing Systems, who will provide the best advice, along with
adapted parts or materials for the repairs you can carry out yourselves. Major
repairs should preferably be carried out by professionals.

8
Safety Recommendations
Hansa boats are designed with a hull form and other features which combine to
give considerable stability. There is a simple set of rules which we must follow to
continue our excellent safety record and prevent any accidents. The stability of
the Hansa boats are reliant upon the following factors.
Centreboards
It is most important that the keel be fully down when sailing. The hole one third
down the keel is there purely to facilitate sailing off a beach, and under no
circumstances should people with disabilities be allowed to sail around with the
keel held in this position. There is provision to lock the keel fully down so as even
in a “knock down” it remains in place.
The Liberty centreboard weighs 72kg and therefore must not be lifted manually.
Always use a hoist to place the centreboard into position.
Seating
Because the placement of sailor’s weight affects stability it is important that
people remain seated low in the boat. If a sailor needs support from strapping, use
only quick release velcro straps to hold the sailor in place. In no circumstances
should any other strap fixings be used.
Reefing
Being a displacement type hull extra sail area in strong winds does not mean more
speed, all it does is push the bow too far into the water and make it more difficult
to handle. In a breeze it is therefore recommended always to reef to suit the
stronger gusts.
Towing
If a Hansa boat needs to be towed on the water by another boat, it is safer and
easier to tie the boat close along side and remove the rudder blade so that it
cannot be “steered” in the wrong direction.
Transferring
A pontoon system which enables safe, keel down transfer of sailors to and from the
boat is available. Using this avoids off the beach keel handling and transferring
problems. It ensures that keels remain down throughout transferring.
Discriminatory Keel and Reefing Adjustments
For safety reasons people with disabilities need the keel down and because many
are unable to raise and lower the keel to improve sailing performance and also
unable to adjust the size of the sail by reefing, it is discriminatory to allow anyone
to make these adjustments during a race.

9
Liberty Special Features
1. The Liberty has 2 rudders which give
directional control at even extreme angles
of heel.
2. There is the option
of fitting a boom with a 3
part manual mainsheet,
rigged as per the 303W,
(fig 2)
or a 2 part double ended
mainsheet (fig 3), one
end going to a servo as-
sist sheet winch and the
other through a conven-
tional swivel/deadeye/
camcleat for manual op-
eration, (fig 4)
Both these ends pass
through a double block
attached to the boom
about 400mm back from
the mast. (see fig 4)
3. A boom vang is fitted which prevents
the boom skying when running in fresh to
strong winds. (see fig 4)
Fig 1
Fig. 2
Fig. 3
Fig. 4

10
Fig. 7
4. The mainsail outhaul primarily cleats at the boom, (fig 5) but passes thru a deckeye
just behind the main mast, down to the console and turns through the boom vang/outhaul
double becket block and back to the central of the 3 clamcleats on the port side of the con-
sole. (fig 6)
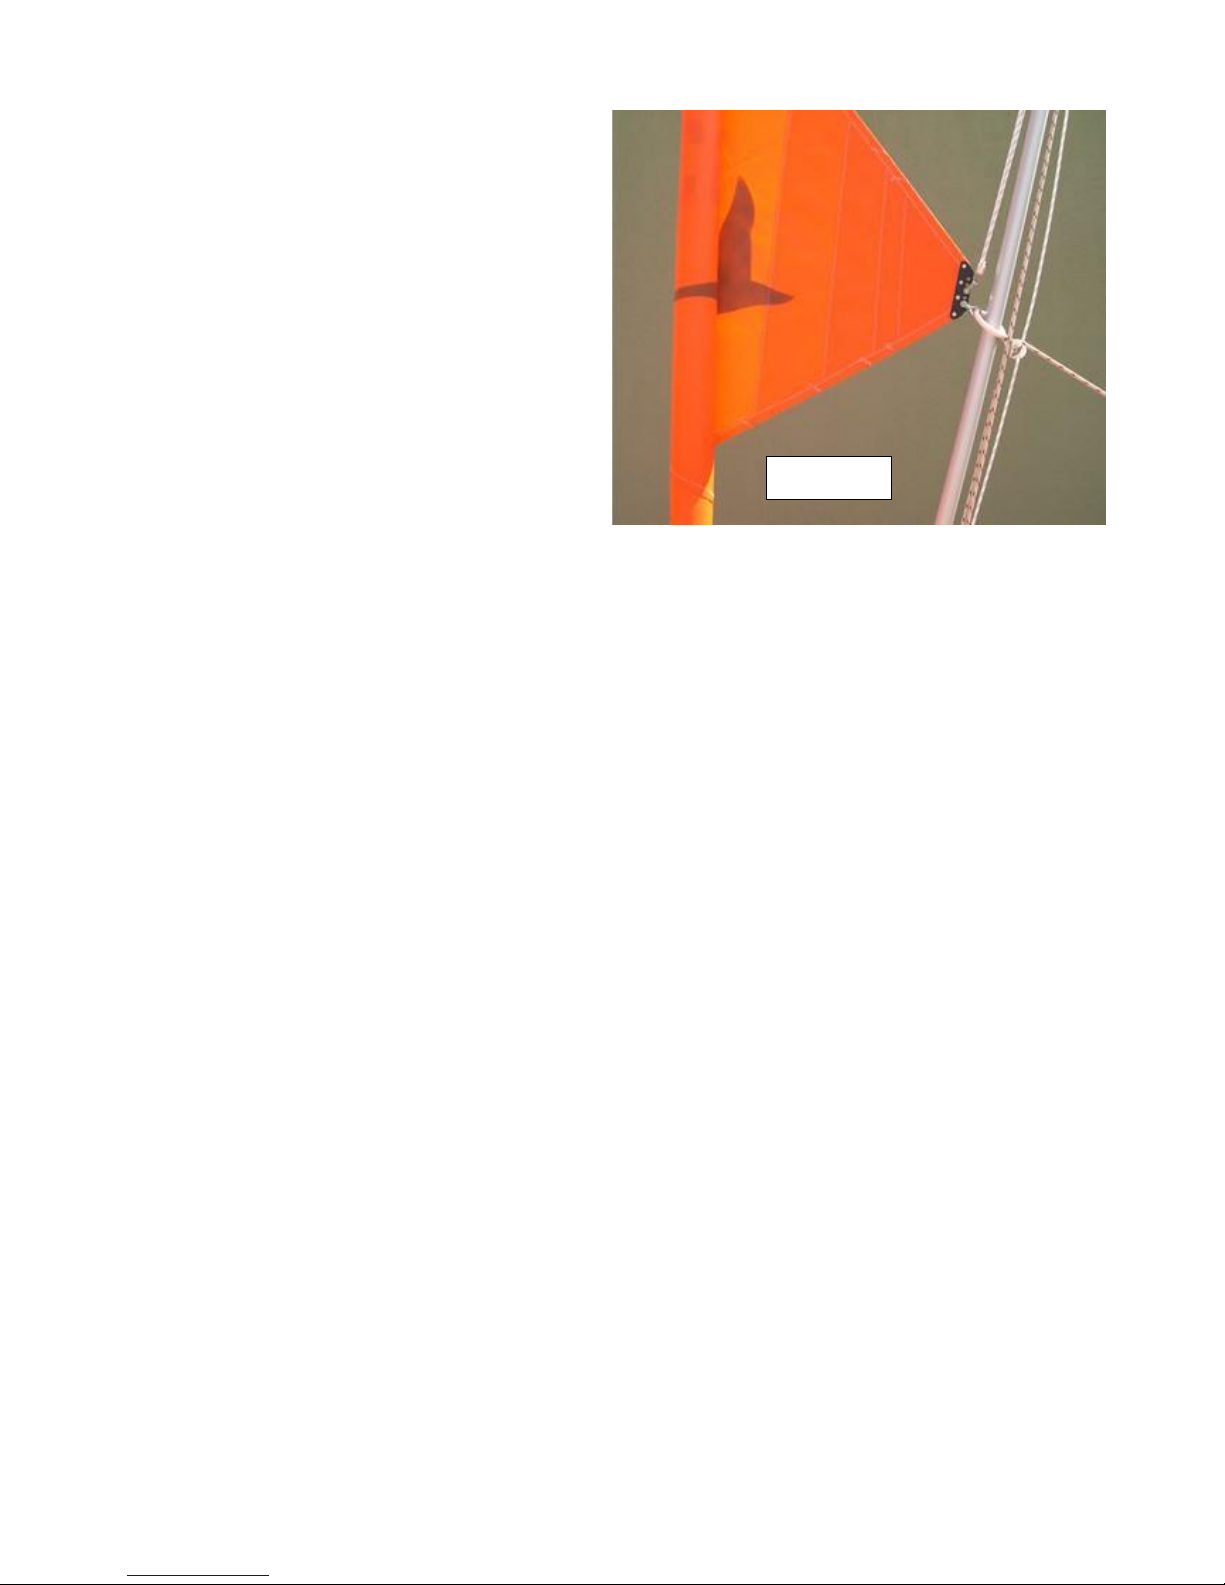
5. The jib is self tacking with a diagonal
strut between the clew and a claw at the
mast which holds the jib flat and prevents
twisting as the sheet is eased. (fig 7, view)
6. The jib sheet is 2 part which gives the option of
one end going to a servo assist winch and the other
down to the camcleat on the starboard side of the
console for manual operation. (fig 8 shows the jib
sheet winch behind mast, jib sheet and camcleat).
Fig. 8
Fig. 6
Fig. 5

11
7. The Liberty has a solid seat designed to take cushions and padding to suit individual
needs. The adjustable backrests are available in short and long versions. Thoracic supports,
headrests and various types of seat belts are available. (fig 34 & 35)
If fig 34 is in B&W the yellow cross-over shoulder straps will be hard to see.
Rigging the Liberty
1. STEPPING THE MAINMAST, FITTING THE BOOM.
1.1 With the sail rolled and tied up, bob-
bin in place tied to the tack of the sail
(fig 9), carefully step the mainmast mak-
ing sure the foot is firmly in the step.
Fig. 9
Fig. 35
Fig. 34
12
1.2 Take the boom, free its outhaul and
sheet, pull the outhaul block and travel-
ing ring as far forward as it will go, then
shackle the traveling ring onto the low-
est hole of the clew board, and shackle
the outhaul to the central hole of the
clew board. (fig 10)
1.3 Unroll the mainsail (about 5 turns)
until the rowlock at the front end of the
boom can be pushed onto the bobbin.
1.4 Then pull the sail out tight with the
outhaul. Cleat the outhaul on the boom.
(see fig 5—page 10)
1.5 Run the outhaul through the deck eye in the cowling just aft of the main mast,
down through the deadeye on the console just aft of the mast, then back to the black
clam cleat on the console port side. Pull on the outhaul, but cleat it at the white
clam cleat on the starboard side of the boom. (see fig 4—page 3)
1.6 Pass the boom vang through its block on the boom and back through its block on
the console just aft of the mast and cleat it at the furthest aft of the 3 black
clamcleats on the port side of the console. Do not overtension the boom vang, it is
there to prevent the boom skying when running downwind in fresh to strong winds,
not to flatten the mainsail when going to windward. (see fig 4–page 9).
1.7 If the boat is to be sailed manually, and has a 3 part sheet fitted to the boom, use
the following procedure.
a) Unravel the sheet, clear any twists and shackle its block onto the traveler and rig
as per fig 2—page 9.
b) Pass the live end of the sheet through the deadeye and camcleat on the console
and tie a figure of eight knot in its end.
1.8 If the boat is to be sailed servo assist and has the sheet on its winch and a bare
boom, unravel the mainsheet which comes up through the console from the sheet
winch then: (as per figs. 3 & 4—page 9)
a) pass its end through the right side of the double block on the boom,
b) then through the plastic guide-ring half way along the boom,
c) then through the first of the blocks towards the end of the boom,
d) then down and through the block on the traveler,
e) then back up and through the block at the end of the boom,
f) then again through the plastic guide-ring, and then through the right side
of the double block,
g) and then down through the fairlead and cam cleat on the centre of the con-
sole.
h) tie a stopper knot in its end. If there was not enough rope for this opera-
tion set up the servo assist electrics and feed out sufficient rope. (see 3.1 on page
15)
Fig. 10

13
1.9 Rotate the mast to fully unroll the sail, haul in on the outhaul and cleat it, pull
the starboard reefing line till its knot is as far as it will go on the port side, then
tighten the reefing drum clamp. (The reefing drum clamp is under the console and as
per fig 11). If full sail is not needed at this time release the outhaul and pull the port
side reefing line till its knot stops at the starboard side, cleat the reefing line on the
port side aft of the console, then haul on and cleat the outhaul. (fig 12, reefing
lines)
2. STEPPING THE FOREMAST.
2.1 Before stepping the mast, unroll
the sail, fit the claw and strut, then
attach the strut to the claw with the
stainless steel spring hook.
(as per fig. 7–page 10; fig. 9—page 11
&
fig. 13)
Fig. 13
Fig. 11
Fig. 12

14
Fig. 14
2.2 At the bow pull the port side jib
reefing line till its knot is at its stop
hard up on the port side of the console
in the cockpit. (see fig 12–page 13,
reefing lines)
2.3 Unhook the jib reefing line tension
shock cord hook (located on back bulk-
head behind the seat) and set up the
reefing line in a loop to complete a full
turn around the foremast reefing drum.
(fig 14, view of loop)
2.4 Step the mast, fit the reefing line
and re-tension the shockcord. (fig 15)
2.5 Presuming the jib sheet block is shackled to the bottom hole of the clewboard, feed
the sheet through the block and down through the deckeye to the turning block, then thru
the deadeye and the cam cleat, then tie a stopper knot in its end. (see fig. 8—page 10 &
fig. 9—page 11).
2.6 At the bow is the jib strut downhaul, free it and attach its plastic hook to the lug on
the front of the claw. (fig 13—page 13).
2.6 Pull in on the downhaul (located on the left side of the console) and cleat it on the
most forward of the 2 black clamcleats. (fig 6 on page 10)
2.7 Check the manual operation of the jib sheet located at the cam cleat on the right side
of the console.
Fig. 15

15
2.8 To furl the jib, remove the strut, unhook the downhaul, slide the claw to the
base of the mast then pull the port jib reefing line to completely roll up the sail.
(fig 16)
If fig. 16 is in B&W it may be hard to see the orange sails rolled around the mast.
2.9 Its OK to roll 1 to 3 turns on the foremast to reef for strong winds, but for
furling do as per 2.8.

16
Guarantee
If you need any help to resolve any problems with the boat, contact:
Hansa Sailing Systems Pty Ltd
P.O. BOX 5048, South Nowra DC, 2541
Australia
Ph: 61 2 4403 0595 Fax: 61 2 4403 0598
Email: info@Hansasailing.com
Terms of Guarantee
1This guarantee is valid for a period of 12 months from the date of purchase
from Hansa Sailing Systems.
2If any part or parts of the boat, including the rigging and fittings, is proved
to be defective by reason of faulty design, workmanship or materials, we
undertake to repair or replace the same free of charge, upon the following
conditions:
(a) This guarantee applies only to the original boat and fittings, and not to
any subsequent alterations, repairs or renewals.
(b) That, if at any time during the guarantee period, any parts are altered or
repaired by any person not authorised by us, then this guarantee will
immediately cease and become void concerning that part, or any other part
affected by the work.
(c) That our decision on all questions relating to any defect shall be
conclusive.
(d) That any part which has been replaced shall become our property.
(e) This guarantee specifically excludes damage resulting from external
impact.
None of the terms of this guarantee effect your statutory rights.
Name: .............................................................................................
Address: .............................................................................................
Owner of Liberty ...............................................………….........
Sail No: ....................................................……………….
HIN No: .............................................…………….........
is covered by the guarantee conditions displayed (above) in this Owner’s Manual,
delivered with this craft.
This guarantee begins ................................................................. (date)
Signature for Hansa Sailing Systems
................................................................

17
Change of Ownership
Please ensure this Owner’s Manual is handed to the new owner as it contains
safety information that is of great importance to the new owner and is essential
to compliance with the EU Recreational Craft Directive.
The Hansa Sailing Association is hoping to keep a continuous register of all Hansa
boats. Your boat has been registered with them under your name and address. In
order to enable us to keep this register up to date it would be very helpful if you
could inform us of any change of ownership.
The form below is provided for you to photocopy and use to give us this
information if you sell the boat.
Change of Ownership Form
Model:
Sail No:
Hull Identification No:
New Owner:
Name: .............................................................................
Address
..........................................................................
......................................................................................
......................................................................................
......................................................................................
Phone No:
................................................................................
Please send completed copy of this form to:
Hansa Sailing Systems Pty Ltd
P.O. BOX 5048, South Nowra DC, 2541
Australia
Please photocopy or copy:
Do not cut this form out of the manual.
Other manuals for Liberty
1
Table of contents
Other Hansa Sailing Boat manuals


Popular Boat manuals by other brands

Grady-White Boats
Grady-White Boats SPORTSMAN 180 owner's manual

Classic Accessories
Classic Accessories Colorado XT owner's manual

HonWave
HonWave T20 Original instructions

Gardasolar
Gardasolar GOGO4 Use and maintenance manual

NW Explorations
NW Explorations Grey Lady operating manual

Bavaria
Bavaria Cruiser 33 owner's manual


Boston Whaler
Boston Whaler 305 conquest manual

Grand
Grand Golden Line G750 owner's manual

Yamaha
Yamaha AR192 Owner's/operator's manual

Aquabotix Technology Corporation
Aquabotix Technology Corporation ENDURA Series manual

Aquaglide
Aquaglide BLACKFOOT HB ANGLER SL owner's manual

Gumotex
Gumotex THAYA user manual