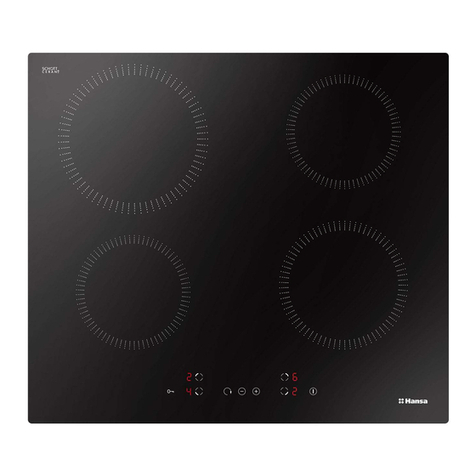
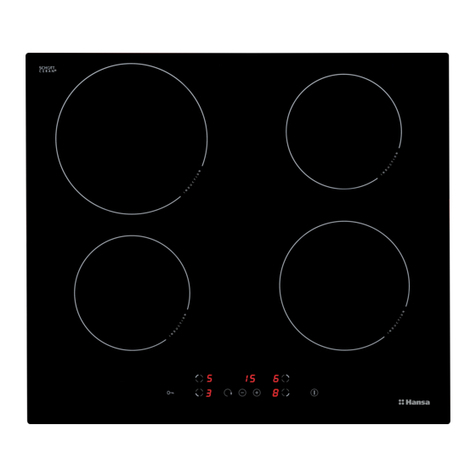
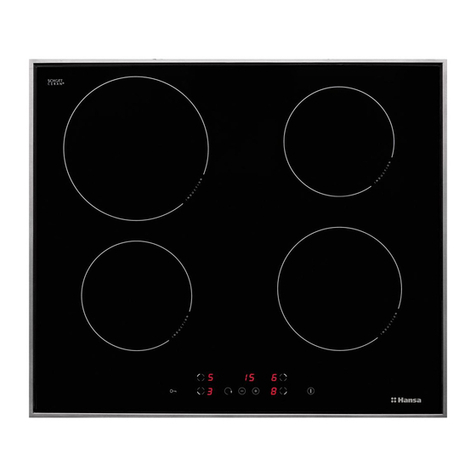
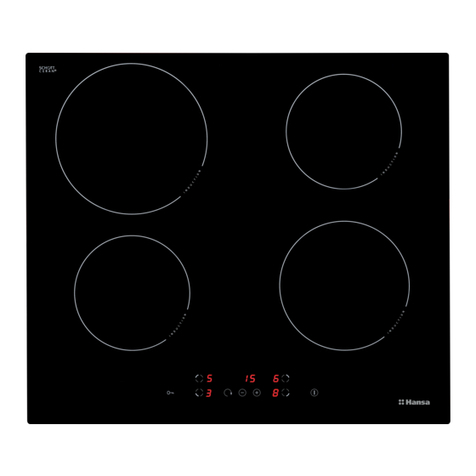
Hansa BHMI62135 User manual

BHMI62135 / PJG3.1ZpZtCR
BHMI62015 / PJG3.1ZpZtR
INSTRUCTION MANUAL / BUILD-IN GAS HOB /
BUILD-IN GAS- ELECTRICAL HOB EN 2
ҚЫЗМЕТ КӨРСЕТУ НҰСҚАУЛЫҒЫ / КІРІКТІРІЛЕТІН ГАЗБЕН
АС ПІСІРУ БЕТІ / КІРІКТІРІЛГЕН ГАЗ-ЭЛЕКТР ПІСІРУ БЕДЕРІ KK 16

2
DEAR CUSTOMER,
Outstanding user-friendliness and excellent efciency make cooktops a perfect choice. Please read this manual
thoroughly before you start to use the appliance to avoid any trouble.
The cooktop’s safety and functionality was checked at the factory test stations prior to dispatch.
Please read this manual carefully before you start to use this cooktop. This way, you can ensure its proper and
correct operation.
Please preserve this manual and store it near the appliance, so that it is available at all times for reference. Obse-
rve the instructions contained herein to prevent accidents.
Note
Do not start to use the appliance before you have read and understood the instructions.
This equipment has been designed solely as a cooking appliance. It is strictly prohibited to use it for any
other purpose, e.g. heating. Using the appliance for other purposes can be dangerous.
The manufacturer reserves the right to introduce modications which will not affect the functionalities and
operation of the appliance.
TABLE OF CONTENTS
ENVIRONMENT
During transportation, protective packa-
ging was used to protect the appliance
against any damage. After unpacking,
please dispose of all elements of packa-
ging in a way that will not cause damage
to the environment.
All materials used for packaging the
appliance are environmentally friendly;
they are 100% recyclable and are mar-
ked with the appropriate symbol.
Caution! During unpacking, the packaging materials (po-
lythene bags, polystyrene pieces, etc.) should be kept out
of reach of children.
UNPACKING DISPOSAL OF THE APPLIANCE
Old appliances should not simply be di-
sposed of with normal household waste,
but should be delivered to a collection and
recycling centre for electric and electronic
equipment. A symbol shown on the product,
the instruction manual or the packaging
shows that it is suitable for recycling.
Materials used inside the appliance are
recyclable and are labelled with information
concerning this. By recycling materials or other parts from
used devices you are making a signicant contribution to
the protection of our environment.
Information on appropriate disposal centres for used
devices can be provided by your local authority.
ENVIRONMENT 2
PRODUCT INFORMATION 3
SAFETY INSTRUCTIONS 3
GUIDE TO THE COOKTOP 5
INSTALLATION 6
OPERATION 9
CLEANING AND ROUTINE MAINTENANCE 12
GUARANTEE 13
TROUBLESHOOTING 14

3
Using energy in a responsible way not only saves money but also helps the environment. So let’s save
energy! And this is how you can do it:
■ Use appropriate cookware: at and thick bottom pots and pans will reduce power consumption by up to one
third. Do not forget to use lid to reduce power consumption by four times!
■ Select properly sized cookware: make sure the diameter of the pan or pot is not smaller than the size of the
burner.
■ Keep the burner surfaces and the cookware bottoms clean: Residues hinder heat transfer, and lasting contami-
nation can be removed only by extremely harmful chemicals. Particularly, the ame slots of the burners must be
kept clean at all times.
■ Do not put up the cookware lids unless really necessary.
■ Do not install the cooktop adjacently to fridges / freezers: this increases power consumption of the cooling
appliances.
HOW TO SAVE ENERGY
ENVIRONMENT
EN
PRODUCT INFORMATION
Product information given in accordance with Commission Regulation (EU) No 66/2014 supplementing
Directive of the European Parliament and Council Directive 2009/125/EC with regard to eco-design
requirements for household ovens, hobs and range hoods
Household electric hobs
Model identier BHMI62135 BHMI62015
PJG3.1ZpZtCR PJG3.1ZpZtR
1106096 1106097
Hob type (electric / gas / gas-electric) O / O / V O / O / V
Number of cooking zones 1 1
Heating technique (induction cooking zones or heating
areas, radiant heating zones, solid hobs) O / O / V O / O / V
Usable surface diameter for electric cooking
zone rounded to 5 mm [Ø cm]
FL - -
RL Ø 15,5 Ø 15,5
RR - -
FR - -
C- -
Energy consumption for each cooking zone
per kg, EC electric cooking [Wh/kg]
FL - -
RL 201,7 201,7
RR - -
FR - -
C- -
Number of gas burners 3 3
Energy efciency for each gas burner (EE gas
burner)
FL 53,5 53,5
RL - -
RR 5 3 , 5 5 3 , 5
FR 53,5 53,5
C- -
In order to determine compliance with the eco-design requirements, the measurement
methods and calculations of the following standards were applied:
EN 60350 -1
EN 60350 -2
E N 3 0 - 2 - 1

4
EN
SAFETY INSTRUCTIONS
Your safety and that of your family are of the utmost importance
to us and although some simple safety when cooking is generally
observed it is worth reading through the following points to ensure
that your hob is operated as safely as possible at all times to prevent
any accidents.
As a responsible company we feel it is very important to maintain
a very high level of safety and to make this section as clear and
highlighted as possible.
Should you have any additional concerns or questions on any safety
related matters please feel free to contact our service department
on 0844 815 8880 (UK) or 0818 464646 (ROI) and our staff will
endevour to help you with any questions you may have.
• Do not leave children unattended in an area where the appliance
is in use.
• Do not allow persons of limited physical, sensual, or psychological
capabilities, or persons whose experience in operating similar
appliances is limited to operate the cooktop, unless if attended by
(adult) caretakers.
• Make sure no part of the power cord comes in contact with hot parts
of the hob.
• Leave sufcient space around the socket to ensure the power plug
is accessible easily after installation.
• Do not install the hob near cooling appliances.
• Do not leave the hob unattended while in use. Boil-overs cause
smoking, and greasy spill-overs may ignite presenting a re risk.
• Execute caution when the food is boiling. Boil-overs may ood the
burner.
• Should a malfunction occur, stop using the appliance. Do not start
to use your hob before a Gas Safe engineer has repaired it.
• Make sure all the burners are closed before opening the main gas
valve at the network or container connection.
• Do not place cooking pans directly onto the burners.
• Maximum weight of a pan to be placed over a single burner is 5 kg.
The overall maximum load of a pan that is to be placed over the
entire grate is 10 kg. Do not place a single pan over two burners at
the same time.
• Do not impact the burners and knobs.
• It is prohibited to modify or repair the hob by persons who do not
possess appropriate training and qualications.
• Do not set the burner knobs open before you have stricken the
match or the ignition appliance.
• Do not extinguish the ame by blowing.
• The user is not allowed to convert the hob to another gas type,
relocate the appliance, or modify the supply network himself. Only a
duly authorised and Gas Safe is allowed to carry out these activities.
• Do not connect antenna cords (e.g. radio antennae) to the gas pipes.

5
EN
GUIDE TO THE COOKTOP
BHMI62135 / PJG3.1ZpZtCR
1, 2, 3, 7 - Surface burners
4 - Surface burner knobs
5 - Grid
6 - Electrical plate
TECHNICAL DATA
lheigh 85 mm
ldepth 500 mm
lwidth 580 mm
lweight of the cooker 9,5 kg
The cooker is equipped with burners:
1 - WOK burner, heat load - 3 kW
2 - Small burner, heat load - 0,9 kW
3 - Medium burners, heat load - 1,88 kW
6 - Electrical plate, total load - 1,5 kW / ϕ 15,5cm
7 - Large burner, heat load - 2,4 kW
Appliance class: see rating label
The cooker is equipped with a pipe terminal - 1/2” ISO 228-1
12
4
5
3
6
72
4
5
3
6
TECHNICAL DATA
lheigh 85 mm
ldepth 500 mm
lwidth 580 mm
lweight of the cooker 8 kg
BHMI62015 / PJG3.1ZpZtR

6
Installation work and repairs should only be performed by a qualied technician in accordance with all applicable codes
and standards. Repairs and service by unqualied persons could be dangerous and the manufacturer will not be held
responsible.
Location
l The kitchen must be dry and well ventilated.
l The kitchen should have a ventilation system including fume exhaust to remove the gases generated by burning
gas and direct them out. That system shall comprise a ventilation grill or a hood. Please install hods in accordance
with the manufacturers’ instructions.
l Fresh air is necessary to ensure gas burning. Minimum gas requirement for the cooktop is 2 cbm per hour per each
1 kW of the burners’ capacity. The air can be supplied either directly from the outside by an at least 100 cm2 duct,
or directly from the adjacent rooms, provided these are equipped with ventilation system routed to the outside of
the building.
l The minimum distance between the burners and the hood exhaust should be 750 mm (see g. 3).
GUIDE TO THE COOKTOP
EN
3
INSTALLATION
Installation of the cooktop:
l Prepare the work top cut-out as shown in the diagram (see g. 5).
l Remember to maintain the minimum safety distances to combustible surfaces below the cooktop of 130 mm.
l Fix the tape (included) to the cooktop edge at the bottom side of the appliance.
l Connect the appliance to gas and electrical mains as per the operating manual.
l Remove any dust from the work top, remove the protective backing of the tape, insert the cooktop into the cut-out, and
press rmly downwards.
l Set the xing brackets (see g. 4) perpendicular to the cooktop edge, x rmly.
l Test the correct operation of the installed cooktop. In particular, check the correct operation of the sealing protection and
the ignition system.
1. Work top
2. 4 screws
3. 4 xing brackets
4. Installed appliance
Fixing the brackets to the work top
4
350mm
350mm
250mm
250mm
750mm
50mm 50mm
Min 300
850mm

7
INSTALLATION
EN
5
Notes for the technician
Instalator powinien:
l The tter should:
l Bear a valid certicate of gas permit
l Have studied the contents of the appliance’s type plate containing the suitable type of gas. Compare the data
with the characteristics of the gas available in the network.
l Check the following:
• ventilation capacity, incl. air exchange in the kitchen,
• tightness and sealing of the gas ttings,
• effectiveness and correct operation of all the functional elements.
l Adjust the settings of the gas control knobs with the washers included to ensure the igniters work properly and
the entire system is leak-proof;
• check the operation of the igniters and leak seal,
• remove the knob if working incorrectly, and adjust bi introducing washer(s) onto the valve spindle,
• check the operation of the igniters and leak seal,
• secure the system with a tight washer and put the knob handle on.
l Issue a certicate of connecting the appliance and inform the user of the operating activities.
NOTE! Installation and service must be performed by a qualied and licensed installer, service agency or
gas supplier. All the relevant safety regulations must be observed.
The cooktop is equipped with an R1/2” connecting pipe for gas connection. If the appliance is intended for use with LPG
(propane – butane), a Ø 8 x 1 mm hose coupling is threaded onto the connector.
Make sure the gas connecting pipe does not come in contact with the metal components of the cooktop.
All the couplings and joints must be tightly sealed.
Note. After connecting the appliance check all ttings for gas leaks e.g. with soapy water.
Do not check the ttings with open re!
Please make sure you have read and understood the entire operating manual. Do follow the instructions to ensure
safe and effective operation of your cooktop.
NOTE: The appliance uses gas, which is a ammable and explosive substance. Thus, it is necessary for the cooktop
to be connected to a gas network which supplies the gas type for which the appliance is suitable.
Installation and service must be performed by a qualied installer, service agency or gas supplier.
Please check the type plate for the information concerning the suitable gas type for your appliance.
Converting the unit to another gas type
Only a licensed and authorised technician may carry out this job.
If the available gas type is different from that provided in the type plate of the appliance (G 20 (GZ 50) 20 mbar, the
burner nozzles should be replaced and ame adjusted.

8
INSTALLATION
EN
Replacement of burner nozzle: loosen the nozzle with a dedicated wrench (7). Fit the new nozzle,
suitable for the required gas type (see table above for reference).
After you have converted the cooktop to another gas type, make sure you have placed a label containing
that information on the appliance.
Valve adjustment
Valve adjustment should be done with the control knob set at Burner ON
saving ame position.
Remove the knob, and adjust the ame with a tiny screwdriver (see g.
7 below).
7
Checking the adjusted ame: heat the burner at full open position for 10 minutes. Then turn the knob into the saving
setting. The ame should not extinguish nor move to the nozzle. If it goes off or moves over to the nozzle, readjust
the valves.
Note.
It is up to the used to request converting the appliance to another gas type if so required by the local conditions
at a licensed gas tter / service.
NOTE
The cooktops delivered by the supplier come with the burners which are suitable for burning the type of
gas which is quoted in the type plate and in the guarantee certicate. The type plate is tted at the bottom
panel of the appliance. The following must be carried out if converting to another gas type is required:
l nozzles must be replaced (see assembling table),
l reduced valve ow rate must be adjusted.
Converting the unit to another gas type (see category on the rating plate on the appliance)
Gas type Nozzle diameter
Small Medium Large WOK
2H G20/20mbar 69 97 110 131
3B/P G30/28÷30mbar 50 68 78 86
Adjustment of the reduced valve ow
Burners Flame Converting the cooktop
from LPG to natural gas
Converting the cooktop
from natural gas to LPG
Regular burners
Full ame Replace the burner nozzle
according to the guideli-
nes in table 1
Replace the burner nozzle
according to the guideli-
nes in table 1
Saving ame Loosen the adjustment
spindle (see g. 7) and
adjust the ame
Loosen the adjustment
spindle (see g. 7) and
adjust the ame

9
OPERATION
Flame selection
At the burners adjusted correctly, the ames should be light blue, and the inner cone should be clearly visible. The size
of ame depends on the position of the related burner control knob.
Burner ON, large ame - Burner ON, small ame
(saving mode)
Burner OFF
8
See also g. 8 for various operating options (ame size selection); the burner should be set at a large ame during the
initial phase of cooking to bring the food to boiling, and then the knob should be turned to the saving ame position to
maintain the cooking. It is also possible to adjust the ame size stepless.
It is prohibited to adjust the ame in the range between the Burner OFF and Burner ON large ame
positions.
Signicant quantities of energy can be saved if the appliance is used correctly, parameters set correctly, and appro-
priate cookware is used. The savings can be as follows:
l Up to 60 per cent savings when proper pots are used,
l Up to 60 per cent savings when the unit is operated correctly and the suitable ame size is chosen.
It is a prerequisite for efcient and energy-saving operation of the cooktop that the burners are kept clean at all times
(in particular the ame slots and nozzles).
Suitable pans
Selection of vessels
Bear in mind that the diameter of the pot must be at least slightly larger than that of the ame. Cover the pots with lids.
It is recommended to use pots the diameters of which exceed the diameters of the ame by 2.5 – 3 times;
l For the small burner, the most suitable pot will be 90-140 mm in diameter,
l For the medium burner, the most suitable pot will be 140-220 mm in diameter,
l For the large burner, the most suitable pot will be 200-240 mm in diameter,
l For the WOK burner, the most suitable pot will be 220-260 mm in diameter,
l The height of the pot should not be larger than its diameter.
Wrong CorrectWrong
9
Lids:
Using a lid while cooking will minimize the loss of heat and decrease the cooking time.
EN

10
OPERATION
EN
Using cooktops with control knob ignition (Zp)
l Press the selected control knob and turn anti-clockwise into Burner ON large ame position.
l Hold depressed until gas is on re
l Release the knob and set the required ame size.
Using cooktops with leak protection (Zt)
protection spark igniter
Hold the burner’s control knob depressed for approx. 10 seconds in Burner ON large ame position. This way, you
activate the protection device.
Repeat the attempt if the protection has not activated for the rst time.
Leak protection will cut off the gas supply if there is no ame for approx. 60 seconds.
At the Zt cooktops, the gas supply to the burners is adjusted with the knobs equipped with the leak
prtection.
What to do if surplus gas leak
occurs
1 – gas network
2 – gas cut off valve
A – valve ON
B – valve OFF
10
11
In any emergency, proceed as follows:
l turn the burners off
l set the cut off valve OFF (see g. 9 B)
l ventilate the kitchen
l report the unit for repair at a service department of a licensed and authorised repair shop
l refrain from using the appliance until it is returned to its operating condition
NOTE
The user can x some minor malfunctions himself, by following the instructions given in this manual.
The burner does not ignite, and gas is smelled;
l Close burner control knobs
l Close the gas mains / supply cut off valve
l Ventilate the kitchen
l Take the burner out of the cooktop
l Clean and blow the slots
l Insert the burner back in place
l Resume ignition attempt.
If the burner still fails to go on, report for a licensed repair.

11
How to use the heating plate
An appropriately selected pan saves energy. A pan should have a thick, at base with a
diameter equal to the plate diameter, as in that case heat is transferred most efciently.
The level of heat can be adjusted gradually by turning the appropriate knob to the right or
left. Switching on the plate results in a yellow signal light on the control panel turning on.
Caution!
Ensure the plate is clean – a soiled
zone does not transfer all of the
heat.
Protect the plate against corrosion.
Switch off the plate before a pan is
removed.
Do not leave pans with prepared di-
shes based on fats and oils unatten-
ded on the switched – on plate; hot
fat can spontaneously catch re.
0 Switch off
● MIN. Warming up
1 Stewing vegetables, slow cooking
● Cooking soups, larger dishes
2 Slow frying
●Grilling meat, sh
3 MAX. Fast heating up, fast cooking, frying
OPERATION
EN

12
CLEANING AND ROUTINE MAINTENANCE
Daily cleaning and proper maintenance have crucial impact
on the durability of your ceramic plate.
Clean the ceramic plate observing the same rules
as for glass. Never use abrasive or aggressive
cleaning agents, scrubbing powders or scratching
sponges.
Burner elements must always be clean. Water
particles may hamper gas ow and produce an
incorrect burner ame.
12
Work panel
l Clean the enamel coated work panel only with warm water with a mild solution of dishwashing liquid. Use mild dish
washing liquids to remove otherwise resistant contamination.
l Clean the stainless steel panel thoroughly before you start to use the appliance. Particularly, remove the remaining
of the protective foil adhesive and packaging tape adhesive. Clean the cooktop regularly each time after use. Do
not allow the work panel to become very dirty, especially do not let spill-over stains to remain on the surface for
long.
Periodic inspections
In addition to current maintenance and care, the following shall be arranged for:
l Periodic inspections of control elements and units of the cooktop. Upon expiration of the warranty, service department
shall be ordered technical inspections of the appliance at least once every two years.
l All operation faults must be repaired.
l Cooktop units shall be maintained according to the maintenance schedule.
Burners, the burner hob grate.
In the case of soiled burners and grate, these elements must be removed from the cooker and washed with warm water
and washing – up products intended for fats and soils. Next, wipe them dry. After the grate has been removed, wash
the burner hob carefully and wipe with a dry and soft cloth. In particular, ensure ame openings in rings under caps are
clean, see the gure below. Do not use steel wire or drill holes.
EN

13
EN
GUARANTEE
Guarantee
Guarantee service will be granted as per the Guarantee Certicate. The manufacturer cannot be held responsible for
any damage caused by improper use or operation of the appliance.
CLEANING AND ROUTINE MAINTENANCE
By ensuring proper cleaning and main-
tenance of your cooker you can have a
signicant inuence on the continuing
fault-free operation of your appliance.
Before you start cleaning, the cooker
must be switched off and you should
ensure that all knobs are set to the
“l”/“0” position. Do not start cle-
aning until the cooker has completely
cooled.
Electric hob
From time to time a lukewarm heating plate
should be covered with a thin layer of an avail-
able lubricating agent,. It is recommended to
use engine oil applied for sewing machines or
bicycles. Do not apply edible oil, because its
salt contents may damage the plates. Dried
up spillage on the surface or rim of the plates
should be removed with a dry pad or brush.
Do not use abrasives, because they may
cause the forming of rust on the plates. By
no means rub the plates with abrasive paper.
Take care not to let salt drop on the plates. It
dissolves in water poducing ugly rust spots.
Use only dry pots and do not put wet lids on
the plates. The enamel parts of the cooker
can be wiped with a gentle rinsing solution
and dried with a soft cloth. Spillage can be
wiped during cooking with a dry cloth, to
prevent building up of hard to clean burnt
deposits.
Chrome plated parts (e.g. rings around heat-
ing plates can be easily polished with a soft
cloth).

14
TROUBLESHOOTING
EN
In each case, proceed as follows:
l Turn the burners off
l Disconnect power supply
l Report for repair
l The user can x some minor malfunctions himself, according to the guidance given in the tables below. Please
check the information below before contacting the service department.
PROBLEM CAUSE REMEDIES
1.The appliance does not work - power cut - check the home power fuse, repla-
ce if needed
2.Burner will not ignite - ame slots contaminated
- close the gas cut off valve, close
burner control knobs, ventilate the
kitchen, take the burner out of the
cooktop, blow and clean the ame
slots
3.Igniter does not work
- power cut - check the home power fuse, repla-
ce if needed
- gas supply break - open gas cut off valve
- contaminated (caked) igniter - clean the igniter
- control knob released too soon - hold the control knob depressed
until the ame goes on and persists
4.Burner extinguishes - control knob released too soon - hold the control knob depressed
until the ame goes on and persists
Manufacturer’s Declaration
The manufacturer hereby declares that this product meets the requirements of the following European
directives:
lLow Voltage Directive 2006/95/EC,
lElectromagnetic Compatibility (EMC) Directive 2004/108/EC
lErP Directive 2009/125/EC
lDirective 2009/142/EC
and has thus been marked with the symbol and been issued with a declaration of compliance made
available to market regulators.

15
ҚҰРМЕТТІ ТҰТЫНУШЫ,
Плитасы – бұл қызмет көрсетудің қарапайымдылығы мен мінсіз тиімділіктің
үйлесімділігі. Нұсқаулықты оқып шыққаннан кейін, плитаның қызмет етуінде
қиындықтар туындамайды.
Зауытта шығарылған плита, орам алдында қауіпсіздігі мен қызметтілігің көқарасымен
бақылау пунктінің мұқият тексерісінен өткен.
Дұрыс қызмет көрсетпеуінің алдын алу үшін ас үй сорғышын қосар алдында аталмыш
пайдалану жөніндегі нұсқаулықпен мұқият оқып танысу керек.
Нұсқаулықта көрсетілген нұсқауларды сақтау Сіздің плитаны дұрыс
пайдаланбауыңыздың алдын алады.
Нұсқаулықты сақтаған дұрыс және оны әрдайым қоластында болатын орындарда
ұстаған жөн.
Төтенше жағдайлардың алдын алу үшін, жұмысты нұсқаулық бойынша
бастаңыз.
Назар аударыңыз!
Құрылғыны тек бұл нұсқаулықты оқып/түсінгеннен кейін ғана пайдаланыңыз.
Аспап тек өзінің тікелей тағайындалуы бойынша ғана қолданылуы тиіс. Кез-
келген өзге мақсаттарда қолданылуы (мысалы, жайдыжылыту) дұрыс емес
және қауіпті болып есептелінеді.
Өндіруші құрылғы құрылымына қызметіне әсер етпейтін өзгерістерді енгізуге
құқылы.
ПРОПАН – БУТАН газ-баллонына плитаны қосу немесе басқа да
газбенқамту жүйесіне қосуды тек өкілетті жөндеуші ғана барлық
қауіпсіздік шарттарын сақтай отырып жасай алады.

16
МАЗМҰНЫ
ӨНІМ ТУРАЛЫ АҚПАРАТ ...................................................................................16
ҚАУІПСІЗДІК БОЙЫНША НҰСҚАУЛЫҚТАР........................................................17
БҰЙЫМ СИПАТТАМАЛАРЫ...............................................................................22
ОРНАТУТЕХНИКАЛЫҚ МӘЛІМЕТТЕР ..............................................................23
ПАЙДАЛАНУ.........................................................................................................28
ТАЗАЛАУ ЖӘНЕ ТЕХНИКАЛЫҚ ҚЫЗМЕТ КӨРСЕТУ........................................33
КӨРСЕТІЛЕТІН ҚЫЗМЕТ ПЕН КҮТІМ................................................................34
АҚАУ ПАЙДА БОЛҒАН КЕЗДЕГІ ӘРЕКЕТТЕР ЕРЕЖЕСІ.................................35
ӨНІМ ТУРАЛЫ АҚПАРАТ
Өнім туралы ақпарат тұрмыстық духовкалар, плиталар және ас үй сорғылары үшін экодизайн
талаптарына қатысты Еуропалық Парламент және Кеңестің 2009/125/ЕС директивасын
толықтыратын, Комиссияның (ЕС) №66/2014 қаулысына сәйкес көрсетілген
Тұрмыстық плиталары газ -электр
Үлгінің сәйкестендіргіші BHMI62135 BHMI62015
PJG3.1ZpZtCR PJG3.1ZpZtR
1106096 1106097
Плита типі (электр / газ / газ -электр) O / O / V O / O / V
Қыздырғыш конфоркаларының немесе аумақтарының
саны 1 1
Қыздыру технологиясы (индукциялық конфоркалар
немесе аумақтар, галогенді конфоркалар, шойын
конфоркалар)
O / O / V O / O / V
Әрбір электр конфоркаға арналған пайдалы
ауданның диаметрі шамамен 5 мм -ге [Ø см]
дейін
FL - -
RL Ø 15,5 Ø 15,5
RR - -
FR - -
C- -
Әрбір конфорка немесе қыздыру аумағы
үшін қуаттың кг EC electric cooking қайта
есептеуіндегі тұтынылуы
FL - -
RL 201,7 201,7
RR - -
FR - -
C- -
Газ жандырғыларының саны 3 3
Әрбір газ жандырғысына арналған қуаттылық
тиімділігі (EE gas burner)
FL 53,5 53,5
RL - -
RR 5 3 , 5 5 3 , 5
FR 53,5 53,5
C- -
Экодизайн талаптарына сәйкестілікті айқындау үшін келесі стандарттардан өлшеу
әдістері мен есептері қолданылған:
EN 60350 -1
EN 60350 -2
E N 3 0 - 2 - 1

17
ҚАУІПСІЗДІК ТЕХНИКАСЫ БОЙЫНША НҰСҚАУЛАР
Назар аударыңыз.Аспап және оның ашық бөлшектері
жұмыс кезінде жоғары температураларға дейін қызады.
Ерекше абайлылықты қадағалау және қыздыру
элементтеріне жақындамау қажет. Егер 8 жастан кіші
балалар тұрақты бақылауда болмаса, аспаптың жанында
болуға жол бермеу қажет.
Бұл бұйым егер аталған қолданылуы бақылаумен жүзеге
асырылса немесе олардың қауіпсіздігіне жауап беретін
тұлғалармен ұсынылған құрылғылардың пайдаланылуы
жөніндег нұсқаулыққа сәйкес 8 жастағы және асатын
балалардың, сонымен бірге шектеулі дене, сенсорлық
немесе психикалық мүмкіндіктері шектеулі немесе
жеткілікті тәжірибе мен білімге ие емес адамдардың
қолдануына болады. Бұл аспаппен балалардың
ойнамауын қадағалау қажет. Балаларды ересектердің
қарауынсыз плитаны жинауға және қолдануға рұқсат
бермеңіз.
Назар аударыңыз. Асүй плитасында майларды қолдана
отырып тағамдарды даярлау қауіпті және өрт туғызуы
мүмкін.
ЕШҚАНДАЙ ЖАҒДАЙДА отты сумен сөндіруге
тырыспаңыз, аспапты сөндіру, осыдан кейін жалынды
мысалы, қақпақпен немесе жанбайтын жамылғыме
нжабуқажет.
Назар аударыңыз. Өртқауіпті: Тағам даярлауға арналған
үстіңгі бетке заттарды сақтауға болмайды.

18
ҚАУІПСІЗДІК ТЕХНИКАСЫ ЖӨНІНДЕГІ НҰСҚАУЛАР
Құрылғыны сыртқы сағатпен немесе қашықтықта басқару
жүйесі көмегімен басқаруға тиым салынады.
Плитаны тазалау үшін бумен тазарту құралдарын
пайдаланбаңыз.
● Бұл құрылғыны сәйкестік нормаларға сай орнату керек және сәйкес келетін
желдетілетін бөлмелерді пайдалану керек. Орнату, пайдалану алдында нұсқаулықпен
танысып алуларыңызды өтініп сұраймыз.
● Бұл аспаппен балалардың ойнамауын қадағалау қажет.
Ерекше ыстық конфорка, торлар, отқа қойылған ыстық сұйықтығы бар ыдыстар
балада күйіктер тудыруы мүмкін.
● Мұқият болыңыз, механикаландырылған құрылғының электрлік кабелі плитаның
ыстық бөліктеріне жанаспауы керек.
● Қосқыш кабель ажыратқышы плитаны орнатудан кейін қолжетімді болу керек.
● Плитаны мұздатқыш маңайына орналастыруға тиым салынады.
● Қуыру үрдісі кезінде плитаны қараусыз қалдырмаңыз. Қолданылаты нмайлар қыздыру
салдарынан жанып кетуі мүмкін.
● Конфоркаларға ағып кетпеу үшін, қайнау моментін бақылаңыз.
● Егер плита істен шыққан болса, онда мамандармен ақау жойылғаннан кейін қайта
пайдалануға болады.
● Барлық тұтқалар жабылғандығына көз жеткізіп алмай газ баллондағы қақпақты
немесе газ беру шүмегін ашпаңыз.
● Конфоркалардың ағуына, сондай ақ олардың ластануына жол бермеу.
Ластанғандарды суығаннан кейін дереу тазалау керек.
● Ыдысты тікелей комфоркаға қоюға болмайды.
● Салмағы 5 кг болатын ыдысты бір комфорка торына қоймау керек, барлық торға 25
кг. Бір ыдысты екі конфоркаға бірдей орналастыруға тиым салынады.
● Тетіктер мен комфоркаларды соқпау
● Арнайы мамандандырылған дайындықтан өтпеген тұлғаларға плитаны жөндеуге
тиым салынады.
● Газды жағуға арналған құралсыз немесе сіріңкесіз газ қақпағын ашуға болмайды.
● Конфоркадағы жалынды оған үрлеп сөндіруге тиым салынады..
● Басқа да газ типіне плитаны өз бетімен жөндеуге қайта жасауға, плитаны басқа
орынға ауыстыруға немесе тоқ көзін ауыстыруға тиым салынады. Аталған әрекеттерді
өкілетті жөндеуші жасай алады.
● Пайдалану бойынша нұсқаулықпен таныспаған балаларды плитаға жақындатпау.
●ГАЗДЫҢ КЕТУІН БАЙҚАҒАН ЖАҒДАЙДА ТИЫМ САЛЫНАДЫ:
Сіріңке жағу, темекі шегу, электрқұралдарын қосу, өшіру (қоңырау немесе жарықтандыру
ажыратқышын), сондай ақ басқа да электрлі және механикалық құрылғылар электрлік
немесе соққы ұшқынын тудыруы мүкін. Бұл жағдайда, газ баллонының қақпағын дереу
жауып, немесе газбенқамту жүйесінде бекіту шүмегімен бұрап бөлмені желдету, одан
кейін бұндай жағдайлардың алдын алуға өкілетті тұлғаны шақыру керек.
● Техникалық ақаулықпен пайда болған кез-келген жағдайда, плитаның электрқорегін сөндіру
керек және жөндеу жұмыстарына тапсыру қажет.

19
ҚАУІПСІЗДІК БОЙЫНША НҰСҚАУЛЫҚТАР
● Газбенқамту жүйесіне қандай да бір антенналы кабельді, мысалға
радиоқабылдағыштарды қосуға тиым салынады.
● Герметикалық емес жүйеден газдың тұтану жағдайында, газдың түсуін дереу жабу
шүмегі арқылы тоқтату керек.
● Газ баллонның герметикалық емес қақпақтан газдың тұтану жағдайында, баллонды
суыту үшін баллонды дымқыл жабынмен жауып, баллондағы қақпақты бұрау керек.
Суығаннан кейін баллонды сыртқа шығару керек. Зақымданған баллонды қайта
пайдалануға тиым салынған.
● Плитаны бірнеше күн бойы пайдаланбаған жағдайда, газбенқамту жүйесіндегі бас
шүмекті жауып отыру керек, газ баллоны болса әр пайдаланғаннан кейін қақпақты
бұрап отыру керек.
● Назар аударыңыз! Тоқ көзінің алмалы кабелінің зақымдануы кезінде, өндіруші
кабелімен немесе арнайы жөндеу орталықтарында, немесе мамандандырылған
тұлғамен қауіптіліктің алдын алу мақсатында ауыстырылуы керек.
● Құрылғыны ас әзірлеуге немесе пісіруге қолдану, ол орнатылған бөлмеде ылғал мен
жылудың бөлінуіне әкеп соғады. Асүй бөлмесі жақсы желдетілетіндігіне көз жеткізіп
алған дұрыс; табиғи желдету саңылаулары ашық болуы керек, немесе механикалық
желдету құралдарын орнату керек (механикалық сорумен түтіндік).
● Құралды ұзақ интенсивті пайдалану қосымша желдетуді қажет етуі мүмкін, мысалға
терезені ашу тиімді желдету үшін немесе механикалық желдетудің өнімділігін арттыру
үшін.

20
ЭЛЕКТР ҚУАТЫН ҮНЕМДЕУ
Электр қуатын үнемдеуге
жауапты тәсіл үйбюджетін
үнемдеуді қарастырып
қана қоймай, қоршаған
ортаны қорғауға да саналы
қатысуды қарастырады.
Бей-жайболмаңыз, электр
қуатын үнемдеуге кірісіңіз! Бұл үшін қажет:
l Даярлау үшін тиісті ыдысты қолдану.
Асүй ыдысы конфорка жалынының
шілінен кішкентай болмауы керек.
Ыдыстың қақпағын пайдалануды
ұмыстпау керек.
l Конфоркалардың, конфорка
маңайындағы торлардың тазалығын
сақтау керек.
Ластану жылудың берілуіне кедергі
келтіреді – тұрып қалған күйіп кеткен
ластанулар жиі жағдайда қоршаған
ортаны өте ластайтын құралдар
көмегімен ғана кетіруге болады.
Жалынды қаққа бөлуші саңылаулары
мен конфоркалардың бүріккілерінің
саңылауларында ерекше тазалықты
сақтаған дұрыс.
l «Кастрөлге артық үңілдеуден» аулақ
болыңыз.
lПлитаны мұздатқыш/
салқындатқыш камералары
маңайына орналастырмау
Қажеттіліксіз электр қуатын қолдану
жағдайында оның шығыны өседі.
This manual suits for next models
3
Table of contents
Languages:
Other Hansa Hob manuals
