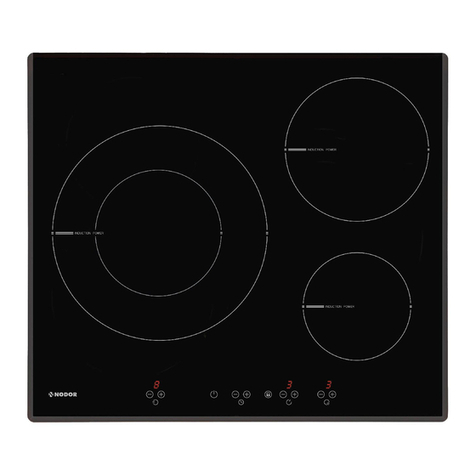
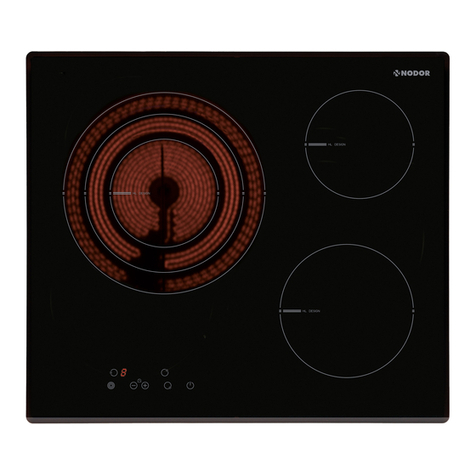
NODOR I2030BK Manual

HASZNÁLATI ÚTMUTATÓ AZ

2
A KÉSZÜLÉK KIZÁRÓLAG HÁZTARTÁSI CÉLÚ
-
-
-
A gyártó tanúsítja, hogy a termék megfelel a kis-
feszültségű elektromos berendezésekre vo-
natkozó 2014/35/EU sz. irányelv, valamint az
elektromágneseses kompatibilitásra vonatkozó
2014/30/EU irányelv összes alapvető követelmé-
nyének.
ÓVINTÉZKEDÉSEK
– A főzőlap használata során mindennemű mág-
nesezhető tárgyat (bankkártyát, oppy lemezt,
számológépet stb.) tartsunk távol.
– Alumínium fóliát vagy alumínium fóliába csoma-
golt ételt ne helyezzünk közvetlenül a főzőlap-
ra, ne helyezzünk a főzőlapra fém tárgyakat,
pl. kést, villát, kanalat vagy edény fedelét, mivel
ezek a tárgyak felforrósodnak.
– Amennyiben teonedényben főzünk szósz nél-
kül, ne lépjük túl az 1-2 perces előmelegítési
időt.
– Amikor leragadásra hajlamos ételt főzünk, kis
teljesítményfokozaton kezdjünk el főzni, majd
folyamatos keverés mellett fokozatosan növel-
jük a teljesítményt.
– A főzés végeztével a főzőzónát a vezérlővel kap-
csoljuk le (állítsuk „0” fokozatra), és ne bízzuk a
lekapcsolást az edény érzékelőre.
– Amennyiben a főzőlap felülete megsérül, áram-
ütés elkerülése érdekében a készüléket azonnal
csatlakoztassuk le a hálózati áramkörről.
– A főzőlap tisztításához soha ne használjunk gőz-
tisztítót.
– Működés közben a készülék és egyes külső ele-
mei átforrósodhatnak.
– Ügyeljünk arra, hogy ne érjünk a fűtőelemekhez.
– 8 év alatti gyermekek mellett gondoskodjunk ar-
ról, hogy egy bizonyos távolságnál ne tudják job-
ban megközelíteni a készüléket, vagy biztosít-
sunk folyamatos felügyeletet.
– A készülék 8 éves vagy 8 év feletti gyermek, il-
letve valamely zikai, érzékszervi vagy szellemi
fogyatékkal élő személy, illetve a kellő tapaszta-
lattal, tudással nem bíró személy által csak fel-
ügyelet mellett használható, feltéve, hogy ezen
személyek a készülék biztonságos használatá-
ra, a készülék használatával kapcsolatos veszé-
lyekre vonatkozó utasításokat megkapták, a tud-
nivalókról tájékoztatva lettek. Gyermekek a ké-
szülékkel nem játszhatnak. A felhasználó általi
karbantartást és tisztítást gyermek kizárólag fel-
nőtt személy állandó felügyelete mellett végez-
heti el.
– Zsírral, olajjal történő sütés veszélyes lehet, a
főzőlapot felügyelet nélkül hagyva tűz keletkez-
het. SOHA ne próbáljunk tüzet vízzel eloltani.
Ehelyett azonnal áramtalanítsuk a készüléket,
majd a tüzet egy lepedővel, takaróval fedjük le.
– Tűzveszély! Ne tároljuk tárgyakat a főzőzónák
felületén.
– Kizárólag a gyártó által engedélyezett, az útmu-
tatóban ismertetett munkalap védőelemek hasz-
nálhatók együtt a készülékkel a munkalap vé-
delme érdekében. Nem megfelelő védőelem
használata balesetet okozhat.
– Használat során a hozzáférhető,
nyitott elemek, felületek rendkívül forróak lehet-
nek. Égési sérülések, forrázás elkerülése érde-
kében a gyermekeket tartsuk távol.
A bekötésre vonatkozó előírásoknak megfelelő-
en a készülék számára tápfeszültséget biztosító
hálózati áramkörbe iktassunk be egy megszakí-
tó egységet, amely III. túlfeszültség-védelmi osz-
tályba tartozó körülmények esetén teljes áramkö-
ri megszakítást biztosít az összes pólusra vonat-
kozóan. A dugvilla vagy a többpólusú megszakító
kapcsoló a készülék közelében, könnyen hozzá-
férhető helyen legyen.
A készülék külső időkapcsolóról vagy távvezér-
lő rendszerről történő működtetése szigorúan ti-
los. A gyártó elutasít mindennemű felelősséget a
fenti utasítások be nem tartásából, valamint a bal-
esetvédelmi előírások, szabványok gyelmen kí-
vül hagyásából bekövetkező eseményekre vonat-
kozóan.
A kockázatok, veszélyek elkerülése érdekében
a tápkábel sérülése, károsodása esetén annak
cseréjét kizárólag a gyártó, a gyártó által meg-
hatalmazott szakszerviz, vagy megfelelő szak-
képesítéssel bíró villanyszerelő végezheti el.

3
A legtöbb főzőedény elektromágneses tulajdonságokkal
bír, ezt használja fel a készülék.
Az elektromágneses teret előidéző tekercset (induktort)
egy elektronikus áramkör működteti és vezérli.
A hőt maga a főzőedény továbbítja az étel felé.
A főzési folyamat az alábbiak szerint történik:
– a hőveszteség minimális (nagy hatásfok),
– a rendszer automatikusan leáll, amikor az edényt le-
vesszük a főzőlapról, vagy akár csak elemeljük róla,
– az elektronikus áramkör maximális rugalmasságot és
számos nombeállítási lehetőséget biztosít.
(1. ábra)
1 - Edény
2 - Indukált áram
3 - Mágneses mező
4 - Induktor
5 - Elektronikus áramkör
6 - Tápfeszültség
1 - BE/KI gomb
2 - Csúszkás érzékelő
3 - Extra teljesítmény gomb
4 - Billentyűzár gomb
5 - Bekapcsolást jelző LED lámpa
6 - Csúszka visszajelző LED lámpa
7 - Billentyűzár visszajelző LED lámpa
8 - Főzőzóna kijelző
9 - Időzítő visszajelző zóna
10 - Időzítő
Telepítés
A telepítéssel (elektromos csatlakoztatással) kapcsolatos
mindennemű műveletet az érvényben lévő előírások, ren-
delkezések betartása mellett kizárólag szakképzett sze-
mély, személyek hajthatják végre.
A telepítésre vonatkozó utasításokat a telepítést végző
személy tanulmányozza át.
Csúszkás érzékelő: az új csúszkás érintővezérlő techno-
lógiával történik a főzési teljesítményfokozatok (1-9) és az
időzítő értékének (1-99) állítása: az érték módosításához
érintsük meg, majd húzzuk el ujjunkat ennek mentén. Uj-
junkat jobbra húzva növeljük, balra húzva csökkentjük az
értéket.
Ezenfelül a kijelölt érzékelési felületen egy adott pontot
megérintve egy adott értéket állítunk be.
A hálózati áramkörhöz történő csatlakoztatást követően
az érintővezérlő egység egy (1) másodperc elteltével mű-
ködésre kész.
Újraindítást követően az összes kijelző és LED-lámpa 1
másodperc hosszan villog, majd ezt követően újra lekap-
csolnak.
A BE/KI gomb (2. ábra, 1-es elem) lenyomásával kapcsol-
juk be az érintővezérlő egységet. A főzőzónák kijelzőin
folyamatos jelleggel a „0” szám látható. Amennyiben va-
lamelyik főzőzóna „forró” állapotban van, a „0” jelzés és
a gyelmeztető „H” jelzés felváltva jelennek meg, illetve
a kijelző jobb alsó sarkában látható tizedesjegy pontok
is villognak. A kijelző pontok másodpercenként villanak
fel (1/2 másodpercig kialszanak, 1/2 másodpercig ég-
nek). Az elektronikus vezérlő 20 másodpercig marad ak-
tív, majd amennyiben ezen időtartamig egyetlen főzőzó-
na teljesítményfokozat sem kerül beállításra, illetve idő-
zítő funkció sem kerül aktiválásra, az érintővezérlő egy
hangjelzés kíséretében automatikusan visszaáll készen-
léti állapotba.
Az érintővezérlő kizárólag a BE/KI gomb (1) önmagában
történő lenyomásával kapcsolható be. Eltérő gomb lenyo-
mására (önmagában vagy akár a BE/KI gombbal együtte-
sen) a vezérlő egység készenléti módban marad.
Amennyiben a vezérlő egység bekapcsolásakor a gye-
rekzár funkció aktív, az összes főzőzóna kijelzőn az „L”
betűjel látható, amely a „LOCKED” (lezárva) kifejezés-
re utal (lásd a gyerekzár működését ismertető szakaszt).
Amennyiben valamelyik főzőzóna „forró” módban van, a
gyelmeztető „H” jelzés és az „L” jelzés felváltva jelennek
meg („H” jel 1/2 másodperc hosszan ég; „L” jel: 1 1/2 má-
sodperc hosszan ég).
Bekapcsolt állapotában az érintővezérlő a BE/KI gombbal
(1) bármikor kikapcsolható. Ez akkor is igaz, amikor az
érintővezérlő egység gyermekzár funkcióval le van zárva.
A BE/KI gomb (1) a kikapcsolási funkciót tekintve minden
esetben elsőbbséget élvez.
Bekapcsolást követően az érintővezérlő egység 20 má-
sodperc után – amennyiben ez idő alatt főzőzóna nem
kerül bekapcsolásra, illetve kiválasztó gomb nem kerül le-
nyomásra – kikapcsol. Amennyiben egy főzőzóna kivá-
lasztásra kerül („0” teljesítményfokozat mellett), a 20 má-
sodperces automatikus kikapcsolási idő úgy áll össze,
hogy amennyiben a kiválasztott főzőzóna 10 másodper-
cig „0” fokozaton marad, a főzőzóna kiválasztása meg-
szűnik, majd ha további 10 másodpercig nem hajtunk
végre műveletet, az érintővezérlő egység kikapcsol.
Amennyiben az érintővezérlő egység aktív, az erre szol-
gáló kijelző panel érintésével kiválaszthatunk főzési zónát
(„8”-as kiválasztó érzékelők). Az adott zóna kijelzője mel-
letti tizedesjegy pont folyamatosan világítani kezd és a ki-
jelzőn a „0” szám lesz látható, forró főzési zóna esetében
a „0”-t helyett a „H” betűjel jelenik meg. Az összes többi fő-
zőzónán a tizedesjetgy pont sötét marad.
Ezután a csúszkás érzékelő sávon a főzési teljesítmény
kiválasztása következik. Ezzel működésbe hozzuk az
adott főzőzónát. A sáv jobb oldali szélső értéke a „9”, a
bal oldali a „0”, e két érték által meghatározott tartomány-
ban választhatjuk ki a főzőzóna teljesítményét.
Először helyezzük az edényt az adott főzési zónára.
Edény hiányában a rendszer nem hozza működésbe az
adott főzési zónát és az alábbi hibajelzés jelenik meg:
electronics automatically resets to the Off-mode by releasing a
signal tone.
The TC may only be switched on by pressing the power key as
sole input In case of an other key is pressed (single or in parallel
with the power key), the control unit is not switched on.
In case of an active “Child Lock Function” when switching
POWER ON, all cooking zone displays show “L” for LOCKED .
Possible optic warnings for hot cooking zones [H] are displayed
in alternation with [L] (H-ON= 0.5 sec; L-ON = 1.5sec).
By pressing the ON/OFF key “1” of the control unit in ON-Mode,
the Touch Control may be switched off at any time. This is also
applicable for locked control units (active child lock). The
ON/OFF key takes always priority with the POWER-OFF function.
Automatic Switch Off
The TC switches from Power ON to OFF after 20 sec., provided
that no cooking zone is activated or a select key is pressed
during that time.
In case of a selected cooking zone (with cooking stage is “0“)
this Auto Power off time is composed of a 10 sec deselection
time and 10 sec Power off time.
ON/OFF Cooking Zone
In case of On-state of the TC a cooking zone may be selected by
touching the dedicated display (Select-Sensors “8”). The
respective display changes to a steady display dot and “0“
instead of “H“ – in case of a hot cooking zone-. On all other
cooking zone displays the dot expires.
That followed a cooking level may be set by using the Slider
area. Thus switches the respective cooking zone on. End stops
are „9“ (right side) and „0“ (left side).
First place the pan in the chosen cooking zone. If the pan is not
present the system cannot be switched on the correspondent
zone.
Switching Off a single cooking zone:
A single cooking zone may be switched off by selecting and
setting cooking level to [0]. In case of an optic warning for hot
cooking zones [H] this is displayed in alternation with [0] and the
synchronously display dot.
After the TC is switched Off the display remains black
respectively [H] is displayed for an optic warning for hot cooking
zone.
Switching Off all cooking zones:
Immediately switching off all cooking zones is always possible
by using the ON/OFF key.[H] possibly appears on all hot cooking
zones . All other cooking zone displays remain black.
Power Stages
The power of the cooking zone is adjustable in 9 different
stages; the respective stage is displayed ([1“] to [9]) via LEDseven-
segment-displays.
Automatic Parboiling (selectable)
When Automatic parboiling is activated, the power of the
cooking zone is switched to 100 % for a period of time
depending on the selected onboiling stage. As soon as the
parboiling time is over, the preselected onboiling stage is valid
again.
Procedure to start Automatic parboiling:
The control unit is switched on and a cooking zone is selected.
After setting cooking stage “9“ Automatic parboiling is activated
by pressing at the right slider sensor. “A” appears on the display
immidiately.
Now the required onboiling stage is selected via Slider area .
The “A” symbol appears after 3 sec upon releasing the key -
alternating with the onboiling stage (500 msec „A“ and 1.5 sec
onboiling stage).
The onboiling stage may be changed within 15 sec after
activation without switching off the parboiling boost. Therefore,
the cooking zone is to be selected and the relevant cooking zone
is to be set afterwards.
In case of a selection after 15 sec a lower cooking stage may be
set; automatic onbboiling is switsched of.
a higher onboiling stage may be selected; this leads to the
parboiling time being automatically brought in line with the
currently selected onboiling stage
Power function
After selection of a respective cooking zone, the power function
can be selected directly via the power function key “3”. By
means of this function certain cooking zones are enabled to
receive power over the nominal. If the desired cooking zone has
the capacity to activate the booster, the display shows a “P“
symbol. The boosting time is limited to 8 min to protect cooking
utensils. After the booster is switched off automatically, the
cooking zone continues operation on power level “9”. The
booster can be reactivated after some minutes.
In case that the pan is removed from the cooking zone during
boosting,
the boosting function remains active and boosting time continues.
Residual Heat
The determination of how long a cooking zone has residual heat
after operation and switch off – which may lead to burnings
when contacting – is calculated.
Status is calculated depending on:
Selected power stage („0“ bis „9“)
On/Off Time of the Relays
The residual heat indication of each cooking zone remains
activated until the calculated temperature is smaller than + 60 °C.
Automatic Switch-off (Operating Time Limitation)
For each activated cooking zone a max. operating time is
defined. The max. operating time is depending on the selected
cooking stage. After the expiration of the max. operating time
the cooking zone is automatically switched off.
Each actuation of the cooking zone status (changing the cooking
level etc.) resets the count-down timer to the initial starting
value.
Timer settings takes priority vs. operating time limitations for
high cooking stage setting.
Protection against unintentional activation
The electronic system cuts off automatically in case of an
identified permanent use of keys for about 10 seconds. The
control unit releases an audible signal for 10 sec of the
malfunction (period: 1000 msec, 500 msec ON) and the error
code “E R 0 3” flashes on the display (0.5 s ON 0.5s OFF). If the
permanant actuation exceeds 10sec, alone the error code “ER
03“ keeps flashing as long as the malfunction occurs and is
identified as such. In case the cooking zone is at stage “hot“ the
[H] symbol alternates with the error code (0.5 sec Symbol 0.5
sec “H“).
Water sprinkled on the glass surface does not always lead to a
key actuation and cannot be surely detected. ( After wiping the

4
Egy adott főzési zóna kikapcsolása
Egy adott főzési zóna kikapcsolásához ennek főzési tel-
jesítményét állítsuk „0” fokozatra. Forró főzési zóna ese-
tében a jelző pont mellett felváltva villan fel a „H” és a „0”
jel, illetve a tizedesjegy pont is villog.
A érintővezérlő leállását követően a kijelző elsötétül, ki-
zárólag a „H” jel marad látható forró főzési zóna ese-
tében.
Az összes főzési zóna kikapcsolása
A BE/KI gombbal azonnal kikapcsoljuk az összes főzé-
si zónát. Esetlegesen a forró főzési zónákat jelző „H” jel-
zések maradnak láthatók. Az összes többi főzési zóna
sötét marad.
A főzési zóna teljesítménye kilenc fokozatban állítható: a
kiválasztott fokozat hét szegmenses LED-kijelzőn látha-
tó 1-9-es számok formájában.
electronics automatically resets to the Off-mode by releasing a
signal tone.
The TC may only be switched on by pressing the power key as
sole input In case of an other key is pressed (single or in parallel
with the power key), the control unit is not switched on.
In case of an active “Child Lock Function” when switching
POWER ON, all cooking zone displays show “L” for LOCKED .
Possible optic warnings for hot cooking zones [H] are displayed
in alternation with [L] (H-ON= 0.5 sec; L-ON = 1.5sec).
By pressing the ON/OFF key “1” of the control unit in ON-Mode,
the Touch Control may be switched off at any time. This is also
applicable for locked control units (active child lock). The
ON/OFF key takes always priority with the POWER-OFF function.
Automatic Switch Off
The TC switches from Power ON to OFF after 20 sec., provided
that no cooking zone is activated or a select key is pressed
during that time.
In case of a selected cooking zone (with cooking stage is “0“)
this Auto Power off time is composed of a 10 sec deselection
time and 10 sec Power off time.
ON/OFF Cooking Zone
In case of On-state of the TC a cooking zone may be selected by
touching the dedicated display (Select-Sensors “8”). The
respective display changes to a steady display dot and “0“
instead of “H“ – in case of a hot cooking zone-. On all other
cooking zone displays the dot expires.
That followed a cooking level may be set by using the Slider
area. Thus switches the respective cooking zone on. End stops
are „9“ (right side) and „0“ (left side).
First place the pan in the chosen cooking zone. If the pan is not
present the system cannot be switched on the correspondent
zone.
Switching Off a single cooking zone:
A single cooking zone may be switched off by selecting and
setting cooking level to [0]. In case of an optic warning for hot
cooking zones [H] this is displayed in alternation with [0] and the
synchronously display dot.
After the TC is switched Off the display remains black
respectively [H] is displayed for an optic warning for hot cooking
zone.
Switching Off all cooking zones:
Immediately switching off all cooking zones is always possible
by using the ON/OFF key.[H] possibly appears on all hot cooking
zones . All other cooking zone displays remain black.
Power Stages
The power of the cooking zone is adjustable in 9 different
stages; the respective stage is displayed ([1“] to [9]) via LEDseven-
segment-displays.
Automatic Parboiling (selectable)
When Automatic parboiling is activated, the power of the
cooking zone is switched to 100 % for a period of time
depending on the selected onboiling stage. As soon as the
parboiling time is over, the preselected onboiling stage is valid
again.
Procedure to start Automatic parboiling:
The control unit is switched on and a cooking zone is selected.
After setting cooking stage “9“ Automatic parboiling is activated
by pressing at the right slider sensor. “A” appears on the display
immidiately.
Now the required onboiling stage is selected via Slider area .
The “A” symbol appears after 3 sec upon releasing the key -
alternating with the onboiling stage (500 msec „A“ and 1.5 sec
onboiling stage).
The onboiling stage may be changed within 15 sec after
activation without switching off the parboiling boost. Therefore,
the cooking zone is to be selected and the relevant cooking zone
is to be set afterwards.
In case of a selection after 15 sec a lower cooking stage may be
set; automatic onbboiling is switsched of.
a higher onboiling stage may be selected; this leads to the
parboiling time being automatically brought in line with the
currently selected onboiling stage
Power function
After selection of a respective cooking zone, the power function
can be selected directly via the power function key “3”. By
means of this function certain cooking zones are enabled to
receive power over the nominal. If the desired cooking zone has
the capacity to activate the booster, the display shows a “P“
symbol. The boosting time is limited to 8 min to protect cooking
utensils. After the booster is switched off automatically, the
cooking zone continues operation on power level “9”. The
booster can be reactivated after some minutes.
In case that the pan is removed from the cooking zone during
boosting,
the boosting function remains active and boosting time continues.
Residual Heat
The determination of how long a cooking zone has residual heat
after operation and switch off – which may lead to burnings
when contacting – is calculated.
Status is calculated depending on:
Selected power stage („0“ bis „9“)
On/Off Time of the Relays
The residual heat indication of each cooking zone remains
activated until the calculated temperature is smaller than + 60 °C.
Automatic Switch-off (Operating Time Limitation)
For each activated cooking zone a max. operating time is
defined. The max. operating time is depending on the selected
cooking stage. After the expiration of the max. operating time
the cooking zone is automatically switched off.
Each actuation of the cooking zone status (changing the cooking
level etc.) resets the count-down timer to the initial starting
value.
Timer settings takes priority vs. operating time limitations for
high cooking stage setting.
Protection against unintentional activation
The electronic system cuts off automatically in case of an
identified permanent use of keys for about 10 seconds. The
control unit releases an audible signal for 10 sec of the
malfunction (period: 1000 msec, 500 msec ON) and the error
code “E R 0 3” flashes on the display (0.5 s ON 0.5s OFF). If the
permanant actuation exceeds 10sec, alone the error code “ER
03“ keeps flashing as long as the malfunction occurs and is
identified as such. In case the cooking zone is at stage “hot“ the
[H] symbol alternates with the error code (0.5 sec Symbol 0.5
sec “H“).
Water sprinkled on the glass surface does not always lead to a
key actuation and cannot be surely detected. ( After wiping the
Az automatikus forralás funkciót bekapcsolva a főzé-
si zóna a kiválasztott forralási teljesítménytől függő idő-
tartamra 100%-os teljesítményre vált. Amint a forralási
idő letelt, újra visszaáll a korábban kiválasztott teljesít-
ményfokozat.
Az automatikus forralás funkció bekapcsolása
A vezérlőegységet kapcsoljuk be, majd válasszuk ki a
főzési zónát. A „9”-es teljesítményfokozat kiválasztása
után az automatikus forralás funkciót a jobb oldali csúsz-
kás érzékelő érintésével kapcsolhatjuk be. Ekkor a kijel-
zőn azonnal megjelenik az „A” jel.
Ezután a csúszkás sávon kiválaszthatjuk a kívánt forra-
lási fokozatot. Az „A” szimbólum a gomb elengedését kö-
vető három másodpercig még látható, majd felváltva, 0,5
másodpercig az „A” jelzés, és 1 1/2 másodpercig a kivá-
lasztott forralási fokozat jelennek meg.
A funkció bekapcsolását követő 15 másodpercig a for-
ralási fokozat a forralási funkció kikapcsolása nélkül ál-
lítható. Ennek feltétele, hogy az adott főzési zóna ki le-
gyen választva, és a főzési fokozat ezután kerüljön ki-
választásra.
Amennyiben ez a 15 másodperc lejárt, és nem válasz-
tottuk ki a forralási fokozatot, már csak egy kisebb főzé-
si teljesítményfokozat kerülhet kiválasztásra és az auto-
matikus forralás kikapcsol.
Nagyobb forralási fokozat kiválasztása esetén a forralá-
si idő automatikusan a kiválasztott forralási fokozatnak
megfelelő időtartamra áll be.
A kívánt főzőzóna kiválasztását követően az extra telje-
sítmény funkció a 3-as gomb lenyomásával aktiválható.
A funkció révén egyes főzőzónák a névlegesnél nagyobb
teljesítmény elérésére válnak képessé. Amennyiben az
adott főzőzóna esetében rendelkezésre áll az „extra tel-
jesítmény” módhoz szükséges teljesítmény, a kijelzőn a
„P” jel lesz látható. A főzőedények védelme érdekében
az extra teljesítményű fokozat működése 8 perc időtar-
tama van korlátozva. Az extra teljesítmény funkció auto-
matikus lekapcsolását követően a zóna „9”-es főzési tel-
jesítményfokozatban működik tovább. Pár perc elteltével
az extra teljesítmény funkció újra aktiválható.
Amennyiben extra teljesítmény módban történő műkö-
dés közben levesszük az edényt az adott főzési zónáról,
a mód ettől függetlenül működésben marad egészen a 8
perces időtartam lejártáig.
A maradványhő kijelző tájékoztatja a felhasználót, hogy a
kerámiaüveg felülete a főzőzónánál és annak környezeté-
ben túl forró, érintése szigorúan tilos. A hőmérséklet meg-
határozása egy matematikai képlet alapján történik, és
a maradványhőt az adott főzőzónához tartozó hét szeg-
menses kijelzőn megjelenő „H” betű jelzi.
A hőmérsékleti állapot kiszámítása a kiválasztott telje-
sítményfokozat („0” – „9”), és a be- és kikapcsolási ide-
je alapján történik.
Az adott főzőzóna kikapcsolását követően az ahhoz tar-
tozó kijelzőn a „forró” („H”) jelzés látható marad egészen
addig, amíg a számított hőmérséklet +60°C-nál kisebb
lesz.
A beállított fokozattól függően, amennyiben az adott fő-
zőzónán semmilyen beállítási műveletet nem történik, a
zóna adott időtartamot követően automatikusan kikap-
csol. A főzőzónán végzett bármilyen beállítási művelet (pl.
a teljesítményfokozat állítása) újraindítja a maximális mű-
ködési idő számlálót, vagyis újraindul az automatikus ki-
kapcsolás várakozási ideje.
A nagyobb főzési teljesítményfokozatok esetében az idő-
zítő funkció elsőbbséget élvez a működési időt korlátozó
funkcióval szemben.
Amennyiben valamely gombot, gombokat legalább 10
másodperc hosszan folyamatosan nyomvatartunk, az
elektronikai rendszer automatikusan lekapcsolja a ké-
szüléket. A vezérlő egység 10 másodperc hosszan
hangjelzéssel gyelmeztet a hibára (1 másodperc síp-
szó, 1/2 másodperc szünet), valamint a kijelzőn az „E
R 0 3” hibakód villog (1/2 másodpercig ég, 1/2 másod-
perc szünet). Amennyiben a gombok működtetése,
nyomvatartása 10 másodperc után sem szűnik meg,
egyedül a hibakód marad látható egészen addig, amíg
a jelenség véget nem ér. Amennyiben a főzőzóna „for-
rónak” minősül, a hibakód és a „H” jel felváltva villanak
fel (1/2 másodpercig a hibakód, majd 1/2 másodpercig
a „H” jel).
Az üvegfelületre fröcskölt vizet egyes esetekben gomb-
nyomásként érzékeli a készülék. (A gombokat fedő üve-
get letörölve a gombok azonnal működésre készek.)
Amennyiben a bekapcsolást követő 20 másodpercen
belül főzőzóna nem került bekapcsolásra, a vezérlőegy-
ség kikapcsol (a kijelző elsötétül).

5
Amennyiben a készülék működésben van (valamely fő-
zőzóna működik) vagy a 20 másodperces várakozá-
si időtartam alatt a „4”-es gomb lenyomásával le tudjuk
zárni a kezelőfelületet: ekkor a „7”-es billentyűzár visz-
szajelző lámpa folytonosan ég. A gomb használatakor -
gyelembe kell vennünk a lezárás műveleti idejét. A ve-
zérlés a lezárást követően is működik, de kizárólag ma-
gát a billentyűzár gombot vagy az BE/KI gombot (1) tud-
juk használni, az összes többi gomb megnyomása ha-
tástalan marad.
Lezárt módban is lehetőség van a kikapcsolásra az BE/
KI gomb (1) lenyomásával. A vezérlő kikapcsolásakor a
„7”-es LED-lámpa is kialszik. Későbbi bekapcsoláskor a
lezárt állapot és a „7”-es LED-lámpa is újra aktív lesz,
egészen addig, amíg a lezáró gomb újbóli lenyomásával
fel nem oldjuk a lezárást (a 10 másodperces várakozási
időtartamban). Kikapcsolt állapotban a lezárt állapot be-
kapcsolására vagy feloldására nincs mód.
Amikor az előre programozott időzítő lejár, a jelzést tu-
domásul vehetjük bármelyik gomb lenyomásával, ehhez
nincs szükség a lezárás feloldására.
Akár amikor a készülék használatban van, akár várako-
zási módban a lezáró gomb újbóli lenyomásával felold-
juk a gombokat, ezt jelzi, hogy a „7”-es visszajelző LED-
lámpa kialszik. Az összes érzékelő gomb normál módon
működik tovább.
Az érintővezérlő egység használatakor az alábbi műve-
letek váltanak ki hangjelzést:
– Gomb lenyomását jelző szokásos rövid sípszó;
– Hosszabb, szaggatott hang valamely gomb, gombok
10 másodpercnél hosszabb lenyomása esetén;
– Időzítő lejárata.
Kétféle időzítő funkció áll rendelkezésre:
– Független időzítő 1 - 99 perc közötti tartományban:
időzített hangjelzés. Ez a funkció kizárólag akkor indít-
ható, amikor egyik főzőzóna sincs működésben (ösz-
szes teljesítményfokozat „0”). Amennyiben bármelyik
zóna működésbe lép („0”-nál nagyobb fokozatra ke-
rül beállításra), a független időzítő tovább működik.
Amennyiben az időzítőt valamely főzőzóna leállításá-
ra kívánjuk inkább használni (lásd a főzőzóna időzí-
tőt), akkor a vezérlőt először ki kell kapcsolnunk, majd
újra bekapcsolnunk.
– Főzőzóna időzítő 1 - 99 perc közötti tartományban: a
funkció csak akkor indítható, amikor valamelyik zóna
működik (teljesítményfokozat > 0; tizedesjegy pont vi-
lágít). Időzített hangjelzés, a négy főzőzóna lekapcso-
lása egymástól függetlenül szabadon programozható.
Időzítő időértékének megadása
A csúszkás érzékelővel történik az állítás.
Elsőként az első számjegy megadása történik, majd ez-
után a második számjegy kerül beállításra.
A második számjegy megadását követő 10 másodper-
cen belül az érték még módosítható (az időzítő kijelzőn a
jelző pont ég, valamint adott főzőzónára vonatkozó idő-
zítő esetén az ehhez tartozó LED-lámpa villog).
Amikor az időzítő kijelző aktív, az időzítő értéke közvet-
lenül „0”-ra állítható a csúszkás sávon a „0” gomb érin-
tésével (bal oldalon).
Aktív időzítő kikapcsolása
Az időzítőt kikapcsolásához állítsunk be annak értékét
„0”-ra.
A független időzítőt – amennyiben működik – az „1”-es
BE/KI gomb kétszeri lenyomásával kapcsolhatjuk ki.
Független időzítő
Amennyiben a vezérlő egység be van kapcsolva és az
összes főzőzóna kijelzőn a „0” érték látható, a független
időzítőt az időzítő kiválasztó gomb lenyomásával kap-
csolhatjuk be. Az időzítő kijelzőjén ekkor a „00” érték lát-
ható. Az időzítő kijelzőn a tizedesjegy pont ég. Amennyi-
ben további beállítás nem történik, az időzítő 10 másod-
perc után kikapcsol. Amennyiben tíz másodpercen belül
megadunk egy időértéket, egyetlen főzőzóna bekapcso-
lása nélkül, a főzőzóna kijelzők elsötétülnek (a közben-
ső relék szintén kikapcsolnak). Esetlegesen a forró zó-
nákat jelző „H” jelek folytonosan égnek.
Amíg az időzítő kijelölt állapotban van (a tizedesjegy
pont 10 másodpercig villog), módosíthatjuk annak érté-
két. A beállítható tartomány 0 és 99 perc között van, per-
cenkénti léptetés mellett. Az érték megadása a csúszkás
érzékelővel történik.
Az időérték megadása után azonnal elkezdődik a visz-
szaszámlálás. Az időzítő kijelölt állapota 10 másodperc
után automatikusan megszűnik, és az időzítő kijelző mu-
tatja az időzítő időértékét. Amikor a megadott idő lejár,
hangjelzés gyelmeztet és a kijelzőn a „00” érték látható.
A hangjelzés megszűnik:
– két perc elteltével és/vagy
– bármely gomb lenyomásával.
Ezután az időzítő kijelzője nem villog tovább, a kijelző el-
sötétül. Esetlegesen a forró zónákat jelző „H” jelek ég-
nek folytonosan.
A BE/KI gomb (1) lenyomásával a vezérlő egység bármi-
kor átváltható „független időzítő módból” főzési módba
– akár aktív, akár nem a független időzítő. Amikor műkö-
dő független időzítő mellett váltunk vissza a vezérlő egy-
ségre, először a független időzítő kerül kijelölt állapot-
ba (az időzítő kijelzőjén a tizedesjegy pont villan fel). Fő-
zőzóna kiválasztását követően a tizedesjegy pont eltű-
nik az időzítő kijelzőről, és a főzőzóna kijelzőjén kezd el
folytonosan világítani a tizedesjegy pont. A vezérlő egy-
séget a BE/KI gombbal (1) kikapcsolva a független idő-
zítő – amennyiben még működésben van – is kikapcsol.
Főzőzóna időzítő beállítása
A vezérlő egység bekapcsolásával lehetőség nyílik főző-
zónára vonatkozó időzítő bekapcsolására.
Az időzítő kijelző kiválasztását követő 10 másodpercen
belül hozzuk működésbe valamelyik főzőzónát (főzési
zóna teljesítménye > 0), ekkor a beállított időérték az
adott főzőzóna kikapcsolására fog szolgálni. Az időzítő

6
melletti visszajelző LED-lámpák (9) mutatják, hogy me-
lyik főzőzónára vonatkozóan állítjuk be az időzítőt.
Amint az időzítő kiválasztásra kerül, a megfelelő LED-
lámpa villogni kezd, és az időzítő kijelzőn a tizedesjegy
pont is világít. Amennyiben ezután egy főzőzónát válasz-
tunk ki, a tizedesjegy pont kialszik, és a LED-lámpa sem
villog tovább.
Amikor az egyik főzőzónáról egy másikra váltunk, az idő-
zítő kijelző mutatja az éppen kiválasztott zónára vonat-
kozó pillanatnyi időértéket. A többi főzőzónára vonatko-
zó időzítési beállítások is érvényben maradnak. További
beállítások megegyeznek a független időzítőnél ismerte-
tett eljárásokkal.
Több aktív főzőzóna időzítő esetén a kijelzőn mindig a
legkisebb időérték jelenik meg, vagyis amelyik a legelő-
ször lejár (aktív művelet nélküli 10 másodperces időtar-
tam után).
Amikor a megadott idő lejár, hangjelzés gyelmeztet és
az időzítő kijelzőn a „00” érték villogva jelenik meg. Az
adott főzőzónát jelölő időzítő LED-lámpa is villog párhu-
zamosan. Az időzített főzési zóna kikapcsol, a kijelzőjén
a „0” érték látható, maga a főzőzóna automatikusan ki-
választásra kerül. Aktív művelet nélküli 10 másodperces
időtartam után a kiválasztás megszűnik és a forró főzé-
si zónát jelző „H” jel lesz látható. Eltérő esetben (a zóna
nem forró) a „0” jel kerül megjelenítésre.
A hangjelzés és a főzőzónát jelölő időzítő LED-lámpa vil-
logása megszűnik:
– két perc elteltével és/vagy
– bármely gomb lenyomásával.
Ezután az időzítő kijelzője elsötétül, a főzőzóna kijelölé-
se megszűnik.
A főzőzóna időzítő működése hasonlít a független időzí-
tő működéséhez.
Amennyiben főzőzóna időzítő került beállításra, a műkö-
dési idő korlátozás érvényét veszti, az előre betáplált ér-
ték gyelmen kívül marad, csak az időzítővel beállított
érték kerül gyelembe vételre.
– Indukciós főzéshez mágneses vonzásra alkalmas
edény a megfelelő.
– Törekedjünk olyan edények használatára, melyek kife-
jezetten ajánlottak indukciós főzéshez.
– Lehetőleg lapos és vastag aljú edényt alkalmazzunk.
– A zónával egyező átmérőjű edény használja fel a legna-
gyobb hatásfokkal a leadott teljesítményt.
– Kisebb edény nem használja fel teljes mértékben a le-
adott teljesítményt, de ez mégsem okoz energiaveszte-
séget. Ettől függetlenül a gyártó nem ajánlja 10 cm-nél
kisebb átmérőjű edény használatát.
– Indukciós főzéshez többrétegű vagy ferrites rozsda-
mentes acél aljú edények alkalmasak.
– Öntöttvas edények közül a zománcozott aljúak megfe-
lelőek, mivel ezek nem karcolják össze a pirokerámia
felületet.
– Üveg, kerámia, agyagedény, alumínium, réz vagy nem
mágnesezhető (ausztenites) rozsdamentes acél edény
használata nem javasolt.
Kaparó segítségével azonnal távolítsunk el bárminemű
alumínium fóliát, ételdarabot, zsírfoltot, cukrot és egyéb
cukortartalmú ételt a felületről, ezzel megelőzve a főző-
lap károsodását.
Ezután tisztítsuk át megfelelő törlőkendővel és tisztító-
szerrel a felületet, öblítsük le vízzel, majd tiszta ruhával
töröljük szárazra. Soha ne használjunk szivacsot, súroló
hatású törlőruhát, valamint ne alkalmazzunk maró hatású,
erős vegyszert tisztítószertként, pl. folttisztítót, sütőtisztítő
spray-t.
Telepítés
Ezen utasítások a szakképzett személyzet számára mint
útmutató szolgálnak a telepítés, beállítás, karbantartás
hatályos törvényeknek és szabványoknak megfelelő vég-
rehajtásához. Ezen műveletek kizárólag úgy hajthatók
végre, hogy a készülék lecsatlakoztatásra került a háló-
zati áramkörről.
Amint azt az 5. ábrán is láthatjuk, a készülék olyan
rögzítőszerkezettel van ellátva, amely alkalmassá te-
szi munkalapba történő beépítésre. Helyezzük a mellé-
kelt tömítőanyagot a főzőlap külső pereméhez. Ne telepít-
sük a főzőlapot sütő fölé; amennyiben mégis így tennénk,
ügyeljünk a következőkre:
– a sütő rendelkezzen a megfelelő hűtési rendszerrel;
– ne szivárogjon el a meleg levegő a sütőtől a főzőlap
felé;
– az ábrának megfelelően szellőző nyílások szüksége-
sek.
Az elektromos bekötést megelőzően ellenőrizzük a követ-
kezőket:
– A hálózati áram karakterisztikája feleljen meg a készü-
lék alján lévő típustáblán feltüntetett paraméterekkel.
– A hálózati áramkör rendelkezzen a megfelelő földelő-
csat la ko zással, a hatályban lévő törvényeknek és szab-
ványoknak megfelelően.
– A hatályos törvények értelmében a földelőcsatlakozás
kötelező.
Amennyiben a készülékhez nem tartozik kábel és/vagy
dugvilla, használjunk a típustáblán feltüntetett üzemi hő-
mérsékletnek megfelelő abszorpciós tulajdonsággal bíró
eszközöket. A kábel hőmérséklete semmilyen körülmé-
nyek között sem mehet 50°C-kal a környezeti hőmérsék-
let fölé.

7
Fig.1 - Abb.1 - Afb. 1 - Рис. 1 - Rys. 1 - Kuva 1.- 图 1 - 1. ábra - Егк. 1.
Fig.2 - Abb.2 - Afb. 2 - Рис. 2 - Rys. 2 - Kuva 2.- 图 2 - 2. ábra - Егк. 2.
1. ábra
2. ábra
Csúszkás
érintővezérlő egység
I3070SLBK

8
3. ábra
4. ábra

9
Fig.5 - Abb.5 - Afb. 5 - Рис. 5 - Rys. 5 - Kuva 5.- 图 5 - 5. ábra - Егк. 5.
min.5mm
min.20mm
min.20mm
min.20mm
min.15mm
Cajón
Armario
Horno
Drawer
Cabinet
min.5mm
min.20mm
min.20mm
min.20mm
min.15mm
min.50mm
Rmax.2mm
D
-1
+3
C
-1
+3
B
A
min.40mm
EA
298
590
590
700
770
770
770
1000
B
520
350
520
350
390
450
520
360
C
275
560
560
680
750
710
750
980
D
500
330
490
330
370
410
490
340
E
68
68
68
68
68
68
68
68
700 350 680 330 68
5. ábra
szekrény
ók
sütő

10
Fig.6 - Abb.6 - Afb. 6 - . 6 - Rys. 6 - Kuva 6. - ⦍6 - 6. ábra - . 6.
6. ábra

Importőr:
MULTIKOMPLEX BUDAPEST KFT.
a páraelszívók szakértője... 1995 óta
H - 1211 Budapest, Mansfeld Péter u. 27
(volt Bajáki Ferenc utca)
tel.: +(36-1) 427 0325, +(36-1) 427-0326;
fax: +(36-1)427 0327
www.multikomplex.hu
60816300.18.01.2017
CATA ELECTRODOMÉSTICOS, S.L.
C. Ter, 2 - 08570 TORELLÓ (Barcelona) SPAIN
Tel. +34 938 594 100 - Fax +34 938 594 101

ES
Instrucciones de uso y mantenimiento para encimeras
EN
Operating and maintenance instructions for hobs
FR
Instructions pour l’usage et la maintenance des plaques
PT
Instruções de uso e manutenção para placas
DE
Bedienungs-und Wartungsanleitungen für kochherde
RU
PL
Instrukcja obsługi i konserwacji płyt grzejnych

I2030BK

THIS APPLIANCE IS CONCEIVED
FOR DOMESTIC USE ONLY. THE
MANUFACTURER SHALL NOT IN
ANY WAY BE HELD RESPONSIBLE
FOR WHATEVER INJURIES OR
DAMAGES ARE CAUSED BY
INCORRECT INSTALLATION OR
BY UNSUITABLE, WRONG OR
ABSURD USE.
The manufacturer declares that this product
meets all the essential requirements for low
voltage electrical material set out in European
directive 2014/35/EU and for electromagnetic
compatibility as required by European directive
2014/30/EU.
PRECAUTIONS
- When the hob is in use keep all magnetizable
objects away (credit cards, floppy disks,
calculators and so on).
- Do not use any alluminium foil or place any
foodstuffs wrapped in alluminium foil directly
on the hob - do not place any metal objects
such as knives, forks, spoons and lids on the
hob surface as they will heat up.
- When cooking in a non-stick pan without
seasoning, do not exceed 1-2 minutes’ pre-
heating time.
- When cooking food that may easily stick, start
at a low power output level and then slowly
increase while regularly stirring.
- After cooking is finished, switch off using the
control provided (turn down to “0”), and do
not rely on the pan sensor.
- If the surface of the hob is damaged,
immediately disconnect the appliance from
the mains to prevent the possibility of electric
shock.
- Never use a steam cleaner to clean the hob.
- The appliance and accessible parts may be
hot during operation.
- Take care to avoid touching the heating
elements.
- Children less than 8 years of age should be
kept at a safe distance unless continuously
supervised.
- This appliance may be used by children
aged 8 or over and by persons with reduced
physical, sensory or mental capabilities or
lack of experience and knowledge, if they
are supervised and have received suitable
instructions on safe use of the appliance and
understand the dangers involved. Children
must not play with the appliance. User
maintenance and cleaning should not be
carried out by children except under constant
supervision.
- Cooking with grease or oil may be dangerous
and cause a fire if left unattended. NEVER
try to extinguish a fire with water. Rather,
disconnect the appliance and then cover the
flames with a cover or sheet, for example.
- The cooking process has to be supervised.
A short term cooking process has to be
supervised continuously.
- Unattended cooking on a hob with fat or oil
can be dangerous and may result in a fire.
- Fire hazard: do not store elements on cooking
surfaces.
- Only counter top protectors designed for
use with the cooking appliance and listed
in the manufacturer’s instructions should be
used as suitable protection for the counter
top incorporated in the appliance. Use of
unsuitable protectors may cause accidents.
- WARNING: Accessible parts will become
hot when in use. To avoid burns and scalds
children should be kept away.
Insert in the fixed wiring a mean for
disconnection from the supply mains having a
contact separation in all poles that provide full
disconnection under overvoltage category III
conditions, in accordance with the wiring rules.
The plug or omnipolar switch must be easily
reached on the installed equipment.
EN

This appliance is not intended to be used via
an external timer or a remote control system.
The manufacturers decline any responsibility
in the event of non-compliance with what is
described above and the accident prevention
norms not being respected and followed.
To avoid all risk, if the power cable
becomes damaged, it must only be
replaced by the manufacturer, by
an authorised service centre, or by
a qualified electrician.
OPERATING PRINCIPLE (Fig. 1)
It exploits the electromagnetic properties of most cooking vessels.
The coil (inductor) which produces the electromagnetic field is
operated and controlled by the electronic circuit.
The heat is transmitted to food by the cooking vessel itself.
The cooking process takes place as described below.
- loss of heat is minimum (high efficiency)
- the system stops automatically when the vessel is removed or
even just lifted from the hob
- the electronic circuit guarantees maximum flexibility and fine
adjustments.
(Fig. 1)
1 Vessel
2 Induced current
3 Magnetic field
4 Inductor
5 Electronic circuit
6 Power supply
User’s Instructions (Fig. 2)
1 ON/OFF
2 Minus –
3 Plus +
4 Cooking zone
5 Setting level display
6 Zone selection lights
7 Lock key
8 Timer Display
Installation
All operations relative to installation (electric connection) should be
carried out by skilled personnel in conformity with the rules in force.
As for the specific instructions see part pertaining to installer.
Switching the Touch Control ON/OFF
After mains voltage is applied the control initializes for approx.
1 second before it is ready for operation.
After a reset all displays and LEDs glow for approx. 1 second. When
this time is over all displays and LEDs extinguish and the control is
in the stand-by mode.
Press the ON/OFF (1) button to switch the touch control on.
The cooking zone displays show a static “0“.
If a cooking zone is in the “hot“ status, the display shows a static
“H“ instead of “0“. The bottom right dot is blinking in 1 second
intervals on all cooking zone displays to indicate that no cooking
zone is selected at the moment.
After switching-ON the electronic control remains activated for 20
seconds. If no cooking zone or timer selection follows within this
period of time, the electronic control automatically switches back
into the stand-by-mode. The control can only be switched-ON if it
identifies the ON/OFF key alone being operated. Should it recognize
key activation other than that, the control remains in the standby-
mode.
If the child safety feature is active when switching on, all cooking
zones show “L“,(LOCKED). If the cooking zones are in a “hot“ status,
the display shows “L“ and“H“ in alternation. When the Touch Control
is ON it can be switched- OFF at any time by operating the ON/OFF
key. This is also valid if the control has been locked (activated child
safety feature).
The ON/OFF key has always priority in the switch-OFF function.
Automatic switch-OFF
When the control is ON it automatically switches-OFF after
20 seconds if no cooking zone or select key has been operated
within this period of time. If case of a cooking zone selection, the
automatic switch-OFF time is composed of 10 seconds deselection
time for a cooking zone at setting“0“ and 10 seconds switch-OFF
time.
Switching a cooking zone ON and OFF
First place the pan in the chosen cooking zone. If the pan is not
present the system cannot be switched on the correspondent zone.
If the touch control is switched on, the cooking zone can be selected
by pressing the button (4) of the corresponding zone.
The display (5) of the zone selected lights up, while the remaining
displays are dimmed. if the cooking zone is “hot”, “H” and “0” are
alternately displayed.
Press the PLUS (3) or MINUS (2) button to select a setting and the
zone will begin to heat up.
Once the cooking zone has been selected, the setting can be
selected by keeping the PLUS (3) button pressed down. The setting
begins at level 1 and increases by 1 level every 0.4 seconds. When
setting “9” is reached, the setting will not be changed further.
If the setting level has been selected using the MINUS (2) button, the
start level is “9“ (maximum level). Keep the button pressed down to
lower the active level by 1 every 0.4 seconds. When setting “0” is
reached, there will be no further setting changed. The setting can
only be changed by pressing the MINUS (2) or PLUS (3) button again.
Switching a cooking zone off
Select the zone to be switched off using the corresponding
button (4). The display (5) of the zone selected lights up, while the
remaining displays are dimmed. Press the Cooking zone (4) and
MINUS (2) buttons at the same time and the setting level of the zone
is changed to 0. Alternatively, the MINUS button (2) can be used to
reduce the setting level to 0.
If a cooking zone is “hot”, “H” and “0” will be alternately displayed.
Switching-OFF all cooking zones
Immediate switching-OFF of all cooking zones can be achieved
anytime by means of the ON/OFF key. In the standby-mode an “H“
appears on all cooking zones which are “hot“.All other cooking zone
displays are not illuminated.
Wattage settings
The output of the cooking zones can be set in 9 steps which
are indicated by the figures “1“ thru “9“ by means of LED
sevensegment-displays.
In case more power is required, select the boost level (“P”)

Boost function
After selection of a respective cooking zone, the boost function can
be activated by selecting the power level 9 and then pressing PLUS
(3) button . By means of this function certain cooking zones are
enabled to receive power over the nominal (the number of boostable
cooking zone depends on the power available on a partial modules
which is to be lees than total hob power ). If the desired cooking zone
has the capacity to activate the booster, the display shows a “P“
symbol. In case the available power is not enough the cooking stage
display flashes for 3 seconds on the cooking zone which needs to be
reduced and which requires automatic adjustment.
The boosting time is limited to 5 min to protect cooking utensils.After
the booster is switched off automatically, the cooking zone continues
operation on power level “9”. The booster can be reactivated after
some minutes.
In case that the pan is removed from the cooking zone during
boosting, the boosting function remains active and boosting time
continues.
The power management is based on on the principle that the last
entry is requested by the induction as top priority. That means that
previous actions and settings also made for the other cooking zones
are reversed automatically, if necessary.
-
If induction identifies the necessity of reducing power at a cooking
zone, the selected cooking stage flashes on that cooking zone
providing a correction period of 3 sec before the power is reduced
automatically to a minimum cooking stage.
-
If the setting is adjusted within the correction period, the power
management checks the settings again. Should a new setting lead to
further power reduction, the correction period starts again.
- If no automatic correction needs being made to the cooking zone
setting, the flashing stops immediately and the original value
remains as a steady display indication. Should the situation change
again on the power reduced cooking zone, no automatic power
increase is effected.
Residual heat indicator
It is meant to indicate to the user that the glass ceramic has a
dangerous touch temperature in the circumference of a cooking
zone. The temperature will be determined following a mathematical
model and the remaining residual heat will be indicated by means of
“H” on the corresponding 7-segment display.
Heating-up and cooling down will be calculated dependent on:
·the selected setting („0“ to „9“)
·the ON/OFF time.
After switching-OFF the cooking zone the respective display shows
“H” until the assigned cooking zone temperature is mathematically
in a uncritical level. (≤60°C).
Automatic power OFF function (operating time limitation)
Dependent on the selected setting, every cooking zone will be
switched-OFF after a defined maximum operation time if no
operation of the assigned cooking zone follows within this time
period. Every change of the cooking zone condition (by means of
the PLUS-, MINUS- key) puts back the maximum operation time of
this cooking zone to the initial value of the operating time limitation.
Protection against unintended switching-ON
·If the electronic control realizes a continuous operation of keys
for approx. 10 seconds, it switches OFF automatically. The control
sends out an audible failure signal for 10 seconds, so that the user
can remove the object which has been mistakenly placed onto the
operation surface. The displays show the failure code “ E R 0 3 “ .
If the failure carries on for more than 10 seconds, only the code “E
R 0 3 “ will be displayed as long as the failure will be recognized
by the electronic control. If the cooking zone is in the “hot” status,
“H“ will appear on the display in alteration with the failure notice.
·If no cooking zone will be activated within 20 seconds after
switching-ON by means of the Power-key, the control switches
back from the ON-condition into the stand-by-mode.
·When the control is switched- ON the ON/OFF-key has priority over
all other keys, so that the control can be switched-OFF anytime,
even in case of multiple or continuous operation of keys.
·In the stand-by mode a continous operation will not be signalized.
However, before the electronic control can be switched-ON again, it
has to recognize that all keys are not operated.
Locking systems
◊Key lock:
The actuation of the key lock key “7” in the wait or active mode locks
the keyboard a key symbol appear in the displays “8”:
siguiente:
Here, the actuation times of the key-lock key have to be taken into
account. The control continues to work in the set mode, but may no
longer be operated with any key, except the key-lock key itself or
the on/off key “1”.
The switching OFF with the on/off key “1” is also possible in the
locked condition. The lock symbol in display “8” fades when
switching off the control. The key-lock function included the lock
symbol in display “8” is active again when switching on (in wait
mode 20 s) until this is deactivated by a repeated actuation of the
key-lock key. The activation/deactivation of the key-lock function in
the off mode is not possible. When programmed timers expire the
respective timer alarms may be confirmed by actuating any key
without needing to unlock the control. The repeated actuation of the
key-lock key in the wait or active mode unlocks the keyboard and
the assigned key-lock symbol fades.All sensor keys may be operated
as usual again.
◊Child safety feature:
Activating the child lock:
After switching-ON the control the child safety feature can be
activated. To achieve this it is necessary to simultaneously
operate the front right cooking zone- select-key and the
MINUS-key and then press the front right cooking-zone-select key
again. There will be an “L”, meaning LOCKED (child safety feature
against unintended switching-ON). If a cooking zone is in the “hot”
condition, “L” and “H” will be displayed in alternation.
This course of operation has to take place within a period of 10
seconds, no other key than described above may be operated.
Otherwise the input will be interrupted because of incompleteness,
the cook top will not be locked then.
The electronic control remains in a locked condition until it gets
unlocked, even if the control has been switched-OFF and -ON in the
meantime. Also a reset of the control (after a voltage drop) does not
cancel the key lock.
Unlocking for cooking purposes: :
To unlock and operate the control it is required to operate the front
right cooking- zone select- key and the MINUS-key simultaneously.
“L“ (LOCKED) in the display extinguishes and all cooking zones
show “0“ with a blinking dot. Should a cooking zone be “hot”, “H” is
displayed instead of the static “0”. After switching- OFF the control,
the child safety feature is active again.
Cancelling the key lock:
After switching-ON the control the child safety feature can be
deactivated. Here it is necessary to simultaneously operate the front
right cooking-zone-select key and the MINUS-key and then operate
the MINUS-key alone. If all steps have been carried out in the right
order within 10 seconds the key lock gets cancelled and the control
is OFF. Otherwise the input will be considered incomplete, the control
remains locked and switches-OFF after 20 seconds.
After a renewed switching-ON by means of the ON/OFF key all

displays show „0“, the display dots are blinking and the control is
ready for cooking. If a cooking zone is in “hot” mode, “0” and “H” will
be alternately displayed.
Audible signal (buzzer)
While the control is in operation the following activities will be
signaled by means of a buzzer:
·normal key activation with a short sound signal.
·continuous operation of keys over a longer period of time
(10 seconds ) with a longer, intermittent sound signal.
Timer function (optional)
The timer function is realized in two versions:
·Stand-alone timer 1..99 min: sound signal when the time is over (=
minute minder). This function is only available when the cooktop is
not in operation, i.e. when there is no cooking.
·Cooking zone timer 1..99 min: sound signal when the time is over,
four cooking zones can be programmed independently.
Timer as minute minder (stand-alone):
·If the control is ON and no cooking zone selected, the standalone-
timer can be used by simultaneously operating MINUS (2) and PLUS
(3) keys.
·Adjustment range (0-99min), it can be set in 1-minute steps with
any key, starting at 1 up to 99 (end stop) with the minus-key starting
at 99 down to 0 (end stop)
·Continuous activation of the plusor minus-key results in a dynamic
increase of the adjustment speed up to maximum value without
sound signal.
·when the plus- or minus key is released in the meantime, the
adjustment speed starts again from a (low) initial value.
·adjustment can be made with a continously activated plus- or
minus-key or by tip-operation (with sound signal) After the timer is
set the time runs down according to the adjustment. When the time
is over there is a sound signal and the timer display blinks.
The sound signal will be stopped
·automatically after 2 minutes and/or
·by operating any key.
Then the blinking of the timer display stops and the display
extinguishes.
Switching-OFF/changing the timer
·The timer can be changed or switched-off anytime by
simultaneously operating MINUS (2) and PLUS (3) keys. (with sound
signal). The timer will be switched off by counting down to “0” with
the minus-key.
For 6 seconds the timer display remains at “0“ before it will be
switched-off.
·If the control will be switched- ON by means of the Power-key, the
stand-alone timer will be switched-off also.
Timer programming on cooking zones
When the control is switched- ON an independent timer can be
programmed for every cooking zone.
·By selecting a cooking zone with the cooking-zone-selectkey (4),
then selecting the setting and, finally, operating MINUS (2) and PLUS
(3) keys simultaneously, the timer can be programmed as a switch-
off function for a cooking zone.
·During timer programming, the pilot light (6) of the selected cooking
zone blinks.
·When the timer has run down, there is a sound signal and
the timer display shows “00“ statically, the assigned cooking
zone timer LED blinks. The programmed cooking zone will
be cut off and „H“ will be displayed if the coking zone is hot,
otherwise a stroke will show in the cooking zone display.
The sound signal and the blinking of the timer LED will be stopped
·automatically after 2 minutes
·by operating any key.
The timer display extinguishes.
·The basic behaviour follows the description of the “minute minder”
(stand-alone-timer).
Cooking vessels (Fig. 3)
- a magnet-attracting vessel may be a suitable vessel for induction
cooking
- prefer vessels which are especially declared to be suitable for
induction cooking
- flat- and thickbottomed vessels
- a vessel with the same diameter as zones ensures the maximum
exploitation of power
- a smaller vessel reduces power exploitation, but does not cause
any energy loss We would anyhow not recommend the use of
vessels with diameters smaller than 10 cm.
- stainless-steel vessels with multi-layer or ferritic stainless-steel
bottoms when specifically suited for induction cooking
- cast-iron preferably enamel-bottomed vessels to avoid scratching
the pyroceram surface
- we do not recommend the use of any glass, ceramic, earthenware,
alluminium, copper or non-magnetic (austenitic) stainlesssteel
vessels.
Maintenance (Fig. 4)
By means of a scraper immediately remove any alluminium foil bits,
food spills,grease splashes, sugar marks and other high sugarcontent
food from the surface in order to avoid damaging the hob.
Subsequently clean the surface with some towel and appropriate
product, rinse with water and dry by means of a clean cloth. Under
no circumstance should sponges or abrasive cloths be used; also
avoid using aggressive chemical detergents such as oven sprays and
spot removers.
Installer’s Instructions
Installation
These Instructions are for the qualified technician, as a guide to
installation, adjustment and maintenance, according to the laws
and standards in force. These operations must always be carried out
when the appliance has been disconnected from the electric system.
Positioning (Fig. 5)
The fixture is especially designed for fitting into a work-top as shown
in the corresponding figure.
Place the supplied sealing agent along the hob perimeter.
Do not install the hob over an oven; in case you do, make sure of
the following:
- the oven is equipped with an appropriate cooling system
- there is no warm-air leakage from the oven towards the hob
- suitable air-inlets are provided as shown in the figure.
Electrical connection (Fig. 6)
Prior to carrying out the electrical connection, please ensure that:
- the plant characteristics are such as to follow what is indicated on
the matrix plate placed at the bottom of the working area;
- that the plant is fitted with an efficient earth connection, following
the standards and law provisions in force.
The earth connection is compulsory in terms of the law.
Should there be no cable and/or plug on the equipment, use suitable
absorption material for the working temperature as well, as indicated
on the matrix plate. Under no circumstance must the cable reach a
temperature above 50°C of the ambient temperature.

Fig.1 - Abb.1 - Afb. 1 - Рис. 1 - Rys. 1 - Kuva 1.- 图 1 - 1. ábra - Егк. 1.
Fig.2 - Abb.2 - Afb. 2 - Рис. 2 - Rys. 2 - Kuva 2.- 图 2 - 2. ábra - Егк. 2.


Fig.5 - Abb.5 - Afb. 5 - Рис. 5 - Rys. 5 - Kuva 5.- 图 5 - 5. ábra - Егк. 5.
min.5mm
min.20mm
min.20mm
min.20mm
min.15mm
Cajón
Armario
Horno
Drawer
Cabinet
min.5mm
min.20mm
min.20mm
min.20mm
min.15mm
min.50mm
Rmax.2mm
D
-1
+3
C
-1
+3
B
A
min.40mm
EA
298
590
590
700
770
770
770
1000
B
520
350
520
350
390
450
520
360
C
275
560
560
680
750
710
750
980
D
500
330
490
330
370
410
490
340
E
68
68
68
68
68
68
68
68
298 520 275 500 68
Other manuals for I2030BK
1
Table of contents
Languages:
Other NODOR Hob manuals
Popular Hob manuals by other brands
KKT KOLBE
KKT KOLBE IND8000RL Instruction and installation manual

KKT KOLBE
KKT KOLBE KF772EDF Instruction and installation manual
Panasonic
Panasonic KY-T936SL Operating & installation instructions

NEFF
NEFF T13T42 Series instruction manual

Zanussi
Zanussi ZBG 509 SS Instruction booklet
Fagor
Fagor IO-TGC-0241/2 instruction manual
AEG
AEG IKB64301FB user manual
THOMSON
THOMSON THI3PLANCHA operating instructions
Creda
Creda S911E Instructions for installation and use
AEG
AEG 75300K-MN Operating and installation instructions
K&H
K&H SL-1800S User instruction manual
MASTER KITCHEN
MASTER KITCHEN MKHI 382-ED 1BR BK Instruction and installation manual
