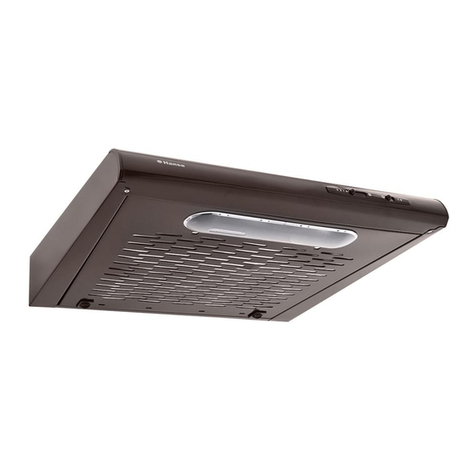
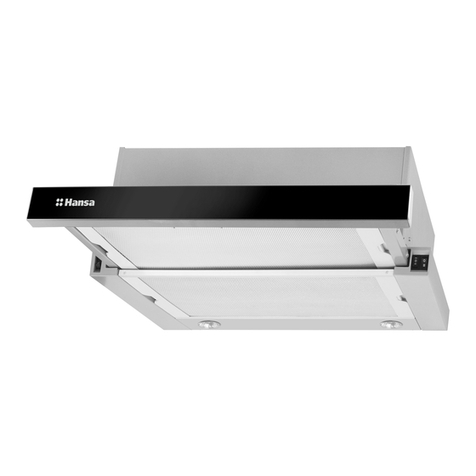
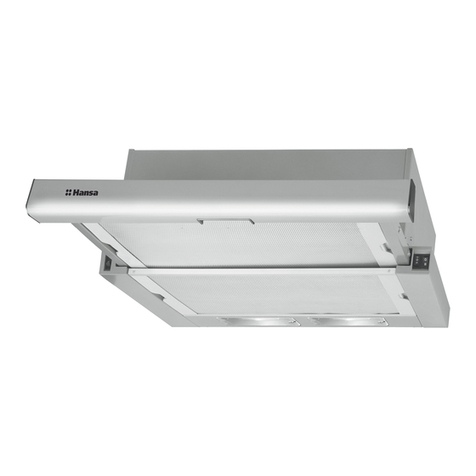
Hansa OTC6223BGH User manual

IO 01243/7
(03.2018)
Kitchen extractor hood / Tűzhely feletti páraelszívó /
Hotă pentru plită / Кухонна витяжка / Кухненски
абсорбатор / Корпус вытяжки / Асүй плитасы
үстіндегі сіңіргіш / Gartraukio korpusas / Tvaika
nosūcēja korpuss / Pliidipealne õhupuhasti / Korpus
nape
OTC*
OPERATING INSTRUCTIONS EN
HASZNÁLATI UTASÍTÁS HU
INSTRUCŢIUNE DE DESERVIRE RO
ІНСТРУКЦІЯ З ЕКСПЛУАТАЦІЇ UK
ИНСТРУКЦИЯ ЗА ОБСЛУЖВАНЕ BG
ИНСТРУКЦИЯ ПО ЭКСПЛУАТАЦИИ RU
ПАЙДАЛАНУ БОЙЫНША НҰСҚАУ KK
NAUDOJIMO INSTRUKCIJA LT
LIETOŠANAS INSTRUKCIJA LV
KASUTUSJUHEND ET
UPUTSTVO ZA UPOTREBU SR


- 3 -
NOTES ON SAFETY 8
UNPACKING 11
DISPOSAL OF OLD APPLIANCE 11
OPERATION 12
OTHER IMPORTANT INFORMATION CONCERNING THE OPERATION OF THE HOOD 17
CLEANING AND MAINTENANCE 18
MAINTENANCE 18
GREASE FILTER 18
ACTIVATED CHARCOAL FILTER 18
LIGHT 18
WARRANTY AND AFTER SALES SERVICE 19
WARRANTY 19
BIZTONSÁGI UTASÍTÁSOK 21
KICSOMAGOLÁS 25
A HASZNÁLT KÉSZÜLÉKEK ELTÁVOLÍTÁSA 25
HASZNÁLAT 26
A PÁRAELSZÍVÓ MŰKÖDÉSÉVEL KAPCSOLATOS EGYÉB FONTOS INFORMÁCIÓK 31
TISZTÍTÁS ÉS KARBANTARTÁS 32
KARBANTARTÁS 32
ZSÍRSZŰRŐ 32
SZÉNSZŰRŐ 32
VILÁGÍTÁS 32
GARANCIA ÉS VÁSÁRLÁS UTÁNI SZERVIZ 33
GARANCIA 33
EN- Table of contents
HU- Tartalomjegyzék
INDICAȚII PRIVIND SIGURANȚA 35
DESPACHETARE 39
ÎNDEPĂRTAREA DISPOZITIVELOR UZATE 39
OPERARE 40
ALTE INFORMATII IMPORTANTE PENTRU OPERAREA HOTEI 45
CURĂŢAREA ŞI ÎNTREŢINEREA 46
ÎNTREŢINERE 46
FILTRUL ÎMPOTRIVA GRĂSIMILOR 46
FILTRUL DE CARBON 46
SISTEM DE ILUMINARE 46
GARANŢIE, SERVICII POSTVÂNZARE 47
GARANŢIA 47
RO - Cuprins

- 4 -
ВКАЗІВКИ ЩОДО БЕЗПЕКИ ЕКСПЛУАТАЦІЇ 49
РОЗПАКУВАННЯ 53
УТИЛІЗАЦІЯ ЗНОШЕНОГО ОБЛАДНАННЯ КОРИСТУВАЧАМИ 53
ЕКСПЛУАТАЦІЯ 54
ІНША ВАЖЛИВА ІНФОРМАЦІЯ ПРО РОБОТУ ВИТЯЖКИ 59
ЧИЩЕННЯ І ДОГЛЯД 60
ДОГЛЯД 60
ЖИРОВЛОВЛЮВАЛЬНИЙ ФІЛЬТР 60
ВУГІЛЬНИЙ ФІЛЬТР 60
ОСВІТЛЕННЯ 60
ГАРАНТІЯ, ОБСЛУГОВУВАННЯ ПІСЛЯ ПРОДАЖУ 61
ГАРАНТІЯ 61
ПРЕПОРЪКИ ОТНОСНО БЕЗОПАСНОСТТА 63
РАЗОПАКОВАНЕ 67
ОБЕЗВРЕЖДАНЕ НА ИЗНОСЕНИ УРЕДИ 67
ОБСЛУЖВАНЕ 68
ДРУГИ ВАЖНИ ИНФОРМАЦИИ ЗА ОБСЛУЖВАНЕТО НА АБСОРБАТОРА 73
ПОЧИСТВАНЕ И ПОДДРЪЖКА 74
ПОДДРЪЖКА 74
ФИЛТЪР ЗА МАЗНИНИ 74
ВЪГЛЕН ФИЛТЪР 74
ОСВЕТЛЕНИЕ 74
ГАРАНЦИЯ, СЛЕД ПРОДАЖБЕНО ОБСЛУЖВАНЕ 75
ГАРАНЦИЯ 75
УКАЗАНИЯ ПО ТЕХНИКЕ БЕЗОПАСНОСТИ 77
РАСПАКОВКА 81
УТИЛИЗАЦИЯ ИЗНОШЕННОГО ОБОРУДОВАНИЯ 81
ЭКСПЛУАТАЦИЯ 82
ПРОЧАЯ ВАЖНАЯ ИНФОРМАЦИЯ О РАБОТЕ ВЫТЯЖКИ 87
ЧИСТКА И УХОД 88
КОНСЕРВАЦИЯ 88
ЖИРОУЛАВЛИВАЮЩИЙ ФИЛЬТР 88
УГОЛЬНЫЙ ФИЛЬТР 88
ОСВЕЩЕНИЕ 88
ГАРАНТИЯ, ПОСЛЕПРОДАЖНОЕ ОБСЛУЖИВАНИЕ 89
ГАРАНТИЯ 89
UK - Зміст
BG - Съдържание
RU - Содержание

- 5 -
KK - Мазмұны
LT - Turinys
ҚАУІПСІЗДІК ТЕХНИКАСЫ БОЙЫНША НҰСҚАУЛАР 91
ОРАУДАН АШУ 95
ПАЙДАЛАНЫЛҒАН ҚҰРЫЛҒЫЛАРДЫ КӘДЕГЕ ЖАРАТУ 95
ПАЙДАЛАНУ 96
СОРҒЫШТЫҢ ЖҰМЫСЫ ТУРАЛЫ ӨЗГЕ МАҢЫЗДЫ АҚПАРАТ 101
ТАЗАРТУ ЖӘНЕ КҮТІМ 102
КОНСЕРВАЦИЯЛАУ 102
МАЙ АУЛАҒЫШ СҮЗГІ 102
БҰРЫШТЫҚ СҮЗГІ 102
ЖАРЫҚТАНДЫРУ 102
КЕПІЛДІК, САТҚАННАН КЕЙІНГІ ҚЫЗМЕТ КӨРСЕТУ 103
КЕПІЛДІК 103
SAUGOS NURODYMAI 105
IŠPAKAVIMAS 108
PANAUDOTŲ PRIETAISŲ ŠALINIMAS 108
NAUDOJIMAS 109
KITA SVARBI INFORMACIJA APIE GARTRAUKIO NAUDOJIMĄ 114
VALYMAS IR PRIEŽIŪRA 115
PRIEŽIŪRA 115
RIEBALŲ FILTRAS 115
ANGLINIS FILTRAS 115
APŠVIETIMAS 115
GARANTIJA, PRIEŽIŪRA PO PARDAVIMO 116
GARANTIJA 116
DROŠĪBAS NORĀDĪJUMI 118
IZSAIŅOŠANA 121
NOLIETOTO IERĪČU UTILIZĀCIJA 121
APKALPE 122
CITA SVARĪGA INFORMĀCIJA PAR TVAIKA NOSŪCĒJA LIETOŠANU 127
TĪRĪŠANA UN KOPŠANA 128
UZTURĒŠANA 128
PRETTAUKU FILTRS 128
OGLES FILTRS 128
APGAISMOJUMS 128
GARANTIJAS UN PĒCGARANTIJAS PAKALPOJUMI 129
GARANTIJA 129
LV - Satura rādītājs

- 6 -
ET - Sisukord
SR - Sadržaj
OHUTUSJUHISED 131
LAHTIPAKKIMINE 135
KASUTATUD SEADMETE UTILISEERIMINE 135
KÄSITSEMINE 136
MUU OLULINE TEAVE ÕHUPUHASTI KASUTAMISE KOHTA 141
PUHASTAMINE JA HOOLDUS 142
HOOLDUS 142
RASVAFILTER 142
SÖEFILTER 142
VALGUSTUS 142
GARANTII, MÜÜGIJÄRGNE HOOLDUS 143
GARANTII 143
BEZBEDNOSNE NAPOMENE 145
UKLANJANJE PAKOVANJA 148
ODLAGANJE ISTROŠENIH UREĐAJA 148
UPOTREBA 149
OSTALE VAŽNE INFORMACIJE O UPOTREBI NAPE 154
ČIŠĆENJE I ODRŽAVANJE 155
ODRŽAVANJE 155
FILTER ZA MASNOĆU 155
UGLJENI FILTER 155
OSVETLJENJE 155
GARANCIJA, USLUGE POSLE PRODAJE 156
GARANCIJA 156

- 7 -
Dear customer,
From now on, your daily housework will be easier
than ever before. Your appliance is excep-
onally easy to use and extremely ecient. Aer
reading these Operang Instrucons, operang the
appliance will be easy.
Before being packaged and leaving the manufacturer,
the appliance was thoroughly checked with regard to
safety and funconality.
Before using the appliance, please carefully read
these Operang Instrucons. By following these
instrucons carefully you will be able to avoid any
problems in using the appliance. It is important to
keep these Operang Instrucons and store them in a
safe place so that they can be consulted at any me.
Follow these instrucons carefully in order to avoid
possible accidents.
Sincerely,

- 8 -
NOTES ON SAFETY
• Before using the appliance, please carefully read
this manual!
• The appliance is designed for household use only.
• The manufacturer reserves the right to introduce
changes, which do not aect operation of the ap-
pliance.
• The manufacturer shall not be liable for any dam-
age or re caused by the appliance resulting from
failure to follow instructions in this manual.
• Cooker hood is designed to remove cooking
odours. Do not use cooker hood for other pur-
poses.
• Connect the cooker hood operating in extraction
mode to a suitable ventilation duct (do NOT con-
nect the cooker to smoke or ue gas ducts, which
are in use). It requires installation of the air ex-
traction duct to the outside. The length of the
duct (usually a pipe of Ø 120 or 150 mm) should
not be longer than 4-5 m. An air extraction duct
is also required for telescopic and furniture hoods
in absorption mode.
• Cooker hood operating in air recirculation mode
requires the installation of an activated charcoal
lter. In this case, installing an extractor duct is
not required, however it is recommended to in-
stall an air guide vane (Mainly in chimney cooker
hoods).
• The cooker hood features independent lighting
and exhaust fan that can be operated at one of
several speeds.
• Depending on the type, the hood is designed to
be permanently attached to a vertical wall over
a gas or electric stove (chimney and universal
hoods); on the ceiling over a gas or electric stove
(island hoods); on the vertical built in furniture

- 9 -
over a gas or electric stove (telescopic and built-
in hoods). Before installing, make sure that the
wall/ceiling structure is strong enough to suspend
the hood. Some hoods are very heavy.
• For details of the installation distance above an
electric hob please refer to product technical
sheet If the installation instructions of the gas
cooker specify a greater distance, this must be
taken into account (Fig. 1).
• Do not leave an open ame under the hood.
When the pots are removed from the burner, set
the minimum ame. Always make sure that the
ame does not extend outside the pot, because it
causes unwanted loss of energy and a dangerous
concentration of heat.
• When cooking on fat, supervise the pans con-
stantly, because overheated fat can ignite.
• Unplug the appliance before any cleaning, replac-
ing the lter or repair work.
• Cooker hood grease lter should be cleaned at
least once a month, because the lter saturated
with fat is ammable.
• Ensure adequate ventilation (air ow) if other
equipment such as liquid fuel stoves or heaters
are operated in the room in addition the cooker
hood. When the cooker hood is simultaneously
operated with burning appliances requiring ade-
quate fresh air from the room to work properly,
their safe operation is possible if under pressure
around these appliances is a maximum of 0.004
mbar (this does not apply when the cooker hood
is used as an odour lter)
• Do not lean on the hood.
• The hood should be cleaned regularly both inside
and out (AT LEAST ONCE A MONTH, following the
indications concerning maintenance provided in
this manual)..Failure to adhere to the rules con-
cerning cleaning the hood and replacing lters

- 10 -
results in a re risk.
• If the power cord is damaged it should be re-
placed by a specialised service centre.
• Ensure that it is possible to disconnect the ap-
pliance from the mains by removing the plug or
switching o the bi-polar switch.
• This appliance is not intended for use by persons
(including children) with physical, mental or sen-
sory handicaps, or by persons inexperienced or
unfamiliar with the appliance, unless under su-
pervision or in accordance with the instructions
as communicated to them by persons responsible
for their safety.
• Particular attention should be paid not to allow
unaccompanied children to use the appliance.
• Make sure voltage indicated on the nameplate
corresponds to the local mains supply voltage.
• Before use, extend and straighten the power cord.
• Packaging materials (bags, polyethylene, poly-
styrene, etc.) should be kept away from children
during unpacking.
• Before connecting the hood to the mains power
supply always check that the power cord is prop-
erly installed and is not trapped by the appliance.
Do not connect the appliance to the mains until
assembly is complete.
• Do not operate your kitchen hood without the al-
uminium grease lters.
• It is strictly forbidden to cook dishes under on an
open ame (ambé) under your kitchen hood.
• Always strictly adhere to regulations issued by the
competent local authorities regarding the techni-
cal and safety requirements for fume extraction.
• Failing to tighten bolts and fasteners in accord-
ance with these instructions may endanger life
and health.
• Hanging kitchen hoods operate only in air circu-
lation / odour absorber mode

- 11 -
UNPACKING
During transportation, protective
packaging was used to protect the
appliance against any damage. Af-
ter unpacking, please dispose of all
elements of packaging in a way that
will not cause damage to the environ-
ment.
All materials used for packaging the
appliance are environmentally friendly; they are
100% recyclable and are marked with the appropri-
ate symbol.
Important! Packaging materials (bags, polyethyl-
ene, polystyrene, etc.) should be kept away from
children during unpacking.
DISPOSAL OF OLD APPLIANCE
In accordance with European Directive
2012/19/EU and Polish legislation re-
garding used electrical and electronic
goods, this appliance is marked with
the symbol of the crossed-out waste
container. This marking indicates that
the appliance must not be disposed of
together with other household waste
after it has been used.
The user is obliged to hand it over to waste collec-
tion centre collecting used electrical and electron-
ic goods. The collectors, including local collection
points, shops and local authority departments pro-
vide recycling schemes.
Proper handling of used electrical and electronic
goods helps avoid environmental and health haz-
ards resulting from the presence of dangerous com-
ponents and the inappropriate storage and process-
ing of such goods.

- 12 -
OPERATION
Kitchen hood controls
Control Panel is shown in Figure 4, for reference it is also shown below:
0123
The control panel is equipped with buttons (isostat switch).
To turn on the kitchen hood, press one of the button to select the de-
sired speed:
1- Low speed. Use this speed when cooking a little food with hardly any
fumes.
2- Medium speed. Use this speed when cooking multiple dishes at the
same time with moderate amount of fumes.
3- High speed. Use this speed when frying or grilling, with large
amount of fumes.
0- Turn o the appliance
Press to turn the lighting on/o. The lighting operates independent-
ly of hood fan.
Selected kitchen hood models have an LED indicator that changes col-
our depending on fan speed.

- 13 -
OPERATION
Kitchen hood controls
Control Panel is shown in Figure 4, for reference it is also shown below:
The control panel is equipped with buttons (rocker switch). You can use
the buttons once the retractable front panel is ejected.
Telescopic kitchen hood is equipped with a limit switch. Every time,
when you eject the retractable front panel, the hood fan will start at
the previously set speed.
Available speeds (when retractable front panel ejected):
- Low speed. Use this speed when cooking a little food with hardly any
fumes.
- High speed. Use this speed when frying or grilling, with large
amount of fumes.
O- The hood o (ejecting the retractable front panel will not start the
fan).
Press to turn the lighting on/o. The lighting operates independent-
ly of hood fan. Limit switch also turns o the lights when you retract
the front panel.

- 14 -
OPERATION
Kitchen hood controls
Control Panel is shown in Figure 4, for reference it is also shown below:
The control panel is equipped with buttons (rocker switch). You can use
the buttons once the retractable front panel is ejected.
Telescopic kitchen hood is equipped with a limit switch. Every time,
when you eject the retractable front panel, the hood fan will start at
the previously set speed.
Available speeds (when retractable front panel ejected):
- Low speed. Use this speed when cooking a little food with hardly any
fumes.
- Medium speed. Use this speed when cooking multiple dishes at the
same time with moderate amount of fumes.
- High speed. Use this speed when frying or grilling, with large
amount of fumes.
O- The hood o (ejecting the retractable front panel will not start the
fan).
Press to turn the lighting on/o. The lighting operates independent-
ly of hood fan. Limit switch also turns o the lights when you retract
the front panel.

- 15 -
OPERATION
Kitchen hood controls
Control Panel is shown in Figure 4, for reference it is also shown below:
3
2
1
4
Control Panel
It is equipped with a touch controls. Touch one the sensors to enable
the desired function:
1 Low speed (1). Use this speed when cooking a little food with hardly
any fumes.
2 Medium speed (2). Use this speed when cooking multiple dishes at
the same time with moderate amount of fumes.
3 High speed (3). Use this speed when frying or grilling, with large
amount of fumes.
4 Lighting on/o The lighting operates independently of hood fan.
Touch sensor corresponding to the selected speed to turn o the
kitchen hood.
O Timer
Use o timer to turn o the hood after a specied time. Use o timer
to lter the fumes out of the air after cooking. The delay time is about
15 minutes. To enable O-Timer at any fan speed touch the active
speed sensor for at least 3 seconds. Sensor ashes. Flashing indicates
that O-Timer has been enabled. To cancel O-Timer touch the active
speed sensor. The appliance will turn o. To turn on the appliance,
touch the sensor corresponding to the desired fan speed. Cancelling the
o-timer does not turn o the lighting.

- 16 -
OPERATION
Cooker hood controls
Control Panel is shown in Figure 4, for reference it is also shown below:
3
2
51
4
Control Panel
It is equipped with a touch controls. Touch one the sensors to enable
the desired function:
1 — Reduce fan speed
2 — Increase fan speed
3 — Speed display The hood fan can run at 3 or 4 speeds (depending
on the model).
4 — O timer
5 — Lighting on/o The lighting operates independently of hood fan.
Available fan speeds:
- Low speed (1). Use this speed when cooking a little food with hardly
any fumes.
- Medium speeds (2 and 3*). Use this speed when cooking multiple
dishes at the same time with moderate amount of fumes.
- High speed (4*). Use this speed when frying or grilling, with large
amount of fumes.
* Varies depending on the model
O Timer
Use o timer to turn o the hood after a specied time. Use o timer
to lter the fumes out of the air after cooking. Maximum delay time
is 90 minutes. Touch to cancel the o-timer at any time. The num-
ber will ash on the display. Then use and to select the delay in
the range 1–9 (multiply the number by ten to obtain delay in minutes,
1 – 10 minutes, 2 – 20 minutes ... 5 – 50 minutes). Touch again to
activate the function. The o timer is set a dot will ash on by the digit
on the display. Touch to cancel the o timer. Touch to reduce the
delay time down to zero. Touch .to conrm the o-timer has been
cancelled. Cancelling the o-timer does not turn o the lighting.

- 17 -
Other important information concerning the operation of
the hood
Operation in air circulation / odour lter mode. In this mode, the ltered
air returns to the room through the outlets. Install activated charcoal
lter in this setting. It is recommended to install the air guide (available
depending on the model, mainly in chimney cooker hoods).
Air extraction operation: When cooker hood operates in extraction mode,
air is discharged outside through an extraction duct. Remove activated
charcoal lter in this setting. The cooker hood is connected to the air
outlet opening using a rigid or exible extraction duct with a diameter of
150 or 120 mm, and the appropriate clamps, which must be purchased
at a hardware store. The appliance should be installed by a qualied
installer.
Fan speed: Lowest and medium fan speed is used in normal conditions
and less intense odours, while the highest speed is used only when cook-
ing odours are very intense, such as during frying or grilling.
Note (applies to universal hoods only): Due to the design of universal
hoods you need to manually change the mode of operation. See Figure
8 for instructions on how to change the mode.
Note (only applies to telescopic and in-built kitchen hoods): Furniture
and telescopic cooker hoods operating in air recirculation mode require
installation of the exhaust duct. The other end of the duct should be di-
rected to the room as it will discharge ltered air.
Note: Hanging kitchen hoods operate only in air circulation / odour ab-
sorber mode

- 18 -
CLEANING AND
MAINTENANCE
Maintenance
Regular maintenance and cleaning of the appliance will ensure trou-
ble-free operation of the cooker hood and extend its life. Especially make
sure that the grease lter and activated charcoal lter are replaced ac-
cording to manufacturer's recommendations.
• Do not use a soaked cloth, sponge, or water jet.
• Do not use solvents or alcohol, as they may tarnish lacquered sur-
faces.
• Do not use caustic substances, especially for cleaning stainless steel.
• Do not use a rough or abrasive cloth.
• It is recommend to use a damp cloth and a neutral detergent.
Note: After several washes in the dishwasher, the colour of the alumini-
um lter may change. The change of colour does not indicate improprie-
ties or the necessity to change it.
Grease lter
For normal hood operation, aluminium grease lter should be cleaned
every month in the dishwasher or by hand using a mild detergent or
liquid soap.
Dismantling of aluminium grease lter is shown on Figure 5.
Acrylic lter is used in some models. This lter should be replaced at
least once every two months or more frequently if the appliance is used
intensively.
Activated charcoal lter
Charcoal lter is used only when the cooker hood is not connected to
the ventilation duct. Activated charcoal lter can absorb odours until
saturated. Charcoal lter is not suitable for washing or regeneration and
should be replaced at least once every two months or more frequently if
the appliance is used intensively.
Dismantling of charcoal lter is shown on Figure 6.
Light
Use incandescent / halogen / LED modules of the same specication as
those factory-installed in the appliance. See Figure 7 for details how to
replace lights. If there is no such gure in this manual, please contact
authorised service to replace the lighting module.

- 19 -
WARRANTY AND AFTER
SALES SERVICE
Warranty
Warranty service as stated on the warranty card. The manufacturer shall
not be held liable for any damage caused by improper use of the product.
The manufacturer recommends that all repairs and adjust-
ments be carried out by the Factory Service Technician or the
Manufacturer's Authorized Service Point. Repairs should be
carried out by a qualied technician only.
Manufacturer’s Declaration
The manufacturer hereby declares that this product meets the re-
quirements of the following European directives:
• Low Voltage Directive 2014/35/EC
• Electromagnetic Compatibility (EMC) Directive 2014/30/EC
• ErP Directive 2009/125/EC
• Directive RoHS 2011/65/EC
and has thus been marked with the symbol and been issued with
a declaration of compliance made available to market regulators.

- 20 -
Tisztelt
Ügyfelünk
A mai naptól kezdve az Ön mindennapi teendői
egyszerűbbek leek mint valaha. A készülék
a könnyű használat és kiváló hatékonyság rendkívüli
kombinációja A használa utasítás elolvasását követő-
en Önnek nem okoz gondot a kezelése.
A készülék, mely elhagyta a gyárat, gondosan elle-
nőrizve le a csomagolás elő a biztonságot és funk-
cionalitást illetően.
Kérjük Önöket, hogy a készülék üzembe helyezése
elő gyelmesen olvassák el a használa utasítást. A
használa utasításban foglaltak betartása segít meg-
előzni a helytelen üzemeltetést. A használa utasítást
meg kell tartani és el kell rakni úgy, hogy szükség
esetén kéz ala legyen.
A balesetek elkerülése érdekében gondosan követni
kell a használa utasításban foglaltakat.
Tiszteleel,
This manual suits for next models
3
Table of contents
Languages:
Other Hansa Ventilation Hood manuals

Hansa
Hansa OTS 5 Series User manual

Hansa
Hansa OKC6462WH User manual

Hansa
Hansa OKC6641ISH User manual

Hansa
Hansa OTS6226IH User manual

Hansa
Hansa OMC621IH User manual

Hansa
Hansa OKP6242SH User manual

Hansa
Hansa OSC5211IH User manual

Hansa
Hansa OKC5111MIH User manual
Hansa
Hansa OTP6241BH User manual

Hansa
Hansa OKP6751TH User manual
Hansa
Hansa OTP6241BH User manual

Hansa
Hansa OKC654T User manual

Hansa
Hansa OKP6321ZBH User manual

Hansa
Hansa OKC655TH User manual

Hansa
Hansa OKP6547SH User manual

Hansa
Hansa OMP6251BGH User manual

Hansa
Hansa OME6135IH User manual
Hansa
Hansa OKP6545SH User manual

Hansa
Hansa OKP6321ZH User manual

Hansa
Hansa OSC Series User manual