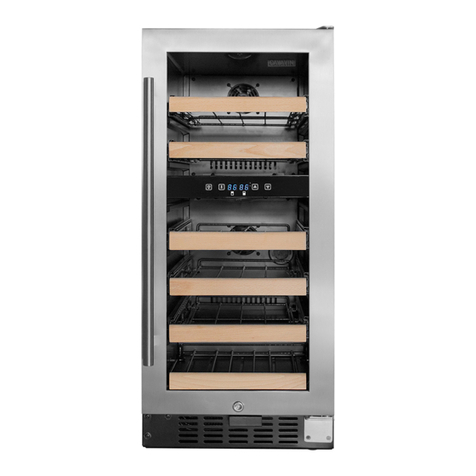
Hansa WCF1K Series User manual

Wine cooler / Винный холодильник / шарап
тоңазытқыш / Холодильник Для Вина / Frigider
pentru vin/ Охладител за вино / Hladnjak za vino /
Хладњак за вино
WCF1K* / WCB1K* /WCU2K* /
WFBB* / WBA* / WBB* / WFBA* /
FWC* / BWC* / WCB2K*
IO-RFW-0022/15
(08.2023)
OPERATING INSTRUCTIONS EN
ИНСТРУКЦИЯ ПО ЭКСПЛУАТАЦИИ RU
ПАЙДАЛАНУ БОЙЫНША НҰСҚАУ KK
ІНСТРУКЦІЯ З ЕКСПЛУАТАЦІЇ UK
INSTRUCŢIUNE DE DESERVIRE RO
РЪКОВОДСТВО ЗА УПОТРЕБА BG
UPUTE ZA UPORABU HR
УПУТСТВО ЗА КОРИШЋЕЊЕ SR


- 3 -
EN- Table of contents
GUIDELINES CONCERNING THE SAFETY OF USE 12
INSTALLATION AND OPERATING CONDITIONS OF THE APPLIANCE 14
CLIMATE RANGE 15
PRACTICAL EVERYDAY TIPS 16
UNPACKING 17
DISPOSAL OF OLD APPLIANCE 17
CONTROLS 18
APPLIANCE CONTROLS- SINGLE AND DUAL ZONE 18
TO SWITCH THE POWER ON/OFF 18
TO CHANGE THE TEMPERATURE 18
OPTIMAL TEMPERATURE SELECTION 19
INDOOR LIGHTING 19
SETTINGS MODE 19
SET THE TEMPERATURE UNIT °F OR °C. 19
SET THE DISPLAY BACKLIGHT INTENSITY 19
SET THE APPLIANCE INTERIOR LIGHTING INTENSITY. 19
SET SOUNDS. 19
INTERNAL HUMIDITY 19
TEMPERATURE DISPLAY 19
SILENT MODE 19
DYNAMIC COOLING MODE 20
WEEKEND MODE 20
TEMPERATURE ALARM 20
PUSH TO OPEN FEATURE 20
DOOR PRESSURE SENSITIVITY ADJUSTMENT 20
CARE AND CLEANING 21
REMOVING THE SHELVES 21
CLEANING 21
TROUBLESHOOTING 21
IF THE APPLIANCE IS NOT WORKING, CHECK 21
THE APPLIANCE IS WORKING, BUT NOT VERY WELL, CHECK 22
THE APPLIANCE IS NOISY, CHECK 22
THE LIGHT DOES NOT WORK, CHECK 22
THE DOOR WILL NOT CLOSE PROPERLY, CHECK 22
THE DISPLAY SHOWS “E1” OR “E2” 22
EPREL 22
WARRANTY AND AFTER SALES SERVICE 23
WARRANTY 23

- 4 -
RU- Содержание
КЛИМАТИЧЕСКИЕ ЗОНЫ 29
ЭЛЕМЕНТЫ УПРАВЛЕНИЯ - ОДНА И ДВЕ ЗОНЫ 33
ВКЛЮЧЕНИЕ / ВЫКЛЮЧЕНИЕ ПИТАНИЯ 33
ИЗМЕНЕНИЕ ТЕМПЕРАТУРЫ 33
ВЫБОР ОПТИМАЛЬНОЙ ТЕМПЕРАТУРЫ 34
ВНУТРЕННЕЕ ОСВЕЩЕНИЕ 34
РЕЖИМ НАСТРОЕК 34
ИЗМЕНЕНИЕ ЕДИНИЦЫ ИЗМЕРЕНИЯ ТЕМПЕРАТУРЫ С ºF/ºC И НАОБОРОТ 34
ЯРКОСТЬ ПОДСВЕТКИ ДИСПЛЕЯ 34
ЯРКОСТЬ ПОДСВЕТКИ ВНУТРИ УСТРОЙСТВА 34
ИЗМЕНЕНИЕ ЗВУКОВЫХ СООБЩЕНИЙ 34
ВЛАЖНОСТЬ ВНУТРИ 35
ДИСПЛЕЙ ТЕМПЕРАТУРЫ 35
SILENT MODE (БЕСШУМНЫЙ РЕЖИМ) 35
РЕЖИМ ДИНАМИЧЕСКОГО ОХЛАЖДЕНИЯ 35
РЕЖИМ ВЫХОДНЫЕ 35
ТЕМПЕРАТУРНЫЙ СИГНАЛ ТРЕВОГИ 35
СНЯТИЕ ПОЛКИ 36
ЧИСТКА 36
ЕСЛИ УСТРОЙСТВО НЕ РАБОТАЕТ, ПРОВЕРЬТЕ 36
ЕСЛИ УСТРОЙСТВО РАБОТАЕТ, НО НЕ ОЧЕНЬ ХОРОШО, ПРОВЕРЬТЕ 37
ЕСЛИ УСТРОЙСТВО ИЗДАЕТ ШУМ, ПРОВЕРЬТЕ 37
ЕСЛИ ОСВЕЩЕНИЕ НЕ РАБОТАЕТ, ПРОВЕРЬТЕ 37
ЕСЛИ ДВЕРЬ НЕ ЗАКРЫТА ДОЛЖНЫМ ОБРАЗОМ, ПРОВЕРЬТЕ 37
ЕСЛИ НА ДИСПЛЕЕ ОТОБРАЖАЮТСЯ «E1» ИЛИ «E2», 37
EPREL 37
ГАРАНТИЯ 38

- 5 -
KK- Мазмұны
КЛИМАТИКАЛЫҚ ЖІКТЕМЕ 44
БАСҚАРУ ЭЛЕМЕНТТЕРІ - БІР ЖӘНЕ ЕКІ АЙМАҚ 48
ҚУАТТАНДЫРУДЫ ҚОСУ / СӨНДІРУ 48
ТЕМПЕРАТУРАНЫ ӨЗГЕРТУ 48
ОҢТАЙЛЫ ТЕМПЕРАТУРАНЫ ТАҢДАУ 49
ІШКІ ЖАРЫҚТАНДЫРУ 49
ТЕҢШЕУ РЕЖИМІ 49
ТЕМПЕРАТУРА БІРЛІГІНІҢ ºF/ºC ЖӘНЕ КЕРІСІНШЕ ӨЗГЕРУІ. 49
ДИСПЛЕЙ КӨМЕСКІ ЖАРЫҒЫНЫҢ АШЫҚТЫҒЫ 49
ҚҰРЫЛҒЫ ІШІНДЕГІ КӨМЕСКІ ЖАРЫҚТЫҢ АШЫҚТЫҒЫ 49
ДЫБЫСТЫҚ ХАБАРЛАМАЛАРДЫ ӨЗГЕРТУ 49
ІШКІ ЫЛҒАЛДЫЛЫҚ 50
ТЕМПЕРАТУРА БЕЙНЕБЕТІ 50
SILENT MODE (ШУСЫЗ РЕЖИМ) 50
ДИНАМИКАЛЫҚ СУЫТУ РЕЖИМІ 50
ДЕМАЛЫС РЕЖИМІ 50
ТЕМПЕРАТУРАЛЫҚ ДАБЫЛ СИГНАЛЫ 50
СӨРЕНІ АЛУ 51
ТАЗАРТУ 51
ҚҰРЫЛҒЫ ЖҰМЫС ІСТЕМЕСЕ, КЕЛЕСІНІ ТЕКСЕРІҢІЗ 51
ҚҰРЫЛҒЫ НАШАР ЖҰМЫС ІСТЕП ТҰРСА, КЕЛЕСІНІ ТЕКСЕРІҢІЗ 52
ҚҰРЫЛҒЫДАН ШУЫЛ ЕСТІЛСЕ, КЕЛЕСІНІ ТЕКСЕРІҢІЗ 52
ЖАРЫҚТАНДЫРУ ЖҮЙЕСІ ЖҰМЫС ІСТЕМЕЙ ТҰРСА, КЕЛЕСІНІ ТЕКСЕРІҢІЗ 52
ЕСІК ТИІСІНШЕ ЖАБЫЛМАҒАН БОЛСА, КЕЛЕСІНІ ТЕКСЕРІҢІЗ 52
БЕЙНЕБЕТТЕ «E1» НЕМЕСЕ «E2» КӨРСЕТІЛЕДІ, 52
КЕПІЛДІК 53

- 6 -
UK- Зміст
КЛІМАТИЧНИЙ КЛАС 59
ЕЛЕМЕНТИ КЕРУВАННЯ - ОДНА І ДВІ ЗОНИ 63
ВМИКАННЯ / ВИМИКАННЯ ЖИВЛЕННЯ 63
ЗМІНА ТЕМПЕРАТУРИ 63
ВИБІР ОПТИМАЛЬНОЇ ТЕМПЕРАТУРИ 64
ВНУТРІШНЄ ОСВІТЛЕННЯ 64
РЕЖИМ НАЛАШТУВАНЬ 64
ЗМІНА ОДИНИЦІ ВИМІРУ ТЕМПЕРАТУРИ З ºF/ºC І НАВПАКИ 64
ІНТЕНСИВНІСТЬ ПІДСВІЧУВАННЯ ДИСПЛЕЯ 64
ІНТЕНСИВНІСТЬ ПІДСВІЧУВАННЯ ВСЕРЕДИНІ ПРИСТРОЮ 64
ЗМІНА ЗВУКОВИХ ПОВІДОМЛЕНЬ 64
ВОЛОГІСТЬ УСЕРЕДИНІ 64
ДИСПЛЕЙ ТЕМПЕРАТУРИ 65
SILENT MODE (ТИХИЙ РЕЖИМ) 65
РЕЖИМ ДИНАМІЧНОГО ОХОЛОДЖЕННЯ 65
РЕЖИМ ВИХІДНІ 65
ТЕМПЕРАТУРНИЙ СИГНАЛ ТРИВОГИ 65
ЗНЯТТЯ ПОЛИЦЬ 66
ОЧИЩЕННЯ 66
ЯКЩО ПРИСТРІЙ НЕ ПРАЦЮЄ, ПЕРЕВІРТЕ 66
ЯКЩО ПРИСТРІЙ ПРАЦЮЄ, АЛЕ НЕ ДУЖЕ ДОБРЕ, ПЕРЕВІРТЕ 67
ЯКЩО ПРИСТРІЙ ВИДАЄ ШУМ, ПЕРЕВІРТЕ 67
ЯКЩО ОСВІТЛЕННЯ НЕ ПРАЦЮЄ, ПЕРЕВІРТЕ 67
ЯКЩО ДВЕРЦЯТА НЕ ЗАЧИНЕНІ НАЛЕЖНИМ ЧИНОМ, ПЕРЕВІРТЕ 67
ЯКЩО НА ДИСПЛЕЇ ВІДОБРАЖАЮТЬСЯ «E1» АБО «E2», 67
EPREL 67
ГАРАНТІЯ 68

- 7 -
RO- Cuprins
INSTALAREA SI CONDITIILE DE LUCRU ALE UTILAJULUI 73
CLASA CLIMATICĂ 74
SFATURI PRACTICE 74
DESPACHETARE 76
ELEMENTE DE CONTROL 78
ELEMENTE DE CONTROL - UNA ȘI DOUĂ ZONE 78
PORNIRE / OPRIRE ALIMENTAREA 78
SCHIMBAREA TEMPERATURII 78
ALEGEREA TEMPERATURII OPTIME 79
ILUMINATUL INTERIOR 79
MODUL DE SETĂRI 79
SCHIMBAȚI UNITATEA DE TEMPERATURĂ DE LA ºF/ºC ȘI INVERS 79
INTENSITATEA ILUMINĂRII AFIȘAJULUI 79
INTENSITATEA LUMINII DE FUNDAL ÎN INTERIORUL DISPOZITIVULUI 79
MODIFICAREA MESAJELOR AUDIO 79
UMIDITATEA ÎNĂUNTRU 80
AFIȘAJUL TEMPERATUREI 80
SILENT MODE (MOD SILENȚIOS) 80
MOD DE RĂCIRE DINAMIC 80
MOD DE WEEKEND 80
ALARMA TEMPERATURII 80
SCOATEREA RAFTURILOR 81
CURĂŢARE 81
DACĂ DISPOZITIVUL NU FUNCȚIONEAZĂ, VERIFICAȚI 81
DACĂ DISPOZITIVUL FUNCȚIONEAZĂ, DAR NU FOARTE BINE, VERIFICAȚI 82
DACĂ DISPOZITIVUL PRODUCE ZGOMOT, VERIFICAȚI 82
DACĂ ILUMINAREA NU FUNCȚIONEAZĂ, VERIFICAȚI 82
DACĂ UȘA NU ESTE ÎNCHISĂ CORECT, VERIFICAȚI 82
DACĂ PE AFIȘAJ SE APRINDE “E1” SAU “E2” 82
EPREL 82
GARANŢIA 83

- 8 -
HR- Sadržaj
KLIMATSKI RAZRED 88
UPRAVLJAČKI ELEMENTI - JEDNA I DVIJE ZONE 91
UKLJUČENJE / ISKLJUČENJE NAPAJANJA 91
PROMJENA TEMPERATURE 91
IZBOR OPTIMALNE TEMPERATURE 92
UNUTRAŠNJE OSVJETLJENJE 92
MODUS POSTAVKI 92
PROMJENA JEDINICE TEMPERATURE S ºF/ºC I OBRNUTO. 92
JASNOĆA OSVJETLJAVANJA ZASLONA 92
JASNOĆA OSVJETLJAVANJA UNUTRAŠNJOSTI UREĐAJA 92
PROMJENA ZVUČNIH PORUKA 92
ZASLON TEMPERATURE 93
SILENT MODE (TIHI MODUS RADA) 93
MODUS DINAMIČNOG HLAĐENJA 93
VIKEND MODUS 93
ALARM TEMPERATURE 93
VAĐENJE POLICA 94
ČIŠĆENJE 94
AKO UREĐAJ NE RADI, TREBA PROVJERITI: 94
AKO UREĐAJ RADI, ALI NE POTPUNO PRAVILNO, PROVJERITI 95
AKO JE UREĐAJ BUČAN, PROVJERITI 95
AKO NE RADI OSVJETLJENJE, TREBA PROVJERITI 95
AKO VRATA UREĐAJA NISU PRAVILNO ZATVORENA, PROVJERITI: 95
AKO NA ZASLONU SVIJETLI “E1” ILI “E2” 95
JAMSTVO 96

- 9 -
SR- Pregled sadržaja
KLIMATSKA KLASA 101
UPRAVLJAČKI ELEMENTI - JEDNA I DVE ZONE 106
UKLJUČENJE / ISKLJUČENJE NAPAJANJA 106
PROMENA TEMPERATURE 106
IZBOR OPTIMALNE TEMPERATURE 107
UNUTRAŠNJE OSVETLJENJE 107
MODUS PODEŠAVANJA PARAMETARA 107
PROMENA JEDINICE TEMPERATURE S ºF/ºC I OBRNUTO. 107
JASNOĆA OSVETLJAVANJA DISPLEJA 107
JASNOĆA OSVETLJAVANJA UNUTRAŠNJOSTI APARATA 107
PROMENA ZVUČNIH PORUKA 107
VLAŽNOST UNUTRAŠNJOSTI 107
DISPLEJ TEMPERATURE 107
SILENT MODE (TIHI MODUS RADA) 108
MODUS DINAMIČNOG HLAĐENJA 108
MODUS VIKEND 108
ALARM TEMPERATURE 108
FUNKCIЈA PUSH TO OPEN 108
PОDЕŠAVANЈЕ ОSЕTLЈIVОSTI VRATA NA PRITISAK 108
VAĐENJE POLICA 109
ČIŠĆENJE 109
AKO APARAT NE RADI, TREBA PROVERITI: 109
AKO APARAT RADI, ALI NE POTPUNO PRAVILNO, PROVERITI 110
AKO JE APARAT BUČAN, PROVERITI 110
AKO NE RADI OSVETLJENJE, TREBA PROVERITI 110
AKO VRATA APARATA NISU PRAVILNO ZATVORENA, PROVERITI: 110
AKO NA DISPLEJU SVETLI “E1” ILI “E2” 110
GARANCIJA 111

- 10 -
BG- Cъдържание
КЛИМАТИЧЕН КЛАС 117
ЕЛЕМЕНТИ НА УПРАВЛЕНИЕТО - ЕДНА И ДВЕ ЗОНИ 121
ВКЛЮЧВАНЕ/ИЗКЛЮЧВАНЕ НА ЗАХРАНВАНЕТО 121
СМЯНА НА ТЕМПЕРАТУРАТА 121
ИЗБОР НА ОПТИМАЛНА ТЕМПЕРАТУРА 122
ВЪТРЕШНО ОСВЕТЛЕНИЕ 122
РЕЖИМ НАСТРОЙКИ 122
СМЯНА НА ЕДИНИЦАТА ЗА ТЕМПЕРАТУРА ОТ ºF/ºC И ОБРАТНО 122
ИНТЕНЗИВНОСТ НА ПОДСВЕТКАТА НА ДИСПЛЕЯ 122
ИНТЕНЗИВНОСТ НА ПОДСВЕТКАТА ВЪТРЕ В УРЕДА 122
СМЯНА НА ЗВУКОВИТЕ СЪОБЩЕНИЯ 122
ДИСПЛЕЙ НА ТЕМПЕРАТУРАТА 123
SILENT MODE (ТИХ РЕЖИМ) 123
РЕЖИМ ДИНАМИЧНО ОХЛАЖДАНЕ 123
РЕЖИМ УИКЕНД 123
АЛАРМА НА ТЕМПЕРАТУРАТА 123
ИЗВАЖДАНЕ НА РАФТОВЕТЕ 124
ПОЧИСТВАНЕ 124
АКО УРЕДЪТ НЕ РАБОТИ, ТРЯБВА ДА ПРОВЕРИТЕ 124
АКО УРЕДЪТ РАБОТИ, НО НЕ МНОГО ДОБРЕ, ТРЯБВА ДА ПРОВЕРИТЕ 125
АКО УРЕДЪТ ГЕНЕРИРА ШУМ, ТРЯБВА ДА ПРОВЕРИТЕ 125
АКО ОСВЕТЛЕНИЕТО НА РАБОТИ, ТРЯБВА ДА ПРОВЕРИТЕ 125
АКО ВРАТАТА НЕ Е ЗАТВОРЕНА ПРАВИЛНО, ТРЯБВА ДА ПРОВЕРИТЕ 125
АКО ДИСПЛЕЯТ ПОКАЗВА “E1” ИЛИ “E2” 125
EPREL 126
ГАРАНЦИЯ 127

- 11 -
Dear customer,
From now on, your daily housework will be easier
than ever before. Your appliance is excep-
onally easy to use and extremely ecient. Aer
reading these Operang Instrucons, operang the
appliance will be easy.
Before being packaged and leaving the manufacturer,
the appliance was thoroughly checked with regard to
safety and funconality.
Before using the appliance, please carefully read
these Operang Instrucons. By following these
instrucons carefully you will be able to avoid any
problems in using the appliance. It is important to
keep these Operang Instrucons and store them in a
safe place so that they can be consulted at any me.
Follow these instrucons carefully in order to avoid
possible accidents.
Sincerely,

- 12 -
GUIDELINES CONCERNING
THE SAFETY OF USE
• The appliance is intended for household use only.
• The manufacturer reserves the right to introduce
changes which do not aect the operation of the
appliance.
• The Manufacturer shall not be held liable for
damage arising from the failure to observe the
instructions contained in this manual.
• Keep this manual for future reference, or to pass
it over to the next user.
• This appliance is not intended for use by persons
(including children) with limited physical or men-
tal capabilities and persons who lack experience
or familiarity with the appliance.
• Do not allow children to use the appliance. Do
not allow them to play with the appliance. They
must not climb inside the drawers and swing on
the doors.
• The appliance operates properly at the ambient
temperature (see product che). Do not use it in
the cellar, unheated summer cottage during au-
tumn and winter.
• When placing, moving, lifting the appliance, do
not hold the door handles, do not pull the con-
denser at the rear part of the refrigerator and do
not touch the compressor unit.
• Pull the plug out from the mains socket before
each maintenance activity. Do not pull on the
cord, but hold the body of the plug instead.
• The “cracking” sound, which the appliance may
emit is caused by the expansion and contraction
of parts as a result of temperature variations.
• For safety reasons do not repair the appliance
yourself. Repairs carried out by persons who do
not have the required qualications may result in
serious danger for the user of the appliance.

- 13 -
• Make sure you do not damage the cooling sys-
tem, by puncturing the refrigerant pipes in the
evaporator or breaking the pipes. The refrigerant
is ammable. If the refrigerant makes contact
with the eyes, rinse them with clean water and
call for medical assistance immediately.
• Important! If the power cord is damaged, it should
be replaced by the manufacturer or specialist re-
pair centre or a qualied person in order to avoid
danger.
• When performing activities, such as cleaning,
maintenance or moving, the appliance must be
completely disconnected from power supply (by
pulling the plug out from the socket)
• This appliance can be used by children aged 8
years and older or by persons with physical, men-
tal or sensory handicaps, or by those who are
inexperienced or unfamiliar with the appliance,
provided they are supervised or have been in-
structed how to safely use the appliance and are
familiar with risks associated with the use of the
appliance. Ensure that children do not play with
the appliance. Cleaning and maintenance of the
appliance should not be performed by children
unless they are 8 years or older and are super-
vised by a competent person.
• Do not clean the appliance with steam
• Keep the appliance and its power cord away from
children under 8 years old.
• Do not immerse the power cord or plug in water.
• Keep cord away from heated surfaces.
• Do not allow the connection cord hanging over
the edge of a table or counter.
• Do not use any electrical appliances inside the
chamber
• Do not use any tools to speed up the defrosting
process
• Regularly clean the ventilation openings (in case
of built-in appliances or those installed under the
worktop)

- 14 -
• This appliance is not designed to be controlled
by electronic timers or other devices that cut o
power directly or remotely.
• In case of accidental spillage of liquids on electri-
cal components, immediately unplug your appli-
ance from the power supply.
• Make sure that the power cord is not crushed or
damaged during installation.
• Disable the appliance before disposing of it. Un-
plug the appliance from the power supply and cut
o the power cord. To prevent children or animals
from being trapped in the appliance, remove the
doors, hinges and locks.
• Note: If the appliance does not have a freezer
compartment (
!
), it is not suitable for freez-
ing foodstus.
• Pursuant to Commission Regulation (EU)
2019/2019, the minimum availability period for
spare parts necessary to repair the appliance is 7
or 10 years depending on the type and purpose
of the spare part.
• The list of spare parts and the ordering procedure
are available on the websites of the manufactur-
er, importer or an authorized representative.
INSTALLATION AND OPER-
ATING CONDITIONS OF THE
APPLIANCE
• Connect the appliance to the power supply 24 hours after unpacking
and setting in the nal location.
• Take the product out of the package, remove the scotch tape protect-
ing the door and the equipment. Any remaining adhesive stains may
be removed with a mild washing agent.
• Clean the interior surface of the cooler and the elements of the equip-
ment with a washing agent dissolved in lukewarm water, then wipe
it dry.
• Place the cooler on an even, at and stable surface, in dry, aired and
shaded room, far from the heat sources such as: oven, hob, central
heating radiators, central heating pipes, hot water installation, etc.
• On the exterior surface of the product may be a protective foil, this
foils should be removed.
• Make sure the appliance is placed in a horizontal position by screwing
in the 2 adjustable front legs (g. 1)

- 15 -
• Keep free space on the sides and rear of the appliance (see installa-
tion drawing)
• When you install your wine cooler inside a furniture cabinet, make
sure that the ventilation grille located in the bottom of the appliance
is not blocked.
• Odours may be released when you rst start your appliance. It will
dissipate when the interior of the appliance cools down
• When you rst start your wine cooler, the compressor will run contin-
uously until the desired temperature is reached inside the chamber
• When you unplug your appliance from the power supply, it is recom-
mended to wait 5 minutes before you plug it back in. This will reduce
the risk of damage to the compressor.
• On selected models, the correct temperature will be shown on the
display only a few hours after the wine cooler has been put into op-
eration
• This appliance should be connected to AC 220-240V 50Hz supply
socket. The socket must be tted properly, and must be supplied with
an earthing conduit and a 10A fuse.
• It is a legal requirement that the appliance is properly earthed. The
manufacturer will not be held liable for any damage or injury which
may result from the failure to full this requirement.
• Do not use adapters, multiple sockets and two-wire extension leads.
If it is necessary to use the extension lead, it must be equipped with
a protection ring and a single socket and must have a VDE/GS safety
certicate.
• If an extension lead is used (with a protection ring and safety certif-
icate), its socket must be located at a safe distance, away from the
sinks, and must not be in a place where it could be ooded by water
or waste water.
• Make sure the appliance can be easily disconnected from the mains,
either by pulling the plug out of the mains socket, or by switching the
two-pole switch o.
Climate range
The information about the climate range of the appliance is provided
on the rated plate. It indicates at which ambient temperature (that is,
room temperature, in which the appliance is working) the operation of
the appliance is optimal (proper).
Climate class Allowable ambient temperature
SN Extended
Temperate
This refrigeration appliance is intended for use at an
ambient temperature ranging between 10°C and 32°C
N Temperate This refrigeration appliance is intended for use at an
ambient temperature ranging between 16 °C and 32°C
ST Subtropical This refrigeration appliance is intended for use at an
ambient temperature ranging between 16 °C and 38 °C
T Tropical This refrigeration appliance is intended for use at an
ambient temperature ranging between 16 °C and 43 °C

- 16 -
PRACTICAL EVERYDAY TIPS
• If the light inside the appliance remains turned on, keep in mind that
the temperature inside the appliance will be higher
• Temperature inside the appliance depends on the amount and type
of stored wine bottles
• To ensure user safety and high quality of stored wine, do not install
the appliance in damp rooms
• Store wine bottles in designated spaces
• Your wine cooler has a limited capacity. Do not place more bottles in
your wine cooler than recommended in specication
• Do not open the wine cooler door if it is not necessary
• Do not cover the shelves with aluminium foil or other material. This
blocks the air circulation inside the appliance
• To avoid damage to the door seal, make sure that the door is com-
pletely open before pulling out the shelf. The shelves should be in-
serted as far as possible, otherwise the shelf may deform and dam-
age the door seal.
• Do not extend the loaded shelves beyond the extension limit (about
1/3 of the shelf length)
• This appliance is designed for storing bottles of wine. Do not use it
for any other purpose.
• Temperature stability is very important when storing wine.
• Exposing your wine cooler to sunlight, signicant temperature uctu-
ations, high humidity and vibrations may cause the wine to go bad.
• In periods of high humidity, condensed water vapour may appear on
the outer surfaces of the glass door. To prevent this, install the appli-
ance in a dry, adequately ventilated room.
• Selected models have an external handle. You need to install it on
your own. Do not use electric tools for this purpose (g. 3*). To do
this, pull the door seal slightly to the side and place the screws on
the inside of the door. Align the handle with the holes on the outside
of the door and tighten the screws with a screwdriver. Reinstall the
door seal.
• The maximum capacity of the appliance is given in the product sheet
enclosed with the wine cooler. This capacity applies to standard 0.75
litre bottles of Bordeaux.
• Selected models have an Anti-tip kit. Install it according to the en-
closed diagram (g. 6*).
• This refrigeration appliance is intended for use as a built-in appliance.
• To achieve the most eective food preservation for the longest pos-
sible time and to avoid wasting any food, position the products as
shown in Figure 12. In addition, this gure illustrates the layout of
drawers, baskets and shelves, which allows the most ecient use of
energy.
• Optimal temperature and storage conditions will extend product shelf
life and optimize electricity consumption. Optimal storage tempera-
ture range should be stated on the food product packaging.
*According to the model

- 17 -
UNPACKING
During transportation, pro-
tective packaging was used to
protect the appliance against
any damage. After unpacking,
please dispose of all elements
of packaging in a way that will
not cause damage to the envi-
ronment. All materials used for
packaging the appliance are environmentally
friendly; they are 100% recyclable and are marked
with the appropriate symbol.Important! Packaging
materials (bags, polyethylene, polystyrene, etc.)
should be kept away from children during unpack-
ing.
DISPOSAL OF OLD APPLIANCE
In accordance with European Direc-
tive 2012/19/EU and local legislation
regarding used electrical and elec-
tronic goods, this appliance is marked
with the symbol of the crossed-out
waste container. This marking indi-
cates that the appliance must not
be disposed of together with other
household waste after it has been
used. The user is obliged to hand it
over to waste collection centre collecting used elec-
trical and electronic goods. The collectors, includ-
ing local collection points, shops and local authori-
ty departments provide recycling schemes. Proper
handling of used electrical and electronic goods
helps avoid environmental and health hazards re-
sulting from the presence of dangerous compo-
nents and the inappropriate storage and process-
ing of such goods.

- 18 -
CONTROLS
Appliance controls- single and dual zone
The control panel is shown in gure 4. For reference it is also shown
below:
Single zone
Dual zone
– Power button
– Light button
– “+” button
– “-” button
Press and hold the power button for one second to switch the wine cooler
on.
Press and hold the power button for ve seconds to switch the wine
cooler o.
Note: Turn o your appliance by unplugging the power cord from the
wall outlet.
To change the temperature
• Press the “+” or “-” buttons until the required temperature is shown
on the display.
• The Preset temperature is 12˚C / 54˚ F. (for single zone models)
• For dual zone models: For the upper/left zone, the default temper-
ature setting is 8°C/46°F, and for the lower/right zone, the default
temperature setting is 12°C/54°F.
• To view the set temperature, touch the “+” or “-” button at any time
and the set temperature will ash in the LED display for ve seconds.
• The display shows the current internal temperature when the wine
cooler is on.
Note: The temperature in the lower zone must be set either the same as
or higher than the temperature in the upper zone.

- 19 -
Optimal temperature selection
Whilst wine is best stored at temperatures between 13 and 15˚ C, your
wine can also be stored at drinking temperature. For red wine this is be-
tween 15 and 17˚C, and for white wine between 12 and 13˚C.
Indoor lighting
Press and hold the light button for 5 seconds to turn the light on or o.
Activation is indicated a dot on the display.
Settings mode
Some settings are available depending on the mode.
Set the temperature unit °F or °C.
Touch and hold for 5 seconds, then use and to set the unit. Touch
to conrm. Touch for 5 seconds to exit.
Set the display backlight intensity
Touch and hold for 5 seconds, then touch once. Now use and
to set the display backlight intensity. The default setting is d1. Touch
to conrm. Touch for 5 seconds to exit.
Set the appliance interior lighting intensity.
Touch and hold for 5 seconds, then touch twice. Now use and
to set the interior lighting intensity. The default setting is L3 Touch to
conrm. Touch for 5 seconds to exit.
Set sounds.
Touch and hold for 5 seconds, then touch four times. Now use
and to set the sounds. The default setting is S1. The possible settings
are as follows:
S0: Touch sensor sound ON / Audio alarm OFF
S1: Touch sensor sound ON / Audio alarm ON
S2: Touch sensor sound OFF / Audio alarm OFF
S3: Touch sensor sound OFF / Audio alarm ON
Touch to conrm. Touch for 5 seconds to exit.
Internal Humidity
According to the model wine coolers are equipped with a humidity sys-
tem to maintain optimal humidity within the wine cooler. Fill the humidity
reservoir approximately 3/4 full with water. Place the reservoir on the
runners on the top shelf as shown in g. 2. Ensure it is located correctly
to prevent water spillage. Check the water level regularly and rell if
required.
Temperature display
The temperature display will show the current internal temperature.
The display ashes:
• When a dierent temperature is being set
• If the internal temperature is +/- 5˚ away from the set temperature.
This serves as a warning to prevent damage to the contents of the appli-
ance should the temperature be too high.
Silent Mode
Touch and hold for 5 seconds, then touch three times. Now use
an to set the silent mode (F0). When the required temperature is
reached, the appliance operates without the fan. This is the default mode
of the wine cooler.

- 20 -
Dynamic cooling mode
Touch and hold for 5 seconds, then touch three times. Now use
and to set the dynamic mode (F1- half time, F2- full time). The fan
alternately turns on and o to maintain air circulation even when the re-
quired temperature is reached. This ensures uniform and stable humid-
ity and temperature in the wine cooler for ideal long-term wine storage
conditions.
Weekend mode
This will switch o the displays, interior light and audible alarms. The
cooling process will continue.
To switch the Weekend mode on, touch and hold the power and light
keys simultaneously for ve seconds. The indicator light will ash four
times and conrm the mode is on. Mode will switch o automatically af-
ter 96 hours, but to switch the mode o at any time, touch and hold the
power and light keys simultaneously for ve seconds.
Temperature alarm
If the temperature rises or falls outside the set temperature range, an
alarm will sound and the display will ash. This may be because:
• The wine cooler has not yet reached the set temperature (when rst
switched on).
• There has been a power failure.
• The wine cooler has been overloaded.
• The door is not closed properly.
Push To Open feature
The function is active when the appliance is connected to the power sup-
ply. Push the door slightly toward the appliance, the door will be slightly
ajar, then you can open it all the way.
Do not block the door during automatic opening, it may damage the
mechanism.
Do not block the pin, it is a small element that opens the door. If the pin
is stuck preventing the door from closing, unplug the appliance from the
wall power outlet the pin should return to the correct position after about
10 seconds.
The Push To Open feature operates properly after about 3 seconds after
the door is closed or opened. If the door does not open immediately after
closing it, wait a while.
Door pressure sensitivity adjustment
To change the door pressure sensitivity for Push To Open feature, do the
following:
• Open the door
• Turn the screw at the top centre of the door counter-clockwise to in-
crease sensitivity and clockwise to decrease sensitivity.
• Close the door and check that it is properly adjusted.
Turning the adjustment screw too far may cause the door to open auto-
matically, or the door may not open even with a strong push.
This manual suits for next models
9
Table of contents
Languages:
Popular Wine Cooler manuals by other brands
NODOR
NODOR NorCare V36BK Installation, use and maintenance instructions
Ivation
Ivation IVFWCC181LBW user guide
Monogram
Monogram ZDWI240 installation instructions

Kucht
Kucht K430D Installation guide and user's manual
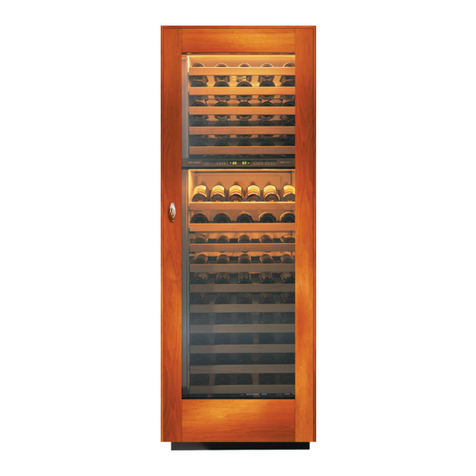
Sub-Zero
Sub-Zero 427 Quick reference guide
Sub-Zero
Sub-Zero 427RB installation instructions
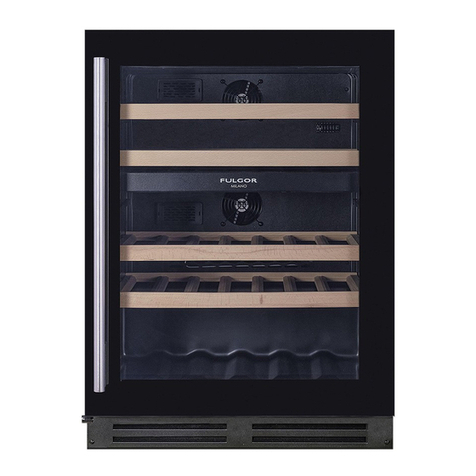
Fulgor Milano
Fulgor Milano FWC 8200 U TC Instructions for installation and use

Cavist
Cavist 46 instruction manual

Vestfrost
Vestfrost FUNCTION Service manual

GE
GE GWS03ADWSS Owner's manual and installation
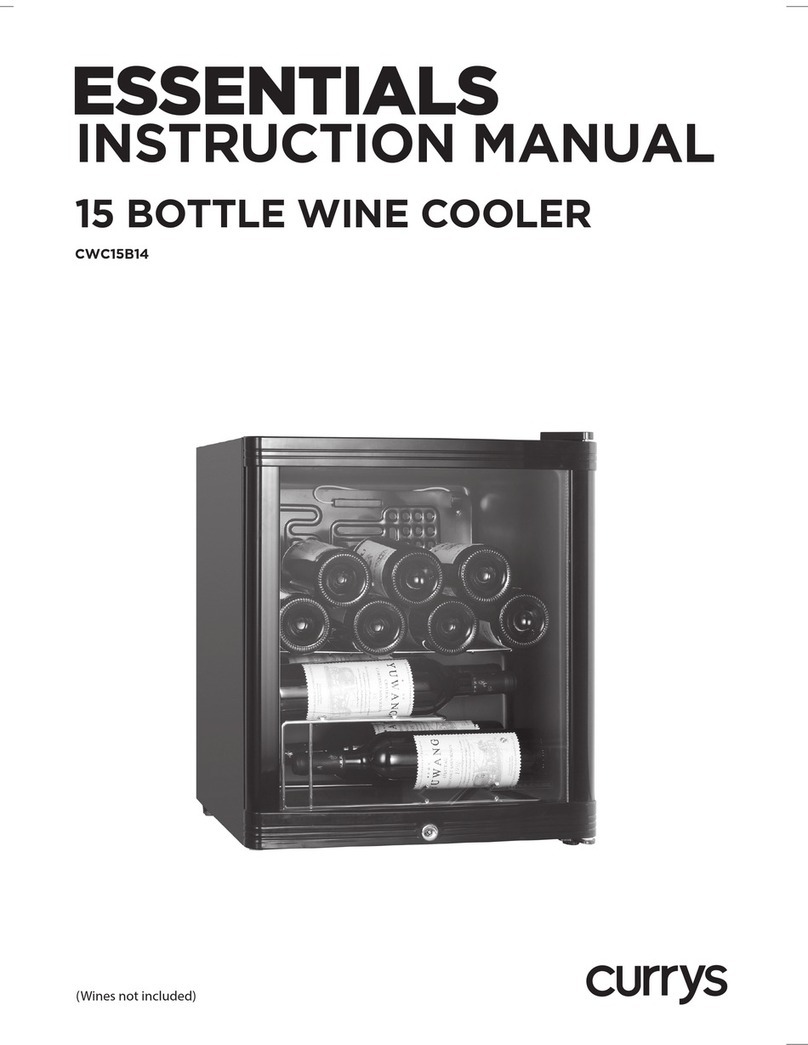
Currys Essentials
Currys Essentials CWC15B14 instruction manual
Klarstein
Klarstein RESERVA 8 UNO manual
