HANSCRAFT IN.K300 User manual

USER MANUAL
IN.K300

2
YOUR COMFORT IS OUR
COMMAND
Our design process is heavily inuenced
by Martin Prochazka, MSc., the
physiotherapist of Czech leading
sportsmen, who oversees that all our
hot tubs always oer both a comfortable
and highly eective massage. They will
further charm you with their modern,
appealing appearance, designed by
Ondrej Kamenicky, M.Arch.
WE ALWAYS CHOOSE THE
GREEN WAY
Instead of using shell lamination which
creates harmful styrenes as a by-product,
we use high quality GreenShield
materials. They are completely harmless
to both health and nature. On top
of that we recycle all of the leftover
material and introduce it back to the
manufacturing process. That makes us a
close to zero-waste company (97%).
Modern manufacturing

3
PRECISE EXECUTION OF
EVERY DETAIL
We work with the latest technology
and machinery, currently also used in
automotive, aircraft and arms industry.
That enables us to be precise to a
hundredth of a millimeter. Precision
and quality are areas which we never
compromise in.
STRICT QUALITY TESTING
BEFORE SHIPMENT
Not one hot tub leaves our manufacture
hall without a series of strict and
thorough testing procedures. We
test all our products in real life
circumstances which allows us to
eliminate 99% of possible defects and
malfunctions. We are also inspired
by the hardline quality control of TPS
(Toyota Production System).
Modern manufacturing

Contents
1 Hot tub performance parameters . . . . . . . . . . . . . . . . . . . . . . . . . 5
1.1 Performance parameters of CELTIC SPAS hot tubs . . . . . . . . . . . . . . . . . 5
1.2 Performance parameters of PLUG & PLAY hot tubs . . . . . . . . . . . . . . . . . 6
2 Hot tub installation preparation . . . . . . . . . . . . . . . . . . . . . . . . . 6
2.1 Preparation of the place for installation and connection to electricity . . . . . . 7
2.2 Preparation of indoor hot tub installation. . . . . . . . . . . . . . . . . . . . . . . 7
2.3 Preparation of outdoor hot tub installation. . . . . . . . . . . . . . . . . . . . . . 7
3 Hot tub installation . . . . . . . . . . . . . . . . . . . . . . . . . . . . . . . . . . 8
3.1 General information . . . . . . . . . . . . . . . . . . . . . . . . . . . . . . . . . . . . 8
3.2 Filling the hot tub with water . . . . . . . . . . . . . . . . . . . . . . . . . . . . . . 8
3.3 Starting the hot tub power supply . . . . . . . . . . . . . . . . . . . . . . . . . . . 9
3.4 Programming the hot tub control unit with the control panel. . . . . . . . . . . 9
4 Aquatic audio system . . . . . . . . . . . . . . . . . . . . . . . . . . . . . . . . . 9
5 Control panel . . . . . . . . . . . . . . . . . . . . . . . . . . . . . . . . . . . . . . 9
5.1 Panel description . . . . . . . . . . . . . . . . . . . . . . . . . . . . . . . . . . . . . . 9
5.2 Start or stop accessories . . . . . . . . . . . . . . . . . . . . . . . . . . . . . . . . . 10
5.3 Water temperature . . . . . . . . . . . . . . . . . . . . . . . . . . . . . . . . . . . . 10
5.4 OMode . . . . . . . . . . . . . . . . . . . . . . . . . . . . . . . . . . . . . . . . . . . 10
5.5 Program menu . . . . . . . . . . . . . . . . . . . . . . . . . . . . . . . . . . . . . . . 11
5.6 Setting the clock . . . . . . . . . . . . . . . . . . . . . . . . . . . . . . . . . . . . . . 11
5.7 Programmingthelter/purgecycles . . . . . . . . . . . . . . . . . . . . . . . . . . 12
5.8 Settinglterorpurgecyclestarttime . . . . . . . . . . . . . . . . . . . . . . . . . 12
5.9 Settingltercycleduration(notavailableonpurgesystems) . . . . . . . . . . . 12
5.10 Settinglterorpurgecyclefrequency . . . . . . . . . . . . . . . . . . . . . . . . . 13
5.11 Setting economy mode . . . . . . . . . . . . . . . . . . . . . . . . . . . . . . . . . . 13
5.12 Setting economy start time. . . . . . . . . . . . . . . . . . . . . . . . . . . . . . . . 14
5.13 Setting economy duration . . . . . . . . . . . . . . . . . . . . . . . . . . . . . . . . 14
5.14 Setting temperature unit . . . . . . . . . . . . . . . . . . . . . . . . . . . . . . . . . 14
5.15 SmartWinterMode . . . . . . . . . . . . . . . . . . . . . . . . . . . . . . . . . . . . 15
5.16 Cooldown . . . . . . . . . . . . . . . . . . . . . . . . . . . . . . . . . . . . . . . . . . 15
5.17 Water temperature regulation. . . . . . . . . . . . . . . . . . . . . . . . . . . . . . 15
6 Problem solutions . . . . . . . . . . . . . . . . . . . . . . . . . . . . . . . . . . . 16
7 Hot tub care . . . . . . . . . . . . . . . . . . . . . . . . . . . . . . . . . . . . . . . 17
7.1 General information . . . . . . . . . . . . . . . . . . . . . . . . . . . . . . . . . . . . 17
7.2 Removalandcleaningoftheltercartridge . . . . . . . . . . . . . . . . . . . . . 17
7.3 Maintainingthequalityofthewaterinthehottub . . . . . . . . . . . . . . . . . 17
7.4 Replacing the water . . . . . . . . . . . . . . . . . . . . . . . . . . . . . . . . . . . . 19
7.5 Cleaning the outer shell of the hot tub. . . . . . . . . . . . . . . . . . . . . . . . . 19
7.6 Hot tub hygiene and disinfection . . . . . . . . . . . . . . . . . . . . . . . . . . . . 19
7.7 Thermocover . . . . . . . . . . . . . . . . . . . . . . . . . . . . . . . . . . . . . . . . 19
7.8 Upkeepofthethermocoverandupkeepinstructions . . . . . . . . . . . . . . . 19
8 Winter and summer . . . . . . . . . . . . . . . . . . . . . . . . . . . . . . . . . . 20
8.1 Wintertime–usingthehottub,allyearoperation(SLP) . . . . . . . . . . . . . . 20
8.2 Summer time . . . . . . . . . . . . . . . . . . . . . . . . . . . . . . . . . . . . . . . . 21
9 Final information . . . . . . . . . . . . . . . . . . . . . . . . . . . . . . . . . . . 21
9.1 Guarantee conditions . . . . . . . . . . . . . . . . . . . . . . . . . . . . . . . . . . . 21
9.2 Safedisposaloftheproductaftertheservicelife . . . . . . . . . . . . . . . . . . 21
9.3 Warrantyclaimsandrepairservices. . . . . . . . . . . . . . . . . . . . . . . . . . . 21
10 Service table . . . . . . . . . . . . . . . . . . . . . . . . . . . . . . . . . . . . . . 22
11 Supplements . . . . . . . . . . . . . . . . . . . . . . . . . . . . . . . . . . . . . . 22
12 Notes . . . . . . . . . . . . . . . . . . . . . . . . . . . . . . . . . . . . . . . . . . . 22

5
Hot tub performance parameters
1 Hot tub performance parameters
1.1 Performance parameters of CELTIC SPAS hot tubs
Performance parameters
rated voltage: three-phase 230/400 V 50 Hz*
maximum working current: 3× 16 A
current surge: up to 3× 25 A
voltage resistance: 1 250 V/min. without breakdown
insulation resistance: >= 1 M Ω
water resistance (cover): IPX5
protection against electric shock: rst stage
T he product does not use the 400 V phase to phase voltage. It is possible to adjust
it to 1× 230 V, however, this is not recommended due to limitations of the functions.
(For more information on this connection, please refer to the Supplements, p. 22)
Load capacity
heating: 1× 230 V/3 kW/13.6 A
ozone: 1× 230 V/50 – 60 Hz/80 mA
blower: 1× 230 V/0.66 kW/2.9 A
pump 1/2: 0.42/2.2 kW
total input power (depending on type of hot tub): 6 kW/h
protection class: I.
lighting: LED 12 V alternating /10 W
maximum output power: 20 W
moisture resistant speakers: according to equipment
Preparation and electrical connection options – AC three-phase
current 3× 230/400 V/16 A/20 A
Ensure that the hot tub is always connected to a circuit protected by a residual-current
protector with a residual current of 0.03 A. It is necessary to use a Type C or Type D
For your own safety and the safety of your product, please observe the following
instructions. Read the following information carefully and follow the user manual
exactly when using the hot tub to avoid damaging the product or the risk of injury.
This appliance is intended for use by children 8 years of age or older with reduced
physical, sensory or mental capabilities, or lack of experience and knowledge,
provided they are under supervision or have been instructed on the use of the
product and understand the risks. Children must not play with the product.
Cleaning and maintenance must not be performed by children without supervision.

6
Performance parameters/Installation preparation
circuit breaker with a rated current of 16 A (motor circuit breaker) downstream of the
Residual Current protective Device.
Recommended Type C or D circuit breaker (motor circuit breaker)
Hot tubs with two massage motors: 3× 16 A/C or D
Hot tubs with three massage motors: 3× 20 A/C or D
!!!THE HOT TUB MUST ONLY BE CONNECTED BY A PERSON WITH PROFESSIONAL
ELECTRICAL QUALIFICATION IN ACCORDANCE WITH DECREE NO. 50/1978 COLL.!!!
1.2 Performance parameters of PLUG & PLAY hot tubs
Performance parameters
rated voltage: single phase 1× 230 V 60 Hz*
maximum working current: 1× 16 A
voltage resistance: 1 250 V/min. without breakdown
insulation resistance: >= 1 M Ω
water resistance (cover): IPX5
protection against electric shock: rst stage
Load capacity
heating: 1× 230 V/2 kW/13.6 A
ozone: 230 V/50 Hz/80 mA
pump 1/2: 2.2 kW
total input power (depending on type of hot tub): 2.7 kW / h
protection class: I.
lighting: LED 12 VAC/10 W
moisture resistant speakers: according to equipment
2 Hot tub installation preparation
Inspect the hot tub prior to installation! If any part is damaged or missing,
contact the seller immediately! Make sure that all components are in
accordance with your order. Check the hot tub before each use. In the event
of damage, do not use the hot tub!

7
Hot tub installation preparation
2.1 Preparation of the place for installation and connection to
electricity
The hot tub must be installed on a at, suciently strong pad with regard to
the load-bearing capacity of the hot tub. If the hot tub is installed outdoors, we
recommend making a monolithic concrete pad with a minimum thickness of 10 cm. It
is always necessary to choose the load-bearing capacity of the pad with regard to the
dimensions and weight of the hot tub. Consult your building supervisor. The weight is
specied in the technical description of the hot tub.
CELTIC SPAS hot tubs are made for electrical connection of 3× 230/400 V~ alternating
current; it is therefore necessary to use a 3× 16 A/C or D, alternatively 3× 20 A/C or D
circuit breaker and a residual-current device corresponding to this connection. It is
also necessary to have the cable in accordance with the applicable regulations. The
cable must have 4 more usable meters in the place of the hot tub so that it can be
easily routed and connected to the control unit. Do not route the cable under the
whirlpool! PLUG & PLAY hot tubs are made for 230 V electrical connection with an
installed circuit breaker and conductor.
2.2 Preparation of indoor hot tub installation
If the hot tub is installed indoors, safety precautions must be observed. The basic
requirements for the safe operation of the hot tub are anti-slip oors and drainage
of the installation site in the event of a water overow. It is also necessary to
realize that humidity will rise around the hot tub, and this may damage surrounding
electrical appliances. We therefore recommend adapting the installation site to these
conditions. The whirlpool should always be accessible from all sides for future
service. If it is not suciently accessible during the warranty period, the owner is
obliged to provide this access. (Sucient access is generally considered to be at least
60 cm from all sides of the hot tub.)
2.3 Preparation of outdoor hot tub installation
If the hot tub is installed outdoors, safety precautions must be observed. The basic
requirements for the safe operation of the hot tub are anti-slip oors and drainage of
the installation site in the event of a water overow from the hot tub. We therefore
recommend adapting the installation site to these conditions.
NO
YES

8
Hot tub installation
3 Hot tub installation
Attention: the hot tub must be connected pursuant to standards valid in the
Czech Republic according to ČSN 33 2000 -7-701
3.1 General information
For the installation, electrical connection and the rst commissioning of the hot tub,
we recommend using the services of professionally trained technicians. If you decide
to install the hot tub yourself, follow the recommendations below.
a) Carefully remove all packing material in which the hot tub was shipped, and place
the hot tub on the site prepared for installation.
b) Remove the front panel located on the side of the hot tub control panel. Remove
the top cover of the electric switchboard, under which the circuit breaker and
residual-current device (if the hot tub is equipped with them) and the ground
terminal are located. Only a professionally qualied person may connect it to the
power cable.
c) Because your hot tub has been thoroughly tested during the production process,
it is possible that a certain percentage of dirt remains in the technological parts
of the hot tub and on its surface; we therefore recommend that you clean the
surface of the whirlpool rst. Use lukewarm water to clean it. Always clean the
surface with suitable soft cloths. Never use any coarse abrasives or textiles that
could damage the surface of the hot tub. If you decide to use a cleaning product,
this product must not damage the surfaces of the hot tub.
3.2 Filling the hot tub with water
Fill the hot tub with a sucient amount of water. The water level in the hot tub
must never fall below the level of the skimmer. If you nd that there is a water leak
when lling the hot tub with water, stop lling the hot tub until the fault has been
corrected. Hot tubs do not have water softening technology and hard water damages
them. Damage caused by misuse is not covered by the warranty.
a) Fill the whirlpool through the skimmer to prevent the aeration of pumps.
b) Do not ll the hot tub with water warmer than 104 ºF.
c) When the water reaches the desired level, insert the cartridge lter into the
skimmer. When installing it, tilt the lter so that no air bubbles remain in it. After
the air has been removed, install the lter.

9
Installation/Audio system/Control panel
3.3 Starting the hot tub power supply
If the hot tub is connected by a mobile power cable, the power supply cable must not
be loaded by sharp objects or exposed to other inuences. In this case, we recommend
placing the supply cable in a protective cover (protector). Switch on the appropriate
circuit breaker for the hot tub.
3.4 Programming the hot tub control unit with the control panel
Now you can start programming the hot tub. The programming process is described
in the Control panel chapter. After programming the hot tub, cover it with a thermal
cover and let its temperature stabilize. Check the water level in the hot tub regularly.
4 Aquatic audio system
AQUATIC/MY MUSIC audio system (if the hot tub is equipped with it)
To listen to music from an external device, you must rst pair the device from which
you will play the music (PHONE, TABLET, COMPUTER). On the external device, turn
on bluetooth and search for the AQUATIC device. The connection is not coded, and
only one connection can be active at a time. When everything is properly connected,
you can start playing music. All functions such as switching, volume control, etc. are
controlled from the connected device. In some cases, the connection to the audio
system is conditioned by a password, in which case enter 0000 as the password.
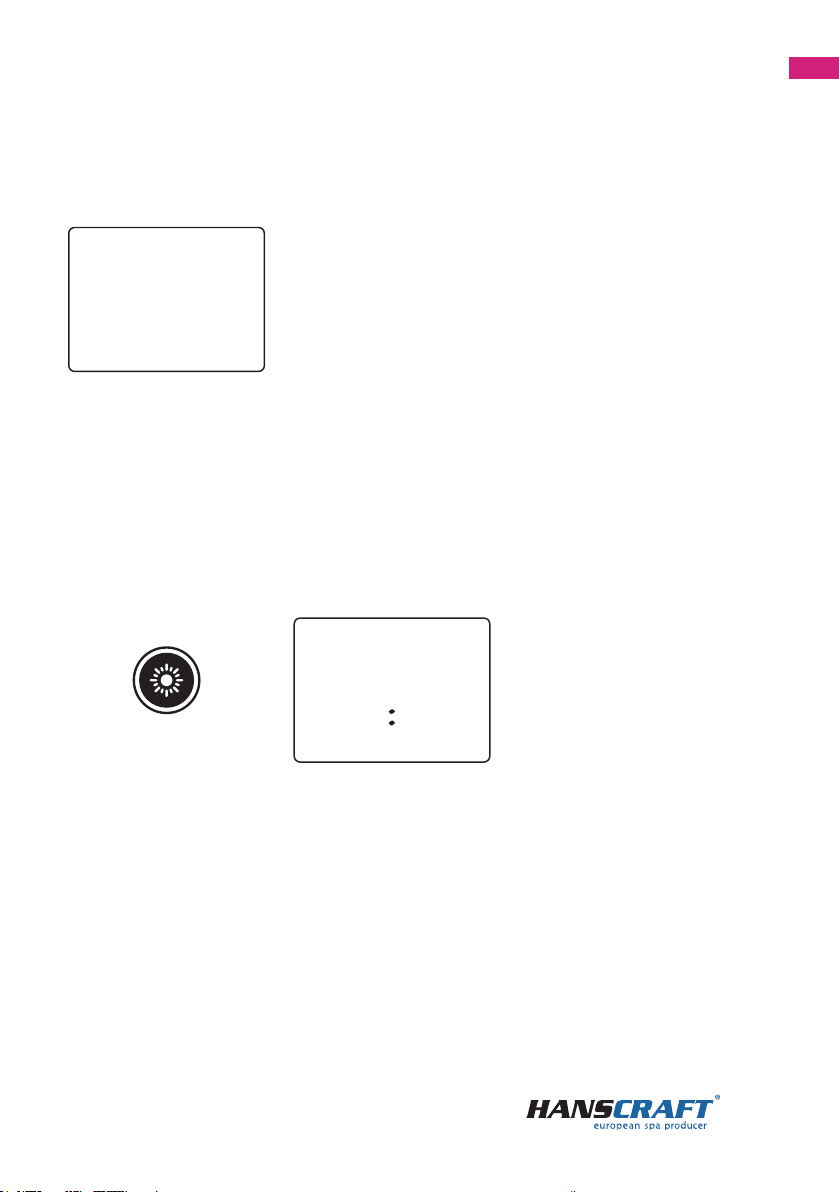
5 Control panel (IN.K300)
5.1 Panel description
jets
lights arrow up
arrow down
8888
AM
PM

10
Control panel
5.2 Start or stop accessories
To start or stop an accessory, press the corresponding button. The indicators light up
when the associated accessory is turned on. If the accessory has more than two states,
press the button until it reaches the desired state. The indicators will ash when the
two-speed pumps are switched on at low speed and will light up at high speed.
5.3 Water temperature
The temperature shown on the screen is the current water temperature. Use the
ARROW Up and ARROW Down buttons to set the desired temperature. The set point
icon will appear at the top of the screen. After 3 seconds without any change to the set
temperature value, the keypad will resume the normal display.
JETS The button is used for quick control of massage jets. In case it
doesn't run ltration, the JETS button must be pressed twice. The
power of water ow nozzles can be adjusted by turning the nozzles
left or right. If so water does not ow through the nozzle, it does
not have to be a fault, the nozzle can only be closed. Not all nozzles
can be regulated in this way. It is also possible to regulate the force
of the massage with the massage engine running, by turning the
valve sucking air into the nozzles located at the upper edge of the
whirlpool.
LIGHTS This button allows switching the lights on.
ARROW UP The arrow up allows selecting an option.
ARROW DOWN The arrow down allows selecting an option.
98f
5.4 Off Mode
Pressing JETS for 5 seconds will enable the O mode. This mode allows you to stop
all outputs including automatic functions such as lter cycle, heat request and smart
winter mode for 30 minutes to perform quick spa maintenance. When O mode is
active, the display will toggle between the “OFF” message, the clock and the water
temperature. The spa light will ash for a few seconds before the end of the
11
Control panel
5.5 Program menu
The program menu is accessible by holding down the Lights key for 5 seconds. In the
program menu the following parameters can be set: clock, lter or purge cycles,
economy mode and temperature units. While in the program menu, use the Arrow
Up or Arrow Down key to adjust the parameters and use the Lights key to jump to
the next parameter. The changes will be saved after the conrmation of the last
parameter only. If there is no action taken for 10 seconds, the system will exit the
program menu without saving any changes.
OOf
PM
1248
LIGHT
(hold for 5 seconds)
30 minutes to warn you that the system is about to resume its normal operation. Press
JETS to restart the system before the expiration of the 30 minute delay. When the
system resumes its normal operation, the display shows “On” for 3 seconds.
5.6 Setting the clock
Enter the program menu by holding down the Lights key for 5 seconds. The display
will show the current clock setting with the hour ashing. “PM” Depending on
factory settings your system may be set to 24-hour time or 12-hour time. Setting
the hour: Use the arrow keys to adjust the hour. Press the Lights key to jump to the
next parameter, the minutes. Setting the minutes: Use the arrow keys to adjust the
minutes. Press the Lights key to jump to the next parameter, the lter or purge start
time (FS).
picture on the next page

12
Control panel
LIGHT
(hold for 5 seconds)
5.7 Programming the filter/purge cycles
Depending on system conguration your spa will perform either a lter or a purge
cycle. The lter cycle menu consists of the following parameters: the start time
(FS), the duration (Fd) and the frequency (FF). The purge cycle menu consists of
the following parameters: the start time (FS) and the frequency (FF). A lter cycle
consists of starting all the pumps and blower in high speed for 1 minute (purge step)
then, the pump associated with the lter will run in low speed for the remaining
duration of the lter cycle (clean step). A purge cycle is used when the spa is
equipped with a 24 hour circulation pump which provides a continuous clean step. It
consists of starting all the pumps and blower in high speed for 1 minute.
5.8 Setting filter or purge cycle start time
The display will show FSXX, “XX” representing the starting hour of the cycle. Use
the arrow keys to adjust the hours. Use the Lights key to jump to the next parameter,
lter duration (Fd).
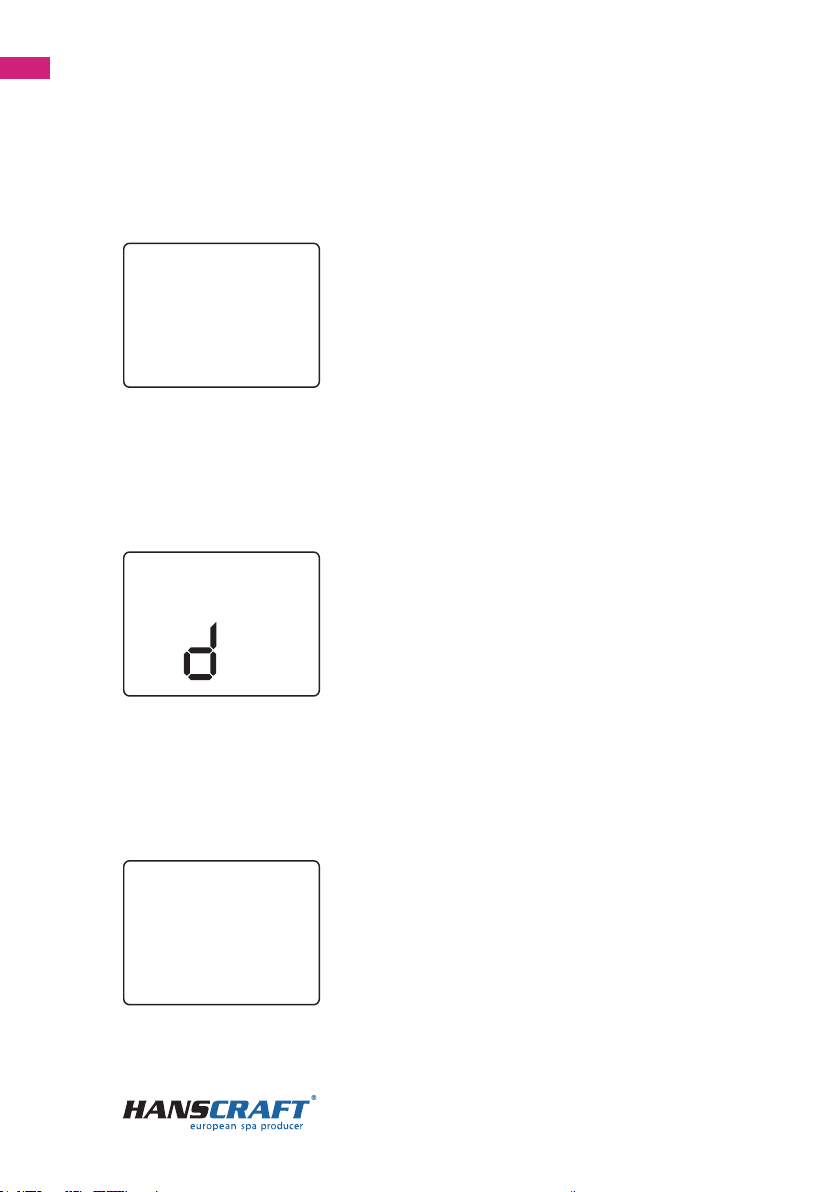
5.9 Setting filter cycle duration
(not available on purge systems)
The display will show Fdxx, “XX” representing the duration in hours of the filter
cycle. Use the arrow keys to adjust the duration. Use the Lights key to jump to the
next parameter, filter or purge frequency (FF).
PM
1248
FS03

13
Control panel
5.10 Setting filter or purge cycle frequency
The display will show FFXX, “XX” representing the number of cycles per day. Use the
arrow keys to adjust the frequency. Use the Lights key to jump to the next parameter,
economy mode (EP).
The “Filter” indicator lights up when lter is on and ashes when suspended.
Setting economy mode.
FF03
EP 1
F 03
(0 = no ltration, 24 = continuous ltration) It is not recommended to set this to “0”.
5.11 Setting economy mode*
This mode allows you to lower the temperature set point of the spa by 20 °F (11 °C)
during a certain period of the day. The display will show EPX, “X” representing the state
of the programmed economy (0 = disabled, 1 = enabled). Use the arrow keys to enable
or disable economy mode. Use the Lights key to jump to the next parameter, economy
start time (ES).When the Economy mode is ON, the display will toggle between the
“Eco” message, the time, and the water temperature.
* Note that the parameters for the economy mode settings
are associated to specic low level conguration of the
syslem that are not present in all software revisions.
14
Control panel
ES1 0
5.12 Setting economy start time*
The display will show ESXX, “XX” representing the hour at which the economy mode
will become active. Use the arrow keys to adjust the hour. Use the Lights key to jump to
the next parameter, economy duration (Ed).
5.13 Setting economy duration*
The display will show EdXX, “XX” representing the duration in hours of the economy
mode. Use the arrow keys to adjust the hour. Use the Lights key to jump to the next
parameter, temperature unit. (24 = continuous economy )
5.14 Setting temperature unit
Water temperature can be displayed in either Fahrenheit (°F) or Celsius (°C). The
display will show °F or °C. Use the arrow keys to change the setting. Use the Lights key
to save all the parameters.
* Note that the parameters for the economy mode settings
are associated to specic low level conguration of the
syslem that are not present in all software revisions.
* Note that the parameters for the economy mode settings
are associated to specic low level conguration of the
syslem that are not present in all software revisions.
E 02
F
15
Control panel
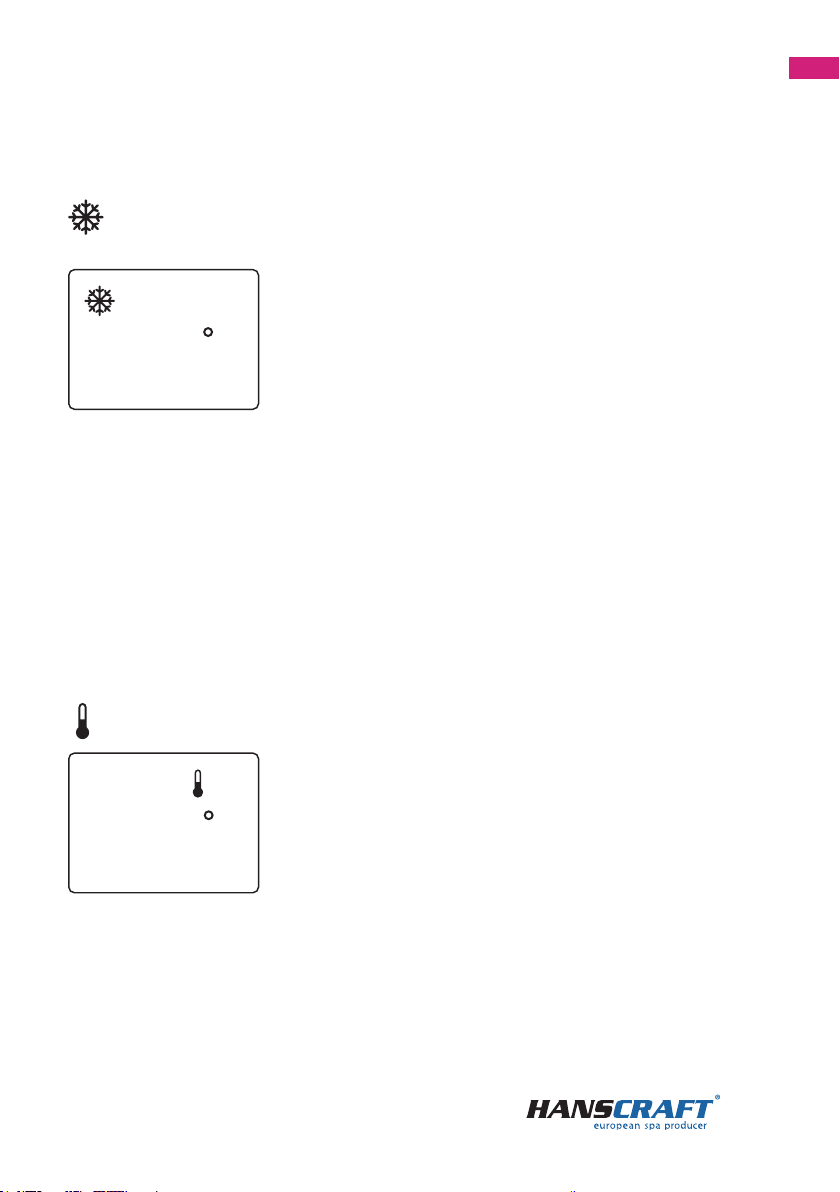
5.15 Smart Winter Mode
Our Smart Winter Mode protects your system from the cold by turning pumps on
several times a day to prevent water from freezing in pipes.
The “SWM” indicator lights up when freezing is detected and ashes when
the purge is active.
5.16 Cooldown
After heating the spa water to the desired Set Point, the heater is turned o, but its
associated pump (Pump 1 low-speed or CP) remains on for a predetermined period of
time to ensure adequate cooling of the heating element, prolonging its useful life.
5.17 Water temperature regulation
Every 15 to 90 minutes the pump will run to ensure accurate water temperature
readings as well as avoid heater activation in dry conditions. After verifying pump
activation and taking a water temperature reading if required, the system automatically
turns the heater on to reach and maintain water temperature at Set Point.
Indicator ashes when taking water temperature reading.
98F
98F

16
Problem solutions
6 Problem solutions
The list below shows the dierent error messages that can appear on the home
screen. Refer to the troubleshooting and error codes section of the TechBook for
your spa pack for more details.
HL Warning! HL Error
FLO No ow for more than 2 hours
FLO No ow condition
HR Danger! Relay stuck
OH Warning! Spa temp. high
Prr Warning! Temp. probes defective
AOH Internal pack temp. high
FLC Flow switch closed
SP in Input voltage issue
FrEr The input frequency is out of range
RH NC Comm. error in. xm2 – in. therm
RH ID in. xm2 – in. therm incompatible
SC ER Learning mode error
F1 in. xm2 Fuse # 1 is blown
F2 in. xm2 Fuse # 2 is blown
F3 in. xm2 Fuse # 3 is blown
Hr Danger! Thermal fuse error
UPL The spa pack does not have valid software.
Please insert valid in. stick to reprogram spa pack.
BL The spa pack does not have valid software.
Please insert valid in. stick to reprogram spa pack.
ERROR MESSAGES

17
Hot tub care
7 Hot tub care
7.1 General information
Do not expose the hot tub to sun without water inside or a cover on top. The direct
sunlight can cause fading and deformation of the surface material. When you are not
using the hot tub, cover it with the thermo cover, regardless of whether it is empty or
full. Protect the hot tub from rain and snow. Place the hot tub under a gazebo or a roof
if possible.
a) Do not open the control unit. There are no user-xable parts inside.
b) Drain, clean and ll the hot tub with clean water on regular schedule.
c) Clean the lter cartridge at least once a week.
d) The hot tub user should have a proper shower before and after the use of the hot
tub.
7.2 Removal and cleaning of the filter cartridge
The hot tub lter cartridge can get clogged by calcareous and mineral particles from a
hard water, which can lead to a restricted water ow inside the ltration system.
We recommend to clean the filter cartridge at least once a week.
Remove the cartridge and the skimmer insertion. Using a garden hose, clean the
cartridge so that no settled dirt remains in the corners of the lter. Once clean, put
the insertion back to the skimmer. Put the cartridge inside the skimmer tank next
and close it. Remember that the lter cartridge has to be replaced every 3– 6 months.
Replace it even sooner if it is damaged or clogged, it is not usable in such state.
Make-up, sunscreens and other types of body lotion decrease the quality of the water
and lower the lter cartridge longevity.
7.3 Maintaining the quality of the water in the hot tub
WARNING: Always add the chemicals to the water, never the other way around.
Add the chemicals to the water only when there are no people inside. Use the
circulation pumps to mix the chemicals with the water. Store the chemicals
according to the instruction on their label.
a) Use a suitable water hardness regulator regularly (the HANSCRAFT SPA
Water hardness regulator is recommended) and follow the instructions on the
chemicals‘ label.

18
Hot tub care
b) Depending on the frequency of use of the hot tub, test the water quality regularly
by a suitable water quality tester.
c) Adjust the water pH level accordingly by suitable water chemicals
(the HANSCRAFT SPA – pH PLUS and pH MINUS is recommended).
d) Adjust the Cl (chlorine) level with suitable water chemicals (HANSCRAFT SPA
– MULTI MINI 3 in 1 tablets are recommended). Follow the instructions on the
chemicals‘ label.
For the chlorine to have the desired effect, the pH level needs to be
adjusted first.
e)
We recommend you to clean/replace the lter cartridge before adding the chemicals.
Chlorine shock – in case of extreme pollution, it is necessary to treat the water with
a dose of fast dissolving chlorine and thus perform a chlorine shock. The pH level of
the hot tub water has to be adjusted to 7.0 –7.6 rst and the chlorine level has to be
checked. Once a week or after adding a large amount of fresh water to the hot tub,
add a shock dose of chlorine 10–20 g/m3(2 table spoons) into the water. Add the
chlorine only when there are no people in the hot tub. After you add the chlorine, turn
on the circulation pumps so that the chemicals mix well with the water. If you are using
a granulated form of the chemical, dissolve it in a small amount of water rst. Let the
chlorine level drop to 3 mg/l before you start using the hot tub.
Oxygen shock – in case of extreme pollution, it is necessary to treat the water with a
large dose of fast dissolving oxygen and thus perform an oxygen shock. The pH level
of the hot tub water has to be adjusted to 7.0–7.6 rst and the oxygen concentration
in the water has to be checked. Once a week or after adding a large amount of fresh
water to the hot tub, add a shock dose of oxygen (2 tablets) into the water. Add the
oxygen only when there are no people in the hot tub. After you add the oxygen, turn
on the circulation pumps so that the chemicals mix well with the water. Let the oxygen
level drop to 15 mg/l before you start using the hot tub.
Store the chemicals according to the instructions on the label.
Ideal chemical levels
Free chlorine concentration
(active oxygen concentration)
0.7–1.0 mg/l
(10–15 mg/l)
pH level 7.0 –7. 6
Calcium 100–180 mg/l
Overall alkalinity 80–120 mg/l

19
Hot tub care
7.4 Replacing the water
It is important to keep the hot tub water fresh and clean. We recommend you to
replace the water at least every 3 months unless the water quality drops sooner. The
hot tub water can be used for watering the garden for example, given that it has not
been chemically treated at least one week prior.
a) Disconnect the hot tub from the power supply (turn o the residual current
device).
b) Check the power supply cable and make sure it is not wet.
c) Drain the water through a water drainage system, close it carefully and ll the
hot tub with fresh water.
d) Connect the hot tub back to the electrical circuit (turn on the residual current
device).
7.5 Cleaning the outer shell of the hot tub
Use a mild, not abrasive cleaning detergent and a soft cloth.
7.6 Hot tub hygiene and disinfection
Taking care of hygiene is extremely important for elimination of any germs, algae and
other harmful organisms polluting the water in the hot tub. Test the water using the
testing kit rst (to nd out the pH and Cl level) and follow by using suitable water
chemicals accordingly. Follow the instructions on the chemicals‘ label carefully.
7.7 Thermo cover
Using the thermo cover helps saving up energy expenditures by minimizing
temperature loss and evaporation. The cover is an eective way of protecting your
hot tub from impurities and fallen leaves.
WARNING: For safety and damage prevention reasons, do not sit, stand or lie
on top of the cover. Do not place any objects on top of it. The thermo cover
does not serve as a fence around the bathing area either. Do not let animals
walk on top of the thermo cover. Prevent a large snow layer build up on top of
the thermo cover.
7.8 Upkeep of the thermo cover and upkeep instructions
It is important to take a proper care of the thermo cover: clean it when necessary
and treat it with a product intended especially for an eco-leather or fake leather. The
guarantee does not cover damages caused by an inappropriate cleaning product.

20
Hot tub care/Winter and summer
a) The right balance of water chemicals represents an important factor in prolonging
the longevity of your hot tub thermo cover.
b) Remove the hot tub's cover and place it on the ground surface down.
c)
Wash the cover with a large amount of water from a garden hose or a water bucket.
d) Clean the thermo cover surface using a soft brush and a mild dish soap solution
(1 tea spoon of dish soap per 8 litres of water).
Attention: Do not let the dish soap solution dry on the thermo cover before
washing it off!
e) Wash o the cleaning solution thoroughly.
f) Return the cover back on the hot tub.
g) Open the thermo cover regularly so that the chemical vapours can disperse. Flip
the thermo cover inner side u at least twice a year for 3–4 hours.
h) If the thermo cover does not get regularly cleaned twice a month, the surface
material can become frail or age prematurely. The seams can separate. If you do
not clean the thermo cover appropriately, the guarantee becomes invalid.
WARNING: Do not lift the thermo cover by the handles. A vacuum forms between
the thermo cover and the hot tub therefore lifting by the handles could result in
a damage. It is necessary to support the thermo cover from below by hand.
8 Winter and summer
Winterizing the hot tub, a process recommended by the producer.
It is required that all water gets drained from the hot tub during the process of
winterizing it, as well as water from all the technical parts of the hot tub (circulation
pumps, pipes, etc.) We recommend you to use our specialized service for this purpose
because awed winterizing of the hot tub can result in a loss of the guarantee. If
you decide to use our professional services, it is necessary to order them sucient
amount of time in advance. In case of winterizing the hot tub by yourself, it is crucial
to do it when the air temperature is still above zero. If the winterizing is done in
temperatures below zero, it can be very dicult because water in the motors could
have frozen already and damaged some parts of the hot tub.
8.1 Winter time – using the hot tub, all year operation (SLP)
If you decide to keep using the hot tub during the winter time, it is necessary to
keep checking the hot tub for cases of for example: circuit break failure, motor not
working, heating not working, lter cartridge getting clogged.
Table of contents
Other HANSCRAFT Hot Tub manuals


Popular Hot Tub manuals by other brands


 owner's manual")


CalderaSpas
CalderaSpas CalderaSpas Utopia Series owner's manual

anko
anko SS-601A user manual

CalderaSpas
CalderaSpas CANTABRIA owner's manual

Dimension One Spas
Dimension One Spas HYDRO SPORT Installation and owner's guide

Bestway
Bestway Lay-Z-Spa Maldives HydroJet Pro manual

Dimension One Spas
Dimension One Spas Nautilus Specifications