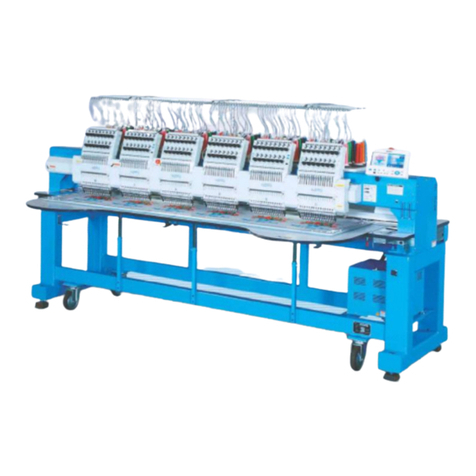
Happy Industrial Corporation HCS2 User manual

S2M701-8
INSTRUCTION BOOK
HCS2
Computerized Compact Single Head Embroidery Mac ine
Original instructions


-S2 -3
INDEX
IMPORTANT SAFETY INSTRUCTIONS.. 1-1
WARNING LABELS & THEIR LOCATIONS .....
1-2
SETTING UP THE MACHINE
Remove the machine from box............... 2-1
Accessories ............................................ 2-2
Assemble machine unit .......................... 2-3
Machine installation ................................ 2-4
Grounding instruction ............................. 2-6
Disposal of a battery............................... 2-6
MAIN PARTS ............................................ 3-1
MESSAGE ................................................ 3-4
TURNING THE MACHINE ON
How to turn on the machine.................... 3-5
Calendar and clock setting ..................... 3-7
THE CONTROL BOX................................ 3-8
DRIVE MODE ........................................... 3-9
GUIDE....................................................... 3-D
INSERTING A NEEDLE............................ 4-1
SELECT NEEDLES AND THREADS....... 4-2
BACKING MATERIALS............................. 4-3
BOBBIN WINDING
Winding the bobbin................................. 4-4
Removing the bobbin.............................. 4-5
Inserting the bobbin ................................ 4-5
Adjusting bobbin thread tension ............. 4-5
Inserting the bobbin case ....................... 4-5
THREADING THE MACHINE
How to thread upper thread.................... 4-6
MACHINE SETTINGS............................... 5-1
PREPARATION OF PATTERN DATA
Connecting to a PC ................................ 5-4
Reading embroidery pattern data from
the PC ..........................................................
5-4b
Read embroidery pattern data................ 5-5
Reading pattern data .............................. 5-6
Selection of folders ................................. 5-9
How to select patterns from memory...... 5-A
Erasing patterns from memory ............... 5-B
NEEDLE BAR SELECTION...................... 5-E
SEWING WITH TUBULAR FRAMES
Installing and removing the frame base.. 6-1
How to hoop ........................................... 6-2
Putting the hoop on the machine............ 6-3
Starting to embroider .............................. 6-4
CAP FRAME (OPTION)
Changing the needle plate...................... 7-1
Installing and removing the cap drive frame...
7-2
Normal cap frame ................................... 7-5
Wide cap frame ...................................... 7-8
Starting to embroider .............................. 7-B
ADJUSTING THE THREAD TENSIONS .. 8-1
ADJUSTING THE LASER POINTER (OPTION)...
8-2
SEWING
What to do if the thread breaks while sewing.
9-1
Stopping and resuming sewing .............. 9-1
Loss of power while embroidering .......... 9-2
Moving the hoop while embroidering and then returning to
the correct location (Position) .......................................
9-3
Moving back to the starting point (Origin)9-3
Going back to the beginning of the design (Top) ....
9-4
Placing the design in the center of the selected
embroidery frame
(Center) ..................................
9-4
Rotating and mirroring designs (Convert) ..
9-5
Starting in the middle of a design (Position)...
9-6
PATTERN
Locking pattern data ............................. 11-1
Trace type............................................. 11-2
Export ................................................... 11-3
Renaming patterns ............................... 11-5
Copying pattern data ............................ 11-6
Moving pattern data.............................. 11-7
Renaming folders ................................. 11-9
Sort ....................................................... 11-A
0_1 M628
0-1

-S2 -4
INDEX
0_2 M628
0-2
Thread break report...............................11-B
PATTERN SETTINGS ............................ 12-1
Scaling.................................................. 12-2
Width adjustment.................................. 12-3
Angle .................................................... 12-4
Repeat sewing...................................... 12-5
Auto origin ............................................ 12-7
Offset.................................................... 12-8
Frame out ............................................. 12-D
NEEDLE BAR SELECTION .................... 13-1
Auto setting........................................... 13-2
Thread color ......................................... 13-3
Repetition of color group setting........... 13-7
READING
Join....................................................... 14-1
Pattern Read Settings .......................... 14-4
POSITION ............................................... 16-1
Piece number ....................................... 16-2
LOCATE.................................................. 17-1
Entry ..................................................... 17-2
Return................................................... 17-3
LETTER .................................................. 18-1
QUEUE ................................................... 19-1
Alter and Execution .............................. 19-2
Delete ................................................... 19-3
Needle bar selection and Pattern settings...
19-4
Registration of QUEUE setting............. 19-5
Read QUEUE setting............................ 19-6
FRAME CONFIRMATION....................... 20-1
Frame selection...........................................
20-2
Adjusted for embroidery area ............... 20-4
User-defined frames (6 ~ 20).................20-A
How to change center point of frame (1 ~ 6,
6 ~ 20) ................................................... 20-J
Non registered .......................................20-L
i-CUSTOM............................................... 21-1
OTHER SETTINGS
Create network ..................................... 22-1
Version information............................... 22-3
Language.............................................22-3b
Calibrate .............................................. 22-3c
Report................................................... 22-4
User maintenance mode ...................... 22-5
SCREEN SAVER.................................... 22-7
SPECIFICATIONS • MAINTENANCE
Specifications ....................................... 23-1
Oiling .................................................... 23-1
Cleaning of rotary hook
Cleaning of thread cutting knife ............ 23-2
ERRORS AND WHAT TO DO ................ 24-1
INITIALIZING OF MACHINE SETTINGS
Re-Initialization of machine system ...... 25-1
Initializing of machine speed ................ 25-2
HELPFUL HINTS .................................... 26-1
EMBROIDERY TERMS .......................... 26-2
BUILT-IN FONT LIST.............................. 26-3

-CS -3
IMPORTANT SAFETY INSTRUCTIONS
1_1 F201
1-1
When using an electrical appliance, basic safety precautions should always be followed, includ-
ing the following.
Read all instructions before using this appliance.
DANGER - To reduce the risk of electric shock:
1. An appliance should never be left unattended when plugged in. Always unplug this appliance
from the electric outlet immediately after using and before cleaning.
WARNING
-To reduce the risk of burns, fire, electric shock, or injury to persons:
1. Do not allow to be used as a toy. Close attention is necessary when this appliance is used
by or near children.
2. Use this appliance only for its intended use as described in this manual. Use only attach-
ments recommended by the manufacturer as contained in this manual.
3. Never operate this appliance if it has a damaged cord or plug, if it is not working properly, if it
has been dropped or damaged, or dropped into water. Return the appliance to the nearest
authorized dealer or service center for examination, repair, electrical or mechanical adjust-
ment.
4. Never operate the appliance with any air openings blocked. Keep ventilation openings of the
sewing machine and foot controller free from the accumulation of lint, dust, and loose cloth.
5. Never drop or insert any object into any opening.
6. Do not use outdoors.
7. Do not operate where aerosol (spray) products are being used or where oxygen is being
administered.
8. To disconnect, turn all controls to the off (“0”) position, then remove plug from outlet.
9. Do not unplug by pulling on cord. To unplug, grasp the plug, not the cord.
10.Keep fingers away from all moving parts. Special care is required around the sewing ma-
chine needle.
11.Always use the proper needle plate. The wrong plate can cause the needle to break.
12.Do not use bent needles.
13.Do not pull or push fabric while stitching. It may deflect the needle causing it to break.
14.Switch the sewing machine off (“0”) when making any adjustments in the needle area, such
as threading needle, changing needle, threading bobbin, or changing presser foot, etc.
15.Always unplug sewing machine from the electrical outlet when removing covers, lubricating,
or when making any other user servicing adjustments mentioned in the instruction manual.
SAVETHESE INSTRUCTIONS
Other manuals for HCS2
1
Table of contents
Other Happy Industrial Corporation Sewing Machine manuals

Happy Industrial Corporation
Happy Industrial Corporation HCS User manual

Happy Industrial Corporation
Happy Industrial Corporation C User manual

Happy Industrial Corporation
Happy Industrial Corporation HCD User manual

Happy Industrial Corporation
Happy Industrial Corporation HCS2 User manual

Happy Industrial Corporation
Happy Industrial Corporation HCR Series User manual

Happy Industrial Corporation
Happy Industrial Corporation HCD2 User manual


