manuals.online logo
Brands
  1. Home
  2. •
  3. Brands
  4. •
  5. Harman Kardon
  6. •
  7. Receiver
  8. •
  9. Harman Kardon AVR 235 User manual

Harman Kardon AVR 235 User manual

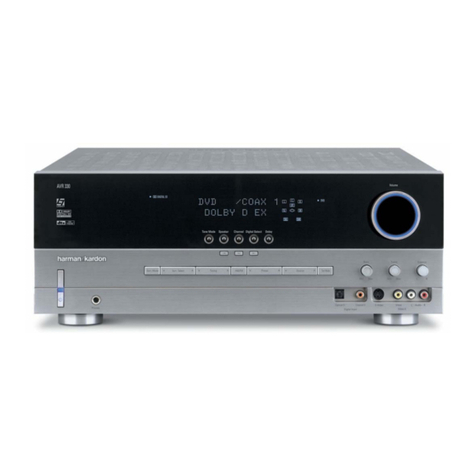
Thank you for purchasing a Harman Kardon AVR 235. This Quick-Start
Guide will help you with a basic system installation. For detailed information
on any step, please refer to the Owner’s Manual pages referenced in this
guide. We strongly recommend that you read the Owner’s Manual for
complete details on how to install, configure and operate the AVR 235,
as well as for the important safety information it contains.
Figure 1 – Speaker Placement
The colors shown for each speaker correspond to
the matching output terminal connection on the
back of the AVR 235 (see page 7).
FRONT
LEFT
SPEAKER
(White)
SURROUND
BACK
LEFT
SPEAKER
(Brown)
SURROUND
BACK
RIGHT
SPEAKER
(Tan)
CENTER
SPEAKER
(Green)
SUBWOOFER
(Purple)
SURROUND
LEFT
SPEAKER
(Blue)
FRONT
RIGHT
SPEAKER
(Red)
SURROUND
RIGHT
SPEAKER
(Gray)
Step 1. Place your speakers in the listening room
(see page 16).
SPEAKER PLACEMENT
AVR 235 QUICK-START GUIDE
Connections Color Guide
Audio Connections Left Right
Front
Center
Surround
Subwoofer
Surround Back
Digital Audio Connections
Coax
Optical
Video Connections
Composite
S-Video
Match the colored jacks on the AVR 235 to the appropriate
jacks on your source equipment or speakers. The colors are
standardized, but not all equipment or connectors use them.
AVR 235 QUICK-START GUIDE
Step 2. Connect the speakers to the receiver: red (+) on speaker to colored (+) on receiver and black (–) to black (–)
(see page 14).
Step 3. Connect the Subwoofer Pre-Out jack to the Line-In jack on your subwoofer.
You may adjust the settings on the subwoofer later as needed (see page 14).
Figure 3 – How to Use the Binding-Post
Speaker Terminal
SURROUND BACK
RIGHT SPEAKER
SURROUND BACK
LEFT SPEAKER
FRONT RIGHT
SPEAKER
FRONT LEFT
SPEAKER
CENTER SPEAKER
SUBWOOFER
+
_
LINE IN/SUB/LFE +
_
SURROUND
RIGHT SPEAKER
+
_
+
_
+
_
SURROUND
LEFT SPEAKER
+
_
+
_
Figure 2 – Speaker Connections
SPEAKER AND AUDIO CONNECTIONS
CD PLAYERAM AntennaFM Antenna
AUDIO RECORDER
L R Optical Coax
REC/IN
PLAY/OUT
Step 4. Connect AM and FM antennas (Fig. 4) (see page 14).
Step 5. Connect source components, as shown in Figures 4 and 5, and the
Device Connection Options chart on the back of this guide (see
pages 14–15).
AUDIO connections: Right channel (red) on source to right (red)
on AVR, and left channel (white) on source to left (white) on AVR.
DIGITAL AUDIO connections, if available: Choose either coax
(orange) to coax (orange) OR optical to optical for each device.
The Coax 1 input defaults to the DVD player, but may be reassigned.
Assign the other digital inputs and outputs as appropriate for your
equipment (see Step 7).
VIDEO connections: Choose component (Y/Pb/Pr – green/blue/
red), composite (yellow) or S-Video (4-pin) for each video source.
Connect the component, composite and S-Video Monitor outputs to
your Video Monitor (TV). Switch your TV set’s input to match the type
of video used for the currently selected source.
Step 6. Plug all components into AC power outlets. The outlets on the back
of the AVR 235 should be used
only
for low-current products, such
as CD or DVD players, and the total should not exceed 100 watts.
Basic Receiver Configuration
Step 7. Select digital inputs: If your DVD is connected to Coax 1, no adjust-
ment is needed. For any other digital-device connections, use the
front-panel Digital Select button and the arrow buttons to select an
optical or coax digital input (see pages 18 and 28).
Step 8. Select a surround mode: Press the Surround Mode button on the
front panel to select Dolby®Pro Logic®II – Movie. (You may select
other modes later as you become familiar with the AVR 235; see
pages 18–20 and 26–28.)
Step 9. Configure speakers: No action is needed if you have five “small”
satellite-type speakers and a subwoofer. Otherwise, press the Speaker
button and then the Set and arrow buttons to select the correct
speaker choices for your system (see pages 20–22).
Step 10. Use to set output levels: Set the Balance to
12 o’clock, and the Volume to –10dB. Sit in the listening position
and hold the remote in front of you at shoulder level, pointing at
the AVR 235. Press the SPL button for 3 seconds, and release it
when the LED flashes amber. Press “5” or “7” to indicate the number
of speakers (not including the subwoofer). Hold the remote steady
until the process is completed (see page 22).
Step 11.
Your system is configured – sit back and enjoy!
TM
Figure 4 – Audio Connections
Dashed lines (––––) indicate coax and optical
digital audio connections. Choose either type
(but not both) for each digital audio source.
DVD PLAYER
VCR (Video 1) TV or Projector
In/Rec
Out/Play
IN
L R VIDEO Video S-Video
Y Pb Pr
Component Video
Y
Pb
Pr
Optical Coax
Cable Box or Satellite Receiver (Video 2)
OUT
L R Video S-Video
Optical Coax
L R Video S-Video
Component Video
Y Pb Pr
Component Video
VIDEO CONNECTIONS
Device Connection Options:Recommended connections are shown in red, but connections may be made to best fit your system requirements. The Video 4, Coax 3 and Optical 3 inputs are on the front panel of the receiver.
Device Input Name Audio Input Connections Audio Output Connections Video Connections
CD Player CD CD L/R Inputs, Optical Digital 1 or 2, or Coaxial Digital 1 or 2Not required Not required
DVD Player DVD Coaxial Digital 1 or 2, Optical Digital 1 or 2, or DVD L/R Inputs Not required DVD Component, Composite or S-Video
VCR Video 1 Video 1 L/R Inputs Video 1 L/R Outputs Video 1 Composite or S-Video Input and Output
Cable Box or Satellite Receiver Video 2 Video 2 L/R Inputs, Optical Digital 1, 2 or 3*, or Coaxial Digital 1, 2 or 3*Inputs Not required Video 2 Component, Composite or S-Video Input
Audio Recorder Tape Tape L/R Inputs, Optical Digital 1/2** or Coaxial Digital 1/2** Inputs Tape L/R Outputs, Digital Optical** or Coaxial Outputs** Not required
TV or Projector Not applicable Not required Not required Monitor-Out Component, Composite and/or S-Video
*Check with your cable company to determine whether digital audio is available for all channels. It may be necessary to make BOTH analog and digital connections if it is not. ** Digital audio recorders only.
250 Crossways Park Drive, Woodbury, New York 11797 www.harmankardon.com © 2004 Harman International Industries, Incorporated Part No. CQE1A228Z
Power for the Digital Revolution.
®
®
Figure 5 – Video Connections
Dashed lines (––––) indicate coax and optical digital audio connections. Choose either type (but not both) for each
digital audio source.
Dotted lines (••••) indicate component, composite or S-Video connections. Component video is the preferred connection
when available, but you may use any of the three types (but not more than one). When component, composite and
S-Video sources are connected to the AVR you must also connect all outputs from the AVR to your TV.

Other manuals for AVR 235

6

Other Harman Kardon Receiver manuals

Harman Kardon NOCTURNE 210 User manual

Harman Kardon

Harman Kardon NOCTURNE 210 User manual

Harman Kardon AVR 3500 User manual

Harman Kardon

Harman Kardon AVR 3500 User manual

Harman Kardon AVR 145 Service manual

Harman Kardon

Harman Kardon AVR 145 Service manual

Harman Kardon AVR 7000 User manual

Harman Kardon

Harman Kardon AVR 7000 User manual

Harman Kardon AVR 7550HD User manual

Harman Kardon

Harman Kardon AVR 7550HD User manual

Harman Kardon AVR 3550HD User manual

Harman Kardon

Harman Kardon AVR 3550HD User manual

Harman Kardon 730 User manual

Harman Kardon

Harman Kardon 730 User manual

Harman Kardon BDS 5 SO User manual

Harman Kardon

Harman Kardon BDS 5 SO User manual

Harman Kardon AVR 525 User manual

Harman Kardon

Harman Kardon AVR 525 User manual

Harman Kardon AVR145/230 User manual

Harman Kardon

Harman Kardon AVR145/230 User manual

Harman Kardon HK505 User manual

Harman Kardon

Harman Kardon HK505 User manual

Harman Kardon AVR 230 User manual

Harman Kardon

Harman Kardon AVR 230 User manual

Harman Kardon AVR35 User manual

Harman Kardon

Harman Kardon AVR35 User manual

Harman Kardon AVR 235 User manual

Harman Kardon

Harman Kardon AVR 235 User manual

Harman Kardon AVR 440 Instruction Manual

Harman Kardon

Harman Kardon AVR 440 Instruction Manual

Harman Kardon AVR 340 User manual

Harman Kardon

Harman Kardon AVR 340 User manual

Harman Kardon AVR 7200 User manual

Harman Kardon

Harman Kardon AVR 7200 User manual

Harman Kardon AVR 7500 User manual

Harman Kardon

Harman Kardon AVR 7500 User manual

Harman Kardon AVR 247 User manual

Harman Kardon

Harman Kardon AVR 247 User manual

Harman Kardon AVR 30 User manual

Harman Kardon

Harman Kardon AVR 30 User manual

Harman Kardon TA600 User manual

Harman Kardon

Harman Kardon TA600 User manual

Harman Kardon AVR 247 User manual

Harman Kardon

Harman Kardon AVR 247 User manual

Harman Kardon AVR 1650 User manual

Harman Kardon

Harman Kardon AVR 1650 User manual

Harman Kardon AVR 1565 User manual

Harman Kardon

Harman Kardon AVR 1565 User manual

Popular Receiver manuals by other brands

Xantech WL85 installation instructions

Xantech

Xantech WL85 installation instructions

Microchip Technology RN4020 manual

Microchip Technology

Microchip Technology RN4020 manual

Bose Lifestyle 18 Series II owner's guide

Bose

Bose Lifestyle 18 Series II owner's guide

Marmitek IRC Reiceiver 3060P quick start guide

Marmitek

Marmitek IRC Reiceiver 3060P quick start guide

RF-Link DAV-2450 user manual

RF-Link

RF-Link DAV-2450 user manual

Connevans FmGenie Visitor's Guide

Connevans

Connevans FmGenie Visitor's Guide

Conrad Akasa 91 89 12 operating instructions

Conrad

Conrad Akasa 91 89 12 operating instructions

Kenpro FM-240 instruction manual

Kenpro

Kenpro FM-240 instruction manual

Yamaha RX-V757 owner's manual

Yamaha

Yamaha RX-V757 owner's manual

Yamaha RX-V3077 Setup guide

Yamaha

Yamaha RX-V3077 Setup guide

Sparkfun Electronics Si4703 quick start guide

Sparkfun Electronics

Sparkfun Electronics Si4703 quick start guide

Yamaha HTR-5590 owner's manual

Yamaha

Yamaha HTR-5590 owner's manual

JVC 0497OFYOTKJEMEN instructions

JVC

JVC 0497OFYOTKJEMEN instructions

dignity DVB-T user manual

dignity

dignity DVB-T user manual

Berkeley Varitronics Systems Beetle 802.11a manual

Berkeley Varitronics Systems

Berkeley Varitronics Systems Beetle 802.11a manual

Marantz M-CR511 owner's manual

Marantz

Marantz M-CR511 owner's manual

Kenwood DVR-605 instruction manual

Kenwood

Kenwood DVR-605 instruction manual

Multitone RPR750 Series Manual & service guide

Multitone

Multitone RPR750 Series Manual & service guide

manuals.online logo
manuals.online logoBrands
  • About & Mission
  • Contact us
  • Privacy Policy
  • Terms and Conditions

Copyright 2025 Manuals.Online. All Rights Reserved.