manuals.online logo
Brands
  1. Home
  2. •
  3. Brands
  4. •
  5. Harman Kardon
  6. •
  7. Receiver
  8. •
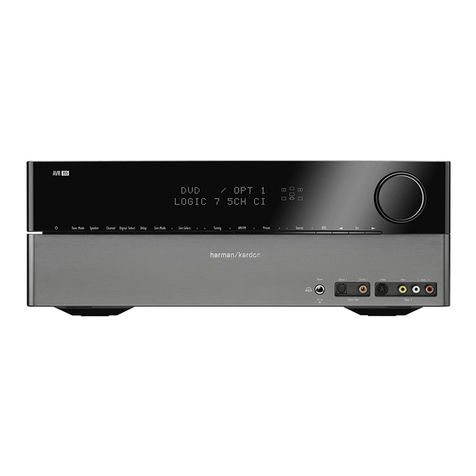
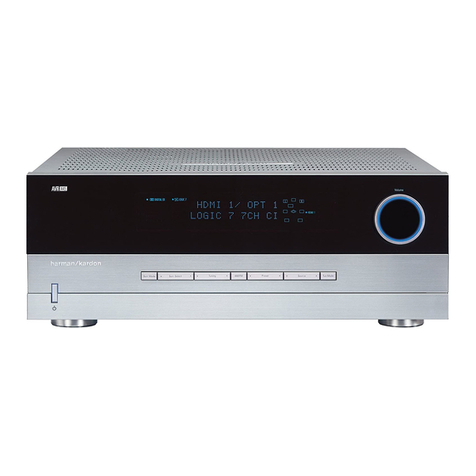
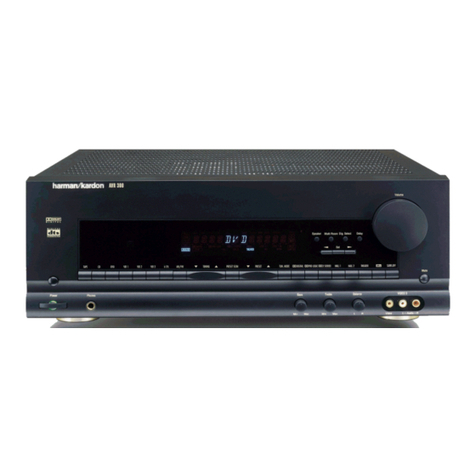
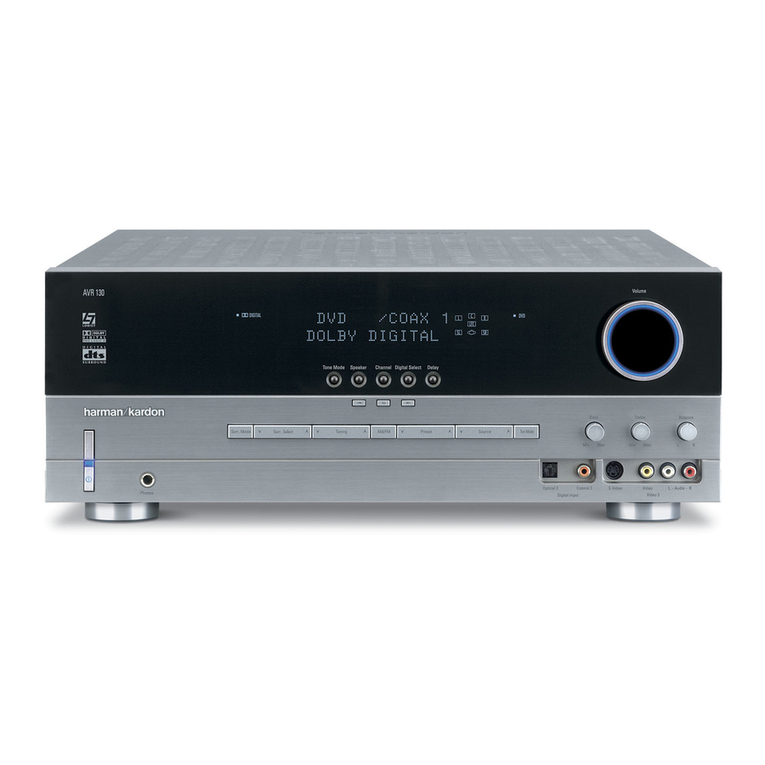
  9. Harman Kardon AVR145/230 User manual

Harman Kardon AVR145/230 User manual

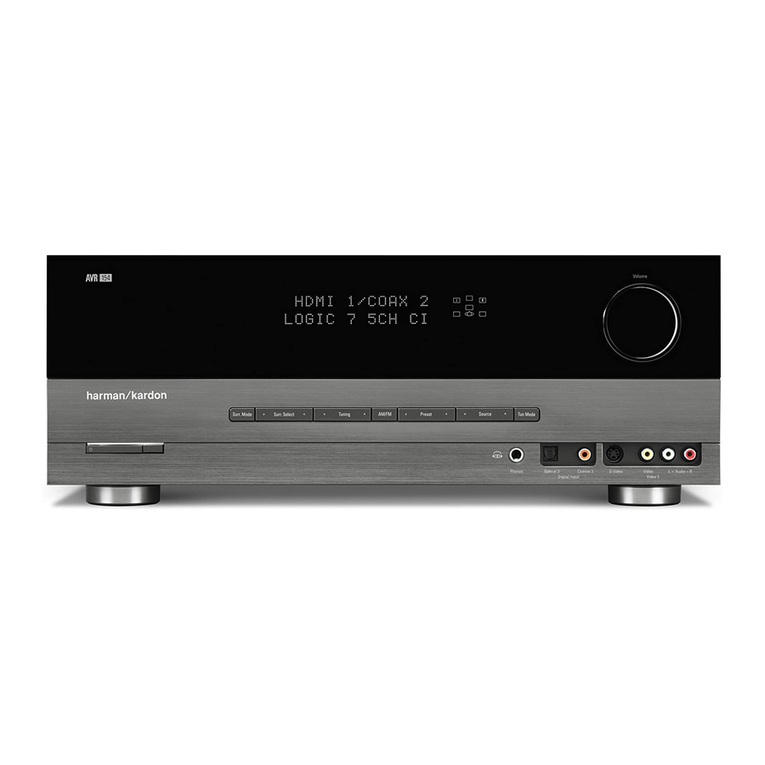
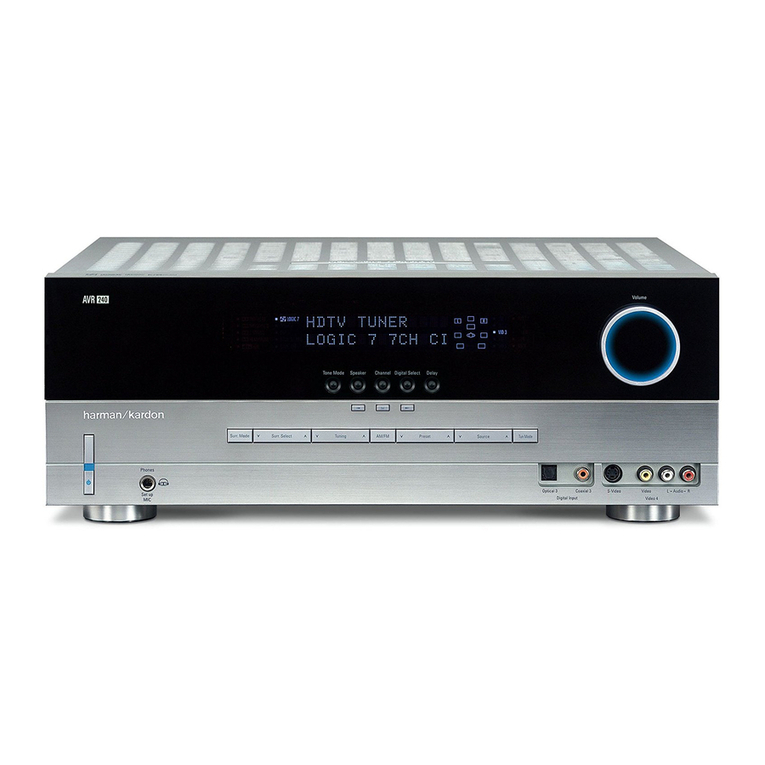
harman/kardon
AVR145
5 X 40W 5.1 CHANNEL A/V RECEIVER
SERVICE MANUAL
CONTENTS
ESD WARNING........................ 2 ELECTRICAL PARTS LIST.... 12
LEAKAGE TESTING.................. 3 SEMICONDUCTOR PINOUTS 48
BASIC SPECIFICATIONS.......... 4 PCB DRAWINGS.................. 119
TROUBLESHOOTING GUIDE..... 5 BLOCK DIAGRAM................. 126
PROCESSOR RESET............... 5 WIRING DIAGRAM................ 127
PACKAGE LIST AND PARTS....... 6 AMP BIAS ADJUSTMENT 128
DISASSEMBLY 7 SCHEMATIC DIAGRAMS....... 129
UNIT EXPLODED VIEW AND PARTS 11
Released 2007
Discontinued XXXX Rev 0, 10/2007
harman/kardon, Inc.
250 Crossways Park Dr.
Woodbury, New York, 11797
harman/kardon
AVR 145/230 service manual
Page 1 of 135
Each precaution in this manual should be followed during servicing.
Components identified with the IEC symbol in the parts list are special significance to safety. When replacing a component identified with
, use only the replacement parts designated, or parts with the same ratings or resistance, wattage, or voltage that are designated in the
parts list in this manual. Leakage-current or resistance measurements must be made to determine that exposed parts are acceptably
insulated from the supply circuit before retuming the product to the customer.
Some semiconductor (solid state) devices can be damaged easily by static electricity. Such components commonly are called
Electrostatically Sensitive (ES) Devices. Examples of typical ES devices are integrated circuits and some field effect transistors and
semiconductor "chip" components.
The following techniques should be used to help reduce the incidence of component damage caused by static electricity.
1. Immediately before handling any semiconductor component or semiconductor-equipped assembly, drain off any electrostatic charge on
your body by touching a known earth ground. Alternatively, obtain and wear a commercially available discharging wrist strap device,
which should be removed for potential shock reasons prior to applying power to the unit under test.
2. After removing an electrical assembly equipped with ES devices, place the assembly on a conductive surface such as aluminum foil, to
prevent electrostatic charge build-up or exposure of the assembly.
3. Use only a grounded-tip soldering iron to solder or unsolder ES devices.
4. Use only an anti-static solder removal device. Some solder removal devices not classified as "anti-static" can generate electrical charges
sufficient to damage ES devices.
5. Do not use freon-propelled chemicals. These can generate electrical change sufficient to damage ES devices.
6. Do not remove a replacement ES device from its protective package until immediately before you are ready to install it. (Most replacement
ES devices are packaged with leads electrically shorted together by conductive foam, aluminum foil or comparable conductive material.)
7. Immediately before removing the protective material from the leads of a replacement ES device, touch the protective material to the
chassis or circuit assembly into which the device will be installed.
Be sure no power is applied to the chassis or circuit, and observe all other safety precautions.
8. Minimize bodily motions when handling unpackaged replacement ES devices. (Otherwise harmless motion such as the brushing together
or your clothes fabric or the lifting of your foot from a carpeted floor can generate static electricity sufficient to damage an ES devices.
CAUTION :
AVR145 harman/kardon
harman/kardon
AVR 145/230 service manual
Page 2 of 135
2
ELECTROSTATICALLY SENSITIVE DEVICES
SAFETY PRECAUTIONS
The following check should be performed for the continued
protection of the customer and service technician.
LEAKAGE CURRENT CHECK
Measure leakage current to a known earth ground (water
pipe, conduit, etc.) by connecting a leakage current tester
between the earth ground and all exposed metal parts of the
appliance (input/output terminals, screwheads, metal
overlays, control shaft, etc.). Plug the AC line cord of the
appliance directly into a 120V AC 60Hz outlet and turn the
AC power switch on. Any current measured must not exceed
o.5mA.
ANY MEASUREMENTS NOT WITHIN THE LIMITS
OUTLINED ABOVE ARE INDICATIVE OF A
POTENTIAL SHOCK HAZARD AND MUST BE
CORRECTED BEFORE RETURNING THE APPLIANCE
TO THE CUSTOMER.
Device
under
test
Test all
exposed metal
surfaces
Also test with
plug reversed
(Using AC adapter
plug as required)
AC Leakage Test
Leakage
current
tester
Reading should
not be above
0.5mA
Earth
ground
harman/kardon
AVR 145/230 service manual
Page 3 of 135
Technical Specifications AVR145/230
Audio Section
Stereo Mode
Continuous Average Power (FTC)
50 Watts per channel, 20Hz–20kHz,
@ < 0.07% THD, both channels driven into 8 ohms
5 Channel Surround Modes
Power Per Individual Channel
Front L&R channels:
40 Watts per channel,
@ < 0.07% THD, 20Hz–20kHz into 8 ohms
Center channel:
40 Watts, @ < 0.07% THD, 20Hz–20kHz into 8 ohms
Surround channels:
40 Watts per channel,
@ < 0.07% THD, 20Hz–20kHz into 8 ohms
Input Sensitivity/Impedance
Linear (High Level) 200mV/47kohms
Signal-to-Noise Ratio (IHF-A) 100dB
Surround System Adjacent Channel Separation
Analog Decoding 40dB
(Pro Logic, etc.)
Dolby Digital (AC-3) 55dB
DTS 55dB
Frequency Response
@ 1W (+0dB, –3dB) 10Hz–130kHz
High Instantaneous
Current Capability (HCC) ±25 Amps
Transient Intermodulation
Distortion (TIM) Unmeasurable
Rise Time 16 µsec
Slew Rate 40V/µsec**
FM Tuner Section
Frequency Range 87.5–108MHz
Usable Sensitivity IHF 1.3 µV/13.2dBf
Signal-to-Noise Ratio Mono/Stereo: 70/68dB (DIN)
Distortion Mono/Stereo: 0.2/0.3%
Stereo Separation 40dB @ 1kHz
Selectivity ±400kHz: 70dB
Image Rejection 80dB
IF Rejection 90dB
AM Tuner Section
Frequency Range 522–1620kHz
Signal-to-Noise Ratio 45dB
Usable Sensitivity Loop: 500µV
Distortion 1kHz, 50% Mod: 0.8%
Selectivity ±10kHz: 30dB
Video Section
Video Format PAL/NTSC
Input Level/Impedance 1Vp-p/75 ohms
Output Level/Impedance 1Vp-p/75 ohms
Video Frequency Response
(Composite and S-Video) 10Hz–8MHz (-3dB)
Video Frequency
Response (Component) 10Hz–100MHz (-3dB)
General
Power Requirement AC 220–240V/50Hz
Power Consumption 65W idle, 540W maximum
(5 channels driven)
Dimensions (Max)
Width 440mm
Height 165mm
Depth 382mm
Weight 9.7 kg
Depth measurement includes knobs, buttons and terminal connections.
Height measurement includes feet and chassis.
All features and specifications are subject to change without notice.
Harman Kardon, The Bridge and Logic 7 are
registered trademarks of Harman International Industries, Incorporated.
is a trademark of Harman International Industries, Inc.
*Manufactured under license from Dolby Laboratories.
“Dolby,” “Pro Logic” and the Double-D symbol are trademarks of Dolby Laboratories.
"DTS" and "DTS Neo:6" are registered trademarks of DTS,
Inc. "96/24" is a trademark of DTS, Inc.
SA-CD is a trademark of Sony Electronics, Inc.
Apple and iPod are registered trademarks of Apple Computer, Inc.
Cirrus is a registered trademark of Cirrus Logic Corp.
**Without input anti slewing and output isolation networks.
TM
harman/kardon
AVR 145/230 service manual
Page 4 of 135
45
TROUBLESHOOTING GUIDE
SYMPTOM CAUSE SOLUTION
Unit does not function when Main • No AC Power • Make certain AC power cord is plugged into
Power Switch is pushed a live outlet
• Check to see whether outlet is switch-controlled
Display lights, but no sound • Intermittent input connections • Make certain that all input and speaker connections
or picture are secure
• Mute is on • Press Mute Button
• Volume control is down •Turn up volume control
No sound from any speaker; • Amplifier is in protection mode • Check speaker wire connections for shorts at receiver and
light around power switch is red due to possible short speaker ends
• Amplifier is in protection mode • Contact your local Harman Kardon service center
due to internal problems
No sound from surround or • Incorrect surround mode • Select a mode other than Stereo
center speakers • Input is monaural • There is no surround information from mono sources
• Incorrect configuration • Check speaker mode configuration
• Stereo or Mono program material • The surround decoder may not create center- or rear-channel
information from nonencoded programs
Unit does not respond to • Weak batteries in remote • Change remote batteries
remote commands • Wrong device selected • Press the AVR selector
• Remote sensor is obscured • Make certain front panel sensor is visible to remote
or connect an optional remote sensor
Intermittent buzzing in tuner • Local interference • Move unit or antenna away from computers, fluorescent
lights, motors or other electrical appliances
Letters flash in the channel indicator • Digital audio feed paused • Resume play for DVD
display and digital audio stops • Check that Digital Input is selected
In addition to the items shown above, additional information on troubleshooting possible problems with your AVR 145, or installation-related issues, may
be found in the list of "Frequently Asked Questions" which is located in the Product Support section of our Web site at www.harmankardon.com.
AVR 145 OM (New) 8/4/06 1:19 PM Page 45
harman/kardon
AVR 145/230 service manual
Page 5 of 135
NO DESCRIPTION PARTS NO. Q,ty
1
2
3
4
5
1
ACCESSORY-1
BOX,OUT CARTON5
6
1
3
DESCRIPTIONNO
CPS4A564
CQXAVR145/230
CPG1A820W
1
1
1
Q,tyPARTS NO.
CPS4A565
SNOW,PAD(R)
4
1
1. Instruction manual ass'y - Accessories 2. Package Drawing
7
1
1
SNOW,PAD(L)
AVR145/230
SET AVR145/230SET 1
FM 1 POL ANT CSA1A018Z 1
1
NO DESCRIPTION PARTS NO. Q,ty
9
10
11
12
13
1CPB1061YPOLY BAG
CQX1A1135YMANUAL,INSTRUCTION
MANUAL ,SETUP GUIDE
1
1
BOOKLET,INFORMATION CQE1A180Z 1
STAPLE CPL0905 3
ACCESSORY-2
ACCESSORY-1
CPB1061Y
POLY BAG
CSA1A027Z
AM LOOP ANTENNA ASS'Y 1
CABR03P3
BATTERY 3
COVER ASS'Y CGRAVR130/230ZA
POLY BAG
1
12
7
23
AM LOOP ANTENNA ASS'Y BATTERY ASS'Y
4
FM 1 POLE ANT
5
COVER ASS'Y
6
BOOKLET,INFORMATION
9
MANUAL INSTRUCTION
10
MANUAL SETUP CODE
11
1
1CGR1A332M7H43
CQE1A220Z
CPS1A676 1
CPB1A176Z 1
1
2
3
4
5
CGR1A331M7H43 1
PAD , COVER
COVER A
COVER B
SHEET,FRONT COVER
BAG , POLY
ACCESSORY-2 CQXAVR145/230
CQX1A1138X
13
1
IMAGE BROCHURES HQE1A273Z
IMAGE BROCHURES
STAPLE
POLY BAG
ACCESSORY-1
1
SNOW PAD (R)
3
BOX ,OUT CARTON
5
SET
4
SNOW PAD (L)
2
ACCESSORY-2
6
REMOCON
TRANSMITTER ASS'Y
2
6
STAPLE
8
8 STAPLE CPL0905 3
REMOCON ASS'Y CARTAVR145/230 1
harman/kardon
AVR 145/230 service manual
Page 6 of 135
1
2
1
1. Removing the Top Cabinet
Remove the Screws
5
4
6
DISASSEMBLY
~
13
11
10
7
9
13
3
12
8
7
5
6
8
9
4
3
2
1
Remove the Screws
2. Removing the Front Panel
1 9
~
6
3
4
7
Remove the Screws
4. Removing the Main PCB
1
25
~
1 7
~
1
25
Remove the Screws
3. Removing the Rear Panel
AVR145/230
25
10
9
8
19
7
65
20 21 22
16
15
4 3 2 117 18
23 24
11 12 13 14
harman/kardon
AVR 145/230 service manual
Page 7 of 135
AVR145 DISASSEMBLY PROCEDURE
1 TOP-CABINET (21) REMOVAL
1. Remove 13 screws (S1,S7) and then remove the Top-cabinet.
2 FRONT PANEL ASS’Y REMOVAL
1. Remove the Top-cabinet, referring to the previous step 1.
2. Disconnect the card cable between connector (CN72-17p) on the FIP PCB (37-1) and connector (CN72) on the Input PCB (39-1).
3. Disconnect the lead wire (BN81-8P) on the FIP PCB (37-1) from connector (CN81) on the Trans PCB (40-4).
4. Disconnect the lead wire (BN22-6P) on the Phone PCB (37-5) from connector (CN22) on the Input PCB (39-1).
5. Disconnect the lead wire (BN18-5P) on the Phone PCB (37-5) from connector (CN18) on the Input PCB (39-1)
6. Disconnect the lead wire (BN10-4P) on the Volume PCB (37-6) from connector (CN10) on the Input PCB (39-1)
7. Disconnect the lead wire (BN41-6P) on the Volume PCB (37-6) from connector (CN41) on the Video PCB (41)
8. Remove 1 screw (S10) and then lead wire (JW82-1P,JW83-1P) on the Phone PCB (37-5).
9 .Remove 1screw (S10) and then lead wire (JW84-1P) on the Volume PCB (37-3).
10. Remove 10 screws (S1) and then remove the Front Panel ASS’Y.
3 VOLUME PCB (37-6) REMOVAL
1. Remove the Top-cabinet, referring to the previous step 1.
2. Remove the Front Panel ASS’Y, referring to the previous step 2.
3. Pull out the Volume Knob ASS’Y.
4. Disconnect connector (CN84) on the Volume PCB (37-6) from the lead wire (BN84-5P) on the FIP PCB (37-1).
5. Remove 8 screws (S2,S14), and then remove the Volume PCB (37-6).
4 PHONE PCB (37-5) REMOVAL
1. Remove the Top-cabinet, referring to the previous step 1.
2. Remove the Front Panel ASS’Y, referring to the previous step 2.
3.. Disconnect connector (CN85)on the Phone PCB (37-5) from the lead wire (BN85-2P) on the FIP PCB (37-1).
4. Remove 2 screws (S2) and then remove the Phone PCB (37-5).
5 POWER LED PCB (37-3) REMOVAL
1. Remove the Top-cabinet, referring to the previous step 1.
2. Remove the Front Panel ASS’Y, referring to the previous step 2.
3. Disconnect connector (CN88) on the Power Led PCB (37-3) from the lead wire (BN88-4P) on the FIP PCB (37-1) .
4. Remove 2 screws (S2) and then remove the Power led PCB (37-3).
6 FIP PCB (37-1) REMOVAL
1. Remove the Top-cabinet, referring to the previous step 1.
2. Remove the Front Panel ASS’Y, referring to the previous step 2.
3. Disconnect the lead wire (BN84-5P) on the FIP PCB (37-1) from connector (CN84) on the Volume PCB (37-6).
4. Disconnect the lead wire (BN85-2P) on the FIP PCB (37-1) from connector (CN85) on the Phone PCB (37-5).
5. Disconnect the lead wire (BN88-4P) on the FIP PCB (37-1) from connector (CN88) on the Power Led PCB (37-3).
6. Disconnect the connector (CN89) on the FIP PCB (37-1) from lead wire (BN89-4P) on the Key PCB (37-2).
7. Remove 3 screws (S2) and then remove the Guide PCB (37-8) & the FIP PCB (37-1).
7 KEY PCB (37-2) REMOVAL
1. Remove the Top-cabinet, referring to the previous step 1.
2. Remove the Front Panel ASS’Y, referring to the previous step 2.
3. Remove the FIP PCB (37-1), referring to the previous step6.
4. Remove 10 screws (S2) and then remove the Key PCB (37-2).
AVR145 harman/kardon
Page 8 of 135
8 TUNER MODULE (42) REMOVAL
1. Remove the Top-cabinet, referring to the previous step 1.
2. Disconnect the card cable between connector (CON1-13p) on the Tuner module (42) and connector (CN13) on Input PCB (39-1).
3. Remove 2 screws (S8) and then remove the Tuner Module (42).
9 VIDEO PCB (41) REMOVAL
1. Remove the Top-cabinet, referring to the previous step 1.
2. Disconnect the card cable between connector (BN14-13p) on the Video PCB (41) and connector (CN14) on the Input PCB (39-1).
3. Disconnect connector (CN43) on the Video PCB (41) from the lead wire (BN43-4P) on the Regulator PCB (A)(40-2).
4. Disconnect the card cable between connector (CN42) on the Video PCB (41) and connector (BN44-7p) on the I-Pod PCB (39-2).
5. Disconnect connector (CN41) on the Video PCB (41) from the lead wire (BN41-6P) on the Volume PCB (37-6).
6. Remove 6 screws (S8) and then remove the Video PCB (41).
10 I-POD PCB (39-2) REMOVAL
1. Remove the Top-cabinet, referring to the previous step 1.
2. Remove the Video PCB (41), referring to the previous step9
3. Disconnect connector (CN46) on the I-Pod PCB (39-2) from the lead wire (BN46-3P) on the Input PCB (39-1).
4. Disconnect the card cable between connector (BN19-9p)) on the I-Pod PCB (39-2) and connector (CN19) on the Input PCB (39-1).
5. Disconnect the card cable between connector (BN44-7p)) on the I-Pod PCB (39-2) and connector (CN42) on the Video PCB (41).
6. Disconnect the card cable between connector (CN47-7p)) on the I-Pod PCB (39-2) and connector (CN47) on the RS232 PCB (37-7).
7. Remove 2 screws (S13) and then remove the I-Pod PCB (39-2).
11 RS232 PCB (37-7) REMOVAL
1. Remove the Top-cabinet, referring to the previous step 1.
2. Remove the Video PCB (41), referring to the previous step9
3. Disconnect the card cable between connector (CN47) on the RS232 PCB (37-7) and connector (CN47-7) on the RS232 PCB (37-7).
4. Remove 2 screws and then remove the RS232 PCB (37-7).
12 INPUT PCB (39-1) REMOVAL
1. Remove the Top-cabinet, referring to the previous step 1.
2. Remove the Tuner module (42), referring to the previous step8
3. Remove the Video PCB (41), referring to the previous step9
4. Disconnect connector (CN20) on the the Input PCB (39-1) from the lead wire (BN20-5P) on the Regulator PCB (B)(40-5).
5. Disconnect connector (CN22) on the Input PCB (39-1) from the lead wire (BN22-6P) on the Phone PCB (37-5).
6. Disconnect connector (CN18) on the Input PCB (39-1) from the lead wire (BN18-5P) on the Phone PCB (37-5)
7. Disconnect connector (CN10) on the Input PCB (39-1) from the lead wire (BN10-4P) on the Volume PCB (37-6).
8. Disconnect the card cable between connector (CN14) on the Input PCB (39-1) and connector (BN14-13p)) on the Video PCB (41).
9. Disconnect the card cable between connector (CN19) on the Input PCB (39-1) and connector (BN19-9p) on the I-Pod PCB (39-2)
10. Disconnect the lead wire (BN46-3P) on the Input PCB (39-1) from connector (CN46) on the I-Pod PCB (39-2).
11. Disconnect the card cable between connector (CN12-21p) on the Input PCB (39-1) and connector (CN12-21p)
on the main PCB (38-1)
12. Disconnect the card cable between connector (CN11-13p) on the Input PCB (39-1) and connector (CN11) on the main PCB (38-1)
13. Disconnect the card cable between connector (CN72) on the Input PCB (39-1) and connector (CN72-17p) on the FIP PCB (37-1)
14. Remove 11 screws (S8,S15) and then remove the Input PCB (39-1).
13 POWER TRANS (36) & POWER PCB ASS’Y(40) REMOVAL
1. Remove the Top-cabinet, referring to the previous step 1.
2. Disconnect lead wire of the Power Trans (36) from connector (CN91-3P) on the Main PCB (38-1)
3. Disconnect connector (CN19-3P,CN20-4P) on TRANS PCB (40-3) from the lead wire (BN19-3P,BN20-4P) on the Main PCB (38-1).
4. Disconnect the lead wire (BN96-8P) on the Power PCB (40-4) from connector (CN96) on the Regulator PCB (B)(40-5).
5. Disconnect the lead wire (BN99-8P) on the Power PCB (40-4) from connector (CN99) on the Regulator PCB (A)(40-2).
6. Disconnect connector (CN81) on the Trans PCB (40-4) from the lead wire (BN81-8P) on the FIP PCB (37-1).
7. Remove 4 Trans screws (S9) and then remove the Power Trans (36)& Power PCB ASS’Y(40) REMOVAL .
AVR145 harman/kardon
Page 9 of 135
14 MAIN PCB ASS’Y (38-1) REMOVAL
1. Remove the Top-cabinet, referring to the previous step 1.
2. Remove the Tuner module (42), referring to the previous step8.
3. Remove the Video PCB (41) referring to the previous step9.
4. Remove the I-Pod PCB (39-2), referring to the previous step 10.
5. Remove the RS232 PCB (37-7), referring to the previous step 11.
6. Remove the Input PCB (39-1), referring to the previous step 12.
7. Remove theAC Cord(35) on the Main PCB (38-1)
8. Disconnect the lead wire (BN90-2P) on the Main PCB (38-1) from connector (CN86) on Moms PCB (37-4).
9. Disconnect connector (CN91-3P) on the Main PCB (38-1) from lead wire of the Power Trans (36)
10. Disconnect the lead wire (BN89-2P) on the Main PCB (38-1) from connector (CN89) on Regulator PCB (A)(40-2).
11. Disconnect the lead wire (BN19-3P,BN20-4P) on the Main PCB (38-1) from connector (CN19-3P,CN20-4P) on TRANS PCB (40-4).
12. Remove 11screws (S13-1EA, S4-2EA, S6-2EA, S8-6EA) and then remove the Main PCB ASS’Y (38-1).
AVR145 harman/kardon
Page 10 of 135
4
8
9
10
10
11
25
26 27
21
28
29
36
30
32
34
35
22
S2
S1
S2
S10
S5
S5
S9
S5
S4
S4
S6 x2
S15
S10
S8
S17
42
19
43
2
3
5
7
33
S1
1
6
S1
S12
S13
S14
S9
S11
S10
S7
S8
S6
S5
S4
S2
S3
NO
17CTB3+8JFCSCREW
SCREW
SCREW
CTB3+8JFZR
CTB3+16GFZR
SCREW,TRANS
SCREW
SCREW
SCREW
SCREW
SCREW
SCREW
SCREW
SCREW
CTB4+6FFC
CTB3+6JR
CTB3+10GFZR
CHD1A023R
CTB3+10GR
CTWS3+10GR
CTW3+12JR
CTB3+8JR
CTW3+8JR
3
2
4
19
6
19
3
10
9
35
1
DESCRIPTION PARTS NO. Q,ty
38-1
39-1
37-2
12
S13
16 BRACKET,PCB CMK2A010
BRACKET,PCB(H/T )
SUPPORT,CUSHION
FRONT PCB ASS'Y
BUSHING,AC CORD
29 BRACKET,TRANS
36
37
30
31
32
33
35
34
TRANS,POWER
PANEL,REAR
BRACKET,PCB
CORD,POWER
23
24
25
26
28
27
17
18
19
20
22
21
HOLDER,PCB
BRACKET,PCB
HEAT SINK
RUBBER,CUSHION
FOOT
PLATE,SHIELD
BRACKET,FIP
HOLDER,LED
CHASSIS,BOTTOM
CABINET,TOP
CMD1A487
CKF4A319Z
COP11910E
CJA2B043ZA
KHR1A028
CMD1A387
CMD1A398
CMY2A269
CUA2A229
CKL2A069H43
CKC5B145S46Z
CMD1A209
CHE1A170
CMD1A417
CHG1A104Z
CHG1A329
CMC1A302
CMH1A215
INDICATOR,VOLUME
BDAGE,HARMAN/KARDON
INDICATOR,POWER
3
10
11
12
13
15
14
7
6
5
4
9
8
KNOB,MOMS
KNOB,POWER
KNOB,DISPLAY
KNOB,FUNCTION
FILTER,FIP
WINDOW ASS'Y
BRACKET,SIDE
PANEL,FRONT
NO
2
1
HOLDER,VOLUME
CAP,VOLUME
DESCRIPTION
CGL1A222
CGUAVR145
CGW1A427RDZH43
CBC1A158MBZG27
CBT1A1026MMZG27
CBT1A1028MBYG27
CMD2A443
CBT1A1027K128
KGB1A158Z
CMZ1A088
CGL1A258Z
CGX1A338MBC63
PARTS NO.
CMH1A214
1
1
1
1
2
1
2
1
1
1
1
4
4
2
2
3
1
1
1
1
1
1
1
11
1
1
1
1
2
1
Q,ty
1
1
43
37-1
37-2
37-3
37-4
37-5
37-6
37-7
37-8
FIP PCB
KEY PCB
POWER LED PCB
MOMS PCB
PHONE PCB
VOLUME PCB
RS232 PCB
GUIDE PCB(CARD CABLE)
38 MAIN PCB ASS'Y COP11911E 1
38-1 MAIN PCB
1
1
1
1
1
1
1
1
1
1
39 INPUT PCB ASS'Y COP11912E 1
39-1
39-2
INPUT PCB
iPOD PCB 1
1
POWER PCB ASS'Y
40 COP11916E 1
40-1 DIGITAL IN OUT PCB 1
BADGE,MODEL
BADGE ASS'Y
44 CGX1A375ZA
CGB1A168Z
1
ORNAMENT,VOLUME CGU1A318Z 1
CHG1A160ZCUSHION 1
1
2
ORNAMENT,BADGE
BADGE,H/K(TOP)
CGX1A375M7G32
KGB1A159Z
1
1
WINDOW,FIP CGU1A399Y
1
2
1
1
CMZ2A090SHEET,VOLUME 1
BRACKET,PCB CMD1A570 1
S2
S11
S7
S1
44
Weright
17
S13
S2
S2
S2
S2
16
14
13 15
S5
VIDEO PCB ASS'Y
41 COP11917E 1
37-1
41
37-7
37-6
37-5
37-3
37-4
40-1
40-4
40-3
39-2
TUNER MODULE
42 1
18
SHEET , REFLECTION CMZ1A120 1
S16
23
24
S4
23
24
S4
S15
S12
45 CMY1A249HEAT SINK 1
45
37-9
37-8
38-2
38-2 GUIDE PCB(CARD CABLE) 1
S5
14-1
40-5
40-2
S16
S17
SCREW CTB3+10JR 3
SCREW,SPECIAL CHD1A012R 18
S14
CHD1A012ZR 2
S15
S4
CHD3A012R 6
S16
CHD4A012R 5
40-2 REGULATOR PCB(A) 5
40-3 TRANS PCB 1
40-4 TRANS PCB 1
40-5 REGELATOR PCB(B) 1
S2
SCREW,SPECIAL
SCREW,SPECIAL
SCREW,SPECIAL
CNVM9014MS171L
40-2
CLT5V045ZE
S4
39-3
39-3 RDS PCB 1
AVR145/230 EXPLODED VIEW
harman/kardon
AVR 145/230 service manual
Page 11 of 135
Only screws marked in yellow are stocked
AVR145/230 Electrical Parts List
Ref. # Part Number Description Value Qty
CGL1A222 INDICATOR , VOLUME INDICATOR 1
CGUAVR145 WINDOW ASS'Y ASS'Y 1
CGB1A168Z BADGE , AVR145 BADGE 1
CGU1A399Y WINDOW , FIP FIP WINDOW 1
CGU1A318Z ORNAMENT , VOLUME ORNAMENT 1
CGX1A338MBC63 CAP , VOLUME CAP 1
CGX1A375ZA BADGE ASS'Y ASS'Y 1
CGX1A375M7G32 ORNAMENT , BADGE ORNAMENT 1
KGB1A159Z BADGE , HARMAN/KARDON(TOP) BADGE 1
CKC5B145S46Z CABINET , TOP TOP CABINET 1
BKC5C145S46 TOP CABINET TOP CABINET 1
CMH1A214 HOLDER , VOLUME HOLDER 1
CMZ2A090 SHEET,VOLUME SHEET 1
CQB1A549Z LABEL , ATTENTION LABEL 1
CQB1A551Z LABEL , BAR CODE LABEL 1
CQB1A622 LABEL , SERIAL NO LABEL 1
CTB3+8JFC SCREW SCREW 13
CTB4+6FFC SCREW SCREW 6
CHE154 CLAMPER , ARM CLAMPER 0,12
CPG1A820W BOX , OUT CARTON BOX 1
CPS4A564 PAD , SNOW L PAD 1
CPS4A565 PAD , SNOW R PAD 1
CQB1A551Z LABEL , BAR CODE LABEL 2
CQB1A795Z LABEL , COUNTRY(AVR245/230) LABEL 2
CQS1A001 RIBON , BAR CODE SONY(TR-4070) 0,12
CQXAVR145/230 INSTRUCTION MANUAL ASS'Y ASS'Y 1
CARTAVR145/230 REMOCON ASS'Y ASS'Y 1
CGRAVR130/230ZA COVER ASS'Y ASS'Y 1
CGR1A331M7H43 COVER A COVER 1
CGR1A332M7H43 COVER B COVER 1
CPS1A676 PAD , COVER PAD 1
CQE1A220Z SHEET , FRONT COVER SHEET 1
CPL0905 STAPLE STAPLE 6
CQE1A180Z BOOKLET , IMFORMATIONS BOOKLET 1
CQX1A1135Y MANUAL , INSTRUCTION AVR145/23 MANUAL 1
CQX1A1138X MANUAL , SETUP(AVR145/230) MANUAL 1
CSA1A018Z FM 1 POLE ANT ANT 1
HQE1A273Z HARMAN IMAGE BROCHURES BROCHURES 1
CRE1A037 LOCKER LOCKER 10
KPL6500 STAPLE STAPLE 8
BOTTOM CHASSIS ASS'Y
Ref. # Part Number Description Value Qty
CUAAVR145/230 BOTTOM CHASSIS ASS'Y ASS'Y 1
CHD1A012ZR SCREW , SPECIAL Not stocked 2
CHD1A023R SCREW , SPECIAL Not stocked 4
CHD4A012R SCREW , SPECIAL Not stocked 5
CHE170 HOLDER , PCB HOLDER 2
harman/kardon
AVR 145/230 service manual
Page 12 of 135
BOTTOM CHASSIS ASS'Y
Ref. # Part Number Description Value Qty
CHE36-3 CLAMPER , WIRE CLAMPER 1
CHG1A104Z CUSHION , RUBBER CUSHION 1
CHG1A160Z CUSHION , RUBBER CUSHION 1
CHG1A360 CUSHION , FOOT CUSHION 4
CHS1A032 HEMELON TAPE TAPE 5
CJA2B043ZA CORD , POWER(EUR) QDR-7100CC 1
CKF4A319Z PANEL , REAR PANEL 1
CKL2A069H43 FOOT FOOT 4
CLZ9W003Z FERRITE , RING FERRITE RING 1
CMD1A487 BRACKET , TRANS BARCKET 1
CNVM9014MS171L MODULE , TUNER(EUR) TUNER 1
CQB1A173Y LABEL, FUSE CAUTION LABEL 1
CTB3+10GFZR SCREW Not stocked 20
CTB3+6FFZR SCREW Not stocked 3
CTB3+6JR SCREW Not stocked 13
CTB3+8JR SCREW Not stocked 7
CTW3+12JR SCREW Not stocked 2
CTW3+8JR SCREW Not stocked 8
CUA2A229 CHASSIS , BOTTOM CHASSIS 1
KHR1A028 BUSHING , AC CORD AC CORD 1
CB11 CWC1B2A13A100B CABLE , CARD CARD CABLE 1
CB12 CWC1C4A21B110B CABLE , CARD CARD CABLE 1
CB13 CWC1C4A13B080B CABLE , CARD CARD CABLE 1
CB14 CWC1B2A13A100B CABLE , CARD CARD CABLE 1
CB19 CWC1B2A09A240B CABLE , CARD CARD CABLE 1
CB42 CWC1B2A07A120B CABLE, CARD (1mm PITCH, A-B TY CARD CABLE 1
CB47 CWC1B2A07A060B CABLE , CARD CARD CABLE 1
F901 KBA2C4000TLEZ FUSE(233TPYE,4A,250V) LITTLE FUSE 1
T901 CLT5V045ZE TRANS , POWER MAIN MAIN TRANS 1
FRONT PANEL ASS
Y
Ref. # Part Number Description Value Qty
CGWAVR145/230 FRONT PANEL ASS'Y ASS'Y 1
CBC1A158MBZG27 KNOB , MOMS KNOB 1
CBT1A1026MMZG27 KNOB , POWER KNOB 1
CBT1A1027K128 KNOB , DISPLAY KNOB 1
CBT1A1028MBYG27 KNOB , FUNCTION KNOB 1
CGL1A258Z INDICATOR , POWER INDICATOR 1
CGW1A427RDZH43 PANEL , FRONT PANEL 1
CHR301 CLAMPER CLAMPER 12
CMC1A302 PLATE , SHIELD PLATE 1
CMD2A443 BRACKET , SIDE BRACKET 2
CMH1A215 HOLDER , LED HOLDER 1
CMK2A010 BRACKET , PCB BRACKET 1
CMZ1A088 FILTER , FIP FIP 1
CMZ1A120 SHEET , REFLECTION SHEET 1
CTB3+10GR SCREW Not stocked 31
CTB3+16GFZR SCREW Not stocked 2
KGB1A158Z BADGE , HARMAN/KARDON(FRONT) BADGE 1
CB72 CWC1B2A17A230B WAFER, CARD CABLE (1mm PITCH, WAFER 1
harman/kardon
AVR 145/230 service manual
Page 13 of 135
FRONT PCB ASSY
Ref. # Part Number Description Value Qty
COP11910E FRONT PCB ASS'Y(AVR145/230) ASS'Y 1
C714 HCBS1H151KBT CAP , CERAMIC 150UF 50V K 1
C716 CCEA1AH331T CAP , ELECT 330UF 10V 1
C719 HCBS1H102KBT CAP , CERAMIC 1000PF 50V K 1
C720 HCBS1H102KBT CAP , CERAMIC 1000PF 50V K 1
C721 HCBS1H102KBT CAP , CERAMIC 1000PF 50V K 1
C723 HCBS1H104ZFT CAP , CERAMIC 0.1UF 50V Z 1
C728 HCBS1H104ZFT CAP , CERAMIC 0.1UF 50V Z 1
C729 HCBS1H473ZFT CAP , CERAMIC 0.047UF 50V Z 1
C731 CCEA1HH100T CAP , ELECT 10UF 50V 1
C735 CCEA1CKS100T CAP , ELECT 10UF 16V 1
C742 HCBS1H223ZFT CAP , CERAMIC 0.02UF 50V Z 1
C793 HCBS1H104ZFT CAP , CERAMIC 0.1UF 50V Z 1
C794 HCBS1C222MXT CAP , CERAMIC 2200PF 16V 1
C795 HCBS1H102KBT CAP , CERAMIC 1000PF 50V K 1
C796 HCBS1H102KBT CAP , CERAMIC 1000PF 50V K 1
C805 HCBS1H223ZFT CAP , CERAMIC 0.022UF 50V Z 1
C806 HCBS1H223ZFT CAP , CERAMIC 0.022UF 50V Z 1
C807 HCBS1H104ZFT CAP , CERAMIC 0.1UF 50V Z 1
C808 HCBS1H181KBT CAP , CERAMIC 180PF 50V Z 1
C809 CCEA1AH471T CAP , ELECT 470UF 10V 1
C812 HCBS1H104ZFT CAP , CERAMIC 0.1UF 50V Z 1
C817 HCBS1H100JCT CAP , CERAMIC 10PF 50V 1
C841 CCEA1HH100T CAP , ELECT 10UF 50V 1
C842 CCEA1HH100T CAP , ELECT 10UF 50V 1
C843 CCEA1HH100T CAP , ELECT 10UF 50V 1
C850 HCBS1H471KBT CAP , CERAMIC 470PF 50V 1
C851 HCBS1H471KBT CAP , CERAMIC 470PF 50V 1
C852 HCBS1H104ZFT CAP , CERAMIC 0.1UF 50V Z 1
C855 HCBS1H101KBT CAP , CERAMIC 100PF 50V K 1
C856 HCBS1H101KBT CAP , CERAMIC 100PF 50V K 1
C857 HCBS1H104ZFT CAP , CERAMIC 0.1UF 50V Z 1
C862 HCBS1H101KBT CAP , CERAMIC 100PF 50V K 1
C863 HCBS1H101KBT CAP , CERAMIC 100PF 50V K 1
C866 CCEA1HKS100T CAP , ELECT 10UF 50V SMALL 1
C867 CCEA1HKS100T CAP , ELECT 10UF 50V SMALL 1
C868 CCEA1EKS470T CAP , ELECT 47UF 25V 1
C869 CCEA1EKS470T CAP , ELECT 47UF 25V 1
C870 HCBS1H681KBT CAP , CERAMIC 680PF 50V K 1
C871 HCBS1H681KBT CAP , CERAMIC 680PF 50V K 1
C872 CCEA1CH331T CAP , ELECT 330UF 16V 1
C873 CCEA1CH331T CAP , ELECT 330UF 16V 1
C874 HCBS1H101KBT CAP , CERAMIC 100PF 50V K 1
C882 HCBS1H104ZFT CAP , CERAMIC 0.1UF 50V Z 1
C889 HCBS1H104ZFT CAP , CERAMIC 0.1UF 50V Z 1
C891 HCBS1H223ZFT CAP , CERAMIC 0.023UF 50V Z 1
C892 HCBS1H223ZFT CAP , CERAMIC 0.023UF 50V Z 1
C893 HCBS1H223ZFT CAP , CERAMIC 0.023UF 50V Z 1
C894 CCEA1CKS100T CAP , ELECT 10UF 16V 1
harman/kardon
AVR 145/230 service manual
Page 14 of 135
FRONT PCB ASSY
Ref. # Part Number Description Value Qty
C896 HCBS1H223ZFT CAP , CERAMIC 0.023UF 50V Z 1
C897 CCEA1AH471T CAP , ELECT 470UF 10V 1
C901 HCBS1H390JT CAP , CERAMIC 39PF 50V Z 1
C903 CCEA1HKS2R2T CAP , ELECT 2.2UF 50V SMALL SIZE 1
C905 CCEA1HKS2R2T CAP , ELECT 2.2UF 50V SMALL SIZE 1
C953 HCBS1H104ZFT CAP , CERAMIC 0.1UF 50V Z 1
C954 HCBS1H104ZFT CAP , CERAMIC 0.1UF 50V Z 1
C957 HCBS1H104ZFT CAP , CERAMIC 0.1UF 50V Z 1
D730 CVD1SS133MT DIODE 1SS133 1
D774 CVD1SS133MT DIODE 1SS133 1
D778 HVD1N5819T DIODE , SCHOTTKY 1N5819 1
D784 CVD1SS133MT DIODE 1SS133 1
D785 CVD1SS133MT DIODE 1SS133 1
L702 HLQ02C100KT COIL , AXAIL 10uH 1
Q701 HVTKRC107MT T.R KRC107M 1
Q722 HVTKRA107MT T.R KRA107M 1
Q724 HVTKRC107MT T.R KRC107M 1
Q725 HVTKRC107MT T.R KRC107M 1
Q734 HVTKTC2874BT T.R , MUTE KTC2874B 1
Q735 HVTKTC2874BT T.R , MUTE KTC2874B 1
Q736 HVTKTC2874BT T.R , MUTE KTC2874B 1
Q737 HVTKTC2874BT T.R , MUTE KTC2874B 1
Q738 HVTKRC107MT T.R KRC107M 1
Q739 HVTKTA1271YT T.R KTA1271Y 1
R701 CRD20TJ103T RES , CARBON 10K OHM 1/5W J 1
R704 CRD20TJ100T RES , CARBON 10 OHM 1/5W J 1
R705 CRD20TJ820T RES , CARBON 82 OHM 1/5W J 1
R706 CRD20TJ820T RES , CARBON 82 OHM 1/5W J 1
R708 CRD20TJ820T RES , CARBON 82 OHM 1/5W J 1
R709 CRD20TJ470T RES , CARBON 47 OHM 1/5W J 1
R710 CRD20TJ470T RES , CARBON 47 OHM 1/5W J 1
R711 CRD20TJ470T RES , CARBON 47 OHM 1/5W J 1
R718 CRD20TJ222T RES , CARBON 2.2K OHM 1/5W J 1
R737 CRD20TJ100T RES , CARBON 10 OHM 1/5W J 1
R747 CRD20TJ103T RES , CARBON 10K OHM 1/5W J 1
R753 CRD20TF1001T RES , CARBON 1K 1/5W F 1
R754 CRD20TF1501T RES , CARBON 1.5K 1/5W F 1
R755 CRD20TF1801T RES , CARBON 1.8K 1/5W F 1
R756 CRD20TF2701T RES , CARBON 2.7K 1/5W F 1
R757 CRD20TF3301T RES , CARBON 3.3K 1/5W F 1
R758 CRD20TF5601T RES , CARBON 5.6K 1/5W F 1
R759 CRD20TF1001T RES , CARBON 1K 1/5W F 1
R760 CRD20TF1501T RES , CARBON 1.5K 1/5W F 1
R761 CRD20TF1801T RES , CARBON 1.8K 1/5W F 1
R762 CRD20TF2701T RES , CARBON 2.7K 1/5W F 1
R763 CRD20TF3301T RES , CARBON 3.3K 1/5WF 1
R764 CRD20TF5601T RES , CARBON 5.6K 1/5W F 1
R765 CRD20TF7501T RES , CARBON 7.5K 1/5W F 1
R766 CRD20TF1001T RES , CARBON 1K 1/5W F 1
R767 CRD20TF1501T RES , CARBON 1.5K 1/5W F 1
harman/kardon
AVR 145/230 service manual
Page 15 of 135
FRONT PCB ASSY
Ref. # Part Number Description Value Qty
R768 CRD20TF1801T RES , CARBON 1.8K 1/5W F 1
R769 CRD20TF2701T RES , CARBON 2.7K 1/5W F 1
R781 CRD20TJ102T RES , CARBON 1K OHM 1/5W J 1
R783 CRD20TJ102T RES , CARBON 1K OHM 1/5W J 1
R784 CRD20TJ102T RES , CARBON 1K OHM 1/5W J 1
R786 CRD20TJ152T RES , CARBON 1.5K OHM 1/5W J 1
R787 CRD20TJ101T RES , CARBON 100 OHM 1/5W J 1
R791 CRD20TJ822T RES , CARBON 8.2K OHM 1/5W J 1
R805 CRD20TJ104T RES , CARBON 100K OHM 1/5W J 1
R806 CRD20TJ472T RES , CARBON 4.7K OHM 1/5W J 1
R824 CRD20TJ221T RES , CARBON 220 OHM 1/5W J 1
R825 CRD20TJ681T RES , CARBON 680 OHM 1/5W J 1
R828 CRD20TJ221T RES , CARBON 220 OHM 1/5W J 1
R829 CRD20TJ681T RES , CARBON 680 OHM 1/5W J 1
R864 CRD20TJ272T RES , CARBON 2.7K OHM 1/5W J 1
R865 CRD20TJ101T RES , CARBON 100 OHM 1/5W J 1
R866 CRD20TJ272T RES , CARBON 2.7K OHM 1/5W J 1
R869 CRD20TJ750T RES , CARBON 75 OHM 1/5W J 1
R871 CRD20TJ104T RES , CARBON 100K OHM 1/5W J 1
R872 CRD20TJ104T RES , CARBON 100K OHM 1/5W J 1
R873 CRD20TJ471T RES , CARBON 470 OHM 1/5W J 1
R874 CRD20TJ471T RES , CARBON 470 OHM 1/5W J 1
R875 CRD20TJ103T RES , CARBON 10K OHM 1/5W J 1
R876 CRD20TJ750T RES , CARBON 75 OHM 1/5W J 1
R877 CRD20TJ750T RES , CARBON 75 OHM 1/5W J 1
R878 CRD20TJ750T RES , CARBON 75 OHM 1/5W J 1
R892 CRD20TJ222T RES , CARBON 2.2K OHM 1/5W J 1
R893 CRD20TJ333T RES , CARBON 33K OHM 1/5W J 1
R895 CRD20TJ101T RES , CARBON 100 OHM 1/5W J 1
R896 CRD20TJ101T RES , CARBON 100 OHM 1/5W J 1
R897 CRD20TJ101T RES , CARBON 100 OHM 1/5W J 1
R898 CRD20TJ101T RES , CARBON 100 OHM 1/5W J 1
R899 CRD20TJ104T RES , CARBON 100K OHM 1/5W J 1
R900 CRD20TJ104T RES , CARBON 100K OHM 1/5W J 1
R901 CRD20TJ152T RES , CARBON 1.5K OHM 1/5W J 1
R902 CRD20TJ152T RES , CARBON 1.5K OHM 1/5W J 1
R903 CRD20TJ102T RES , CARBON 1K OHM 1/5W J 1
R904 CRD20TJ102T RES , CARBON 1K OHM 1/5W J 1
R905 CRD20TJ104T RES , CARBON 100K OHM 1/5W J 1
R906 CRD20TJ104T RES , CARBON 100K OHM 1/5W J 1
R907 CRD20TJ472T RES , CARBON 4.7K OHM 1/5W J 1
R908 CRD20TJ472T RES , CARBON 4.7K OHM 1/5W J 1
R909 CRD20TJ221T RES , CARBON 220 OHM 1/5W J 1
R910 CRD20TJ221T RES , CARBON 220 OHM 1/5W J 1
R911 CRD20TJ221T RES , CARBON 220 OHM 1/5W J 1
R912 CRD20TJ221T RES , CARBON 220 OHM 1/5W J 1
R913 CRD20TJ102T RES , CARBON 1K OHM 1/5W J 1
R915 CRD20TJ473T RES , CARBON 47K OHM 1/5W J 1
R918 CRD20TJ472T RES , CARBON 4.7K OHM 1/5W J 1
R919 CRD20TJ472T RES , CARBON 4.7K OHM 1/5W J 1
harman/kardon
AVR 145/230 service manual
Page 16 of 135
FRONT PCB ASSY
Ref. # Part Number Description Value Qty
R956 CRD20TJ1R0T RES , CARBON 1 OHM 1/5W J 1
S701 HST1A020ZT SW , TACT 1A020 1
S702 HST1A020ZT SW , TACT 1A020 1
S703 HST1A020ZT SW , TACT 1A020 1
S704 HST1A020ZT SW , TACT 1A020 1
S705 HST1A020ZT SW , TACT 1A020 1
S706 HST1A020ZT SW , TACT 1A020 1
S707 HST1A020ZT SW , TACT 1A020 1
S708 HST1A020ZT SW , TACT 1A020 1
S709 HST1A020ZT SW , TACT 1A020 1
S710 HST1A020ZT SW , TACT 1A020 1
S711 HST1A020ZT SW , TACT 1A020 1
S712 HST1A020ZT SW , TACT 1A020 1
S713 HST1A020ZT SW , TACT 1A020 1
S714 HST1A020ZT SW , TACT 1A020 1
S715 HST1A020ZT SW , TACT 1A020 1
S716 HST1A020ZT SW , TACT 1A020 1
S717 HST1A020ZT SW , TACT 1A020 1
S718 HST1A020ZT SW , TACT 1A020 1
S719 HST1A020ZT SW , TACT 1A020 1
S720 HST1A020ZT SW , TACT 1A020 1
CMC3A111 PLATE , EARTH PLATE 1
BK71 CMD1A209 BRACKET , FLT BRACKET 1
BK72 CMD1A209 BRACKET , FLT BRACKET 1
BK73 CMD1A209 BRACKET , FLT BRACKET 1
BN10 CWZAVR230BN10 WIRE ASS'Y (SHIELD) WIRE 1
BN18 CWZAVR125BN18 WIRE ASS'Y (SHIELD) WIRE 1
BN22 CWZAVR145BN22 WIRE ASS'Y (SHIELD) WIRE 1
BN41 CWZAVR130BN41 WIRE ASS'Y (SHIELD) WIRE 1
BN81 CWB2C908200BM WIRE ASS'Y WIRE 1
BN84 CWB2B905080EN WIRE ASS'Y WIRE 1
BN85 CWB2B902100EW WIRE ASS'Y ( ANGLE ) WIRE 1
BN88 CWB2B904100EN WIRE ASS'Y WIRE 1
BN89 CWB2B904100EN WIRE ASS'Y WIRE 1
CN47 CJP07GA117ZY TEMP ITEM WAFER 1
CN72 CJP17GA193ZY WAFER, CARD CABLE (SMD) WAFER 1
CN84 CJP05GB46ZY WAFER WAFER 1
CN85 CJP02GA19ZY WAFER, 2PIN WAFER 1
CN86 CJP02GA89ZM WAFER WAFER 1
CN88 CJP04GB46ZY WAFER WAFER 1
CN89 CJP04GB46ZY WAFER WAFER 1
D701 CVD52CSBBCEAB2 BLUE L.E.D L.E.D 1
D703 CVD52CSBBCEAB2 BLUE L.E.D L.E.D 1
D705 CVD52CSBBCEAB2 BLUE L.E.D L.E.D 1
D723 CVD50BOBBWGA L.E.D , 2 COLOR (ORG , BLUE) L.E.D 1
D727 CVD50BOBBWGA L.E.D , 2 COLOR (ORG , BLUE) L.E.D 1
ET03 CMD1A569 BRACKET , PCB BRACKET 1
FIP1 HFLHCA18ML03 F.I.P FIP 1
IC73 HRVNJL34H380A SENSOR , REMOTE JRC 1
IC75 HVI74ACT04MTR I.C , HEX INVERTER FAIRCHILD 1
harman/kardon
AVR 145/230 service manual
Page 17 of 135
FRONT PCB ASSY
Ref. # Part Number Description Value Qty
IC76 HVI74HCU04AFNG I.C , INVERTER TOSHIBA 1
IC86 HVINJM4556AL I.C , HEADPHONE JRC 1
IC97 HVIST202EBW IC , RS232C TRANSCEIVER ST 1
JK81 CJJ4M043Y JACK , BOARD BOARD JACK 1
JK82 HJSTORX177L MODULE , OPTICAL(RX) OPT JACK(RX) 1
JK83 CJJ2E026Z JACK , HEADPHONE(SILVER PLATE) JACK 1
JK85 CJJ9M003Z JACK , S-VIDEO JACK 1
JK86 CJJ4S023Y JACK , BOARD JACK 1
JK97 CJJ9W001Z 9P D-SUB FEMALE(RS-232C) SEMCO JACK 1
JW82 CWE8202300RV WIRE ASS'Y WIRE 1
JW83 CWE8202150RV WIRE ASS'Y WIRE 1
JW84 CWE8202110RV WIRE ASS'Y WIRE 1
SW1 CSH1A008ZV SW , PUSH (MOMS) MOMS SWITCH 1
SW95 KST1A010Z SW , TACT SWITCH 1
SW98 HSH2B018Z SW , PUSH SWITCH 1
VR74 CSR2A037Z ENCODER ENCODER 1
MAIN PCB ASSY
Ref. # Part Number Description Value Qty
COP11911E MAIN PCB ASS'Y(AVR145/230) ASS'Y 1
CHD3A012R SCREW , SPECIAL Not stocked 3
CHS1A032 HEMELON TAPE TAPE 1
C501 CCEA1HH100T CAP , ELECT 10UF 50V 1
C502 CCEA1HH100T CAP , ELECT 10UF 50V 1
C503 CCEA1HH100T CAP , ELECT 10UF 50V 1
C504 CCEA1HH100T CAP , ELECT 10UF 50V 1
C505 CCEA1HH100T CAP , ELECT 10UF 50V 1
C506 CCKT1H331KB CAP , CERAMIC 330PF 50V 1
C507 HCBS1H331KBT CAP , CERAMIC 330PF 50V 1
C508 HCBS1H331KBT CAP , CERAMIC 330PF 50V 1
C509 CCKT1H331KB CAP , CERAMIC 330PF 50V 1
C510 HCBS1H331KBT CAP , CERAMIC 330PF 50V 1
C561 CCEA1CH101T CAP , ELECT 100UF 16V 1
C562 CCEA1CH101T CAP , ELECT 100UF 16V 1
C563 CCEA1CH101T CAP , ELECT 100UF 16V 1
C564 CCEA1CH101T CAP , ELECT 100UF 16V 1
C565 CCEA1CH101T CAP , ELECT 100UF 16V 1
C566 CCEA1CH101T CAP , ELECT 100UF 16V 1
C567 CCEA1CH101T CAP , ELECT 100UF 16V 1
C568 CCEA1CH101T CAP , ELECT 100UF 16V 1
C569 CCEA1CH101T CAP , ELECT 100UF 16V 1
C570 CCEA1CH101T CAP , ELECT 100UF 16V 1
C571 HCBS1H681KBT CAP , CERAMIC 680PF 50V 1
C572 HCBS1H681KBT CAP , CERAMIC 680PF 50V 1
C573 HCBS1H681KBT CAP , CERAMIC 680PF 50V 1
C574 HCBS1H681KBT CAP , CERAMIC 680PF 50V 1
C575 HCBS1H681KBT CAP , CERAMIC 680PF 50V 1
C601 CCCT1H120JC CAP , CERAMIC 12PF 50V 1
C602 CCCT1H120JC CAP , CERAMIC 12PF 50V 1
harman/kardon
AVR 145/230 service manual
Page 18 of 135
MAIN PCB ASSY
Ref. # Part Number Description Value Qty
C603 CCCT1H120JC CAP , CERAMIC 12PF 50V 1
C604 CCCT1H120JC CAP , CERAMIC 12PF 50V 1
C605 CCCT1H120JC CAP , CERAMIC 12PF 50V 1
C606 CCCT1H330JC CAP , CERAMIC 33PF 50V 1
C607 CCCT1H330JC CAP , CERAMIC 33PF 50V 1
C608 CCCT1H330JC CAP , CERAMIC 33PF 50V 1
C609 CCCT1H330JC CAP , CERAMIC 33PF 50V 1
C610 CCCT1H330JC CAP , CERAMIC 33PF 50V 1
C681 CCEA1HH100T CAP , ELECT 10UF 50V 1
C682 CCEA1HH100T CAP , ELECT 10UF 50V 1
C683 CCEA1HH100T CAP , ELECT 10UF 50V 1
C684 CCEA1HH100T CAP , ELECT 10UF 50V 1
C685 CCEA1HH100T CAP , ELECT 10UF 50V 1
C726 CCKT1H221KB CAP , CERAMIC 220PF 50V 1
C900 HCQI1H473JZT CAP , MYLAR 0.047UF 50V 1
C901 HCQI1H473JZT CAP , MYLAR 0.047UF 50V 1
C905 CCFT1H223ZF CAP , CERAMIC 0.022UP 50V 1
C907 CCEA1CH101T CAP , ELECT 100UF 16V 1
C908 CCFT1H223ZF CAP , CERAMIC 0.022UP 50V 1
C910 HCQI1H473JZT CAP , MYLAR 0.047UF 50V 1
C911 CCEA1CH471T CAP , ELECT 470UF 16V 1
C912 CCEA1CH221T CAP , ELECT 220UF 16V 1
C913 CCFT1H104ZF CAP , SEMICONDUCTOR 0.1UF 50V ZF 1
C914 HCQI1H473JZT CAP , MYLAR 0.047UF 50V J 1
C917 HCQI1H473JZT CAP , MYLAR 0.047UF 50V J 1
C924 CCFT1H104ZF CAP , SEMICONDUCTOR 0.1UF 50V ZF 1
C939 CCEA1HH4R7T CAP , ELECT 4.7UF 50V 1
C940 CCEA1AH471T CAP , ELECT 470UF 10V 1
C948 CCFT1H104ZF CAP , SEMICONDUCTOR 0.1UF 50V ZF 1
C949 CCEA1HH220T CAP , ELECT 22UF 50V 1
C971 HCQI1H562JZT CAP , MYLAR 5600PF 50V 1
C972 HCQI1H562JZT CAP , MYLAR 5600PF 50V 1
C973 HCQI1H562JZT CAP , MYLAR 5600PF 50V 1
C980 HCQI1H562JZT CAP , MYLAR 5600PF 50V 1
C981 HCQI1H562JZT CAP , MYLAR 5600PF 50V 1
C990 HCQI1H473JZT CAP , MYLAR 0.047UF 50V J 1
C991 CCEA1HH1R0T CAP , ELECT 1UF 50V 1
C992 HCQI1H473JZT CAP , MYLAR 0.047UF 50V J 1
C993 HCQI1H473JZT CAP , MYLAR 0.047UF 50V J 1
C995 HCQI1H473JZT CAP , MYLAR 0.047UF 50V J 1
C997 HCQI1H473JZT CAP , MYLAR 0.047UF 50V J 1
C999 CCFT1H223ZF CAP , CERAMIC 0.022UP 50V 1
D501 CVD1SS133MT DIODE 1SS133 1
D502 CVD1SS133MT DIODE 1SS133 1
D503 CVD1SS133MT DIODE 1SS133 1
D504 CVD1SS133MT DIODE 1SS133 1
D505 CVD1SS133MT DIODE 1SS133 1
D581 CVD1SS133MT DIODE 1SS133 1
D582 CVD1SS133MT DIODE 1SS133 1
D583 CVD1SS133MT DIODE 1SS133 1
harman/kardon
AVR 145/230 service manual
Page 19 of 135
MAIN PCB ASSY
Ref. # Part Number Description Value Qty
D584 CVD1SS133MT DIODE 1SS133 1
D585 CVD1SS133MT DIODE 1SS133 1
D901 CVD1N4003SRT RECT , DIODE 1N4003 1
D902 CVD1SS133MT DIODE 1SS133 1
D911 CVD1SS133MT DIODE 1SS133 1
D912 CVD1SS133MT DIODE 1SS133 1
D914 CVD1SS133MT DIODE 1SS133 1
D917 CVD1SS133MT DIODE 1SS133 1
D953 CVD1SS133MT DIODE 1SS133 1
D954 CVD1N4003SRT RECT , DIODE 1N4003 1
D955 CVD1N4003SRT RECT , DIODE 1N4003 1
D956 CVD1N4003SRT RECT , DIODE 1N4003 1
D957 CVD1N4003SRT RECT , DIODE 1N4003 1
D961 CVD1N4003ST RECT , DIODE 1N4003 1
D962 CVD1N4003SRT RECT , DIODE 1N4003 1
D963 CVD1N4003ST RECT , DIODE 1N4003 1
D973 CVD1SS133MT DIODE 1SS133 1
D974 CVD1SS133MT DIODE 1SS133 1
D979 HVDMTZJ6.2BT DIODE , ZENER MTZJ6.2B 1
D980 CVD1SS133MT DIODE 1SS133 1
ET90 HJT1A025 PALTE , EARTH MET37-0002 1
ET91 HJT1A025 PALTE , EARTH MET37-0002 1
F901 KJCFC5S HOLDER , FUSE FUSE HOLDER 2
F902 KBA2D2500TLET FUSE(SR-5, 2.5A, 250V) SAVE FUSETECH 1
Q501 HVTKTA1268GRT T.R KTA1268GR 1
Q502 HVTKTA1268GRT T.R KTA1268GR 1
Q503 HVTKTA1268GRT T.R KTA1268GR 1
Q504 HVTKTA1268GRT T.R KTA1268GR 1
Q505 HVTKTA1268GRT T.R KTA1268GR 1
Q511 HVTKTC3200GRT T.R KTC3200GR 1
Q512 HVTKTC3200GRT T.R KTC3200GR 1
Q513 HVTKTC3200GRT T.R KTC3200GR 1
Q514 HVTKTC3200GRT T.R KTC3200GR 1
Q515 HVTKTC3200GRT T.R KTC3200GR 1
Q516 HVTKTC3200GRT T.R KTC3200GR 1
Q517 HVTKTC3200GRT T.R KTC3200GR 1
Q518 HVTKTC3200GRT T.R KTC3200GR 1
Q519 HVTKTC3200GRT T.R KTC3200GR 1
Q520 HVTKTC3200GRT T.R KTC3200GR 1
Q541 HVTKTC3198YT T.R KTC3198Y 1
Q542 HVTKTC3198YT T.R KTC3198Y 1
Q543 HVTKTC3198YT T.R KTC3198Y 1
Q544 HVTKTC3198YT T.R KTC3198Y 1
Q545 HVTKTC3198YT T.R KTC3198Y 1
Q556 HVTKTC3200GRT T.R KTC3200GR 1
Q557 HVTKTC3200GRT T.R KTC3200GR 1
Q558 HVTKTC3200GRT T.R KTC3200GR 1
Q559 HVTKTC3200GRT T.R KTC3200GR 1
Q560 HVTKTC3200GRT T.R KTC3200GR 1
Q561 HVTKTC3200GRT T.R KTC3200GR 1
harman/kardon
AVR 145/230 service manual
Page 20 of 135

This manual suits for next models

1

Other Harman Kardon Receiver manuals

Harman Kardon AVR 354 User manual

Harman Kardon

Harman Kardon AVR 354 User manual

Harman Kardon AVR 435 User manual

Harman Kardon

Harman Kardon AVR 435 User manual

Harman Kardon AVR 125 User manual

Harman Kardon

Harman Kardon AVR 125 User manual

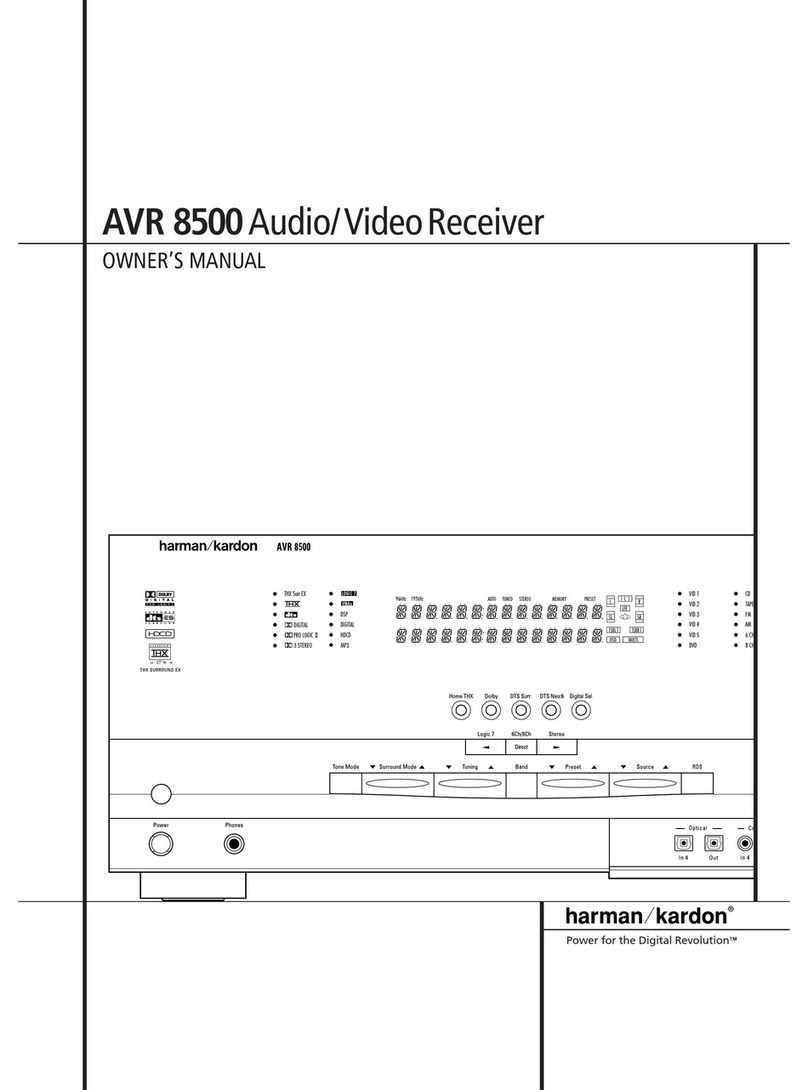
Harman Kardon AVR8500 User manual

Harman Kardon

Harman Kardon AVR8500 User manual

Harman Kardon AVR 354 User manual

Harman Kardon

Harman Kardon AVR 354 User manual

Harman Kardon AVR 125 Instructions and recipes

Harman Kardon

Harman Kardon AVR 125 Instructions and recipes

Harman Kardon AVR 435 User manual

Harman Kardon

Harman Kardon AVR 435 User manual

Harman Kardon AVR 745 User manual

Harman Kardon

Harman Kardon AVR 745 User manual

Harman Kardon AVR 700 User manual

Harman Kardon

Harman Kardon AVR 700 User manual

Harman Kardon AVR 110 User manual

Harman Kardon

Harman Kardon AVR 110 User manual

Harman Kardon AVR 130 User manual

Harman Kardon

Harman Kardon AVR 130 User manual

Harman Kardon AVR 1600 Quick start guide

Harman Kardon

Harman Kardon AVR 1600 Quick start guide

Harman Kardon System 13828 User manual

Harman Kardon

Harman Kardon System 13828 User manual

Harman Kardon AVR 445 User manual

Harman Kardon

Harman Kardon AVR 445 User manual

Harman Kardon DPR 1001 User manual

Harman Kardon

Harman Kardon DPR 1001 User manual

Harman Kardon HK495I User manual

Harman Kardon

Harman Kardon HK495I User manual

Harman Kardon AVR 7550HD User manual

Harman Kardon

Harman Kardon AVR 7550HD User manual

Harman Kardon AVR 2550 User manual

Harman Kardon

Harman Kardon AVR 2550 User manual

Harman Kardon AVR 225 User manual

Harman Kardon

Harman Kardon AVR 225 User manual

Harman Kardon AVR 130 User manual

Harman Kardon

Harman Kardon AVR 130 User manual

Harman Kardon HARMAN/KARDON AVR360 User manual

Harman Kardon

Harman Kardon HARMAN/KARDON AVR360 User manual

Harman Kardon AVR 8000 User manual

Harman Kardon

Harman Kardon AVR 8000 User manual

Harman Kardon BDS 277 User manual

Harman Kardon

Harman Kardon BDS 277 User manual

Harman Kardon AVR 235 User manual

Harman Kardon

Harman Kardon AVR 235 User manual

Popular Receiver manuals by other brands

AVLink AVM-6995H-SYS-A1 Quick setup guide

AVLink

AVLink AVM-6995H-SYS-A1 Quick setup guide

Kathrein UFS 923 operating manual

Kathrein

Kathrein UFS 923 operating manual

Erone SEL2641R433-OC4 manual

Erone

Erone SEL2641R433-OC4 manual

SMART MX56 manual

SMART

SMART MX56 manual

Yamaha RX-V3800 - AV Receiver Service manual

Yamaha

Yamaha RX-V3800 - AV Receiver Service manual

AOR AR-Mini operating manual

AOR

AOR AR-Mini operating manual

JVC LVT0100-001B instructions

JVC

JVC LVT0100-001B instructions

Kenwood kdc0mp928 instruction manual

Kenwood

Kenwood kdc0mp928 instruction manual

Pioneer AVH-X8690BT owner's manual

Pioneer

Pioneer AVH-X8690BT owner's manual

Watkins Johnson WJ-87 18-17 instruction manual

Watkins Johnson

Watkins Johnson WJ-87 18-17 instruction manual

AMX MX8 instruction manual

AMX

AMX MX8 instruction manual

Team Electronic RX-EP-U manual

Team Electronic

Team Electronic RX-EP-U manual

Rockford Fosgate PMX-0 Installation & operation guide

Rockford Fosgate

Rockford Fosgate PMX-0 Installation & operation guide

GTO RB709U-NB owner's manual

GTO

GTO RB709U-NB owner's manual

Yamaha RX-V692 Service manual

Yamaha

Yamaha RX-V692 Service manual

TechnoTrend TT-micro S2810 user manual

TechnoTrend

TechnoTrend TT-micro S2810 user manual

Onkyo TX-NR525 Manual de instrucciones

Onkyo

Onkyo TX-NR525 Manual de instrucciones

Softel SR1002 Mini FTTH manual

Softel

Softel SR1002 Mini FTTH manual

manuals.online logo
manuals.online logoBrands
  • About & Mission
  • Contact us
  • Privacy Policy
  • Terms and Conditions

Copyright 2025 Manuals.Online. All Rights Reserved.