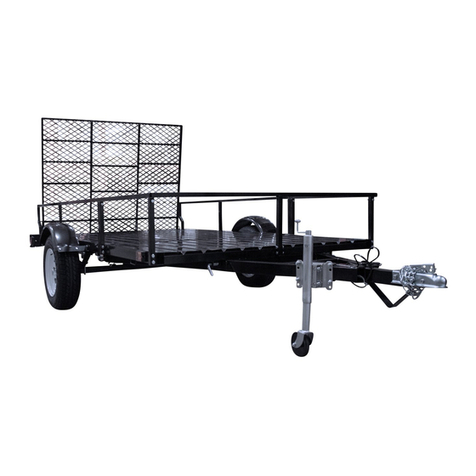
Harper DewEze 400 Series User manual

400/500
400/500 SERIES
1-2019

400/500 1

400/500
Thank you for purchasing a DewEze Flatbed.
TO THE OWNER OR OPERATOR:
As with all Harper products, the 400 and 500 Series Flatbeds have been thoroughly tested and built
to provide a sturdy, dependable product. The Flatbed is equipped with live hydraulics, which allows
it to be used for a wide range of lifting and hauling tasks. This manual is written as an aid to oper-
ating and maintaining the DewEze Flatbed. Read and understand the manual thoroughly before
operation to avoid damage to the unit or injury to the operator or bystanders.
A Flatbed can present hazards to an operator who follows unsafe procedures in either the operation
or maintenance of the unit. Therefore, SAFETY WARNINGS are present at certain locations in the
text. Harper Industries is not responsible for accidents or injuries that result from the misuse or lack
of maintenance of the Flatbed.
SYMBOL: SAFETY WARNING!
MEANING: Failure to understand and obey this warning may result in injury to you or others.
Whenever this symbol is used, please pay very close attention to the information presented, and
make sure you fully understand. If you do not, contact your dealer or Harper Industries for clarica-
tion.
151 E. HWY. 160 Harper, KS 67058
(620) 896-7381 • Fax (620) 896-7129
Toll Free 800-835-1042
Email [email protected]
Website www.deweze.com
© 2019 Harper Industries, Inc.
The Harper and DewEze names and the ATM logo are registered trademarks of Harper Industries, Inc. All other brand and product-
names are trademarks or registered trademarks of their respective companies.
1

400/500
Statement of Warranty
Harper Industries warrants to each purchaser of a new DewEze Flatbed from an autho-
rized dealer or representative, that such equipment is free of manufacturer’s defects which
appear while in normal service for a period of TWO YEARS commencing with deliver to
the original user. The Flatbed hydraulic and electrical systems are warranted for a period
of one year.
The obligation of Harper Industries under this warranty is expressly limited, at our op-
tion, to replacement or repair at a service facility designated by Harper Industries or at
the manufacturing plant in Harper, Ks. A part will be replaced after inspection discloses
it to have been defective. This warranty does not apply to defects caused by damage or
unreasonable use (including failure to provide reasonable and necessary maintenance, or
by performing functions without genuine DewEze accessories) while in the possession of
the consumer.
Harper Industries shall not be liable for the consequential damages of any kind, including
but not limited to consequential labor costs or transportation charges in connection with
replacement or repair of defective parts.
Harper Industries makes no warranty with respect to trade accessories. They are subject
to the warranties of their respective manufacturers.
ANY IMPLIED OR STATUTORY WARRANTIES, INCLUDING ANY WARRANTY OR
MERCHANTABILITY OR FITNESS FOR A PARTICULAR PURPOSE, ARE EXPRESSLY
LIMITED TO THE DURATION OF THIS WRITTEN WARRANTY. Harper Industries makes
no other express warranty, nor is anyone authorized to make any on behalf of Harper In-
dustries.
For further information please contact your nearest DewEze dealer.
RECORDS
Date of Purchase ______ / ______ / ______
Dealer’s Name _________________________________
Dealer’s Phone _________________________________
Serial Number Machine __________________________
Serial Number Engine ___________________________
23

400/500
Table of Contents
OPERATOR SECTION
To the Owner or Operator...............................................
Warranty Statement........................................................
Table of Contents............................................................
Specications..................................................................
Feature Identication
Dummy Arms....................................................
Hugger Arms.....................................................
Headache Rack................................................
Gooseneck Hitch..............................................
Hitch Plate........................................................
Optional Toolbox & Fender Skirt.......................
Remote Hand Control.......................................
Safety Guidelines
Equipment Safety..............................................
General Flatbed Safety.....................................
Hydraulic Safety................................................
Operating Instructions
Beginning Operation.........................................
Loading.............................................................
Unloading.........................................................
Unrolling...........................................................
Storing the arms...............................................
Turning System Off...........................................
Maintenance
Check Daily or Before Use...............................
Grease..............................................................
Hydraulic Pressure...........................................
Hydraulic Oil.....................................................
Other Maintenance Notes.................................
Troubleshooting..............................................................
PARTS SECTION
Standard Parts
Flatbed Standard Parts.....................................
Flatbed XRM Parts...........................................
Hydraulics
Hydraulic Assembly...........................................
Hydraulic Assembly Valve and Filter.................
Gen 2 Valve-Service Parts................................
Hydraulic Assembly Reservoir..........................
Hose Change (after change)............................
Hose Change (before change).........................
400 Series with Large and Small FPS Valves..
XRM Hydraulics................................................
Hydraulic Assembly Lift & Squeeze..................
Lights and Decals
400/500 Series Lights.......................................
Decals...............................................................
Accessories
Flatbed Accessories.........................................
30” Toolbox ......................................................
Cargo Lights & Across the Bed Toolbox..........
Flatbed Accessories Spinners & Risers..........
Other Accessories............................................
Switch, Clutch Control Assy.............................
Front Skirt Toolbox Replacement....................
Appendices
I
Remote Control...............................................
2-Bank Wiring - Kar-Tech Remote...................
3rd Bank Wiring - Kar-Tech Remote................
II
E/H Power Unit................................................
E/H Power Kit..................................................
E/H Power Kit w/ Remote................................
30” Toolbox Modication..................................
XRM Fitting Update.........................................
1
2
3
4
5
5
5
5
5
5
5
6
6
6
7
7
7
7
7
7
8
8
8
8
8
9
1.1
1.1.1
1.2
1.2.1
2.1
2.2
2.3
2.4
2.4.1
2.4.2
2.5
2.6
2.7
2.8
2.8.1
2.9
3.1
3.2
3.2.1
4.1
4.2
4.3
4.4
4.5
4.6
4.7
5.1
5.2
5.3
5.4
5.5
5.5.1
5.6
5.6.1
5.7
5.8
3

400/500
Specications DewEze atbeds are specically designed
to transport and feed round hay bales.
45

400/500
Feature Identication
5
Dummy Arms - serve as side rails, along
with the hugger arms, for the atbed.
Hugger Arms - squeeze together to grip the
bale and lift it onto the atbed. When the
arms are stored they serve as side rails for
the atbed.
Headache Rack - protects the rear pickup
window. The hydraulic uid tank and the
valve are also located in the bottom, left side
of the headache rack.
Gooseneck Hitch - is located under a door
in the middle of the bed.
Hitch Plate - has three holes for towing.
SAFETY WARNING!
Do not exceed chassis manufacturer’s
recommended towing capacity.
Optional Toolbox & Fender Skirt - mount
under the bed on both sides. The Electric/
Hydraulic power unit mounts inside of the
toolbox on the left.
Remote Hand Control - operates the func-
tions of the atbed. Uses two AA batteries.

400/500
Equipment Safety
Safety of the operator is one of the main
concerns in designing and developing a new
piece of equipment. Designers and manu-
facturers build in as many safety features as
possible. However, every year many acci-
dents occur which could have been avoided
by a few seconds of thought and a more
careful approach to handling equipment.
Many accidents can be avoided by observ-
ing the precautions in this section. To avoid
personal injury, study the precautions listed in
this manual and follow them.
• Do no attempt to operate this equip-
ment under the inuence of drugs or
alcohol.
• Review the safety instructions with all
users annually.
• This equipment is dangerous to chil-
dren and persons unfamiliar with
its operation. The operator should
be a responsible adult familiar with
farm machinery and trained in this
equipment’s operation.
• Do not allow persons to operate or
assemble this unit until they have read
this manual and have developed a
thorough understanding of the safety
precautions and of how it works.
If you have any questions not answered in
this manual or require additional copies,
please contact your dealer or DewEze manu-
facturing.
General Flatbed Safety
SAFETY WARNING!
Do not stand under the hugger arms when
operating the bale pickup unit, even when
arms are empty.
• Replace any CAUTION, WARNING,
DANGER or instructional decal that is
not readable or is missing.
• Make sure all safety pins are in place
and flatbed mounting bolts are secure
to the truck frame.
• Make sure hinges, joints, and sliding
parts are well greased, especially dur-
ing off season to prevent rusting and
binding.
• Check with truck dealer for any load
limits, additional suspension or tire
requirements. The flatbed’s carrying
capability may exceed the truck’s
GVRW, especially on a 3/4 ton truck.
Hydraulic Safety
SAFETY WARNING!
Hydraulic system operates under high
pressure and escaping fluid can penetrate
the skin.
• Do no operate hydraulic system with
hood open.
• Do not activate electric clutch unless
truck engine is at idle. Switching the
clutch on at road speeds can seriously
damage your hydraulic system.
Safety Guidelines
6 7

400/500
Beginning Operation
• Turn pump switch to the “on” position
while engine is idling. (Red light will
indicate that pump is on).
IMPORTANT: In cold weather, allow the
engine to idle for 5-10 minutes with the
pump on before operating the arms.
This will allow the oil to warm up and
ow more freely. Neglecting to do this
may cause hydraulic pump failure.
Loading
• Back truck against bale with arms
wide apart and tilted slightly upward.
• Close the arms rmly against the bale.
• Lift the bale onto the truck.
• Release the bale and repeat the
operation for the second bale.
IMPORTANT: When hauling one bale,
make sure it is resting on the bed.
When hauling two bales make sure the
second bale is as far forward as it will
go (Fig. 1). Carrying a bale behind the
bed, as shown in Fig 2, places
excessive stress on the cylinder,
linkage, and pins.
NOTE: Spinners may be necessary to grip
the front bale for unloading.
Unloading
• To unload, do the reverse of the load-
ing operation.
Unrolling
NOTE: Risers and spinners must be installed
to unroll bales.
• Position the arms over the bale so the
spinner is at the center of the bale.
• Close the arms and pick up the bale.
• To unroll, lower the bale to the ground.
• Turn the pump off and push the
FLOAT switch on the hand control.
• Drive forward slowly. Bale will gradu-
ally unroll.
• When nished, touch FLOAT or an
other function to disengage.
CAUTION: Failure to engage FLOAT
function while unrolling a bale may
damage lift cylinder rod.
Storing the Arms
• Close arms partially and lay them on
bed.
• Open arms until they are ush with
sides of bed. They now function with
the dummy arms as the bed’s side
rails.
Turning the System Off
• Turn the pump off and release pres-
sure in the system by stroking one of
the function switches when atbed is
not in use.
CAUTION: Operating truck at road speeds,
or above 2,000 RPM, with pump engaged,
may cause hydraulic pump failure.
Operating Instructions
7

400/500
Check Daily or Before Use
• Check hydraulic oil level. Keep level
between “add” and “full” on dipstick.
• Check belt tension and idler pulleys on
engine clutch pump system.
• Examine hydraulic hoses for cracks or
leaks.
SAFETY WARNING!
Do not check for hydraulic leaks with
your hands while the system is
operating. Use a piece of wood or
cardboard. Hydraulic uid escaping
under pressure can penetrate the skin
and may cause death if not treated
immediately.
Grease
• Grease the locations indicated in the
illustration below once per week.
Hydraulic Pressure
• Hydraulic system pressure should be
2450 psi.
• To check pressure, hook a test gauge
to the quick-couplers.
Hydraulic Oil
• Change hydraulic oil when it is milky in
appearance, or annually.
• Change hydraulic oil lter after the rst
40 hours of use and then every 250
hours, or annually thereafter.
In Cold Weather (below 10° F)
• Fill with hydraulic oil specically rated
for cold weather.
• Do not attach other hydraulic
equipment to the bed. The oil will
intermix and the cold weather viscosity
will be lost.
Other Maintenance Notes
• If the quick-couplers leak, the o-rings
inside may need to be replaced.
• High heat, 190° or greater, can be
damaging to the hydraulic system.
Feel various parts of the system to
make sure there are no “hot spots”
which may indicate a problem.
• For easy hookup of the couplers, shut
switch “off” and activate control valve
switches with the ignition “on”. This
will release the pressure in the lines.
• In the off season, run the bed at least
twice a month to prevent valve
condensation.
Maintenance
8 9

400/500
Troubleshooting
Problem Symptom Possible Solutions
Hydraulic No Oil • CHECK OIL LEVEL IN RESERVOIR. If oil level is low, check for
Pump Flow leaks in system.
• CHECK BELT TENSION. Tighten if needed. Replace belt if
necessary.
• CHECK FOR SHEARED KEY ON PUMP SHAFT. Replace key.
• CLUTCH NOT FUNCTIONING. See clutch section.
• INTERNAL PUMP DAMAGE. Have pump repaired or replaced.
• CHECK PRESSURE LINE AT PUMP TO SEE IF OIL IS
MOVING.
• CHECK TO SEE IF SUCTION HOSE COLLAPSES IN
SUCTION
Hydraulic No Oil • VALVE NOT FUNCTIONING. Check for disconnected wires at
Pump Pressure solenoid.
• CHECK FOR POSSIBLE LEAKS IN SYSTEM. Repair blown
hoses.
• CHECK FOR MALFUNCTIONING SWITCH. Replace broken
switches.
• PRESSURE RELIEF IS BROKEN ALLOWING OIL TO BYPASS
SYSTEM. Replace pressure relief.
• PRESSURE SEAL ON PUMP IS BROKEN OR WORN. Re-
place.
• BELTS OR CLUTCH MAY BE SLIPPING. Tighten belts.
• PRESSURE RELIEF MAY BE SET TOO LOW.
CAUTION: PRESSURE EXCEEDING 2,600 PSI CAN DAMAGE
THE PUMP.
Clutch Does Not • CHECK FOR BLOWN FUSE. Replace.
Engage CAUTION: FUSE SHOULD NOT EXCEED 30 AMPS
• CHECK WIRE TO CLUTCH. Insure there are no breaks or
shorts.
• CHECK FOR BAD SWITCHES IN SYSTEM. Replace.
• CHECK FOR BAD MAGNETIC COIL. Use jumper from positive
battery terminal to check coil. Replace coil if necessary.
Belt(s) Jumps Off • BELTS TOO LOOSE. Tighten belts.
Pulley • CHECK FOR EXCESSIVE BELT WEAR. Replace worn belts.
• CHECK FOR LOOSE PUMP BRACKET. Tighten loose bolts.
Replace broken bolts.
• CHECK ALIGNMENT OF CLUTCH AND CRANKSHAFT
PULLEYS. Re-align pulleys.
• CHECK CRANKSHAFT PULLEY FOR LOOSE OR BROKEN
BOLTS. Tighten loose bolts. Replace broken bolts.
• CHECK ALIGNMENT OF IDLER PULLEY AND THE CONDI-
TION OF IDLER PULLEY BEARINGS. Re-align idler pulley.
Replace worn or broken bearings.
• MAKE SURE THAT BELTS ARE NOT CRACKED OR WORN.
9

400/500

400/500
400/500
SERIES
PARTS

400/500

400/500
Table of Contents
PARTS SECTION
Standard Parts
Flatbed Standard Parts.....................................
Flatbed XRM Parts...........................................
Hydraulics
Hydraulic Assembly...........................................
Hydraulic Assembly Valve and Filter.................
Gen 2 Valve-Service Parts................................
Hydraulic Assembly Reservoir..........................
Hose Change (after change)............................
Hose Change (before change).........................
400 Series with Large and Small FPS Valves..
XRM Hydraulics................................................
Hydraulic Assembly Lift & Squeeze..................
Lights and Decals
400/500 Series Lights.......................................
Decals...............................................................
Accessories
Flatbed Accessories.........................................
30” Toolbox ......................................................
Cargo Lights & Across the Bed Toolbox...........
Flatbed Accessories Spinners & Risers............
Other Accessories.............................................
Switch, Clutch Control Assy..............................
Front Skirt Toolbox Replacement.....................
Appendices
I
Remote Control................................................
2-Bank Wiring - Kar-Tech Remote....................
3rd Bank Wiring - Kar-Tech Remote.................
II
E/H Power Unit.................................................
E/H Power Kit...................................................
E/H Power Kit w/ Remote.................................
30” Toolbox Modication...................................
XRM Fitting Update..........................................
1.1
1.1.1
1.2
1.2.1
2.1
2.2
2.3
2.4
2.4.1
2.4.2
2.5
2.6
2.7
2.8
2.8.1
2.9
3.1
3.2
3.2.1
4.1
4.2
4.3
4.4
4.5
4.6
4.7
5.1
5.2
5.3
5.4
5.5
5.5.1
5.6
5.6.1
5.7
5.8

400/500
211309
211308
CROSSTUBE
FLATBED WELDMENT
DUMMY ARM, RIGHT
DUMMY ARM, LEFT
***
200191 210459
210174 -- MUD FLAP, WIDE
210178 -- MUD FLAP, NARROW
140015
211282
211298
510174
510174
110336
310325
210755
510174
310325
210757
110336
210935
210753
210757
310325
510174
310325
211292
110673
710586
110676
110440
110645
110645
110437
211481
211202
FLATBED STANDARD PARTS
2/24/2009 Rev. 6/10
110365
110650
210919
210892
210920
1.1

400/500
FLATBED
W EL DM ENT C ROSST UBE L EFT RIGHT
470 211230 211311 211313 211312
470W 211470 211310 211313 211312
475 211232 211311 211315 211314
478 211233 211310 211319 211318
477 211231 211311 211489 211487
480 211234 211310 211321 211320
482 211235 211310 211323 211322
485 211236 211310 211325 211324
487 211237 211310 211327 211326
578 215013 215026 215028 215027
582 215014 215026 215030 215029
587 215016 215026 215034 215033
DUM M Y ARM
ST A NDA RD
Parts List
DESCRIPTIONQUANTITYPART #
WASHER, 1-1/4 FLAT MACHINE 10GA
2110336
BOLT, 5/8-18 X 1.5 GR 52110365
BOLT, 3/8-16 X 0.75, WIZ FLANGE
2110437
BOLT, 3/8-16 X 1, WIZ FLANGE2110440
NUT, 3/8-16 WIZ FLANGE2110645
WASHER, 5/8" FLAT STANDARD
2110650
WASHER, 1/4" FLAT STANDARD10110673
WASHER, 3/8" FLAT STANDARD
2110676
BUSHING, .5 X .375 X .500 W/FLNG2200191
HITCH BALL AND NUT1210459
PIN ASSY, LIFT CYLINDER ROD END
1210753
PIN ASSY, IDLER ARM1210755
PIN ASSY, CROSSARM PIVOT
2210757
HINGE ROD / RECESSED WELL1210892
FLATBED STANDARD PARTS
*** 400 SERIES
2ea 110533 -- BOLT, 3/8-16 X 5.0
500 SERIES
2ea 110542 -- BOLT, 3/8-16 X 5.5
2/24/2009 Rev. 6/10
VALVE COVER1211202
SHIELD, CROSSTUBE
2211292
PUSH ARM KIT
---
211297
PUSH ARM WELDMENT
1211298
SNAP RING1140015
PUSH ARM1211282
EDGE TRIM
1211481
COTTER PIN, 1/4 X 24310325
GREASE ZERK, 1/4-28 ST
4510174
SCREW, 1/4 X 1 TEK SELF-TAP10710586
LID / RECESSED WELL1210919
HINGE CLIP
2210920
IDLER ARM, MACHINE DWG.
1210935
ii 1.1

400/500
1.1.1
CROSSTUBE
DUMMY ARM, RIGHT
DUMMY ARM, LEFT
***
10 11
210174 -- MUD FLAP, WIDE
210178 -- MUD FLAP, NARROW
400 & 500 SERIES
FLATBED STANDARD PARTS
7/23/2012
4
5
5
919
16
8
22.2
22.1
23
24
23
14
12
124
18.3
18.2
18.1
15
23
1
13
24
23
17
2
6
25
7
24
3
20
21

400/500 ii 1.1.1
CROSSTUBE LEFT RIGHT
470 211311 211897 211898
470W 211310 211921 211922
475 211311 211903 211904
477 211311 211909 211910
479 211311 211915 211916
482 211310 211923 211924
484 211310 211929 211930
487 211310 211935 211936
488 211310 911941 211942
578 215026 211947 211948
582 215026 211953 211954
587 215026 211959 211960
DUMMY ARM
STANDARD
Parts List
DESCRIPTIONQUANTITYPART #ITEM
WASHER, 1-1/4 FLAT MACHINE 10GA
21103361
BOLT, 5/8-18 X 1.5 GR 521103652
BOLT, 3/8-16 X 0.75, WIZ FLANGE
21104373
BOLT, 3/8-16 X 1, WIZ FLANGE2110440
4
NUT, 3/8-16 WIZ FLANGE
2110645
5
WASHER, 5/8" FLAT SAE
21106636
WASHER, 1/4" FLAT STANDARD10110673
7
WASHER, 3/8" FLAT STANDARD
21106768
NUT, 3/8-16 U-TYPE .75L21108049
BUSHING, .5 X .375 X .500 W/FLNG
220019110
HITCH BALL AND NUT
121045911
PIN ASSY, LIFT CYLINDER ROD END121075312
PIN ASSY, IDLER ARM
121075513
PIN ASSY, CROSSARM PIVOT221075714
IDLER ARM, MACHINE DWG.
121093515
VALVE COVER
121120216
SHIELD, CROSSARM221129217
PUSH ARM KIT
---
21129718
SNAP RING114001518.1
PUSH ARM
121128218.2
PUSH ARM WELDMENT
121129818.3
EDGE TRIM, VALVE COVER121148119
SQUEEZE ARM LEFT, GRAY
121196520
SQUEEZE ARM RIGHT, GRAY121196621
LID ASSEMBLY
--
21506922
HINGE ROD, LID RECESSED WELL
121089222.1
LID, RECESSED WELL121091922.2
COTTER PIN, 1/4 X 2
431032523
GREASE ZERK, 1/4-28 ST
4
51017424
SCREW, 1/4 X 1 TEK SELF-TAP
1071058625
400 & 500 SERIES
FLATBED STANDARD PARTS
*** 400 SERIES
2ea 110533 -- BOLT, 3/8-16 X 5.0
500 SERIES
2ea 110542 -- BOLT, 3/8-16 X 5.5
7/23/2012

400/500
FLATBED
W EL DM ENT CROSSTUBE L EFT RIGHT
470 211366 211402 211406 211405
475 211367 211402 211408 211407
478 211369 211403 211412 211411
477 211368 211402 211410 211409
480 211370 211403 211414 211413
482 211371 211403 211416 211415
485 211372 211403 211418 211417
487 211373 211403 211420 211419
578 215017 215052 215036 215035
582 215018 215052 215038 215037
587 215020 215052 215042 215041
DUM M Y ARM
XRM
Parts List
DESCRIPTIONQUANTITYPART #
ROLL PIN, 1/4 X 2
2200150
CYLINDER PIN2210941
FLOATING PIN
2210942
HUGGER ARM, LEFT1211355
EXTENSION ARM, LEFT
1211434
EXTENSION ARM, RIGHT
1211433
CROSSTUBE ENDCAP2211755
SQUEEZE ARM XRM, RIGHT
1215086
BOLT, 5/16-18 X 0.75, GR8 BLK16110794
210941
200150
210942
215085
200150
210941
210942
DUMMY ARM, LEFT
DUMMY ARM, RIGHT
FLATBED WELDMENT
FLATBED XRM PARTS
211433
211434 CROSSTUBE
5/4/2009
211755110794
215086
1.2
This manual suits for next models
13
Popular Utility Vehicle manuals by other brands

Powerfix
Powerfix PTS 2 A1 operating instructions
Hisun Motors
Hisun Motors HS750UTV-2 manual
Bennche
Bennche Bighorn 400 owner's manual
Hammerhead
Hammerhead SUPER 250 2008 Owner's manual and parts manual
Pongratz
Pongratz MA 250 U-K Additional Operating Manual

Taylor-Dunn
Taylor-Dunn B0-015-00 Operation, t roubleshooting and replacement parts manual

