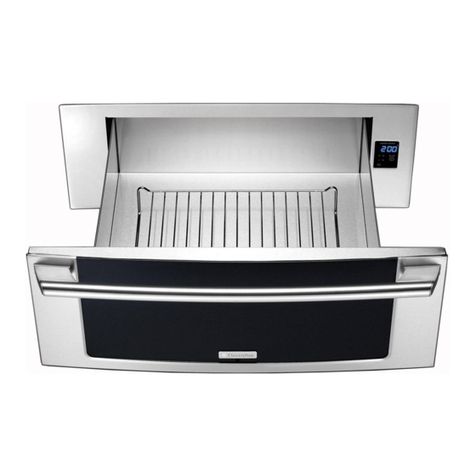
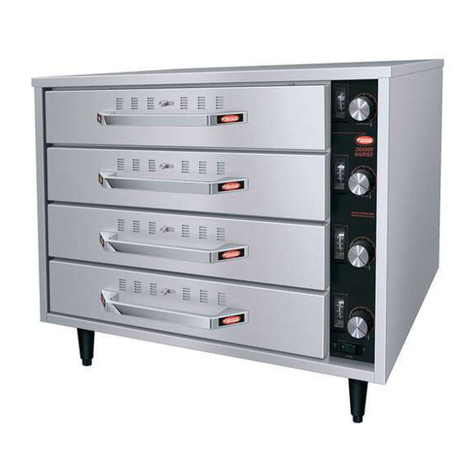
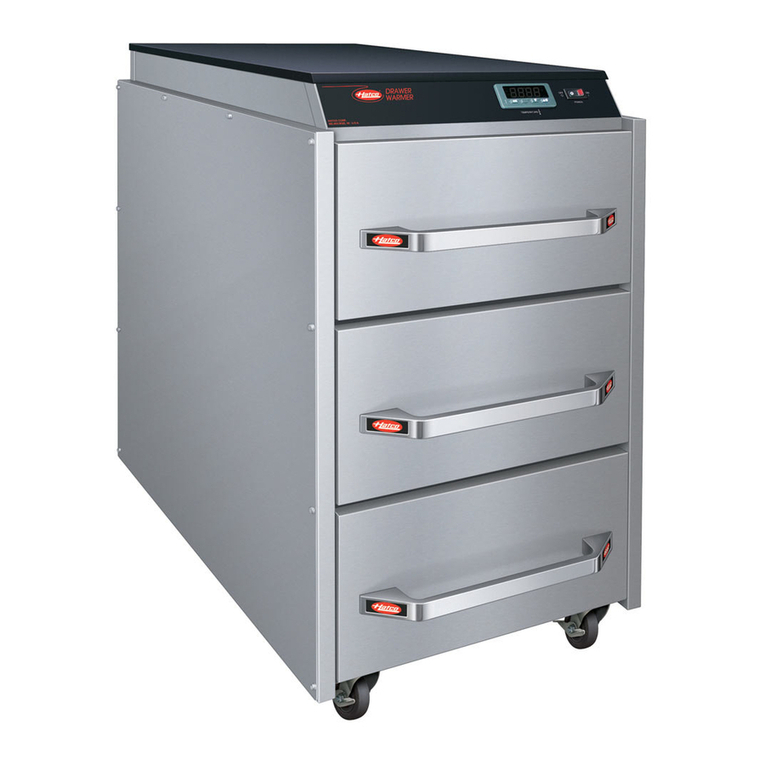
Hatco CDW-3N Series User manual

P/N 07.04.566.00 © 2023 Hatco Corporation
Convected Drawer Warmer
CDW-3N Series
Installation and Operating Manual
For and Non- Models
Original Instructions
Instrucciones originales
Instructions originales
Originalanleitung
Istruzioni originali
Vertaling van de
originele instructies
Cajón calientaplatos por aire de convección
Serie CDW-3N
Manual de Instalación y Operación
P 12
¡Regístrese en línea!
Tiroirs chauffants à convection
Série CDW-3N
Manuel d’installation et d’utilisation
P 22
S’inscrire en ligne!
Warmhalteschrank mit Konvektionsheizsystem
Serie CDW-3N
Installations- und Bedienungshandbuch
P 32
Registrieren Sie sich online!
Riscaldatore a cassetti a convezione
Serie CDW-3N
Manuale per l’installazione e l’uso
P 43
Registratevi online!
Convectieladenwarmer
Serie CDW-3N
Handleiding voor Installatie en Bediening
P 53
Registreer online!

CDWCEM-11232
CONTENTS
INTRODUCTION
Hatco Convected Drawer Warmers are designed to keep foods
at optimum serving temperatures without affecting quality.
They are built for tough kitchen duty with rugged stainless steel
construction, heavy-duty hardware, stainless steel slides, and
positive-closing drawers. The Convected Drawer Warmers’
unique air-flow forces warm air throughout the unit, creating a
blanket-effect of dry heat around the food product.
Hatco Convected Drawer Warmers are products of extensive
research and field testing. The materials used were selected
for maximum durability, attractive appearance, and optimum
performance. Every unit is inspected and tested thoroughly
prior to shipment.
This manual provides the installation, safety, and operating
instructions for Convected Drawer Warmers. Hatco
recommends all installation, operating, and safety instructions
appearing in this manual be read prior to installation or
operation of a unit.
Important Owner Information..............................................2
Introduction...........................................................................2
Important Safety Information ..............................................3
Model Description ................................................................4
Model Designation ...............................................................4
Specifications .......................................................................5
Plug Configurations .............................................................5
Electrical Rating Chart.........................................................5
Dimensions..........................................................................5
Installation.............................................................................6
General................................................................................6
Installing the Drawer Warmer..............................................6
Operation...............................................................................7
General................................................................................7
Unlocking the Temperature Controller.................................8
Changing the Setpoint Temperature....................................8
Maintenance..........................................................................8
General................................................................................8
Daily Cleaning .....................................................................8
Troubleshooting Guide ........................................................9
Options and Accessories ..................................................10
Service Information............................................................10
International Limited Warranty ......................................... 11
IMPORTANT OWNER INFORMATION
Record the model number, serial number, voltage, and purchase
date of the unit in the spaces below (specification label located
on the back of the unit). Please have this information available
when calling Hatco for service assistance.
Model No. _______________________________________
Serial No.________________________________________
Voltage__________________________________________
Date of Purchase__________________________________
Register your unit!
Completing online warranty registration will prevent delay in
obtaining warranty coverage. Access the Hatco website at
www.hatcocorp.com, select the Support pull-down menu,
and click on “Warranty”.
Business
Hours: 7:00 to 5:00 Central Time (CT)
(Summer Hours: June to September—
7:00 to 5:00 Monday–Thursday
7:00 to 4:00 Friday)
Telephone: +1-414-671-6350
E-mail: [email protected]
Additional information can be found by visiting our web site at
www.hatcocorp.com.
Correct Disposal of this Product
This marking indicates that this product and its electronic
components should not be disposed of with other
commercial waste. To prevent possible harm to the
environment or human health from uncontrolled waste
disposal, recycle responsibly to promote the sustainable
reuse of material resources. To dispose of product and its
electronic components, contact supplier where product
was purchased for environmentally safe recycling.
Safety information that appears in this manual is identified by
the following signal word panels:
WARNING
WARNING indicates a hazardous situation
which, if not avoided, could result in death
or serious injury.
CAUTION
CAUTION indicates a hazardous situation
which, if not avoided, could result in minor
or moderate injury.
NOTICE
NOTICE is used to address practices not
related to personal injury.
NOTE: Refer to the Symbol Identification tables on the back
cover of this manual for definitions of symbols that may
appear in this manual.
CDWCEM-1123 3
IMPORTANT SAFETY INFORMATION
WARNING
FIRE HAZARD:
•Locate unit a minimum of 25 mm (1″)
from combustible walls and materials.
If safe distances are not maintained,
discoloration or combustion could occur.
• Do not use harsh chemicals such as bleach
(or cleaners containing bleach), oven
cleaners, or flammable cleaning solutions
to clean this unit.
Make sure food product has been heated
to the proper food-safe temperature before
placing in unit. Failure to heat food product
properly may result in serious health risks.
This unit is for holding preheated food
product only.
This unit is not intended for use by children
or persons with reduced physical, sensory,
or mental capabilities. Ensure proper
supervision of children and keep them away
from the unit.
Make sure all operators have been instructed
on the safe and proper use of the unit.
This unit must be serviced by qualified
personnel only. Service by unqualified
personnel may lead to electric shock or burn.
This unit has no “user-serviceable” parts.
If service is required on this unit, contact
an Authorized Hatco Service Agent or
contact the Hatco Service Department at
+1-414-671-6350.
CAUTION
BURN HAZARD:
• Some exterior surfaces on the unit will
get hot. Use caution when touching these
areas.
• Use caution when opening drawer. Hot air
escapes when drawer is open.
Locate unit in an area that is convenient for
use. The location should be level and strong
enough to support the weight of the unit and
contents.
NOTICE
Do not lay unit on the front or back side.
Damage to the unit could occur.
Use non-abrasive cleaners and cloths only.
Abrasive cleaners and cloths could scratch
finish of unit, marring its appearance and
making it susceptible to soil accumulation.
WARNING
ELECTRIC SHOCK HAZARD:
• Plug unit into a properly grounded
electrical receptacle of the correct
voltage, size, and plug configuration. If
plug and receptacle do not match, contact
a qualified electrician to determine and
install proper voltage and size electrical
receptacle.
• Turn OFF power switch, unplug power
cord, and allow unit to cool before
performing any cleaning, adjustments,
or maintenance.
• DO NOT submerge or saturate with water.
Unit is not waterproof. Do not operate if
unit has been submerged or saturated
with water.
• Unit is not weatherproof. Locate unit
indoors where ambient air temperature
isaminimumof21°C(70°F).
• Do not steam clean or use excessive
water on the unit.
• This unit is not “jet-proof” construction.
Do not use jet-clean spray to clean this
unit.
• Do not pull unit by power cord.
• Discontinue use if power cord is frayed
or worn.
• Do not attempt to repair or replace a
damaged power cord. The cord must be
replaced by Hatco, an Authorized Hatco
Service Agent, or a person with similar
qualifications.
• Do not clean unit when it is energized or
hot.
• Do not allow liquids to spill into the unit.
• Use only Genuine Hatco Replacement
Parts when service is required. Failure
to use Genuine Hatco Replacement
Parts will void all warranties and may
subject operators of the equipment to
hazardous electrical voltage, resulting
in electrical shock or burn. Genuine
Hatco Replacement Parts are specified
to operate safely in the environments in
which they are used. Some aftermarket
or generic replacement parts do not have
the characteristics that will allow them to
operate safely in Hatco equipment.
Read the following important safety information before using this equipment to avoid
serious injury or death and to avoid damage to equipment or property.

CDWCEM-11234
MODEL DESCRIPTION
All Models
Hatco Convected Drawer Warmers are designed to keep
foods hot, flavor-fresh, and crisp until served. They are non-
humidified, single cavity/single temperature controlled units
that provide even, dry heat for food product that does not
require humidity or moisture. Convected Drawer Warmers are
constructed of rugged stainless steel with durable nylon rollers,
12-gauge stainless steel slides, and heavy-duty hardware.
The insulated top and sides of the drawer warmers provide
maximum energy efficiency.
NOTE: Refer to the OPTIONS AND ACCESSORIES section
for additional available features.
Model CDW-3N
The CDW-3N model has three individual drawers that each hold
It features a digital temperature controller and a Power I/O
(on/off) switch that control the temperature and power for the
entire unit.
Model CDW-3N2
The CDW-3N2 model has six individual drawers that each
not included). It features a digital temperature controller and
a Power I/O (on/off) switch that control the temperature and
power for the entire unit.
Digital
Temperature
Controller
Power I/O Switch
Model CDW-3N
MODEL DESIGNATION
C D W - x N 2
Convected Drawer Warmer
Quantity of Full-Size Drawers Narrow Width Unit
No Character = Full-Size Drawers
2 = Split Drawers

CDWCEM-1123 5
Model Voltage Watts Amps Plug Configuration Shipping Weight
CDW-3N 230 933 4.1 CEE 7/7 Schuko, BS-1363, AS 3112 81 kg (179 lbs.)
CDW-3N2 230 933 4.1 CEE 7/7 Schuko, BS-1363, AS 3112 81 kg (179 lbs.)
SPECIFICATIONS
Plug Configurations
Units are supplied from the factory with an electrical cord and
plug installed. Plugs are supplied according to the application.
WARNING
ELECTRIC SHOCK HAZARD: Plug unit into a properly
grounded electrical receptacle of the correct voltage,
size, and plug configuration. If plug and receptacle do not
match, contact a qualified electrician to determine and
install the proper voltage and size electrical receptacle.
NOTE: The specification label is located on the back of the
unit. See label for serial number and verification of unit
electrical information.
CEE 7/7 Schuko BS-1363
AS 3112
Plug Configurations
NOTE: Receptacle not supplied by Hatco.
Model Width
(A)
Depth
(B)
Height
(C)
CDW-3N 420 mm
(16-5/8
)774 mm
(30-1/2
)762 mm
(30
)
CDW-3N2 420 mm
(16-5/8
)774 mm
(30-1/2
)762 mm
(30
)
Electrical Rating Chart
Dimensions
A
C
B
Front View Side View

CDWCEM-11236
INSTALLATION
General
The Convected Drawer Warmer is shipped with most
components pre-assembled. Casters or legs must be installed
on location. Care should be taken when unpacking the shipping
carton to avoid damage to unit and the components enclosed.
WARNING
ELECTRIC SHOCK HAZARD: Unit is not weatherproof.
Locate the unit indoors where the ambient air temperature
isaminimumof21°C(70°F).
FIRE HAZARD:Locateunitaminimumof25mm(1″)from
combustible walls and materials. If safe distances are not
maintained, discoloration or combustion could occur.
NOTE: The unit must be transported in the upright position.
1. Remove the unit from the carton.
NOTE: To prevent delay in obtaining warranty coverage,
complete online warranty registration. See the
IMPORTANT OWNER INFORMATION section for
details.
2. Remove tape and protective packaging from all surfaces
of unit.
3. Make sure the desired installation location is appropriate.
• Locate the unit in an area where the ambient air
temperature is constant and a minimum of 21°C
(70°F). Avoid areas that may be subject to active air
movements or currents (i.e., near exhaust fans/hoods,
air conditioning ducts, and exterior doors).
• Make sure the unit is located on solid, level flooring.
• Make sure the unit is at the proper height in an area
convenient for use.
4. Install the unit.
Installing the Drawer Warmer
Convected Drawer Warmers are freestanding units that require
the installation of legs or casters as well as anti-tip protection
before operation.
1. Remove the plastic bag containing the four legs or casters
from the drawer of the unit.
2. Remove any pans from the drawers of the unit.
NOTICE
Do not lay unit on the front or back side or damage to the
unit could occur.
3. Carefully lay the unit on its left or right side (requires two
people).
4. Install each leg or caster. Refer to the appropriate
procedure in this section.
5. Return the unit to its upright position (requires two people).
For units on legs — If the unit is not level or rocks, turn the
adjustable tip/flange of the appropriate leg to level the unit.
6. Install the appropriate anti-tip protection. Refer to the
procedure in this section.
• Make sure the unit is level before fastening leg flanges
to the floor in the anti-tip protection procedure.
Installing Casters
1. Align the four holes on the caster plate with the four holes
in the bottom of the unit at one corner of the unit.
2 Install a bolt through each of the holes in the caster plate
and into the bottom of the unit. Tighten securely.
3. Repeat steps 1 and 2 for the remaining three casters.
Caster Plate
Mounting
Bracket
Bolt
Caster Installation
Installing Legs
1. Thread a leg into the hole located at one corner of the unit.
2. Hand-tighten the leg until snug. Do not over-tighten.
3. Repeat steps 1 and 2 for the remaining three legs.
Lengthen
Shorten
Adjustable
Flange
Leg Installation
Installing Anti-Tip Protection
Freestanding units may require anti-tip protection by either
fastening the leg flanges to the floor or installing the Anti-Tip
Wall Bracket supplied with the unit (both available at time of
order from Hatco).
Leg Flange
Fastening Leg Flanges to the Floor
1. Make sure the unit is in the desired
location and has been properly leveled.
2. Using the appropriate fasteners, secure
each leg flange to the floor.
Installing the Anti-Tip Wall Bracket
1. Move the unit to the desired location against the wall
where the wall bracket will be installed. Make sure the
unit has been properly leveled.
2. Loosen, but do not remove, the two screws that secure the
anti-tip plate to the top of the unit.

CDWCEM-1123 7
INSTALLATION
General
Use the following procedures to operate a Convected Drawer
Warmer.
WARNING
Read all safety messages in the IMPORTANT SAFETY
INFORMATION section before operating this equipment.
1. Plug the unit into an electrical receptacle of the
correct voltage, size, and plug configuration. See the
SPECIFICATIONS section for details.
2. Move the Power I/O (on/off) switch to the I(on) position.
The switch will illuminate.
• The digital temperature controller will energize and
the current temperature of the unit will appear on the
display.
• The phrase “out 1” will appear in the upper left corner of
the display to show that the unit is in heat mode.
CAUTION
BURN HAZARD:
• Some exterior surfaces on the unit will get hot. Use
caution when touching these areas.
• Use caution when opening drawer. Hot air escapes
when drawer is open.
3. Press and release the key on the digital temperature
controller to verify the setpoint temperature.
• The setpoint temperature will be shown for 15
seconds. After 15 seconds, the display will revert
to the current temperature of the unit. To change the
setpoint temperature, refer to “Changing the Setpoint
Temperature” in this section.
“out 1” Celsius
Symbol
Down Arrow
Key Up Arrow
Key
SET
Key
Digital Temperature Controller
NOTE: The digital temperature controller is pre-set to a
setpoint temperature of 91°C (195°F) at the factory.
Once the setpoint temperature is changed, the new
setpoint temperature will remain in memory until it is
changed again. The maximum setpoint temperature is
91°C (195°F).
4. Allow the unit 15–20 minutes to reach operating
temperature before loading preheated food product.
Digital Temperature Controller Power I/O Switch
Model CDW-3N Control Panel
3. Determine the location of the wall bracket on the wall.
a. Position the wall bracket flush against the wall above the
unit.
b. With the locking tab handle pushed down on the bracket,
position the bracket so that the locking tab sits completely
inside the cutout on the anti-tip plate.
• Move the anti-tip plate back-and-forth as necessary
to properly seat the locking tab inside the plate.
Secure the plate to the unit once the proper location is
determined.
c. Mark the locations for the wall bracket fasteners through
the holes on the wall bracket.
4. Pre-drill the holes in the wall at the marked locations for the
appropriate wall bracket fastening system.
5. Install the wall bracket using the appropriate fasteners.
6. Lift the locking tab handle on the wall bracket, and move
the unit in position underneath the wall bracket.
7. Release the locking tab handle so that the locking tab sits
completely inside the cutout on the anti-tip plate.
Anti-Tip Wall Bracket
Screw
Locking Tab Handle
Locking Tab
Anti-Tip Plate
(adjustable)
Installing the Anti-Tip Wall Bracket
OPERATION

CDWCEM-11238
OPERATION
Unlocking the Temperature Controller
The keys on the digital temperature controller are locked
automatically after 30 seconds to prevent unauthorized
changes to the settings. Use the following procedure to unlock
the controller.
1. Press the key one time.
2. If the display shows “Loc”, hold the key for 4 seconds
until the display shows “UnL”.
Changing the Setpoint Temperature
Use the following procedure to change the setpoint temperature
of the unit.
1. Press and release the key. The current setpoint
temperature will be shown on the display.
2. Press the key or key within 15 seconds to
change the setpoint temperature. If no key is pressed
within 15 seconds, the display will revert to the current
temperature of the unit.
3. Press the key or wait 15 seconds to lock in the new
setpoint temperature.
MAINTENANCE
General
The Hatco Convected Drawer Warmer is designed for maximum
durability and performance with minimum maintenance.
WARNING
ELECTRIC SHOCK HAZARD:
• Turn power switch OFF, unplug power cord/turn off
power at circuit breaker, and allow unit to cool before
performing any maintenance or cleaning.
• DO NOT submerge or saturate with water. Unit is not
waterproof. Do not operate if unit has been submerged
or saturated with water.
• Do not steam clean or use excessive water on the unit.
• This unit is not “jet-proof” construction. Do not use
jet-clean spray to clean this unit.
• Do not clean the unit when it is energized or hot.
This unit has no “user-serviceable” parts. If service
is required on this unit, contact an Authorized Hatco
Service Agent or contact the Hatco Service Department at
+1-414-671-6350.
Daily Cleaning
To preserve the finish of the unit as well as maintain
performance, it is recommended that the unit be cleaned daily.
1. Move the Power I/O (on/off) switch to the O(off) position,
unplug the power cord, and allow the unit to cool.
2. Remove and wash all food pans and accessories.
NOTICE
Use non-abrasive cleaners and cloths only. Abrasive
cleaners and cloths could scratch finish of unit, marring its
appearance and making it susceptible to soil accumulation.
3. Wipe down surfaces using a damp cloth. A non-abrasive,
cream cleaner may be used for difficult stains. Hard to
reach areas should be cleaned with a small brush and mild
soap.
• Make sure to check and clean the interior of the unit.
Food pieces may fall from the food pans into the drawer
cavity. CAUTION! Burn Hazard—Do not clean drawer
cavity when unit is on!
4. Wipe dry the entire unit using a dry, non-abrasive cloth.

CDWCEM-1123 9
Symptom Probable Cause Corrective Action
Unit too hot. Setpoint temperature too high. Change the setpoint temperature to a lower setting.
Unit connected to incorrect power supply. Verify with qualified personnel that power supply
matches unit specification.
Digital temperature controller is defective. Contact an Authorized Hatco Service Agent or Hatco
for assistance.
Unit not hot enough. Unit not allowed enough time to preheat. Allow unit 15–20 minutes to reach operating
temperature.
Setpoint temperature too low. Change the setpoint temperature to a higher setting.
Drawer(s) not closed completely. Make sure all drawers are closed completely.
Digital temperature controller is defective. Contact an Authorized Hatco Service Agent or Hatco
for assistance.
Unit not working at all. Unit not plugged in. Plug unit into proper power supply.
Unit not turned on. Move Power I/O (on/off) switch to the I(on) position.
Circuit breaker tripped. Reset circuit breaker.
Power I/O (on/off) switch defective.
Contact an Authorized Hatco Service Agent or Hatco
for assistance.
Digital temperature controller is defective.
Heating element burned out.
TROUBLESHOOTING GUIDE
WARNING
This unit must be serviced by qualified personnel only.
Service by unqualified personnel may lead to electric
shock or burn.
WARNING
ELECTRIC SHOCK HAZARD: Turn OFF power switch,
unplug power cord/turn off power at circuit breaker,
and allow unit to cool before performing any cleaning,
adjustments, or maintenance.
Troubleshooting Questions?
If you continue to have problems resolving an issue, please contact the nearest Authorized Hatco Service Agency or Hatco for
assistance. To locate the nearest Service Agency, log onto the Hatco website at www.hatcocorp.com, select the Support pull-
down menu, and click on “Find A Service Agent”; or contact the Hatco Parts and Service Team at:
Telephone: +1-414-671-6350
e-mail: [email protected]

CDWCEM-112310
OPTIONS AND ACCESSORIES
Food Pans
Accessory stainless steel food pans are available in various
sizes.
ST PAN 2...............
ST PAN 4...............
(324 x 527 x 102 mm)
HDW6″PAN.........
(324 x 527 x 152 mm)
Full Pan, 2-1/2″ Deep Full Pan, 4″ Deep
Full Pan, 6″ Deep
Stainless Steel Food Pans
Trivets
Accessory stainless steel or nickel-plated trivets are available
in various sizes.
TRIVET(1/2)SS.....Half-size stainless steel trivet —
TRIVET SS............Full size stainless steel trivet —
TRIVET(1/2) .........Half-size nickel-plated trivet —
TRIVET..................Full size nickel-plated trivet —
1/2 Trivet
Full Trivet
Trivets
SERVICE INFORMATION
The warranty on this Hatco unit is for one year from date of
purchase or eighteen months from date of shipping from Hatco,
whichever occurs first.
If you experience a problem with this unit during the warranty
period, please do the following:
Contact Local Hatco Dealer
When contacting the Hatco dealer for service assistance,
please supply the dealer with the following information to
ensure prompt processing:
• Model of unit
• Serial number (located on the unit)
• Specific problem with the unit
• Date of purchase
• Name of business
• Shipping address
• Contact name and phone number
The Hatco dealer will do the following:
• Provide replacement part(s) as required
• Submit warranty claim to Hatco for processing
Non-Warranty Problems
If you experience a non-warranty problem that requires
assistance, please contact the nearest Authorized Hatco
Service Agency.
To locate the nearest Service Agency:
• access our website at www.hatcocorp.com, select the
Support pull-down menu, and click on “Find A Service
Agent”
• call Hatco Service at +1-414-671-6350

CDWCEM-1123 11
INTERNATIONAL LIMITED WARRANTY
WARRANTY, EXCLUSIVE REMEDY:
Hatco Corporation (Seller) warrants that the products it
manufactures (Products) will be free from defects in materials
and workmanship under normal use and service and when
stored, maintained, and installed in strict accordance with
factory recommendations. Seller’s sole obligation to the person
or entity buying the Products directly from Seller (Customer)
under this warranty is the repair or replacement by Seller or
a Seller-authorized service agency, at Seller’s option, of any
Product or any part thereof deemed defective upon Seller’s
examination, for a period of: (i) the Warranty Duration from the
date of shipment by Seller or (ii) the Warranty Duration from
the date of Product registration in accordance with Seller’s
written instructions, whichever is later. The “Warranty Duration”
shall mean a period of eighteen months (18) months, or the
periods set forth below for specific Product components. Credit
for Products or parts returned with the prior written permission
of Seller will be subject to the terms shown on Seller’s
material return authorization form. PRODUCTS OR PARTS
RETURNED WITHOUT PRIOR WRITTEN PERMISSION OF
SELLER WILL NOT BE ACCEPTED FOR CREDIT. Expenses
incurred by Customer in returning, replacing or removing the
Products will not be reimbursed by Seller. If the defect comes
under the terms of the limited warranty, the Products will be
repaired or replaced and returned to the Customer and the cost
of return freight will be paid by Seller. The remedy of repair
or replacement provided for herein is Customer’s exclusive
remedy. Any improper use, alteration, repairs, tampering,
misapplication, improper installation, application of improper
voltage, or any other action or inaction by Customer or others
(including the use of any unauthorized service agency) that in
Seller’s sole judgment adversely affects the Product shall void
this warranty. The warranty expressly provided herein may
only be asserted by Customer and may not be asserted by
Customer’s customers or other users of the Products; provided,
however, that if Customer is an authorized equipment dealer of
Seller, Customer may assign the warranty herein to Customer’s
customers, subject to all of the limitations of these Terms, and in
such case, the warranty shall be exclusively controlled by Seller
in accordance with these Terms. THIS LIMITED WARRANTY
IS EXCLUSIVE AND IS IN LIEU OF ANY OTHER WARRANTY,
EXPRESSED OR IMPLIED, INCLUDING BUT NOT LIMITED
TO ANY IMPLIED WARRANTY OF NONINFRINGEMENT,
MERCHANTABILITY, OR FITNESS FOR A PARTICULAR
PURPOSE, WHICH ARE EXPRESSLY DISCLAIMED.
Two(2)YearPartsWarranty:
Conveyor Toaster Elements (metal sheathed)
Drawer Warmer Elements (metal sheathed)
Drawer Warmer Drawer Rollers and Slides
Food Warmer Elements (metal sheathed)
Display Warmer Elements (metal sheathed air heating)
Holding Cabinet Elements (metal sheathed air heating)
Heated Well Elements — HW, HWB, and HWBI Series
(metal sheathed)
Induction Ranges
Induction Warmers
Five(5)YearPartsWarranty:
3CS and FR Tanks
Ten(10)YearPartsWarranty:
Electric Booster Heater Tanks
Gas Booster Heater Tanks
Ninety(90)DayParts-OnlyWarranty:
Replacement Parts
Notwithstanding anything herein to the contrary, the limited
warranty herein will not cover components in Seller’s sole
discretion such as, but not limited to, the following: coated
incandescent light bulbs, fluorescent lights, heat lamp bulbs,
coated halogen light bulbs, halogen heat lamp bulbs, xenon
light bulbs, LED light tubes, glass components, and fuses;
Product failure in booster tank, fin tube heat exchanger, or other
water heating equipment caused by liming, sediment buildup,
chemical attack, or freezing.
WARRANTY REGISTRATION INSTRUCTIONS:
Product registration must be submitted within 90 days
from the date of shipment from our factory to qualify for
additional coverage. Registration may be submitted through
the form on Seller’s website, through the form accessible
through the QR code on the Product (where available), or
by calling Customer Service with the required information at:
+1-414-671-6350.
LIMITATION OF LIABILITY:
SELLER WILL NOT BE LIABLE FOR ANY INDIRECT,
INCIDENTAL, CONSEQUENTIAL, PUNITIVE, EXEMPLARY,
OR SPECIAL DAMAGES, INCLUDING WITHOUT LIMITATION
ANY LOST PROFITS, COSTS OF SUBSTITUTE PRODUCTS,
OR LABOR COSTS ARISING FROM THE SALE, USE,
OR INSTALLATION OF THE PRODUCTS, FROM THE
PRODUCTS BEING INCORPORATED INTO OR BECOMING
A COMPONENT OF ANOTHER PRODUCT, OR FROM ANY
OTHER CAUSE WHATSOEVER, WHETHER BASED ON
WARRANTY (EXPRESSED OR IMPLIED) OR OTHERWISE
BASED ON CONTRACT, TORT, OR ANY OTHER THEORY
OF LIABILITY, AND REGARDLESS OF ANY ADVICE OR
REPRESENTATIONS THAT MAY HAVE BEEN RENDERED BY
SELLER CONCERNING THE SALE, USE, OR INSTALLATION
OF THE PRODUCTS, EVEN IF SELLER IS AWARE OF THE
POSSIBILITY OF SUCH DAMAGES. IN NO EVENT WILL
SELLER’S AGGREGATE LIABILITY ARISING OUT OF OR
RELATED TO THIS AGREEMENT EXCEED THE TOTAL
AMOUNTS PAID TO SELLER BY CUSTOMER FOR THE
PRODUCTS WITHIN THE THREE (3) MONTH PERIOD
IMMEDIATELY PRECEDING THE EVENT GIVING RISE
TO CUSTOMER’S CLAIM. THE LIMITATIONS SET FORTH
HEREIN REGARDING SELLER’S LIABILITY SHALL BE VALID
AND ENFORCEABLE NOTWITHSTANDING A FAILURE
OF ESSENTIAL PURPOSE OF THE LIMITED REMEDY
SPECIFIED IN THESE TERMS.
Seller reserves the right to update these Terms at
any time, at its sole discretion, which become binding
upon the date of publishing. For the most current
version of our full Terms of Sale, see our website at:
https://www.hatcocorp.com/terms-of-sale

CDWCEM-1123
12
CONTENIDO
La información de seguridad que aparece en este manual se
identifica a través de los siguientes paneles con señales y
palabras:
ADVERTENCIA
ADVERTENCIA indica una situación peligrosa
que, en caso de no evitarse, puede resultar
en lesiones graves e incluso la muerte.
ATENCIÓN
ATENCIÓN indica una situación peligrosa
que, en caso de no evitarse, puede resultar
en lesiones menores o moderadas.
AVISO
AVISO se usa para abordar prácticas que no
están relacionadas con lesiones personales.
NOTA: Consulte las tablas de identificación de símbolos
en la contraportada para conocer las definiciones
correspondientes a los símbolos que pueden aparecer
en este manual.
INTRODUCCIÓN
Gracias al diseño de los Cajón calientaplatos por aire de
convección de Hatco, los alimentos se conservan a una
temperatura de servicio óptima y su calidad permanece intacta.
Su diseño permite un alto rendimiento en la cocina e incluye
acero inoxidable de gran resistencia, uniones sólidas, guías
correderas en acero inoxidable y cajones de cierre hermético.
El exclusivo flujo de aire de los cajones calientaplatos por aire
de convección introduce el aire caliente a la fuerza dentro de
la unidad, creando un efecto sábana de calor seco alrededor
del producto alimenticio.
Los Cajón calientaplatos por aire de convección de Hatco son
el fruto de importantes trabajos de investigación y ensayos de
campo. Los materiales empleados han sido seleccionados por
su gran resistencia, aspecto atractivo y rendimiento óptimo.
Todas las unidades son sometidas a cuidadosas inspecciones
y pruebas antes de proceder a su envío.
Este manual contiene las instrucciones relativas a la
instalación, las medidas de seguridad y el manejo de los
Cajones Térmicos de Hatco. Hatco recomienda leer todas las
instrucciones referentes a la instalación, el funcionamiento y
la seguridad contenidas en este manual antes de comenzar la
instalación o utilizar la unidad.
Información Importante para el Propietario ....................12
Introducción........................................................................12
Información Importante de Seguridad .............................13
Descripción del Modelo.....................................................14
Denominación del Modelo.................................................15
Especificaciones ................................................................15
Configuraciones del Enchufe ............................................15
Cuadro de Clasificación Eléctrica .......................................15
Dimensiones......................................................................15
Instalación...........................................................................16
Generalidades ...................................................................16
Instalación del cajón calientaplatos...................................16
Operación............................................................................17
Generalidades ...................................................................17
Desbloqueo del controlador de temperatura.....................18
Cambio de la temperatura del punto de ajuste.................18
Mantenimiento ....................................................................18
Generalidades ...................................................................18
Limpieza diaria ..................................................................18
Guía de Resolución de Problemas...................................19
Opciones y Accesorios......................................................20
Información del Servicio de Garantía...............................20
Garantía Internacional Limitada........................................21
INFORMACIÓN IMPORTANTE PARA EL PROPIETARIO
Anote el número de modelo, número de serie (La etiqueta de
especificaciones está ubicada en la parte trasera de la unidad),
voltaje y fecha de compra de su unidad en los espacios a
continuación. Por favor, tenga esta información disponible
cuando llame a Hatco para recibir asistencia técnica.
Modelo No. _______________________________________
Serie No. _________________________________________
Voltaje ___________________________________________
Fecha de compra___________________________________
¡No olvide registrar su aparato!
Registre la garantía en nuestro sitio web para evitar retrasos
en la obtención de la cobertura de la garantía. Visite el
sitio web de Hatco: www.hatcocorp.com, elija el idioma
Español, seleccione el menú desplegable Support (Soporte)
y haga clic en “Warranty”(Garantía).
Horario de atención: 7:00 a.m. a 5:00 p.m., lunes a viernes
Hora Central (CT)
(Horario de verano—junio a septiembre:
7:00 a.m. a 5:00 p.m., lunes a jueves
7:00 a.m. a 4:00 p.m., viernes)
Teléfono: +1-414-671-6350
Puede encontrar información adicional si visita nuestro sitio
Web en www.hatcocorp.com.
Desecho correcto de este producto
Esta marca indica que este producto y sus componentes
electrónicos no deben desecharse con otros residuos
comerciales. Para evitar posibles daños al medio ambiente o
a la salud humana debido al desecho no controlado de
residuos, recicle en forma responsable para promover el
reuso sustentable de los recursos materiales. Para desechar
este producto y sus componentes electrónicos,
comuníquese con el proveedor en donde compró el producto
para conocer las normas de reciclaje ambiental seguro.

CDWCEM-1123 13
INFORMACIÓN IMPORTANTE DE SEGURIDAD
ADVERTENCIA
PELIGRO DE DESCARGA ELÉCTRICA: Use
sólo repuestos Hatco originales cuando
se necesite realizar mantenimiento. En
caso de no utilizase repuestos Hatco
originales, se anularán todas las garantías
y se puede someter a los operadores del
equipo a voltajes eléctricos peligrosos,
dando como resultado descargas eléctricas
o quemaduras. Los repuestos Hatco
originales están especificados para operar
en forma segura en los entornos en los
que se usan. Los repuestos de mercado
secundario o genéricos no cuentan con las
características que les permiten operar en
forma segura en los equipos Hatco.
RIESGO DE INCENDIO:
• Coloque la unidad a un mínimo de
25 mm de paredes y materiales que sean
combustibles. Si no se mantienen las
distancias seguras, podría provocarse
combustión o decoloración.
• No utilice productos químicos agresivos
tales como lejía (o productos de limpieza
que contengan lejía), limpiahornos o
soluciones de limpieza inflamables para
limpiar esta unidad.
Asegure que los productos alimenticios han
sido calentados a la temperatura adecuada
para la seguridad de los alimentos antes
de colocarlos en la unidad. No calentar el
producto alimenticio de forma correcta
podría resultar en graves riesgos para la
salud. Esta unidad es sólo de mantenimiento
de productos alimenticios precalentados.
Esta unidad no debe ser utilizada por
niños o personas con capacidades físicas,
sensoriales o mentales disminuidas.
Asegúrese de los niños están supervisados
y manténgalos alejados de la unidad.
Asegúrese de que los usuarios de esta
unidad han recibido la formación necesaria
para garantizar el manejo de esta unidad de
forma segura y apropiada.
Sólo personal calificado debe realizar
mantenimiento en esta unidad. El
mantenimiento por parte de personal que
no esté calificado puede causar descargas
eléctricas o quemaduras.
ADVERTENCIA
PELIGRO DE DESCARGA ELÉCTRICA:
• Enchufe la unidad a un tomacorriente
adecuadamente conectado a tierra
del voltaje, tamaño y configuración
del enchufe correctos. Si el enchufe
y el tomacorriente no coinciden,
comuníquese con un electricista
calificado para determinar e instalar el
voltaje y el tamaño de tomacorriente
correctos.
• Coloque el interruptor de alimentación
en posición de apagado, desenchufe
la unidad y/o desconecte el interruptor
automático y deje que la unidad se enfríe
antes de realizar cualquier operación de
mantenimiento o limpieza.
• NO sumerja ni sature la unidad con agua.
La unidad no es impermeable. No opere
la unidad si ésta se sumergió o saturó
con agua.
• La unidad no es a prueba de intemperie.
Coloque la unidad en interiores donde la
temperatura del aire ambiente sea de un
mínimode21°C(70°F).
• No limpie con vapor ni use agua en
exceso en la unidad.
• Esta unidad no tiene una construcción
“a prueba de chorros”. No use un
pulverizador de limpieza a chorro para
limpiar la unidad.
• No tire la unidad por el cable de
alimentación.
• No use la unidad si el cable de
alimentación está deshilachado o
desgastado.
• No intente reparar ni reemplazar un
cable de alimentación dañado. El cable
deberá reemplazarlo Hatco, un agente de
servicio Hatco autorizado o una persona
con calificaciones similares.
• No limpie la unidad cuando esté
energizada o caliente.
• No permita que se derramen líquidos
dentro de la unidad.
Lea la siguiente importante información de seguridad para evitar lesiones personales
o la muerte, y para evitar daños al equipo o la propiedad.

CDWCEM-1123
14
Todos los Modelos
Los cajones calientaplatos por aire de convección están
diseñados para mantener a los alimentos calientes, frescos y
crocantes antes de que se sirvan. Son unidades controladas
por cavidad simple/temperatura simple no humidificadas que
ofrecen calor seco y uniforme para productos alimenticios que
no requieren humedad o vaho. Los cajones calientaplatos por
aire de convección están construidos con acero inoxidable
resistente con rodillos de nylon durable, rampas de acero
inoxidable de 12 calibres y maquinaria para servicio pesado.
Las partes superior y laterales de los cajones calientaplatos
ofrecen una máxima eficiencia energética.
NOTA: Consulte la sección OPCIONES Y ACCESORIOS para
ver las funciones adicionales disponibles.
Modelo CDW-3N
El modelo CDW-3N cuenta con tres calientaplatos individuales,
cada uno de los cuales con una bandeja para alimentos
(bandejas incluidas). Posee un controlador de temperatura
digital y un interruptor de I/O (encendido/apagado) que controla
la temperatura y la alimentación para toda la unidad.
Modelo CDW-3N2
El modelo CDW-3N2 tiene seis cajones individuales, cada uno
de los cuales admite una bandeja para alimentos de tamaño
no incluidas). Posee un controlador de temperatura digital y
un interruptor de interruptor de I/O (encendido/apagado) que
controla la temperatura y la alimentación para toda la unidad.
Controlador de
Temperatura Digital
Interruptor de I/O
Modelo CDW-3N
ADVERTENCIA
Esta unidad no tiene piezas a las que el
usuario pueda realizar mantenimiento. Si
necesita realizar mantenimiento en esta
unidad, comuníquese con un agente de
servicio autorizado de Hatco o con el
Departamento de Servicio de Hatco al
+1-414-671-6350.
ATENCIÓN
PELIGRO DE QUEMADURAS:
• Algunas superficies exteriores de la
unidad se calientan. Tenga precaución al
tocar estas áreas.
• Tenga cuidado al abrir los cajones: saldrá
aire muy caliente.
Coloque la unidad a la altura correcta del
mesón en un área que sea cómoda para su
uso. La ubicación debe estar nivelada para
evitar que la unidad o su contenido caigan
accidentalmente y ser lo suficientemente
firme para soportar el peso de la unidad y el
contenido.
AVISO
No apoye la unidad sobre uno de los paneles
laterales o sobre el panel posterior. Podría
dañar la unidad.
Use sólo limpiadores no abrasivos. Los
limpiadores abrasivos podrían rayar
el acabado de la unidad, estropear su
apariencia y hacerla susceptible a la
acumulación de suciedad.
INFORMACIÓN IMPORTANTE DE SEGURIDAD
DESCRIPCIÓN DEL MODELO

CDWCEM-1123 15
DENOMINACIÓN DEL MODELO
Configuraciones del Enchufe
Las unidades incluyen un cable eléctrico y una clavija instalados
en fábrica. Las clavijas suministradas varían dependiendo de
las aplicaciones.
ADVERTENCIA
PELIGRO DE DESCARGA ELÉCTRICA: Enchufe la unidad
a un tomacorriente adecuadamente conectado a tierra del
voltaje, tamaño y configuración del enchufe correctos. Si
el enchufe y el tomacorriente no coinciden, comuníquese
con un electricista calificado para determinar e instalar el
voltaje y el tamaño de tomacorriente correctos.
NOTA: Hatco no proporciona el tomacorriente.
CEE 7/7 Schuko BS-1363
AS 3112
Configuraciones del Enchufe
NOTA: La etiqueta con las especificaciones está situada en el
panel posterior. Para comprobar el número de serie y
la información relativa a la electricidad de este aparato,
consulte la etiqueta.
C D W - x N 2
Cantidad de cajones de tamaño completo
Sin caracteres = cajones de tamaño completo
2 = cajones divididos
Cajón Calientaplatos por Aire de Convección
Unidad de Poco Espesor
ESPECIFICACIONES
NOTA: El peso de envío incluye el material de embalaje.
Cuadro de Clasificación Eléctrica
Dimensiones
A
C
B
Vista Frontal Vista Lateral
Modelo Voltaje Vatios Amperios Configuraciones del Enchufe Peso de Envío
CDW-3N 230 933 4.1 CEE 7/7 Schuko, BS-1363, AS 3112 81 kg (179 lbs.)
CDW-3N2 230 933 4.1 CEE 7/7 Schuko, BS-1363, AS 3112 81 kg (179 lbs.)
Modelo Ancho
(A)
Profundidad
(B)
Altura
(C)
CDW-3N 420 mm
(16-5/8
)774 mm
(30-1/2
)762 mm
(30
)
CDW-3N2 420 mm
(16-5/8
)774 mm
(30-1/2
)762 mm
(30
)

CDWCEM-1123
16
INSTALACIÓN
Generalidades
El cajón calientaplatos por aire de convección se envía con
la mayoría de los componentes armados previamente. Las
ruedas o las patas deben instalarse en el lugar. Debe tenerse
cuidado al desempacar la caja en la cual se envía la unidad
para evitar dañar la unidad ni los componentes incluidos.
ADVERTENCIA
PELIGRO DE DESCARGA ELÉCTRICA: La unidad no es
a prueba de intemperie. Coloque la unidad en interiores
donde la temperatura del aire ambiente sea de un mínimo
de21°C(70°F).
RIESGO DE INCENDIO: Coloque la unidad a un mínimo de
25 mm de paredes y materiales que sean combustibles. Si
no se mantienen las distancias seguras, podría provocarse
combustión o decoloración.
NOTA: La unidad debe transportarse en posición vertical.
1. Retire la unidad de la caja.
NOTA: Para evitar retrasos en la obtención de la cobertura de
la garantía, registre la garantía en nuestro sitio web.
Para obtener más información, consulte la sección
INFORMACIÓN IMPORTANTE PARA EL USARIO.
2. Quite la cinta y el material de embalaje de todas las
superficies de la unidad.
3. Coloque la unidad en la ubicación que desea.
• Sitúe la unidad en un lugar donde la temperatura
ambiente sea constante y no sea inferior a 21°C (70°F).
Evite las zonas en las que se produzcan movimientos
o corrientes de aire (es decir, cerca de ventiladores/
campanas, conductos de aire acondicionado y puertas
exteriores).
• Asegúrese de que la unidad esté ubicada en suelo firme
y nivelado.
• Asegúrese de que la unidad esté situada a una altura
adecuada en un lugar apropiado para su uso.
4. Instale la unidad.
Instalación del cajón calientaplatos
Los cajones calientaplatos de convección son unidades
independientes que, antes del funcionamiento, requieren la
instalación de patas o ruedas, así como protección contra caídas.
1. Quite la bolsa plástica con las cuatro patas o ruedas del
cajón superior de la unidad.
2. Quite las bandejas de los cajones de la unidad.
AVISO
No apoye la unidad sobre uno de los paneles laterales o
sobre el panel posterior. Podría dañar la unidad.
3. Coloque cuidadosamente la unidad en posición horizontal,
hacia la izquierda o derecha (esta tarea requiere dos
personas).
4. Instale cada pata o rueda. Consulte el procedimiento
correspondiente en esta sección.
5. Vuelva a colocar la unidad en posición vertical (esta tarea
requiere dos personas). Para unidades con patas — Si
la unidad no está nivelada o se mueve, gire la punta/
brida ajustable de la pata correspondiente para nivelar la
unidad.
6. Instale la protección contra caídas adecuada. Consulte el
procedimiento para hacerlo en esta sección.
• Asegúrese de que la unidad esté nivelada antes de
ajustar las bridas de las patas al piso en el procedimiento
de instalación de la protección contra caídas.
Instalación de las ruedas
1. Alinee los cuatro orificios en la placa de ruedas con los
cuatro orificios en la parte inferior de la unidad en una
esquina de la unidad.
2 Instale un perno a través de cada uno de los orificios en la
placa de ruedas y en la parte inferior de la unidad. Ajuste
firmemente.
3. Repita los pasos 1 y 2 para las tres ruedas restantes.
Placa de las ruedas
Soporte de
Montaje
Perno
Instalación de las ruedas
Instalación de las patas
1. Enrosque una pata en el orificio situado en una esquina
de la unidad.
2. Ajuste manualmente la pata hasta lograr un buen ajuste.
No apriete demasiado.
3. Repita los pasos 1 y 2 para las tres patas restantes.
Alargar
Acortar
Brida
ajustabl
Instalación de las patas
Instalación de la protección contra caídas
Es posible que las unidades independientes deban tener una
protección contra caídas mediante la sujeción de las bridas
de las patas al piso o la instalación del soporte para pared
contra caídas proporcionado con la unidad (ambos disponibles
al momento del pedido en Hatco).
Brida de
la pata
Brida de
la pata
Sujeción de las bridas de las patas al piso
1. Asegúrese de que la unidad esté en la
ubicación deseada y se haya nivelado
correctamente.
2. Con los sujetadores adecuados, asegure
todas las bridas de las patas al piso.

CDWCEM-1123 17
INSTALACIÓN
Instalación del soporte para pared contra caídas
1. Mueva la unidad a la ubicación deseada contra la pared
donde se instalará el soporte para pared. Asegúrese de
que la unidad esté correctamente nivelada.
2. Afloje, pero no extraiga, los dos tornillos que aseguran la
placa contra caídas a la parte superior de la unidad.
3. Determine la ubicación del soporte para pared en la pared.
a. Posicione el soporte para pared al ras contra la pared y
por encima de la unidad.
b. Con la manija de la pestaña de bloqueo presionada
sobre el soporte, posicione el soporte de manera que la
pestaña de bloqueo se asiente completamente dentro
de la abertura en la placa contra caídas.
• Mueva la placa contra caídas hacia atrás y adelante
según sea necesario para asentar correctamente la
pestaña de bloqueo dentro de la placa. Asegure la
placa a la unidad una vez determinada la ubicación
correcta.
c. Marque las ubicaciones de los sujetadores del soporte
para pared a través de los orificios del soporte para
pared.
4. Perfore previamente los orificios en la pared en las
ubicaciones marcadas para el sistema de sujeción del
soporte para pared adecuado.
5. Instale el soporte para pared con los sujetadores
adecuados.
6. Levante la manija de la pestaña de bloqueo del soporte
para pared y mueva la unidad a su posición, debajo del
soporte para pared.
7. Suelte la manija de la pestaña de bloqueo de manera que
esta se asiente completamente dentro de la abertura en
la placa contra caídas.
Soporte para pared contra caídas
Tornillo
Manija de la pestaña de bloqueo
Pestaña
de bloqueo
Placa contra caídas
(ajustable)
Instalación del soporte para pared contra caídas
OPERACIÓN
Generalidades
Utilice los siguientes procedimientos para hacer funcionar el
Cajón calientaplatos por aire de convección.
ADVERTENCIA
Lea todos los mensajes de seguridad de la sección
Información de seguridad importante antes de operar el
equipo.
1. Enchufe la unidad a un tomacorriente con la tensión, el
tamaño y la forma de enchufe correctos. Vea la sección
de ESPECIFICACIONES para conocer los detalles.
2. Coloque el interruptor de I/O (encendido/apagado) en la
posición I(encendido). Se iluminará el interruptor.
• El controlador digital de temperatura se energizará,
y la temperatura actual de la unidad aparecerá en la
pantalla.
• La frase “out 1” aparecerá en la esquina superior
izquierda de la pantalla para indicar que la unidad se
encuentra en modo térmico.
ATENCIÓN
PELIGRO DE QUEMADURAS:
• Algunas superficies exteriores de la unidad se
calientan. Tenga precaución al tocar estas áreas.
• Tenga cuidado al abrir los cajones: saldrá aire muy
caliente.
3. Presione y suelte la tecla del controlador digital de
temperatura para verificar la temperatura del punto de
ajuste.
• La temperatura del punto de ajuste se mostrará durante
15 segundos. Después de 15 segundos, la pantalla
cambiará a la temperatura actual de la unidad. Para
cambiar la temperatura del punto de ajuste, consulte
“Cambio de la temperatura del punto de ajuste” en esta
sección.
NOTA: El controlador digital de temperatura se establece
previamente en una temperatura de punto de ajuste de
91°C (195°F) en la fábrica. Una vez que se cambia la
temperatura del punto de ajuste, la nueva temperatura
del punto de ajuste permanecerá en la memoria hasta
que vuelva a cambiarse. La temperatura máxima del
punto de ajuste es 91°C (195°F).
4. Espere de 15 a 20 minutos para que la unidad alcance
la temperatura operacional antes de colocar alimentos
precalentados.
Tecla de
flecha arriba
“out 1”
Tecla de
flecha abajo
Símbolo
Celsius
Tecla
SET
Controlador Digital de Temperatura

CDWCEM-1123
18
OPERACIÓN
Desbloqueo del controlador de
temperatura
1. Presione el botón una sola vez.
2. Si la pantalla muestra “Loc” (bloquedo), mantenga pulsada
la tecla durante 4 segundos hasta que la pantalla
muestre “UnL” (desbloquedo).
Cambio de la Temperatura del Punto de
Ajuste
Utilice el siguiente procedimiento para cambiar la temperatura
del punto de ajuste de la unidad.
1. Presione y suelte la tecla . La temperatura del punto
de ajuste actual se mostrará en la pantalla.
2. Presione la tecla o dentro de los 15 segundos
para cambiar la temperatura de punto de ajuste. Si no
se presiona ninguna tecla dentro de los 15 segundos, la
pantalla retornará a la temperatura actual de la unidad.
3. Presione la tecla o aguarde 15 segundos para
guardar la nueva temperatura de punto de ajuste.
Controlador de
Temperatura Digital Interruptor de I/O
CDW-3N—Panel de control
MANTENIMIENTO
Generalidades
El cajón calientaplatos por aire de convección Hatco está
diseñado para ofrecer durabilidad y desempeño máximos con
el mínimo mantenimiento.
ADVERTENCIA
PELIGRO DE DESCARGA ELÉCTRICA:
• Desenchufe el cable de alimentación o APAGUE el
interruptor con fusibles/cortocircuito y deje que la
unidad se enfríe antes de realizar ninguna operación
de mantenimiento o limpieza.
• NO sumerja ni sature la unidad con agua. La unidad
no es impermeable. No opere la unidad si ésta se
sumergió o saturó con agua.
• No limpie con vapor ni use agua en exceso en la unidad.
• Esta unidad no tiene una construcción “a prueba de
chorros”. No use un pulverizador de limpieza a chorro
para limpiar la unidad.
• No limpie la unidad cuando esté energizada o caliente.
Esta unidad no tiene piezas a las que el usuario pueda
realizar mantenimiento. Si necesita realizar mantenimiento
en esta unidad, comuníquese con un agente de servicio
autorizado de Hatco o con el Departamento de Servicio de
Hatco al +1-414-671-6350.
Limpieza diaria
Se recomienda que la unidad se limpie diariamente para
preservar el acabado de la unidad así como para mantener
su rendimiento.
1. Coloque el interruptor de I/O (encendido/apagado) en la
posición O(apagado), desenchufe el cable de alimentación
y deje que se enfríe la unidad.
2. Extraiga y limpie todas las bandejas de alimentos.
AVISO
Use sólo limpiadores no abrasivos. Los limpiadores
abrasivos podrían rayar el acabado de la unidad, estropear
su apariencia y hacerla susceptible a la acumulación de
suciedad.
3. Limpie las superficies con un paño húmedo. Se puede
utilizar una crema limpiadora no abrasiva para manchas
difíciles. Las zonas difíciles de alcanzar deberán limpiarse
utilizando un cepillo pequeño y jabón neutro.
• No olvide inspeccionar el interior de la unidad por si
fuera necesario limpiarlo. Es posible que se caigan
trozos de comida de la bandeja y que vayan a parar
a la cavidad del cajón. ¡ADVERTENCIA! Riesgo de
quemaduras — ¡No limpie la cavidad del cajón
cuando la unidad esté encendida o enchufada!
4. Seque toda la unidad con un paño seco no abrasivo.

CDWCEM-1123 19
Síntoma Causa Probable Acción Correctiva
Unidad demasiado caliente. Temperatura del punto de ajuste demasiado alta. Cambie la temperatura del punto de ajuste a un valor
más bajo.
Unidad enchufada en fuente de alimentación
incorrecta.
Verifique con personal cualificado que la fuente de
alimentación corresponde a las especificaciones de
la unidad.
El controlador digital de temperatura está defectuoso. Póngase en contacto con un agente de servicio
autorizado o con Hatco para asistencia.
Unidad no suficientemente
caliente.
No ha dejado transcurrir el tiempo necesario para
precalentar la unidad.
Deje transcurrir de 15 a 20 minutos para que la
unidad alcance la temperatura de funcionamiento.
Temperatura del punto de ajuste demasiado baja. Cambie la temperatura del punto de ajuste a un valor
menos bajo.
El cajón no está completamente cerrado. Compruebe que todos los cajones están
completamente cerrados.
El controlador digital de temperatura está defectuoso. Póngase en contacto con un agente de servicio
autorizado o con Hatco para asistencia.
La unidad no funciona. Unidad no enchufada. Enchufe la unidad en la fuente de alimentación
correcta.
Unidad no encendida. Mueva el interruptor de I/O (encendido/apagado) a la
posición I(encendido).
El interruptor automático del cuadro de distribución se
ha desconectado .
Vuelva a conectar el interruptor automático.
Interruptor de I/O (encendido/apagado) defectuoso.
Póngase en contacto con un agente de servicio
autorizado o con Hatco para asistencia.
El controlador digital de temperatura está defectuoso.
Resistencia fundida.
GUÍA DE RESOLUCIÓN DE PROBLEMAS
ADVERTENCIA
Sólo personal calificado debe realizar mantenimiento
a la unidad. El mantenimiento realizado por personal
no calificado puede causar descargas eléctricas o
quemaduras.
ADVERTENCIA
PELIGRO DE DESCARGA ELÉCTRICA: Desenchufe el
cable de alimentación o APAGUE el interruptor con fusibles/
cortocircuito y deje que la unidad se enfríe antes de realizar
ninguna operación de mantenimiento o limpieza.
¿Tiene preguntas sobre cómo resolver un problema?
Si no logra resolver un problema, póngase en contacto con el agente de servicio autorizado de Hatco más cercano para obtener
ayuda. Para encontrar la Agencia de Servicios más cercana, ingrese en el sitio web de Hatco www.hatcocorp.com, seleccione
el Menú de «Support» (Soporte) desplegable y haga clic en «Find A Service Agent» (Encuentre un agente de servicio) o póngase
en contacto con el Equipo de Servicio y Piezas de Hatco de la siguiente manera:

CDWCEM-1123
20
OPCIONES Y ACCESORIOS
Bandejas para Alimentos
Disponemos de bandejas para alimentos accesorias, fabricadas
en acero inoxidable y disponibles en varios tamaños.
ST PAN 2............... Bandeja grande en acero inoxidable de
324 mm An x 527 mm Prof x 64 mm Al
ST PAN 4............... Bandeja grande en acero inoxidable de
324 An x 527 Prof x 102 Al mm
HDW6″PAN......... Bandeja grande en acero inoxidable de
324 An x 527 Prof x 152 Al mm
Bandeja grande de
64 mm (2-1/2”) de
profundidad
Bandeja grande de
102 mm (4″) de
profundidad
Bandeja grande de
152 mm (6″) de
profundidad
Bandejas para Alimentos en Acero Inoxidable
Trébedes
Se pueden conseguir trébedes de acero inoxidable o de níquel
laminado en diversos tamaños.
TRIVET(1/2)SS..... Trébede de acero inoxidable de tamaño
(259 x 194 mm)
TRIVET SS............ Trébede de acero inoxidable de tamaño
(257 x 457 mm)
TRIVET(1/2) ......... Trébede de níquel laminado de tamaño
(259 x 194 mm)
TRIVET.................. Trébede de níquel laminado de tamaño
(257 x 457 mm)
Trébede Medio
Trébede Completo
Trébedes
INFORMACIÓN DE SERVICIO DE GARANTÍA
La garantía de esta unidad tiene una duración de un año a
partir de la fecha de compra o de dieciocho meses a partir de
la fecha de envío desde Hatco, lo que ocurra primero.
Si tiene algún problema con la unidad durante el período que
cubre la garantía, haga lo siguiente:
Póngase en contacto con el distribuidor local de Hatco
Cuando contacte al distribuidor de Hatco para obtener ayuda
de mantenimiento, proporcione la siguiente información al
distribuidor a fin de asegurar la rapidez del procedimiento:
• Modelo de la unidad
• Número de serie (ubicado en la unidad)
• Problema específico con la unidad
• Fecha de compra
• Nombre del comercio
• Dirección de envío
• Nombre y número de teléfono de contacto
El distribuidor de Hatco hará lo siguiente:
• Proporcionará la(s) pieza(s) de repuesto según sea necesario
• Presentará el reclamo de garantía a Hatco para su
procesamiento
Problemas sin garantía
Si experimenta un problema que no tiene garantía y requiere
asistencia, póngase en contacto con la agencia de servicio
autorizado de Hatco más cercana.
Para localizar la agencia de servicio más cercana:
• Ingrese a nuestro sitio web: www.hatcocorp.com, elija el
idioma Español, seleccione el menú desplegable Support
(Soporte) y haga clic en “Find A Service Agent” (Buscar un
agente de servicio)
• Llame al Servicio técnico de Hatco: +1-414-671-6350
• Escriba al Servicio técnico de Hatco:
Other manuals for CDW-3N Series
2
Table of contents
Languages:
Other Hatco Warming Drawer manuals

Hatco
Hatco HDW-1 Installation instructions

Hatco
Hatco DRAWERMAX HDM-2 User manual

Hatco
Hatco HDW-R2 Series User manual

Hatco
Hatco HDW-1 User manual

Hatco
Hatco FLAV-R-SAVOR FSHC-7W Series User manual

Hatco
Hatco Drawermax HDM Series User manual

Hatco
Hatco FLAV-R-SAVOR FSHC-5W Series User manual

Hatco
Hatco CDW-3N Series User manual

Hatco
Hatco HDW Series User manual

Hatco
Hatco HDW-1 User manual