HCI BM15AP2 User manual

BedMate AP QUICK START GUIDE
For Model BM15AP2
For Customer Support/Service, please call: 1
-
800
-
783
-
8105
The latest product information and documantation is available at:www.hcic.com


WARNING
To reduce the risk of fire or electric shock, do not expose this apparatus to rain or moisture and this apparatus shall not be exposed to dripping or splashing and no objects filled with liquids, such as vases, shall be
placed on the apparatus.
Do not use this LCD TV Monitor near water. For example: avoid placing it near a bathtub, washbowl, kitchen sink, or laundry tub, in a wet basement, or near a swimming pool, etc.
This apparatus shall be connected to a mains socket outlet with a protective earthing connection.
The mains plug of this apparatus must remain readily operable.
Advertisement:
Pour réduire le risque du feu ou de décharge électrique, n’exposez pas cet appareil à la pluie ou à l’humidité. L’appareil ne sera pas exposé à l’égoutture ou l’éclaboussement et aucun objet remplis de liquides, tels
que des vases, ne seront placés sur l’appareil.
NOTE TO CABLE TV INSTALLER
This reminder is provided to call the cable TV installer’s attention to Article 820-40 of the National Electric Code (U.S.A.). This code provides guidelines for proper grounding and, in particular, specifies that the
cable ground shall be connected to the grounding system of the building as close to the point of the cable entry as practical.
REGULATORY INFORM
This equipment generates, uses and can radiate radio frequency energy, and if not installed in accordance with this instruction manual, may cause harmful interference to radio communications. However, there is
no guarantee that interference will not occur in a particular installation. If this equipment does cause harmful interference to radio or television reception, which can be determined by turning the equipment off
and on, the user is encouraged to try to correct the interference by one or more of the follow measures:
1. Increase the separation between the equipment and receiver.
2. Consult the dealer or an experienced radio/TV technician for help.
CAUTION
Do not attempt to modify this product in any way without written authorization from HealthCare Information, LLC. Unauthorized modification will void the warranty of the product.
COMPLIANCE
The party responsible for this product’s compliance is:
HealthCare Information, LLC, 113 Commerce Blvd., Loveland, OH 45140, USA. Phone 513-271-8100
IMPORTANT SAFETY INSTRUCTIONS
1) Read these instructions. 2) Keep these instructions.
3) Heed all warnings 4) Follow all instructions.
5) Do not use this apparatus near water. 6) Clean only with dry cloth.
7) Do not block any ventilation openings. Install in accordance with the manufactures instructions.
8) Do not install near any heat source such as radiators, heat registers, stoves, or other apparatus (including amplifiers) that produce heat.
9) Do not defeat the safety purpose of the polarized or grounding type plug. A polarized plug has two blades with one wider than the other. A grounding type plug has two blades and a third
grounding prong. The wide blade or third prong is provided for your safety. If the provided plug does not fit into you outlet, consult an electrician for replacement of the obsolete outlet.
10) Protect the power cord from being walked on or pinched particularly at plugs, convenience receptacles, and the point where they exit from the apparatus.
11) Only use attachments/accessories specified by the manufacturer.
12) Use only with the cart, stand, tripod, bracket, or table specified by the manufacturer, or sold with the apparatus. When a cart is used, use caution when moving the cart/apparatus combination to
avoid injury from tip-over.
13) Unplug this apparatus during lightning storms or when unused for long periods of time.
14) Refer all servicing to qualified service personnel. Servicing is required when the apparatus has been damaged in any way, such as power-supply cord or plug is damaged, liquid has been spilled or
objects have fallen into the apparatus, the apparatus has been exposed to rain or moisture, does not operate normally, or has been dropped.
IMPORTANT SAFEGUARDS FOR YOU AND YOUR NEW PRODUCT
YOUR NEW PRODUCT HAS BEEN MANUFACTURED AND TESTED WITH YOUR SAFETY IN MIND. HOWEVER, IMPROPER USE CAN RESULT IN POTENTIAL ELECTRICAL SHOCK OR FIRE HAZARDS. TO AVOID DEFEATING THE
SAFEGUARDS THAT HAVE BEEN BUILT INTO YOUR NEW PRODUCT, PLEASE READ AND OBSERVE THE FOLLOWING SAFETY POINTS WHEN INSTALLING AND USING YOUR NEW PRODUCT, AND SAVE THEM FOR FUTURE
REFERENCE. OBSERVING THE SIMPLE PRECAUTIONS DISCUSSED IN THE MANUAL CAN HELP YOU GET MANY YEARS OF ENJOYMENT AND SAFE OPERATION THAT ARE BUILT INTO YOUR NEW PRODUCT.
REAL TIME CLOCK BACKUP BATTERY
CAUTION – Danger of explosion if battery is incorrectly replaced. Replace only with the same or equivalent type.

INSTALLATION
The BM15AP2 is designed to be used with an HCI Outreach Support Arm. Third party support arms may also be used. Installation onto third party support arms will be
similar to the HCI Outreach Support Arm. To install the BM15AP2 onto a Outreach Arm
Do not apply power to the set until the installation is completed.
Install this Television on an arm that has been properly mounted according to the arm and mount manufacturer’s instructions. Make sure that the arm
is locked into its retracted position. If the arm cannot be locked into its retracted position, raise the outer arm to its highest position to install the
television.
Failure to secure the arm could result in bodily inury.
If hanging the television on a wall, make sure that the wall mount used is rated to carry the full weight of the television. All HCI televisions utilize
standard VESA mounting patterns. Follow the directions that come with mount.
Failure to follow these steps could result in bodily injury.
1. Remove the safety screw and retainer from the BedMate Stem.
Cut the wire tie holding the shim to the lock plate.
2. For HCI Outreach-V2 arms, install the supplied shim onto the arm.
Shim is optional for other arms. Install as necessary for a snug fit.
3. Slide the set onto the arm. The notch in the mount goes to the rear of the nose and slides partially over the bolt
head on the bottom of the nose.
4. Install the retainer back onto the stem and secure with the
screw from step one.Connect the coax and Ethernet cables.
Slightly wrench tighten the coax connectors to the coupler
just enough that you can not undo the connectors by hand.
DO NOT OVER TIGHTEN. 1/16 TO 1/8 TURN PAST FINGER TIGHT IS ENOUGH.
5. Gently tuck the cables insode the nose and reinstall the nose covers.
6. Apply power and preceed with setup.

Setup
1. Install the IR remote control batteries.
A Turn the IR Remote over. Press down on the arrow and slide the battery cover off the bottom.
B. Install the two included AAA batteries. The polarity is indicated on the bottom of the battery compartment. Make sure the batteries are installed correctly.
C. Slide the battery cover back onto the remote and snap into place.
2. Enter Admin Mode
A. Turn set on using the POWER button on the IR or touching the lower right corner of the screen. It takes the set about a minute to boot after power is applied
to the set before you can turn it on. After that there is a 5 second delay after you turn the set on/off before you can turn it on/off again.
B. Press the HOME button on the IR remote.
C. Using an IR remote, press the function button. CODE: 0000000 will appear in red on the upper right of the screen.
D. Enter code 1236363. You can use the IR remote or virtual key pad on the screen. Apps drawer button will appear at the bottom middle of the screen.
3. Scan for channels (must be in admin mode)
A. Press the SETUP button on the IR remote.
B. Touch Television, CHANNEL, Auto Program, Search Cable Channels, OK The set will now scan for viewable channels and create a channel line up.
Note: If the set is connected to an antenna, select Search Air Channels instead of Search Cable Channels.
C. Wait for scan to complete. This may take up to 20 minutes depending on the number of digital channels present.
The set is now ready for basic use. For advanced setup download the full Operations Manual from www.hcic.com. Direct link to the manual is
https://www.hcic.com/wp-content/uploads/2015/07/BedMateAP-Operations-Manual-Rev-1-1.pdf
4. Cloning (must be in Admin Mode)
A. Generate clone file.
a. Insert a USB flash drive into any USB port on the set. The side port is usually easiest to get to.
b. Enter Admin Mode and press the SETUP button.
c. Scroll down the left column and touch Clone & Reset followed by Generate Clone File. Wait for the process to complete. This may take several minutes.
B. Restore clone file.
a. Move the USB flash drive to a set that you wish to copy the setup to.
b. Enter Admin Mode and press the SETUP button.
c. Scroll down the left column and touch Clone & Reset followed by Restore Clone File. Wait for the process to complete. This may take several minutes.
d. Repeat B. for all sets.
Note: The following will not clone, IP setup, flash drive content, user installed apps, app data and some widget setup information.
Table of contents
Popular Wireless Access Point manuals by other brands
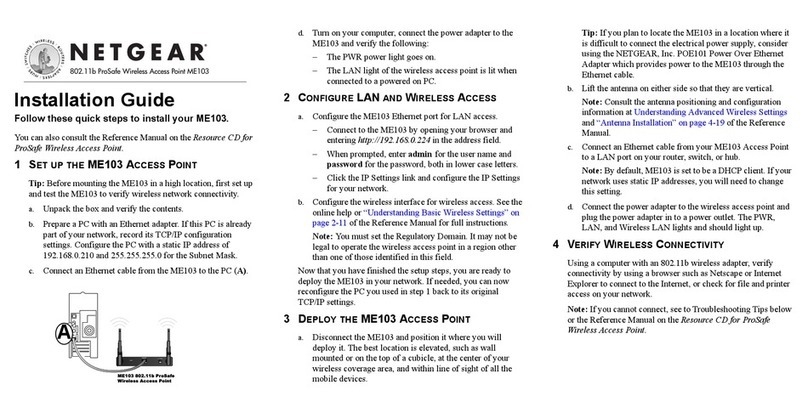
NETGEAR
NETGEAR ME103 - 802.11b ProSafe Wireless Access... installation guide

Moxa Technologies
Moxa Technologies AWK-1121 Quick installation guide

PoeWit
PoeWit WAP-1 quick start guide
Coaxmedia
Coaxmedia Series 6000 user guide
Edimax
Edimax EW-7303HPn V2 Connection guide
Comnet
Comnet NetWave NWK7/M quick start guide
