HCT DRF2 User manual

021-DRF Rev B DRC User Manual 1
Copyright © Enovation Controls – 2018
DRF Valve Controller
DRF
Closed-loop and Open-loop
Proportional Valve Controller
Enovation Controls reserves the right to improve this product at any time and without notice. This manual may
contain mistakes and printing errors. The content is regularly checked and updated. Please check our website
or contact our customer support for latest version. Enovation Controls accepts NO liability for technical mistakes
or printing errors or their consequence.

021-DRF Rev B DRC User Manual 2
Copyright © Enovation Controls – 2018
DRF Valve Controller
Contents
Welcome.....................................................................................................................Error! Bookmark not defined.
Product Application Guidelines..................................................................................................................................3
DRF Controllers.........................................................................................................................................................4
Operating Specifications....................................................................................................................................4
Physical Description ..........................................................................................................................................5
User Interface....................................................................................................................................................5
Configuration.....................................................................................................................................................6
Parameter List...................................................................................................................................................9
PID Algorithm...................................................................................................................................................12
Setup Procedure..............................................................................................................................................12
Wiring ..............................................................................................................................................................17
Order Information.....................................................................................................................................................18
Application Examples ..............................................................................................................................................19
Open Loop Double Solenoid Control (DRF2-Vxx) ...........................................................................................19
Double/Single/Single Solenoid Control (DRF4-Vxx)........................................................................................20
Closed Loop Velocity Mode (DRF2-Vxx) .........................................................................................................21
Revision Record......................................................................................................................................................21

021-DRF Rev B DRC User Manual 3
Copyright © Enovation Controls – 2018
DRF Valve Controller
Cautions
Changing setup values or operating modes while a machine is running may cause unintended machine movement.
It could lead to possible injury or death. Any moving parts should be disabled prior to changing setup values or
operating modes. In every case, exercise caution and work should be completed only by qualified personnel.
Product Application Guidelines
ALWAYS do the following
•FULLY read this manual and accompanying data sheets BEFORE starting.
•Isolate this unit from all other equipment BEFORE any form of welding.
•Isolate the controller from ANY form of battery charging or battery boosting.
•Be aware of the electrical & mechanical connections, and the expected reactions of the equipment.
•Operate the units within the temperature range.
•Use the correct tools to do the job (i.e. P.C., software) etc.
•Separate High Voltage AC cables from Low Voltage DC signal and supply cables.
•Make sure power supply is CORRECT, ELECTRICALLY CLEAN, STABLE, and rated for the full load.
•Make sure the controller output voltage & current is compatible with the equipment.
•All unused wires / terminals should be terminated safely.
•Ensure ALL connectors have no unintended SHORT or OPEN circuits.
•Ensure ALL connectors are wired correctly, secure, locked in place and fully connected.
•Disconnect or connect wires to or from this unit only when the power supply is disconnected.
•Use adequate screening in areas of intense Radio Frequency fields.
•Ensure ALL work areas are clear of personnel before operating the controller.
•Follow and abide by local and country health & safety standards.

021-DRF Rev B DRC User Manual 4
Copyright © Enovation Controls – 2018
DRF Valve Controller
DRF Controllers
The DRF controller drives proportional solenoid valves in a closed loop system to follow a command signal. When
the feedback is greater than the command input, the coil receives full current; when the feedback is less than the
command input, the coil receives 0 current.
Once configured, the settings are permanently stored in the controller memory.
DRF Features
Easily configured using HCT Graphical User Interface (GUI) or HCT Hand Held Interface (HHI)
LED indication of power, output current and fault status
DIN-rail mount housing with removable terminal blocks
Multiple modes for open loop and closed-loop applications, programmable enable input
All input and output limits are independently adjustable
Adjustable output with short circuit protection, adjustable ramp up and ramp down rates
Fully adjustable PID control loop
Operating Specifications
Supply Voltage 9 to 32VDC
Supply Current Valve current + 50mA (Quiescent Max)
Output Current DRF-x06: 600mA MAX. per channel
DRF-x12: 1.2A MAX. per channel
DRF-x25: 2.5A MAX. per channel
Coil Resistance 2Ω MIN.
Reference Voltages +10V, -10V @ 20mA (DRF-Vxx versions only)
Dither Frequency 30, 50, 75, 100, 125, 150, 175, 200, 225, 250, 275, 300, 1000 Hz
Analog Input Range DRF-Vxx: -10V to 10V DRF-Axx: 0 to 20mA
Analog Input Impedance
DRF-Vxx:
38kΩ
DRF-Axx:
250Ω
Analog Input Resolution 10 bits
Operating Temperature Range -20º to 70º C; -40º to 85º C (storage)
Enclosure Polyamide
Dimensions Inch: 0.69 W x 4.50 H x 4.30 D; mm: 17.5 W x 114.5 H x 109.4 D

021-DRF Rev B DRC User Manual 5
Copyright © Enovation Controls – 2018
DRF Valve Controller
Physical Description
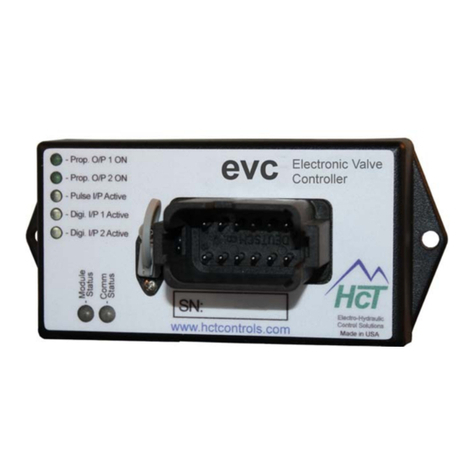
There are PWR LED and OUTx LEDs. For DRF-4, there are 5 LEDs. The PWR LED is
green when the applied voltage is within the operating range.
OUTx LEDs indicate current output for a given channel. The LEDs are yellow and the
brightness will vary with the output current.
In the case of a fault the LEDs will flash red with a flash code. See Fault Status for
details.
The DRF communicates with the Graphical User Interface through the USB port.
When connected to a PC, the DR controller is recognized as a USB device with or
without power supply. However, it must be powered when configuring the settings.
User Interface
The DRF has a number of internal settings.
Users can open the Graphical User Interface to view, make changes and save the settings in a data file which can
be uploaded to any DRF controller.

021-DRF Rev B DRC User Manual 6
Copyright © Enovation Controls – 2018
DRF Valve Controller
Configuration
The GUI has 4 buttons (ran from a PC): Lock, Unlock, Up, and Down. There are short-cut keys: ‘/’(lock), ‘*’(unlock),
‘+’(up), and ‘-‘(down).
Use the up and down arrows to navigate through the parameter list. The display will show the next parameter in the
list when pressed. The parameter name is on the first line and the value is on the second line. The list is in circular,
stepping down from the last parameter to the first and vice-versa.
There are three types of parameters: fixed; monitor; and variable. Fixed parameters show the module’s firmware
version, etc. Monitor parameters display output current and system voltage. Use variable parameters to configure
the controller, such as maximum output current, operating mode, etc. Some parameters combine variable and
monitor in one line. Use it to set a variable according to the current monitor value.
Press the unlock button to enter the edit mode. An asterisk (*) will appear at the beginning of the second line. Use
the up and down buttons to change the value. For parameters containing both variable and monitor, the monitor
data is in square brackets.
Press the lock button to save the parameters and end edit mode.
When the lock button is pressed, the changes take effect immediately. Change values only when the machine is
NOT running.

021-DRF Rev B DRC User Manual 7
Copyright © Enovation Controls – 2018
DRF Valve Controller
“Read settings from controller” displays a static table of values from non-volatile memory. The changes made to the
settings by selecting “lock” are not updated in the table unless “read settings from controller” is selected again.
To save the settings into a file for future use, click “read settings from controller” before clicking “save settings to
file”.

021-DRF Rev B DRC User Manual 8
Copyright © Enovation Controls – 2018
DRF Valve Controller
When uploading settings from a data file, the static table shows the settings from the data file, but they are not in
the controller yet.
Click “write settings to controller” before clicking “read settings from controller”. After this step, the static table will
display the DRF settings from the data file.

021-DRF Rev B DRC User Manual 9
Copyright © Enovation Controls – 2018
DRF Valve Controller
Parameter List
The following table outlines the DRF parameters as well as the limits and units of measure for each parameter.
Parameter Limits Units
DRFx-xxx Version #
C1 Mode See Mode Description Mode #
C1 Proportional gain 0.0 to 100 %
C1 Integral gain 0.0 to 100 %
C1 Derivative gain 0.0 to 100 %
C1 PID loop time 1 to 30 Cycles
C1 Deadband 0.0 to 2.0 V (mA)
Previous 5 parameters repeated for channel 3
2
C1 Min input -10 to +10.0; 4 to 20.0 V (mA)
C1 Max input -10 to +10.0; 4 to 20.0 V (mA)
C1 Min output 0 to 6001mA
C1 Max output 0 to 6001mA
C1 Ramp up 0.0 to 120.0 Seconds
C1 Ramp down 0.0 to 120.0 Seconds
Previous 6 parameters repeated for all channels2
Dither frequency 30 to 1000 Hz.
C1 Command input V (mA)
C1 Output current mA
Previous 2 parameters repeated for all channels2
Supply voltage Volts
Fault status Fault
10 to 1.2 A for –12A version, 0 to 2.5 A for –25A version
2Parameters starting with C1 are repeated for each channel and are displayed as C2 to C4

021-DRF Rev B DRC User Manual 10
Copyright © Enovation Controls – 2018
DRF Valve Controller
DRFx-xxx -The title parameter is fixed. It displays the model number and the firmware version.
Cx MODE -Four modes of operation.
Open Loop Modes -
Modes 1 and 2 are open loop modes for channel 1 & 3.
For modes 1 & 2, channels 2 & 4 use its own inputs.
For modes 3 & 4, channels 2 & 4 use the inputs from channel 1 & 3 for dual-coil applications.
E.g., to drive a two-coil directional proportional valve, set C1 mode 1 and C2 mode 3. Do not overlap the input
ranges.
Closed Loop Modes - Modes 3 and 4 use the velocity PID algorithm. Channel 1 or 3 input is the command input;
channel 2 or 4 input is the feedback. Only channel 1 or 3 has output current.
When the feedback is bigger than the command, the output reduces to 0A; when the feedback is smaller than
the command, the output current increases to maximum current until the feedback matches the command.
PROPORTIONAL GAIN –Sets the P term in a PID control loop. It is a multiplication of the error added to the
output. The higher the setting, the faster the response will be. Also, higher settings result in shorter ramp time,
but it can cause oscillation. It is variable type.
INTEGRAL GAIN – Sets the I term in a PID control loop. It is the sum of the error over time. It overcomes an offset
in the output or to correct for small deviations over time. A higher gain will result in more integral control but
can cause oscillation. It is variable type.
DERIVATIVE GAIN –Sets the D term in a PID control loop. It is the rate of change of error. The higher the
derivative gain, the quicker the system will respond to sudden changes. It is variable type.
PID LOOP TIME -Sets the PID loop closure time in number of dither cycles. The lower the number, the more
quickly the system responds to error. It is a variable type.
Mode Enable Channels comments
1 CUR NO ENBL 1,3 Open loop, use its own input
2 CUR USE ENBL X 1,3 Open loop, use its own input
3 VEL NO ENBL 1,3 Closed-loop, C1 & C3 are the command inputs
4 VEL USE ENBL X 1,3 Closed-loop, C1 and C3 are the command inputs
1 IN2 NO ENBL 2,4 Open loop, single-coil valve, use its own input;
Closed-loop, feedback
2 IN2 USE ENBL X 2,4 Open loop, single-coil valve, use its own input;
Closed-loop, feedback
3 IN1 NO ENBL 2,4 Open loop, dual-coil valve, use inputs from C1 & C3
4 IN1 USE ENBL X 2,4 Open loop, dual-coil valve, use inputs from C1 & C3

021-DRF Rev B DRC User Manual 11
Copyright © Enovation Controls – 2018
DRF Valve Controller
DEADBAND -Sets the error tolerance of the PID loop. The control will only respond to error greater than the
Deadband parameter. For a velocity loop the output will remain at a fixed level. For a position loop both
outputs will remain off. This parameter is a variable type.
Cx MIN INPUT -Sets the minimum command input. The input can be inverted. The value in the brackets is the
present command input.
Cx MAX INPUT - Sets the maximum command input. The input can be inverted. The value in the brackets is the
present command input.
Cx MIN OUTPUT - Sets the minimum output current (milliamps for -06A, amps for -12A,-25A). The value in the
brackets is the present output current.
Cx MAX OUTPUT - Sets the maximum output current (milliamps for -06A, amps for -12A,-25A). It cannot be
inverted. The value in the brackets is the present output current.
Cx RAMP UP/DOWN - Sets the time for Output current to ramp UP or Down through the full input range. These
parameters are variable.
DITHER FREQ. – Options: 30, 50, 75, 100, 125, 150, 175, 200, 225, 250, 275, 300, and 1000 Hz. Set the PWM or
dither frequency according to the valve specifications. This parameter is variable.
Cx COMMAND INPUT - Displays the present input. This parameter is a monitor type.
Cx OUTPUT CURRENT -Displays the present output current. This parameter is a monitor type.
SUPPLY VOLTAGE -Displays the module’s power supply voltage. It is helpful for troubleshooting. This parameter
is a monitor type.
FAULT STATUS -The STATUS LED will flash red 2 times for Coil Open and 3 times for Coil Short in both open-
loop modes and closed-loop modes.
In open loop mode, the LED will continue to flash until clearing faults by moving the command signal out of
active range or cycling the power.
In closed-loop mode, only power cycle can clear the faults.

021-DRF Rev B DRC User Manual 12
Copyright © Enovation Controls – 2018
DRF Valve Controller
PID Algorithm
The controller uses a digital, velocity PID algorithm as shown:
O(t) = O(t-1) + P*(e(t)-e(t-1)) + I*T*e(t) + D/T*(e(t) + e(t-2) – 2*e(t-1))
Where:
O = output
P = proportional gain term
I = integral gain term
D = derivative gain term
e(t) = error at time t
T = PID loop time
Setup Procedure
1. Select the operating frequency.
2. Set the Minimum and Maximum Outputs according to the valve specs.
3. Set the Dither Frequency according to the valve specs. Higher dither frequencies can improve frequency
response.
4. Start with Proportional only to achieve a stable system.
5. Add Integral.
6. Add Derivative to improve system response and/or stability.

021-DRF Rev B DRC User Manual 13
Copyright © Enovation Controls – 2018
DRF Valve Controller
DRF Closed-loop control:
Place channel 1 in Mode 3 or 4, channel 2 in
mode 1 or 2.
When the feedback (channel 2 input 5.5V) is
greater than the command (channel 1 input
3.8V), DRF outputs 0A to Channel 1.
Channel 2 does not have an output.
When the feedback (channel 2 input 5.5V) is
less than the command (channel 1 input
9.8V), DRF outputs 0.74A to Channel 1.
Channel 2 does not have an output.

021-DRF Rev B DRC User Manual 14
Copyright © Enovation Controls – 2018
DRF Valve Controller
When the feedback (channel 2 input 5.5V) is
greater than the command (channel 1 input
1.3V), DRF outputs 0A to Channel 1.
Channel 2 does not have an output.
When the feedback (channel 2 input 5.5V) is
less than the command (channel 1 input
7.2V), DRF outputs 0.74A to Channel 1.
Channel 2 does not have an output.

021-DRF Rev B DRC User Manual 15
Copyright © Enovation Controls – 2018
DRF Valve Controller
Open-loop dual coil Mode:
0.5V to 9.5V drives the channel 1 output, -0.5
to -9.5V drives the channel 2 output.
Channel 1 has an output of 0.56A because
the input is 5.5V.
Channel 1 has an
output of 0.22A because
the input is 2.4V.

021-DRF Rev B DRC User Manual 16
Copyright © Enovation Controls – 2018
DRF Valve Controller
Channel 2 has an output of 0.34A because
the input is -3.5V.
Channel 2 has an
output of 0.64A because
the input is -6.4V.

021-DRF Rev B DRC User Manual 17
Copyright © Enovation Controls – 2018
DRF Valve Controller
Wiring
Terminal functions are listed in the table below.
Terminal Function
J1-1 +V Supply
J1-2 Supply Common
J1-3 Enable Input
J2-1 Output Ch. 1
J2-2 Common
J2-3 Output Ch. 2
J3-1 Output Ch. 3
J3-2 Common
J3-3 Output Ch. 4
J4-1 -10V Reference
J4-2 Common
J4-3 +10V Reference
J5-1 Command Input Ch. 1
J5-2 Common
J5-3 Command Input Ch. 2
J6-1 Command Input Ch. 3
J6-2 Common
J6-3 Command Input Ch. 4

021-DRF Rev B DRC User Manual 18
Copyright © Enovation Controls – 2018
DRF Valve Controller
Order Information
The following is a break-down of the DRF part numbering system:
DRF4-V12 06 = 600mA max
12 = 1.2A max
25 = 2.5A max
V = -10 to +10V input
A = 0 to 20mA
# = Number of channels (2 or 4)
Required Communication Cables:
For the PC software SAM: PN: 108-00134

021-DRF Rev B DRC User Manual 19
Copyright © Enovation Controls – 2018
DRF Valve Controller
Application Examples
Open Loop Double Solenoid Control (DRF2-Vxx)
The DRF can drive a dual-coil valve with a
joystick or
potentiometer of 10kΩ.
If enable switch is not used, set channel 1 to be Mode 1,
channel 2 to be Mode 3.
If enable switch is used,
set channel 1 to be Mode 2,
channel 2 to be Mode 4.
The minimum and maximum input parameters for the two
channels should not be overlap.
Set the dither and output settings according to the valve
specifications.
Schematic
FUSE
+V Power Input
9 - 32VDC
+V = Enabled
PWR J1-1
DRF2
Electronic Valve
Controller
Enable J1-3
GND J1-2
-10V Ref. Out J4-1
+10VDC @ 20mA
0 to 10VDC
+10V Ref. Out J4-3
Ch. 1 I/P J5-1
Sig GND J4-2
J5-2
VDC I/P
mA I/P
Supply Voltage
4-12mA
Ch. 2 I/P J5-3
Prop. PWM (Sourcing)
Sig GND J2-2
Ch. 1 Out J2-1
Ch. 2 Out J2-3
Prop. PWM (Sourcing)
0 to -10VDC 12-20mA
Example Settings
Input / Output Diagram
-10V
(Ch. #2)
600mA
5mA
600mA
5mA
Center (0V)
Ch. #2
Current Ch. #1
Current
10V
(Ch. #1) Command
Input
-0.2V
(Ch. #2) 0.2V
(Ch. #1)
Parameter
Value
C1 Mode 2 CUR USE ENBL
C1 Min input 0.2 V
C1 Max input 10.0 V
C1 Min output 5 mA
C1 Max output 600 mA
C1 Ramp up 1 S
C1 Ramp down 1 S
C2 Mode 4 IN1 USE ENBL
C2 Min input -0.2 V
C2 Max input -10.0 V
C2 Min output 5 mA
C2 Max output 600 mA
C2 Ramp up 1 S
C2 Ramp down 1 S
Dither frequency 150 Hz.

021-DRF Rev B DRC User Manual 20
Copyright © Enovation Controls – 2018
DRF Valve Controller
Double/Single/Single Solenoid Control (DRF4-Vxx)
The DRF drives a dual-coil valve with joystick input J5-1 and 2
single-coil valves with joystick input J6-1 and J6-3.
Set the dither and output settings accordi
ng to the valve
specifications.
Schematic
FUSE
+V Power Input
9 - 32VDC
+V = Enabled
PWR J1-1
DRF4
Electronic Valve
Controller
Enable J1-3
GND J1-2
-10V Ref. Out J4-1
+10VDC @ 20mA
0-10VDC
+10V Ref. Out J4-3
Ch. 1 I/P J5-1
VDC I/P
mA I/P
Supply Voltage
4-12mA
Ch. 2 I/P J5-3
+10VDC @ 20mA
0-10VDC
Ch. 3 I/P J6-1
Sig GND J6-2
VDC I/P
mA I/P
Supply Voltage
4-20mA
Ch. 4 I/P J6-3
Prop. PWM (Sourcing)
Ch. 3 Out J3-1
Sig GND J3-2
Ch. 4 Out J3-3
Prop. PWM (Sourcing)
+10VDC @ 20mA
0-10VDC
VDC I/P
mA I/P
4-20mA
Supply Voltage
Sig GND J4-2
J5-2
Prop. PWM (Sourcing)
Ch. 2 Out J2-3
Prop. PWM (Sourcing)
Ch. 1 Out J2-1
Sig GND J2-2
0 to -10VDC 12-20mA
Example Settings
Parameter
Value
C1 Mode 2 CUR USE ENBL
C1 Min input 0.2 V
C1 Max input 10.0 V
C1 Min output 5 mA
C1 Max output 600 mA
C1 Ramp up 1 S
C1 Ramp down 1 S
C2 Mode 4 IN1 USE ENBL
C2 Min input -0.2 V
C2 Max input -10.0 V
C2 Min output 5 mA
C2 Max output 600 mA
C2 Ramp up 0 S (NOT USED)
C2 Ramp down 0 S (NOT USED)
C3 Mode 2 CUR USE ENBL
C3 Min input 0.2 V
C3 Max input 10.0 V
C3 Min output 5 mA
C3 Max output 600 mA
C3 Ramp up 1 S
C3 Ramp down 1 S
C4 Mode 2 IN4 USE ENBL
C4 Min input 0.2 V
C4 Max input 10.0 V
C4 Min output 5 mA
C4 Max output 600 mA
C4 Ramp up 1 S
C4 Ramp down 1 S
Dither frequency 150 Hz.
This manual suits for next models
1
Table of contents
Other HCT Controllers manuals
