HEALTH ONE HUB-700Android User manual

User’s Manual
Upright Bike HUB-700Android
Recumbent Bike HRB-700Android
www.ehealth-one.com
FOR BETTER LIFE
For customer service
Call +82-(0)-31-949-8010
E-mail to ceo@ehealth-,one.com
Before using this equipment. Please read all “safety Instruction”
Carefuly to ensure safe and Correct operation.

Table of Contents
1. Without prior consent of Health-One, using or copying
the pictures and contents in this manual is not allowed.
2. Without prior notice to customer, product could be
changed for improvement purpose.
1. Specifications ...................................................03
A. Upright Bike
B. Recumbent Bike
2. Safety Instruction ...................................................04
3. Safety Rules for workout .................................................05
4. Product Introduction .................................................06
5. Installation Location .................................................06
6. Components of Upright Bike .........................................07
7. Part names of Upright Bike ............................................08
8. Assembly and setup of Upright Bike .........................09
A. How to install the display console
B. Cable connection &
installation of front shroud and water bottle holder
9. Components of Recumbent Bike .................................11
10. Part names of Recumbent Bike ..................................12
11. Assembly and setup of Recumbent Bike ...............13
A. how to disassemble the front shroud
B. how to assemble the display console
12. Display Console for bike with built-in TV monitor
A. Features and Functions .............................................15
B. Control Board ........................................................16
C. TV channel setting ......................................................17
D. Operation Instructions ...............................................18
1) Manual Workout
2) Target Workout
3) Program Workout
4) Profile Workout
13. 13. Display Console for bike with FND
A. Features and Functions. .........................................22
B. Control Board .........................................................23
C. Operation Instructions ...............................................24
1) Manual Workout
2) Cardio Workout
3) FAT BURN Workout
4) HR Goal Workout
5) Profile Workout
6) Target Workout

Model Display Power
Dimension Weight
Max.
Load
Resistance
Level Program Heart Rate
Monitoring Option
HUB-700Android
15" HD TV
Touch Screen
110~220V
1230x640x1493
(W x D x H x mm) 85kg 180kg 1~20
3 cardio programs
7 profile programs
3 target programs
4 virtual programs
Polar Contact Type
Bluetooth HR Device
(Option)
-
HRB-700Android
15" HD TV
Touch Screen
110~220V
1577x666x1385
(W x D x H x mm) 100kg 180kg 1~20
3 cardio programs
7 profile programs
3 target programs
4 virtual programs
Polar Contact Type
Bluetooth HR Device
(Option)
-
3
1. Specifications
A. Upright Bike B. Recumbent Bike
Specifications

4
2. Safety Instruction
The following safety instructions are for correct and safe use of the bikes and should be followed for your safety and to prevent accident.
There are 3 types of safety marks PROBIHITION, WARNING, and CAUTION, according to the safety level.
WARNING PROHIBITION CAUTION
This mark calls for your attention to a possible danger.
Read the accompanying instructions carefully to ensure safe use.
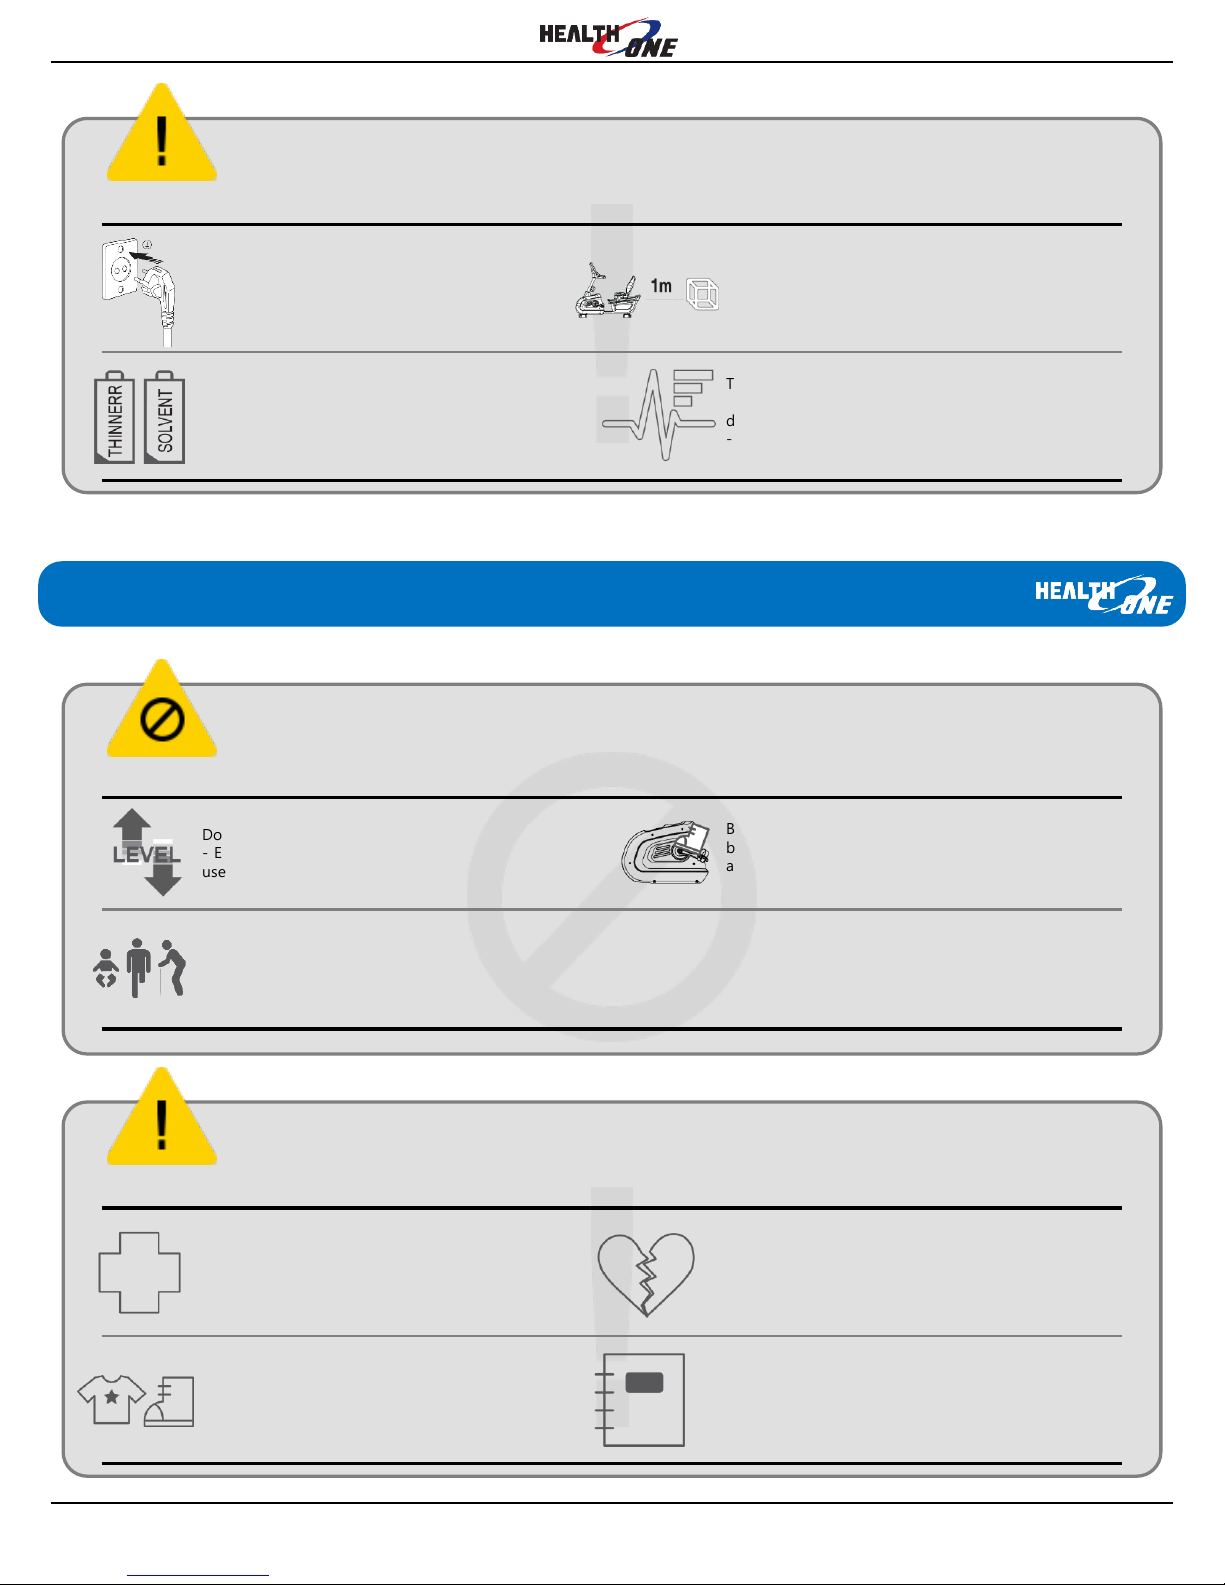
WARNING
Failure to obey this warning can result in injury or death.
Always unplug the power cord after use of the
bike or before cleaning or maintenance (only for
bike with TV monitor) to avoid electric shock.
Stepping on the display console or on the seat
may cause damage or accident.
Check for proper assembly before first use and
do not attach any accessory not recommended
by the manufacturer as it may be hazardous.
The bike uses power of AC 100V to AC 240V at
50/60HZ. To reduce danger of accident when it
breaks down, connect the power plug to a ground
socket as required by the law.
Failure to obey this prohibition can result in malfunction or safety accident.
Do not operate the bike in any other way
than stated in this manual.
Do not install the bike near water, in very dusty
or humid areas or on thick carpeting to avoid
damage.
Do not use the bike in case that the power cord
is damaged or the bike does not work normally.
Do not operate the bike if it is doused with water
or other liquid. Stop the machine and contact
customer service immediately.
PROHIBITION
Do not leave the power cord near the fire or
excessive heat (for bike with TV monitor).
Do not attempt to repair or modify the bike unless
a qualified engineer.
Do not use a multi-socket simultaneously for other
electrical equipment to avoid fire due to overload
(for bike with TV monitor).
Prevent foreign matters from getting into moving
parts. Prevent clothing or any part of your body
from touching moving parts.

3. Safety Rules for workout
5
Safety Instruction
CAUNTION
Failure to obey this caution can result in slight injury or product damage.
Power must be turned off and plug is removed
after use or when not in use for a long period.
For safety purpose, ensure that solid objects
should be about 1m away from the back of the
bike and 0.5m away from the side of the bike.
Do not use any solvent, wax, thinner or other
petroleum product for cleaning. Use soft dry
cloth only.
The heart rate monitoring system is not a
medical equipment. Its figure could be different
depending on use environment.
- Just take the measured figure for workout program.
Failure to obey this prohibition can result in malfunction or safety accident.
Do not abruptly change the resistance level.
- Especially, abrupt start may cause some damage to
user body or product.
Be careful not to pinch your foot or cloth
between moving parts such as pedal spindle
and crank arm.
Do not allow children under age 10, the disabled,
the elderly or unfit persons or pets to use the
machine to avoid accident unless closely guide by
a guardian.
PROHIBITION
CAUNTION
Failure to obey this caution can result in slight injury or product damage.
If you feel pain, difficulty in breathing or other
systems while workout, stop it immediately and
consult your doctor.
Always do workout following your workout ability.
Do not overwork.
Wear proper cloths and shoes for workout.
Consult your doctor or a specialist (trainer)
before starting workout. Especially if you have
high blood pressure, heart disease or other
symptoms or if you are over 35.

6
5. Installation Location
4. Product Introduction
· Please check if the ground surface is even and solid.
Otherwise, it may cause noise, vibration and tripping over.
· Please check if the location is indoors without humidity or dust.
Humidity or dust may cause breakdown of the bike.
· Please allow enough space from surrounding fixtures. For safety purpose, ensure that solid objects
should be about 1m away from the back of the bike and 0.5m away from the side of the bike.
· The installation location for bike with TV monitor should be within 1.5m from electrical socket to
plug the bike cord into the socket because power cord of 1.8m is provided. And in the installation
location, antenna cable should be offered.
· Please use standard plug and socket and make sure the electrical outlet is grounded
(only for bike with TV monitor).
· When moving, please do it by two persons to avoid any waist injury. Injected plastic parts or pedal
Parts could be broken when moving. Please hold steel part of the bike and move it.
HEALTH-ONE Bike is an ideal health equipment for fitness center. This bike with good appearance is
designed to operate smoothly, safely and stirlessly and has 15 inch LCD HD TV monitor, which will let
users work out without being tiresome.
Features
· The most innovative design (Good Design awarded by Korean Government)
· Built-in 15 inch LCD HD TV monitor with Touch Screen
· Various and optimized cardio workout programs
· USB Inlet(Video, Image, Music etc)
· Contact & Telemetry Heart Rate Monitoring System
· Control Board with Capacitive Soft Feeling button
· Bluetooth Wireless Headphone Set Function for User Friendly
· Bearing with outstanding durability

HUB-700Android
7
6. Components of Upright Bike
Display Console Assembly Main Body Assembly Front Shroud

8
7. Part names of Upright Bike
Part names
A Display & TV monitor
BControl Board
CJack Housing (only for bike with TV monitor)
D Handgrip
E Heart Rate Grip
F Mobile Phone Rack
G Console Post
H Water Bottle Holder
IFront Shroud
JRear Shroud
K Crank
L Pedal
M Saddle (Seat)
N Seat Adjusting Lever
O Front Foot
PRear Foot
QLeveling Adjuster
R Foot Wheel
S Electrical Connection Assembly
(only for bike with TV)
A
A
B
E E
DD
E E
C
G
H
I
O P
L
K J
N
M
Q
R
S
R
Q

9
8. Assembly and setup of Upright Bike
A. How to install
the display console
After unpacking all of the components,
assemble and install the bike as per the following procedure.
CAUTION
· Please plug bike cord into standard voltage socket
(only for the bike with TV monitor).
· Please install the bike on even floor and avoid any
uneven surface.
· When installing, the bike with TV monitor should
be plugged into electrical socket which is grounded.
·Please remove dust or foreign materials from the bike
before test operation.
1. Plug the display console power and other
cables into their mating connectors.
And slide the post of the display console
assembly into the tube of the main body
assembly.
2. Fix the post and the tube using hex
socket flat head cap bolts securely.
Tools requires
A. 5mm metric hex key wrench
B. 4 pcs of M8 x 20 hex socket flat head cap bolt
C. 4 pcs of M8 x 60 hex socket flat head cap bolt
Caution : Be careful not to cut cables when sliding
the console post into the body tube.
Tools requires
B 4pcs of M8 x 20 hex socket flat head cap bolt
A 5mm metric hex key wrench
C 4pcs of M8 x 60 hex socket flat head cap bolt
1
2

10
Assembly and setup of Upright Bike
B. Cable connection & installation of front shroud and water bottle holder
1. Carefully pull the following cables out
of the display console post.
A : Communication Cable
B : Antenna Cable (only for bike with TV)
C : AV cable (only for bike with TV)
D : Power Cable (only for bike with TV)
2. Put the front shrouds onto
the body tube.
3. Fix the front shrouds using
5 pcs of Pan Head Screw.
4. Slide the water bottle onto the fix
bracket located on the console post.
Caution : Be careful not to let the cable out of the front shroud
when assembling the front shrouds.
Required tools
A : Phillips Screwdriver
B : Phillips Screwdriver
A. Phillips Screwdriver
B. M5 x 10 Pan Head Screw x 5 pcs
Required tools
1
2
3
4

9. Components of Recumbent Bike
11
HRB-700Android
Display Console Assembly Main Body Assembly Seat AssemblyPost Shroud

10. Part names of Recumbent Bike
12
Part names
A Display & TV monitor
B Control Board
C Jack Housing (only for bike with TV monitor)
D Front Handgrip
E Heart Rate Grip
F Mobile Phone Rack
G Console Post
H Water Bottle Holder
I Front Shroud
J Rear Shroud
K Crank
L Pedal
M Back Seat
N Saddle (Seat)
O Side Handgrip
P Seat Position Adjusting Lever
Q Front Foot
R Rear Foot
S Leveling Adjuster
T Foot Wheel
U Electrical Connection Assembly (only for bike with TV)
A
B
C
D
E
F
E
D
G
H
I
J K L
M
N
O
P
QR
S
T
U
T S

11. Assembly and setup of Recumbent Bike
13
A. How to disassemble
the front shroud
After unpacking all of the components,
assemble and install the bike as per the following procedure.
CAUTION
· Please plug bike cord into standard voltage socket
(only for the bike with TV monitor).
· Please install the bike on even floor and avoid any
uneven surface.
· When installing, the bike with TV monitor should
be plugged into electrical socket which is grounded.
·Please remove dust or foreign materials from the bike
before test operation.
1. Unscrew 6 pcs of M5 x 10 Pan Head
Screw on the front shroud using a Phillips
Screwdriver.
2. Detach the front shrouds pushing them
toward rear foot.
Required tools
A : Phillips Screwdriver
B : 6 pcs of M5 x 10 Pan Head Screw
Caution : When disassembling the front shrouds,
be careful not to damage the pedal.
A. Phillips Screwdriver
B. 6 pcs of M5 x 10 Pan Head Screw
Required tools
1
2

14
Assembly and setup of Recumbent Bike
B. How to assemble the display console
1. Insert Post Shroud to console post and
put cables into body post of body and take
them out underneath, then join console post
and body post
Carefully pull the following cables out of
body post.
2. Fix the post and the tube using hex socket
flat head cap bolts securely.
A : Communication Cable
B : Antenna Cable (only for bike with TV)
C : AV cable (only for bike with TV)
D : Power Cable (only for bike with TV)
3. Assemble the Front Shroud in reverse order.
1
2
3

15
Assembly and setup of Recumbent Bike
B. How to assemble the display console
Required tools
A. Phillips Screwdriver
B. 6 pcs of M5 x 10 Pan Head Screw
Caution : When assembling the front shrouds, be careful
not to damage the pedal and assemble the Front
Shrouds to meet with the Post Shroud well.
A. Phillips Screwdriver
B. 6 pcs of M5 x 10 Pan Head Screw
Required tools
4. Fit the Water Bottle Holder to the fix
bracket on the post.
4

16
Assembly and setup of Recumbent Bike
C. How to assemble the Seat
Required tools-2
A. Phillips Screwdriver
B. 2pcs of M5*10 Pan Head Screw
3pcs of M5*20 Pan Head Screw
A. Phillips Screwdriver B. M5*10 Pan Head Screw
M5*20 Pan Head Screw
Required tools-2
Required tools-1
A. 3mm L-wrench
B. M5*20 hexagon head wrench bolt
Required tools-1
A. 3mm L-wrenches
B. M5*20 Hexagon head wrench bolt
2. Inset cable of heart rate sensor into hole on
aluminum slide.
Pull seat adjust lever and slowly insert seat
assembly
from the back of aluminum slide.
Connect cable of heart rate sensor to connector
from body.
Assemble rear shroud and seat stopper
in reverse order.
1. Take out Seat Stopper at right of aluminum slide
by using 3mm wrench.
Unfasten 5 bolts at rear shroud and take out rear
shroud.
1
2

15 inch LED Touch Screen :
Idle Screen of Bike 700Android Manual Workout
TV Screen during Workout Virtual Training
Bluetooth Pairing Input Personal Data
17
12. Display Console for bike with built-in TV monitor
A. Features and Functions
The Bike with built-in TV monitor has 4 screens to be selected by user.

18
Display Console for bike with built-in TV monitor
B. Screen Control UI
Exercise Program Application
Application
Select Cardiovascular Workout
Select Target Workout
Profile Program
Workout Target
& Elapsed Time
Displays workout time at seconds & minutes
(Min : 1sec / Max : 99min 59sec)
Displays calories consumption. Basic Consumption is calculated from
70kg weight, and user should input his/her correct weight to
calculate real calories consumption for his/her own workout.
Displays resistance intensity grade.
Displays the current speed at which user is pedaling in revolutions-
per-minute.
Displays energy consumption volume by second.
1. Two handles (Left/Right) checks one’s heart rate (Hand Pulse Grip)
2. Bluetooth Wireless Heart Rate Monitoring Device(Wearable)
3. Polar Chest Belt
Display current time and date
It shows total distance.
In manual workout, one column is 400m.
In target workout, it shows percentage out of total workout target
Conduct exercise with exercise program
Additional supports for application apps, virtual training, TV. Search
engine, external device connecting app.
Conduct cardiovascular workout based on heart rate monitoring
system. It will not operate and would stop recording data when the
machine does not read the user's signal
Set the goal from Target Workout TIME, DISTANCE, CALORIES
available for Target Workout
Choose any of six different workout programs. User can set workout
level by him/herself in Customized.
LEVEL
TIME
DISTANCE
CALORIES
WATT
RPM
HEART RATE
CURRENT TIME

19
Display Console for bike with built-in TV monitor
Allows you to move to level 8 or 16 quickly without pressing
+,- buttons
Allows you to increase or decrease the resistance Level in 1 unit
increments. Minimum resistance level is 1 while maximum is 20.
Start and Stop the operation of bike
Change the channel and volume on TV Mode
To regulate TV Volume and TV Channel.
To set detail functions of TV.
Display the message for user
Display Workout Information on the top of the screen while utilizing
internet or video You may move Floating icon to any location by
touching the white point
LEVEL BUTTON
QUICK LEVEL
BUTTON
Message Display
TV Volume / Channel
Remote Controller
START / STOP BUTTON
Floating Button
TV CONTROL BUTTON
B. Screen Control UI

20
Display Console for bike with built-in TV monitor
C. Control Board
START Lets you begin your workout by simply Pressing it.
Quick Start uses a default of 70kg, a resistance Level of 1.
STOP Lets you stop your workout.
+/-
Allows you to Increase or decrease the resistance level in 1
unit increments. Minimum resistance lever is 1 while
maximum is 20.
POWER(TV)
This power button will turn off the power of TV.
SOURCE This Source button will demonstrate menu of changing
connections sources (TV / HDMI / DVI / USB etc).
MENU
EXIT
TV VOL/CH
allows user to adjust TV volume and channel.
CAUTION
If any subjects are on the button, it may cause malfunction during the first power on due to the
nature of the Soft touch button.
This manual suits for next models
1
Table of contents
Other HEALTH ONE Exercise Bike manuals