HE&M Femi 782XL User manual

1
ARMATURE
CLEANING
FOR FEMI
782XL,782XLH
& ABS-105
UTILITY SAWS
2
Femi Utility Saw 782, 782XLH, and ABS105
Armature Cleaning
If the motor will not start, or runs sluggish, or only starts when the arm is up, or possibly sparks
are visible through the vents in the motor cover (and the electric power supply has been
checked), a possible issue could be that there is a “glaze” on the part of the motor where the
motor brushes make contact with the armature, called the “commutator”.
This is a relatively easy repair and the instructions below will provide an easy to understand step-
by-step set of instructions.
Begin by verifying that
electrical power has been
completely disconnected from
the saw.
Remove the two screws that
fasten the motor cover onto the
motor housing.
DANGER! Shock hazard. Disconnect electrical power before interacting
with electrical components. Electrical shock could cause injury or death.
Gently slide the motor cover up
and off of the motor housing
and set it aside.

3
Using two small flat blade screw drivers, pull up on the fan that is pressed onto the motor
Now lift of the thin ‘Dust
Cover’ that sits beneath
the fan and set it aside
Remove the fan.

4
The “Commutator” is essentially a set of copper ‘plates’ that spin with the motor shaft along
with the armature and that contact the carbon motor brushes As the carbon brushes wear, the
carbon collects on the commutator. This “glaze” will prevent good contact with the brushes
and can lead to poor motor performance or even failure. It is important to note that even a
relatively new motor could have enough of a coating of dust on the commutator to cause an
issue. Therefore it is a logical issue to check if the motor runs sluggish or won’t start at all.
In the photo to the right
the screw driver is
pointing to the
commutator. The
Armature windings can
be seen just below it.
Before attempting to remove the two motor brushes, gently bend the wire leads up and away
from the motor housing. This will make removing the motor brushes easier.
Wire leads connect to
each motor brush on
both sides of the motor
housing

5
Gently pry the motor brush out of
the motor housing using a small
flat blade screw driver on the brass
motor brush holder-receptacle.
Once the motor brush is loose, pull it
the rest of the way out with your
fingers.
The two photos below point out the carbon surface that rides against the copper plates on the
commutator in the photo lower left. The commutator is shown in the photo lower right.

6
Repeat the motor brush removal
process by gently prying out the
second motor brush receptacle on
the opposite side of the motor
housing.
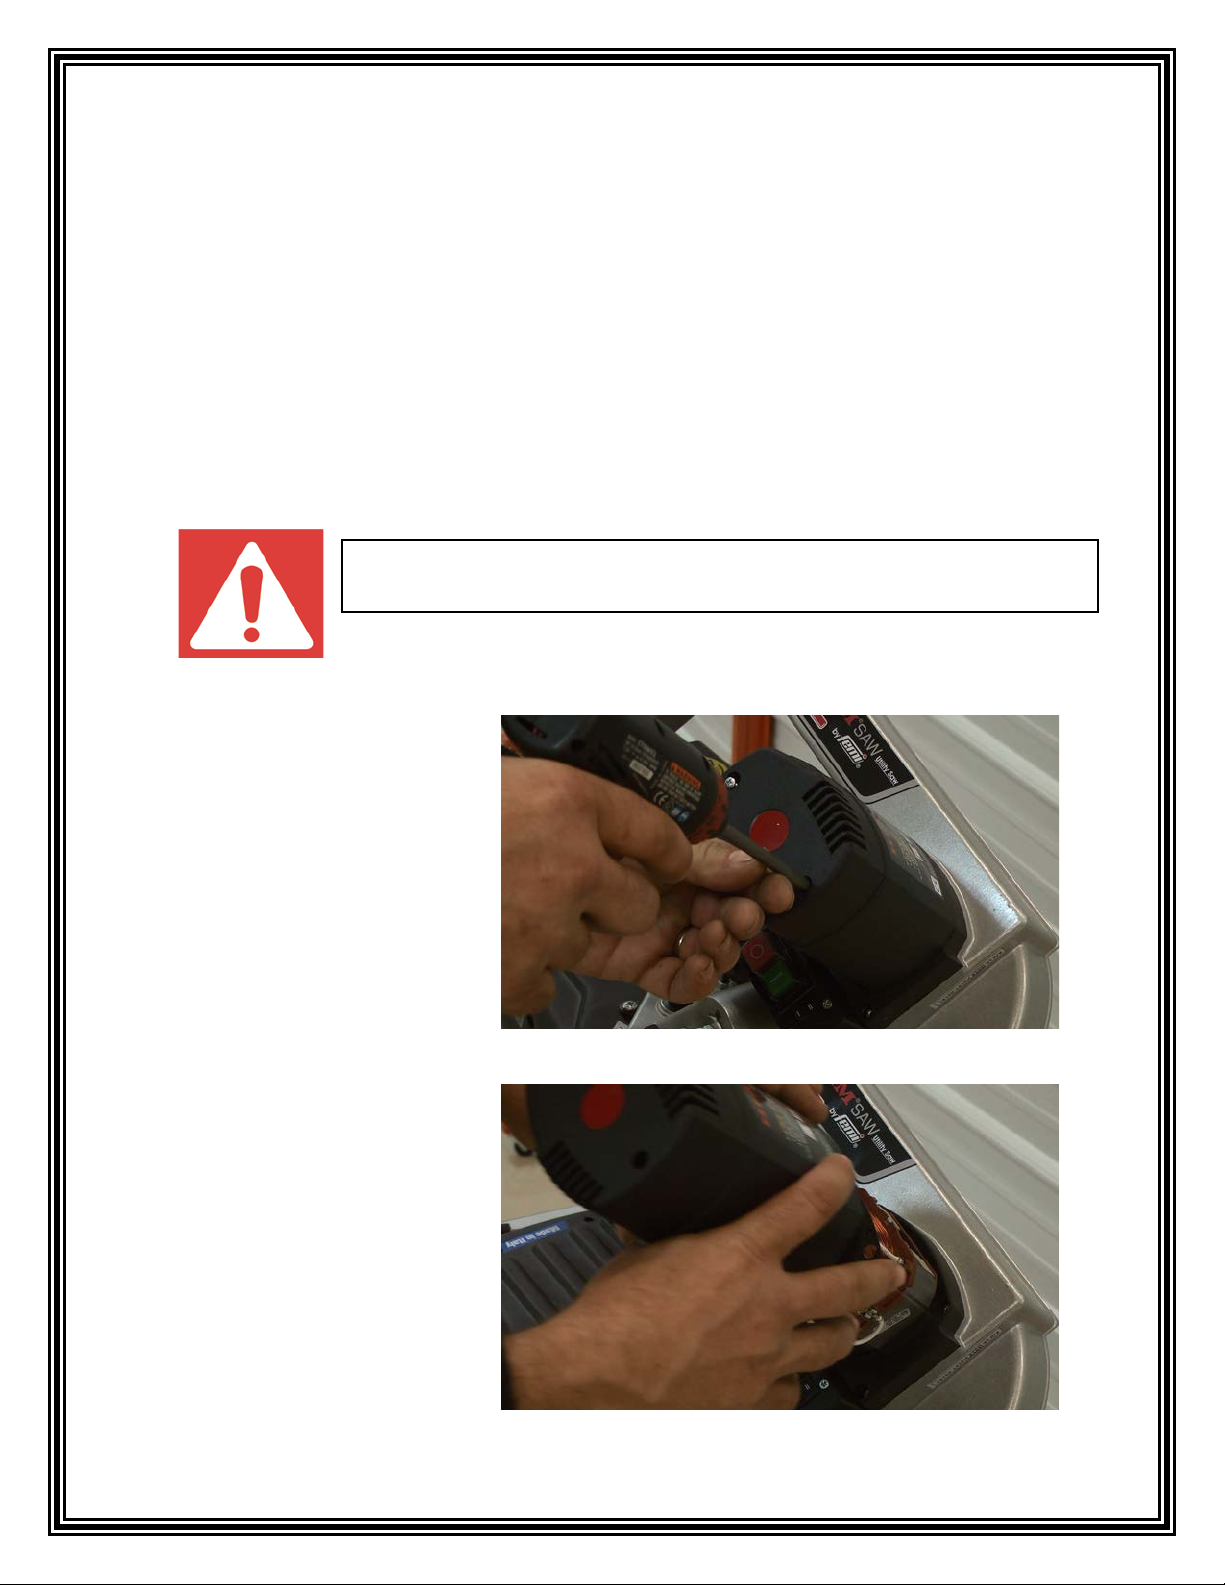
The next part of the process involves spinning the armature shaft which can be accomplished
by hand, but is more efficient if performed with a slow speed electric drill. Care must be taken
not to get fingers into the slot that allows access to the commutator.

7
When the copper plates on the commutator appear to be clean, use compressed air to blow
carbon dust and other debris out of the armature and motor housing. Then reinstall the two
carbon motor brushes, pressing each one in until they are each seated. There will be a slight
“click” as each snaps into place.
Fold a piece of fine grit abrasive
cloth to make it rigid enough
and small enough to fit into the
slot on the motor housing. Spin
the motor/armature shaft while
holding the abrasive cloth
against the copper plates on the
commutator. Move the cloth
around to make contact with all
of each small copper plate. DO
NOT put fingers into the slot to
apply pressure.
WARNING: Do not put fingers into the motor housing slot. Injury could occur.

8
After both of the motor brushes
have been reinstalled and seated,
reinstall the thin dust cover on top
of the motor housing.
After the dust cover is set on top of the motor housing, reinstall the fan with the fan fins on
the bottom, facing the motor. Press the fan onto the motor shaft by hand being sure it is
pressed on completely.

9
Once the fan is pressed onto the
motor shaft, spin the fan by hand
and verify that there is not any
contact between the fan and dust
cover under it.
Reinstall the motor cover being
careful not to pinch any of the wires.
When the motor housing is properly
aligned on the motor housing,
reinstall the two fastener screws the
hold the cover to the housing.
Connect electrical power to the
saw and try the motor again. If it
is not running properly contact
HE&M Utility Saws
representative for more help.
This manual suits for next models
2
Other HE&M Saw manuals


Popular Saw manuals by other brands

Parkside
Parkside PDTS 6.3 B3 Translation of the original instructions

WolfPack
WolfPack 07021585 instruction manual

Jet
Jet J-FK350-4 Operating instructions and parts manual

Woodstar
Woodstar sb 12 Original instruction manual

EINHELL
EINHELL TC-SB 200/1 Original operating instructions

Makita
Makita DCS5553Z instruction manual


Central Machinery
Central Machinery 93012 Owner's manual & safety instructions

Black & Decker
Black & Decker BD200SD instruction manual

Powermatic
Powermatic PM253BT Operating instructions and parts manual

EINHELL
EINHELL TK 600 operating instructions

Makita
Makita HS7601 instruction manual

Berbel
Berbel BRS-1050 Instruction manual and safety instructions