manuals.online logo
Brands
  1. Home
  2. •
  3. Brands
  4. •
  5. Heatilator
  6. •
  7. Indoor Fireplace
  8. •
  9. Heatilator GBI25 Series Manual

Heatilator GBI25 Series Manual

Other manuals for GBI25 Series

2

This manual suits for next models

1

Other Heatilator Indoor Fireplace manuals

Heatilator CM36 Manual

Heatilator

Heatilator CM36 Manual

Heatilator SC60 User guide

Heatilator

Heatilator SC60 User guide

Heatilator BIR50-B User manual

Heatilator

Heatilator BIR50-B User manual

Heatilator LEGACY42-IFT User manual

Heatilator

Heatilator LEGACY42-IFT User manual

Heatilator G270 SERIES B User manual

Heatilator

Heatilator G270 SERIES B User manual

Heatilator CNXT70PLUS User manual

Heatilator

Heatilator CNXT70PLUS User manual

Heatilator HST-42D User manual

Heatilator

Heatilator HST-42D User manual

Heatilator CONSTITUTION C-40 User manual

Heatilator

Heatilator CONSTITUTION C-40 User manual

Heatilator GDST5244I User manual

Heatilator

Heatilator GDST5244I User manual

Heatilator CB4236IR User manual

Heatilator

Heatilator CB4236IR User manual

Heatilator Birmingham BIR50 User manual

Heatilator

Heatilator Birmingham BIR50 User manual

Heatilator CNXT4236IT-C User manual

Heatilator

Heatilator CNXT4236IT-C User manual

Heatilator Wood Burning Fireplace EL36 Series User manual

Heatilator

Heatilator Wood Burning Fireplace EL36 Series User manual

Heatilator CRAVE4836 User manual

Heatilator

Heatilator CRAVE4836 User manual
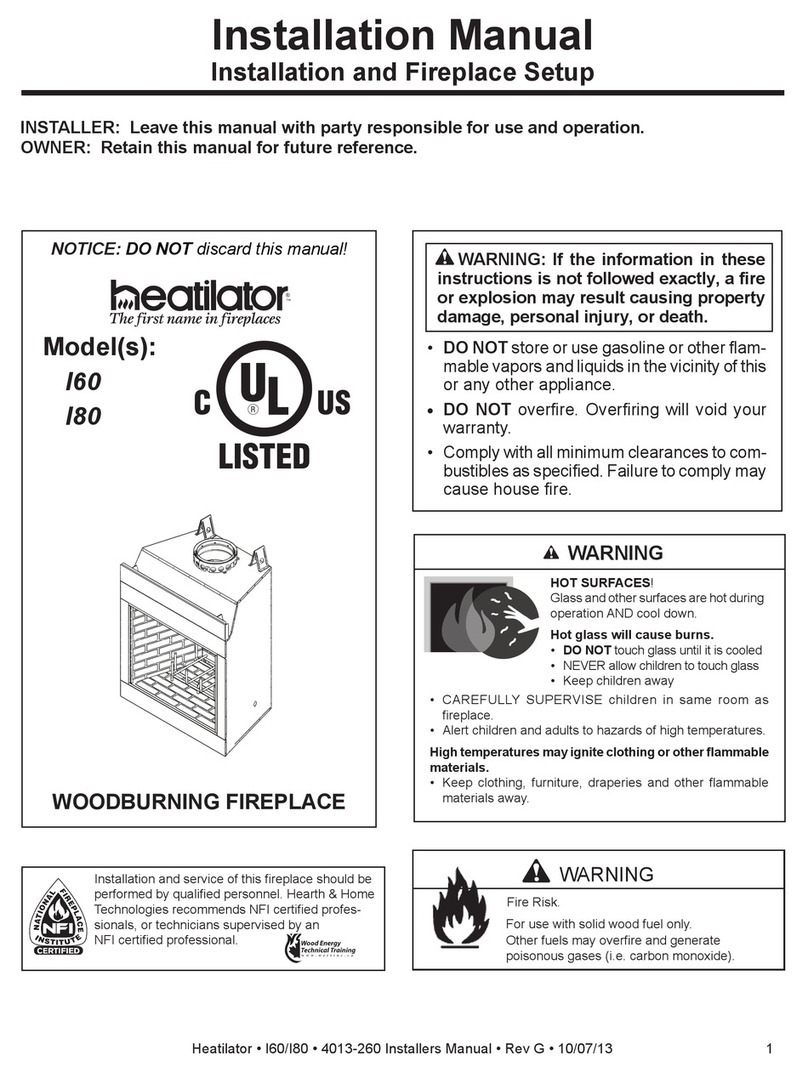
Heatilator Direct Vent Gas Appliance CNXT4236IT User manual

Heatilator

Heatilator Direct Vent Gas Appliance CNXT4236IT User manual

Heatilator CL36D User manual

Heatilator

Heatilator CL36D User manual

Heatilator NB3630 Manual

Heatilator

Heatilator NB3630 Manual

Heatilator SILH30E-B User manual

Heatilator

Heatilator SILH30E-B User manual

Heatilator RBV4236IH User manual

Heatilator

Heatilator RBV4236IH User manual

Heatilator LEGACY42-IFT User manual

Heatilator

Heatilator LEGACY42-IFT User manual

Heatilator SC60 User manual

Heatilator

Heatilator SC60 User manual

Heatilator ODYSSEY SERIES User manual

Heatilator

Heatilator ODYSSEY SERIES User manual

Heatilator NOVUS GNBC30 Manual

Heatilator

Heatilator NOVUS GNBC30 Manual

Heatilator Wood Burning Fireplace EL36 Series User manual

Heatilator

Heatilator Wood Burning Fireplace EL36 Series User manual

Popular Indoor Fireplace manuals by other brands

Napoleon NEFL42CHD-1 manual

Napoleon

Napoleon NEFL42CHD-1 manual

Masport WOOD FIRE installation guide

Masport

Masport WOOD FIRE installation guide

JAYLINE SS280 Installation & operation instructions

JAYLINE

JAYLINE SS280 Installation & operation instructions

Heat-N-Glo SL-32S Installation

Heat-N-Glo

Heat-N-Glo SL-32S Installation

kozy heat Bellingham 52 quick start guide

kozy heat

kozy heat Bellingham 52 quick start guide

Paragon Fires ROOM SEALED INSET LIVE FUEL EFFECT GAS FIRE owner's manual

Paragon Fires

Paragon Fires ROOM SEALED INSET LIVE FUEL EFFECT GAS FIRE owner's manual

Monessen Hearth LCUF32CR-B Installation & owner's manual

Monessen Hearth

Monessen Hearth LCUF32CR-B Installation & owner's manual

PuraFlame Galena owner's manual

PuraFlame

PuraFlame Galena owner's manual

Dimplex Toluca Deluxe instruction manual

Dimplex

Dimplex Toluca Deluxe instruction manual

SEI TENNYSON FA8544AO Assembly instructions

SEI

SEI TENNYSON FA8544AO Assembly instructions

Dru G25 installation manual

Dru

Dru G25 installation manual

Capital fireplaces Designline DL700 Installation and user instructions

Capital fireplaces

Capital fireplaces Designline DL700 Installation and user instructions

IronStrike VINTAGE VINT-DVS-U Installation and operation

IronStrike

IronStrike VINTAGE VINT-DVS-U Installation and operation

ACR Heat HERITAGE N25 Installation and operating instruction manual

ACR Heat

ACR Heat HERITAGE N25 Installation and operating instruction manual

European Home HVF-42 Installation, operation and owner's manual

European Home

European Home HVF-42 Installation, operation and owner's manual

Quadra-Fire MTVERNINSAE-MBK Owner's manual operation & care

Quadra-Fire

Quadra-Fire MTVERNINSAE-MBK Owner's manual operation & care

Harman Home Heating Accentra Insert Installation & operating manual

Harman Home Heating

Harman Home Heating Accentra Insert Installation & operating manual

Trimline Fires Zircon 1024 installation instructions

Trimline Fires

Trimline Fires Zircon 1024 installation instructions

manuals.online logo
manuals.online logoBrands
  • About & Mission
  • Contact us
  • Privacy Policy
  • Terms and Conditions

Copyright 2025 Manuals.Online. All Rights Reserved.

02-02 1 26678 Rev H
THE GBi25 SERIES
B-VENT GAS FIRED FIREPLACE INSERT ROOM HEATER
INSTALLATION & OPERATING
INSTRUCTIONS
This manual must be used for installation of the GBi25 series B-Vent Gas Fired Fireplace Insert and
retained by the homeowner for operation and maintenance instructions.
WARNING!
Improper installation, adjustment, alteration, service or maintenance can cause injury or property damage. Refer to this
manual. For assistance or additional information, consult a qualified installer, service agency or the gas supplier.
WARNING: If the information in this manual
is not followed exactly, a fire or explosion may
result causing property damage, personal in-
jury or loss of life
 Do not store or use gasoline or other flammable
vapors and liquids in the vicinity of this or any
other appliance.
 What to do if you smell gas
 Do not try to light any appliance.
 Do not touch any electrical switch; do not use
any phone in your building.
 Immediately call your gas supplier from a
neighbors phone. ollow the gas suppliers
instructions.
 If you cannot reach your gas supplier, call the
fire department.
 Installation and service must be performed by a
qualified installer, service agency or the gas
supplier.
26678 Rev H 2 02-02
GBI25 SERIES B-VENT GAS FIRED FIREPLACE INSERT
CAUTION:
Do not expose the appliance to the elements (such as rain, etc )
SAFETY PRECAUTIONS
1. Please read these installation instructions completely
before beginning installation procedures. ailure to
follow them could cause a malfunction resulting in
serious injury and/or property damage.
2. Installation and repair should be done by a qualified
service person. This appliance should also be
inspected annually by a qualified service person. More
frequent inspections/cleaning may be required due
to excessive lint from carpeting, bedding material, etc.
It is imperative that the control compartment and
burners of the appliance be kept clean.
3. The GBi25is a vented gas appliance. Do not burn
wood or other material in this appliance.
4. NEVER leave children unattended when there is a
fire burning in the fireplace.
. This appliance must be vented with a minimum 4 B-
Vent system and must terminate above the roof line.
Venting must not be connected to a chimney flue
servicing a solid fuel burning appliance.
6. Use only the fuel gas specified on the rating label of
this gas appliance.
7. The appliance area shall be kept clear and free from
combustible materials, gasoline and other flammable
vapors and liquids.
8. While servicing this appliance, always shut off all
electricity and gas to the appliance. This will prevent
possible electrical shock or burns. Also, make sure
the fireplace is completely cooled before servicing.
9. Do not use this appliance if any part has been under
water. Immediately call a qualified service technician
to inspect the appliance and to replace any part of the
control system and any gas control which has been
under water.
10. Be sure to provide adequate clearances around the
air openings into the combustion chamber and
adequate accessibility clearances for servicing and
proper operation.
11. Provisions shall be made to provide adequate
combustion and ventilation air. The flow of combustion
and ventilation air should not be obstructed.
Contents
A. Listings and Code Aprovals ..................................................................................................... 3
B. Description of the System ....................................................................................................... 3
C. System components ............................................................................................................... 4
D. Dimensions and Clearances ................................................................................................... 4
E. Pre- nstallation Preparation ..................................................................................................... 5
F. Step-by-Step nstallation of the System ...................................................................................6
G. Operating nstructions ........................................................................................................... 14
H. Maintenance nstructions ....................................................................................................... 16
. Troubleshooting ..................................................................................................................... 17
J. Replacement Parts ............................................................................................................... 18
K. Optional Components ...........................................................................................................19
ndex ...................................................................................................................................... 23
Warranty ................................................................................................................................ 24
02-02 3 26678 Rev H
GBI25 SERIES B-VENT GAS FIRED FIREPLACE INSERT
A. LISTINGS AND CODE APROVALS
U.S. AND CANADA CERTIFICATION
This appliance has been tested in accordance with ANSI
Z21.11.1-1991, CAN/CGA 1-2.1-MB6 and applicable
sections of ANSI Z21.50-1996 CAN/CGA 2.22-M96 and
has been LISTED by Underwriters Laboratories Inc. for
installation and operation as described in these
Installation and Operating Instructions. All components
are UL. AGA, CGA or CSA safety certified.
LOCAL CODES
Check with your local building code agency prior to
installing this appliance to ensure compliance with local
codes, including the need for permits and follow-up
inspections. This installation must conform with local
codes or, in the absence of local codes, with the National
uel Gas Code, ANSI Z223.1-latest edition in the U.S.A.
and the CANI-B149-latest edition in Canada. The
appliance, when installed, must be electrically grounded
in accordance with local codes; in the absence of local
codes, with the current National Electric Code ANSI/ NPA
No. 70 (in the U.S.A.) or with the current CSA C2.1 Canadian
Electric Code in Canada.
FUEL
Any additions, changes or conversions required in order
for the appliance to satisfactorily meet the application
needs, must be made by a qualified service technician
using factory specified and approved parts.
If you require assistance during installation, please contact
your local dealer or the Heatilator Technical Services
Department, Hearth Technologies Inc., 1915 W. Saunders
Street, Mt. Pleasant, Iowa 52641 (1-800-843-2848).
HEATILATOR® is a registered trademark of Hearth
Technologies Inc. (HTI), a division of HON INDUSTRIES.
B. DESCRIPTION OF THE SYSTEM
The GBi25 Series is a B-vent gas-fired room heater.
Combustion air is supplied from inside the house.
This HEATILATOR system must consist of the following:
1. Appliance
2. B-Vent Venting System
3. Termination
4. Surround
HIGH TEMPERATURE SEALANT MATERIAL
Sealants that will withstand high temperatures: General
Electric RTV103 (Black), or equivalent. Rutland, Inc.
ireplace Mortar #63 or equivalent; Dow Corning 732 or
equivalent.
We strongly recommend that you DO NOT install B-Vent
Gas Appliances in strong negative air locations, such
as a basement or a public facility. Living rooms with
cathedral ceilings could be susceptible to a negative
air situation, but such installations can be overcome
through raising the termination, depending on specific
installations. This fireplace uses room air for normal
operation and could have problems establishing a
positive draft in negative air locations. In lieu, we
recommend a direct vent appliance.
Note: Illustrations throughout these instructions reflect
typical installations and are for design purposes only.
Actual installation may vary slightly due to individual
design preferences. However, minimum and maximum
clearances must be maintained at all times.
The illustrations and diagrams used throughout these
installation instructions are not drawn to scale.
Tools and building supplies normally required for
installation:
Saw Wall-finishing materials
Pliers raming material
Hammer Surround
Phillips screwdriver Caulking material
Tape measure Safety gloves
Plumb line Electric drill/bits
Level raming Square
26678 Rev H 4 02-02
GBI25 SERIES B-VENT GAS FIRED FIREPLACE INSERT
C. SYSTEM COMPONENTS
The table below is a list of only those components which may be safely used with this gas-fired fireplace insert.
rebmuNgolataCnoitpircseD
52iBGtoliPgnidnatS,saGlarutaN-tresnIderiF-saGtneV-B
L52iBGtoliPgnidnatS,saGenaporP-tresnIderiF-saGtneV-B
42DSGmirThti)"2/1-04xH"42(dnuorruSllamS
04DSGmirThti)"2/1-04xH"2/1-82(dnuorruSmuideM
64DSGmirThti)"64xH"33(dnuorruSegraL
PVKCsaGenaporPottiKnoisrevnoC
NVKCsaGlarutaNottiKnoisrevnoC
D. DIMENSIONS AND CLEARANCES
MANTEL
A combustible mantel may be positioned no lower than 12 above the top of the appliance opening of the existing
fireplace. The combustible mantel may have a maximum depth of 10. Combustible trim materials, such as a surround
or mantel support brackets, protruding no more than 1-1/2 from the face of the existing fireplace, can be placed no
closer than 6 from any edge of the surround.
LEDOMAB
42DSG"5.04"42
04DSG"5.04"5.82
64DSG"64"33
02-02 5 26678 Rev H
GBI25 SERIES B-VENT GAS FIRED FIREPLACE INSERT
E. PRE-INSTALLATION PREPARATION
Installation and repair should be done by a qualified service technician. The appliance should be inspected before
use and at least annually by a qualified service technician. More frequent cleaning may be required due to excessive
lint from carpeting, bedding material, etc. It is imperative that control compartments, burners and circulating air
passageways of the appliance be kept clean.
Due to high temperatures, the appliance should be located out of traffic and away from furniture and draperies.
WARNING!
This appliance may use the B-vent chimney system only and must not be connected to a chimney flue servicing
a separate solid fuel buring appliance.
This appliance must be installed on a noncombustible, flat, solid, continuous surface (i.e. fireplace hearth.)
1. GAS PRESSURE
or natural gas, the minimum inlet gas supply
pressure is 4.5 inches water column (w.c.), and the
maximum inlet gas supply pressure is 7.0 inches
w.c. Input rate is 17,000 to 22,000 Btu/hr. or propane
gas, the minimum inlet gas supply pressure is 11.0
inches w.c. and a maximum 14.0 inches w.c. Input
rate is 15,000 to 22,000 Btu/hr.
Manifold pressure for this appliance is 1.7 - 3.5 inches
w.c. for natural gas and 5.4 - 11.0 inches w.c. for
propane gas. This appliance has a variable adjust
manifold.
Input (line) and output (manifold) pressure taps are
located at the front of the gas control valve near the
variable regulator for test gauge connection with a
3/8 diameter hose.
A 1/8 NPT plugged tapping is provided on the gas
control valve, near the outlet to the main burner
immediately upstream of the gas supply connection
to the appliance, accessible for a test gauge
connection.
2. HIGH ALTITUDE INSTALLATION
U.S. Installation: Appliances are tested and approved
for elevations from 0-2000 feet (0-610m).
When installing this appliance at an elevation above
2000 feet, it may be necessary to decrease the input
rating by changing the existing burner orifice to a
smaller size. Input should be reduced 4% for each
1000 feet above sea level. Check with the local gas
utility for proper orifice size identification and to see if
the gas in your area has been deregulated. This
appliance is shipped with a .093 in./2.36 mm. orifice
size on natural gas versions and a .056 in./1.42 mm.
orifice size on propane gas versions.
Canadian Installation: Appliances are certified for
elevations from 0-4500 feet. When installing this
appliance at an elevation between 0-4500 feet in
Canada, the input rating does not need to be reduced.
When installing this appliance at an elevation above
4500 feet in Canada, check with local authorities.
Consult your local gas company for assistance in
determining the proper orifice for your location or refer
to ANSI Z23.1-latest edition, Appendix .
3. COMPONENTS
Before installing this appliance, it may be necessary
to remove the smoke shield, ash lip, refractory,
damper blade, etc. If removed, the label referenced
on page 7 MUST be affixed to the existing fireplace
prior to installation.
WARNING!
To prevent contact with sagging or loose insulation, the appliance must not be installed against vapor barriers
or exposed insulation.
26678 Rev H 6 02-02
GBI25 SERIES B-VENT GAS FIRED FIREPLACE INSERT
F. STEP-BY-STEP INSTALLATION OF THE SYSTEM
WARNING!
Before starting, do the following:
1. Wear gloves and safety glasses for protection.
2. Keep hand tools in good contition. Sharpen cutting edges and make sure tool handles are secure.
3. Always maintain the minimum air space required to the enclosure to prevent fire.
WARNING!
This appliance is equipped with a safety control system designed to protect against improper venting of com-
bustion products. Operation of this appliance when not connected to a properly installed and maintained venting
system, or tampering with a vent safety shut-off system can result in carbon monoxide (CO) poisoning and
possible death.
1. VENTING REQUIREMENTS
A flue liner from the outlet of the draft hood to the roof
termination is required. This appliance is required to
be connected to a listed 4 diameter, stainless steel
or aluminum flexible gas vent liner with a top
termination. A 4 B-Vent or listed 4 rigid single wall
gas vent may also be used.
Before attempting to run your flue liner, you must make
sure that it will pass through the existing damper area;
this is best done with a flexible liner. In a zero clearance
(factory built) fireplace, the existing damper must be
removed or locked out of the way in the open position.
or masonry fireplaces, if the damper will not allow
the passage or a 4 flex, do not proceed without
consulting a local mason on how to remove or alter
the damper without risk of structural damage or
leakage.
A minimum vertical venting height of 9 feet above the
base of the appliance must be maintined. The
horizontal run must not exceed 50% of the vertical
height. Maximum vertical venting height is 40 above
the base of the appliance. The vent termination must
be in accordance with its respective listing and
manufacturers instructions.
Install 4 flue liner down through the chimney. When
using flexible liner, use caution around the offsets so
as not to rupture the liner. Measure up 16 from the
existing fireplace bottom and leave hanging in
fireplace.
2. GAS LINE INSTALLATION
A gas line must run into the existing woodburning
fireplace, for either a factory built or masonry fireplace.
If it is a factory built fireplace, the gas line should be
brought into the fireplace through the gas knockouts
provided.
Note: The appliance and its manual shutoff valve must
be disconnected from the gas supply piping system
during any pressure testing of that system at test pres-
sures in excess of 1/2 psi (3.5 kPa). The appliance must
be isolated from the gas supply piping system by clos-
ing the manual shutoff valve during any pressure test-
ing of the gas supply piping system at test pressures
equal to or less than 1/2 psi (3.5 kPa).
It is recommended that 1/2 inside diameter black
pipe be run into the fireplace through the right side. If
the existing fireplace already has gas run to it, but
through the left side, it is recommended that the gas
be rerouted to the right side. See igure 1.
Place an elbow at the end of the black pipe so that it
runs perpendicular to the face. A 1/3 flare adapter
(not supplied) is necessary to connect the flex line
(supplied) to the black pipe.
Check for leaks using a soap and water solution or a
leak detector.
Figure 1 - Gas Line Installation
02-02 7 26678 Rev H
GBI25 SERIES B-VENT GAS FIRED FIREPLACE INSERT
Seal with high temperature silicone at the point where
the gas line enters the existing fireplace to prevent
cold air infiltration.
This fir plac has b n alt r d to
accommodat an ins rt and should b
insp ct d by a qualifi d s rvic t chnician
prior to r -us as a conv ntional fir plac .
Note: The above label, located in the instruction
package, must be affixed to the existing fireplace prior
to installation of the GBi25 Gas ired ireplace Insert.
3. APPLIANCE INSTALLATION
a. Firebox Entry
To gain access to the draft hood, remove the two
screws located in the upper corners of the glass
frame. See igure 2.
Figure 2 - Firebox Entry
Figure 3 - Glass Frame Removal
Rotate glass frame forward and lift out. See
igure3.
Handle the glass frame with care to avoid striking
or scratching it on hard objects or slamming it
shut.
Remove the two screws on the baffle, as shown
in igure 4. To remove the draft hood, unscrew
the four screws located around the exhaust
opening. See igure 5. Slide the draft hood out of
the appliance and attach draft hood to flex liner in
appliance with a minimum of three sheet metal
screws. A 4 diameter hose clamp may also be
used. See igure 6.
The draft hood must be installed so as to be in
the same atmospheric pressure zone as the
combustion air inlet to the appliance and shall
be located so that the relief opening is accessible
for checking vent operation.
Pack the area at the damper with noncombustible
insulation to prevent cold air infiltration into the
fireplace cavity.
Figure 4 - Baffle Removal
Figure - Draft Hood Removal
Figure 6 - Draft Hood Attachment
Label
26678 Rev H 8 02-02
GBI25 SERIES B-VENT GAS FIRED FIREPLACE INSERT
b. Installation of Appliance
1) The appliance should be set on a level
surface. Located on the bottom pan of the
appliance are two 5/16-18 nuts. Bolts
(provided) may be used for leveling purposes.
2) Place appliance on hearth and slide the
appliance into the fireplace. Position the draft
tube in the hold located on the back. Reach
through the exhaust hole and grab the draft
hood. See igure 7. Continue to slide
appliance back until draft hood is in position.
Reinstall four screws around the exhaust
hole.
Figure 7
3) Place the flex line through the gas line access
hole on the right side and connect it to the
manual shutoff valve. Turn on the gas and
check for leaks with a soap and water
solution or a gas leak detector. If a leak is
detected, tighten the fitting and recheck all
joints.
Reinstall the baffle with two screws.
c. Surround Installation
1) Carefully remove the surround parts from the
shipping carton. Attach the surround top to
each side with two screws provided. See
igure 8. Located on the surrounds is a bend
tab used to cover the switch leads. or Model
GSD24, the bend tab is located on the top of
the right surround side. or Models GSD40
and GSD46 the bend tab is located on the
right side of the top surround. Use a pair of
pliers to bend the tab forward. See igure 8.
Figure 9 - Installation of Surround Hood
Figure 10 - Installation of Surround Hood
Figure 8 - Attach Surround Top
2) or zero clearance fireplaces or fireplaces
with combustible material within 12 inches
of the firebox opening, it is required to use
the surround hood (black). This hood is not
required for masonry fireplaces. To install
the surround hood, bend the tabs down, as
shown in igure 9. Place the tab through the
slots in the surround top and bend the small
tab over. See igure 10.
3) Place three screws in the surround top and
slide the brass hood over the screws.
Remove the plastic coating on brass before
securing. See igure 11.
4) Assemble the brass trim with brackets
provided, as shown in igure 12. Slide the
brass trim on the surround ( igure 13).
) To install the surround, place hooks on the
surround side into slots located on the
column ( igure 14).
6) Locate the electrical cord on the left side of
the appliance and route it through the
surround and trim. Make sure that the
electircal cord is routed away from the
appliance.
02-02 9 26678 Rev H
GBI25 SERIES B-VENT GAS FIRED FIREPLACE INSERT
7) DO NOT PACK INSULATION INSIDE THE
SURROUND.
8) Remove the switch from wire assembly and
feed wire through the brass trim. See
igure15. Re-install the switch to the wires
and push into place. See igure 16.
WARNING!
ELECTRICAL GROUNDING INSTRUCTIONS
This appliance is equipped with a three-prong
(grounding) plug for your protection against shock
hazard and should be plugged directly into a prop-
erly grounded three-prong receptacle. Do not cut or
remove the grounding prong from this plug.
Figure 11 - Installation of Hood
Figure 12 - Assemble Brass Trim
Figure 13 - Installation of Surround Hood
Figure 14 - Installation of Surround Hood
Figure 1 - Installation of ON/OFF Switch
Figure 16 - ON/OFF Switch in Surround Installed
Important: Remove all shipping material, fingerprints
and smudges from the brass trim prior to burning the
appliance. If this is not done, they will be burned into
the trim.
26678 Rev H 10 02-02
GBI25 SERIES B-VENT GAS FIRED FIREPLACE INSERT
d. Rock Wool Placement
The log set is shipped in place. Tear the rock
wool into pieces no larger than 1/2 diameter.
Place the rock wool in front of the flange located
in the middle of the burner. Do not place the rock
wool behind or above the 3/8 flange. This will
block the air slot and cause carbon desposits on
the log. Place the rock wool on both the left and
right sides to complete the burning ember look. It
is not necessary to use the entire bag. See
igure17.
Figure 17 - Rock Wool Placement
e. Glass Frame Installation
1) When cleaning the glass, use only non-
caustic, non-abrasive cleaners. DO NOT
ATTEMPT TO CLEAN HOT GLASS. It is
dangerous, and the glass is more likely to
be stained by the cleaning agent. Stubborn
film can often be removed using Brasso® or
a non-abrasive cleaner.
2) After cleaning the glass, position the tabs on
the glass frame into the slots on the column
of the appliance. Hold door in place and
secure with screws removed earlier. Be
careful not to over-tighten.
Note: Placement of the rock wool should be done
with care and time, as this will create the look of
the fire when burning.
WARNING!
Never operate this appliance with the glass removed
or not sealed.
WARNING!
Do not operate appliance with the panel(s) removed,
cracked or broken. Replacement of the panel(s)
should be done by a licensed or qualified service
person.
f. Brass Trim Cleaning
All prints and smudges must be wiped clean from
the brass trim prior to initial burn. If this is not
done, these prints will be cured into the brass
finish and set for the life of the appliance. To keep
the finish looking its best, gently wipe with a soft
cloth after the appliance has had ample time to
cool down. If desired, use a non-abrasive cleaner
such as soap and water. Never use any solvent,
thinner or abrasive cleaner since these will
damage the finish.
g. Valve Access
The valve is located behind the control access
panel. Lift the panel up and rotate forward. See
igure18. This will expose the gas valve, variable
regulator and fan control, as shown in igure 19.
Figure 18 - Valve Access
Figure 19 - Gas Valve, Variable Regulator & Fan Control