Heatlie Barbecues Roaster R3000SS Configuration guide

HEATLIE
ROASTER
R3000SS
Instructions and
General Information

CONGRATULATIONS
ON PURCHASING A HEATLIE
ROASTER!
Designed for those who love catering for large crowds effortlessly, the Heatlie
Roaster is your answer. Using LP gas only, the Roaster is admired by professional
caterers, sporting clubs and schools. Said to be the toughest commercial roasting
oven on the market, the industrial size allows enough room for a dozen or so
roasts at once with room for extra racks and additional accessories if required.
• Please read the following instructions before you begin to use your Heatlie
Roaster.
• Be sure to read the Warranty Policy and understand these conditions.
This appliance is for OUTDOOR USE ONLY.
AGA Certificate No. No. 4683
ROASTER
A-040-MAN Heatlie Roaster Instruction Manual Rev 3.00 15.09.23

ROASTER
3
A-040-MAN Heatlie Roaster Instruction Manual Rev 3.00 15.09.23
CONTENTS
5 5
7
10
13
Unpacking The Box Safety Precautions
Using the Roaster
Service and Repairs
Positioning Your
Heatlie Roaster In
An Outdoor Area
Connecting to a Gas
Supply Lighting Instructions
Troubleshooting
Specifications and
Gas Consumption
12
14
13
15
Maintenance
Schedule
Warranty Policy
6
89
Assembly Procedure

ROASTER
4A-040-MAN Heatlie Roaster Instruction Manual Rev 3.00 15.09.23
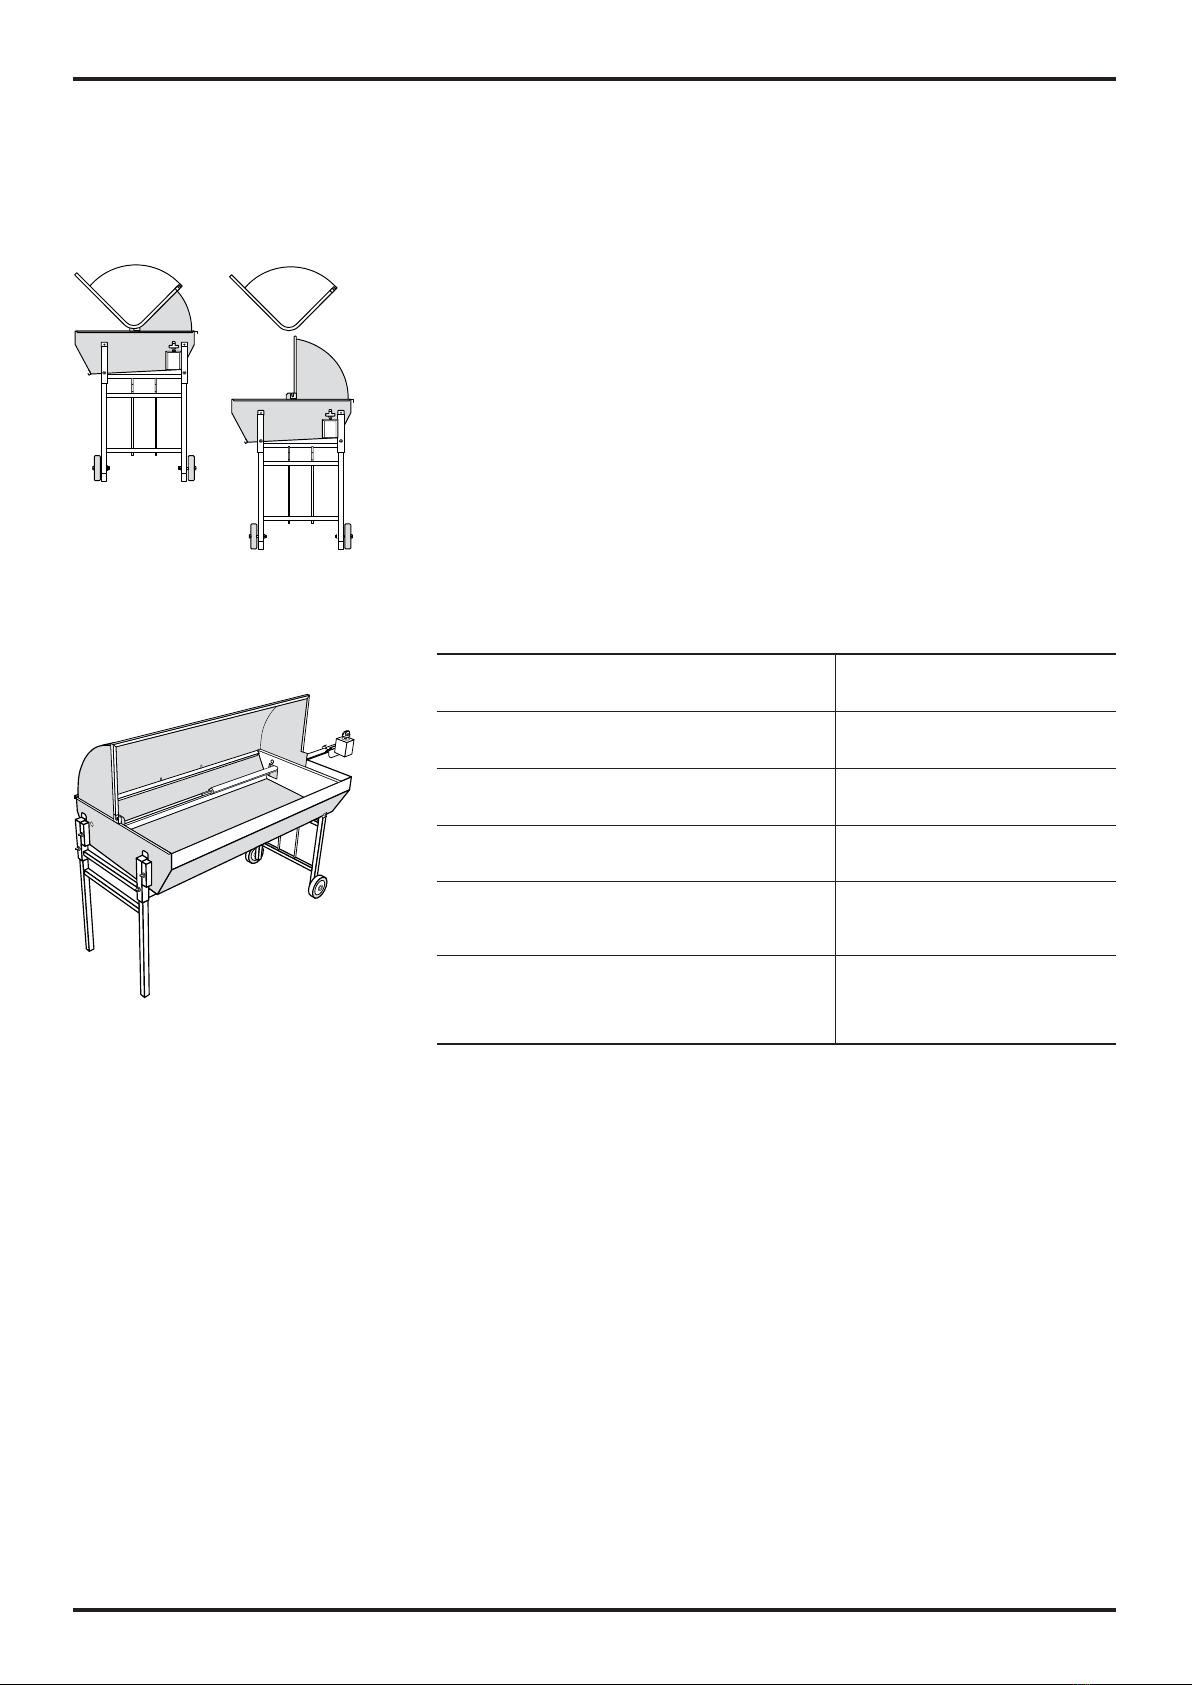
R3000SS
Note: End tables and double up racks pictured above are not included as standard with the Heatlie Roaster.

ROASTER
5
A-040-MAN Heatlie Roaster Instruction Manual Rev 3.00 15.09.23
Remove all items from the box and check against the list below to ensure
that all components are included.
Box Contents
Before installation, please check that the following components have been
supplied:
1 x Heatlie Roaster
1 x Heatlie Ribbon Roaster Burner
3 x Cooking Racks
2 x Handles
1 x Billy can
1 x Instruction Pack
1 x Leg Box containing:
2 x Wheels
1 x Wheel Leg complete with gas bottle bracket
2 x Axles
2 x Aluminium washers
2 x Thin washers
2 x Nyloc nuts
1 x Fixed Leg
UNPACKING
THE BOX
If the information in this manual is not followed exactly, a fire or explosion
may result causing property damage, personal injury or death.
DO NOT STORE FLAMMABLE MATERIAL IN OR NEAR THIS
APPLIANCE, THIS INCLUDES FUEL GAS.
DO NOT STORE ARTICLES ON OR AGAINST THIS APPLIANCE.
DO NOT SPRAY AEROSOLS IN THE VICINITY OF THIS APPLIANCE
WHILE IT IS IN OPERATION. THIS INCLUDES SPRAY COOKING OILS.
DO NOT MODIFY THIS APPLIANCE.
DO NOT USE AN ADAPTOR AT THE CYLINDER CONNECTION.
SAFETY
PRECAUTIONS

ROASTER
6A-040-MAN Heatlie Roaster Instruction Manual Rev 3.00 15.09.23
This Roaster is only to be used in an above ground, open air situation
with natural ventilation, without stagnant areas, where gas leakage
and products of combustion are rapidly dispersed by wind and natural
convection. Heatlie Roasters are not for use indoors. Please refer to
AS5601 for specific installation and ventilation regulations.
If you are using the appliance within a structure, please ensure that you
are complying with at least one of the following positioning options:
• An enclosure with walls on all sides, but at least one permanent
opening at ground level and no overhead cover (Figure F1).
• Within a partial enclosure that includes an overhead cover and no
more than two walls (Figures F2 and F3).
• Within a partial enclosure that includes an overhead cover and more
than two walls, with the following also applying (Figures F4 and F5):
• At least 25% of the total wall area is completely open and unrestricted,
• At least 30% of the remaining wall area is open and unrestricted.
• In the case of balconies, at least 20% of the total side, back and front
wall areas are to be open and unrestricted and remain as such.
NOTE: A door, blinds, or windows, is not to be considered a permanent
opening.
FIGURE F1 - OUTDOOR AREA - EXAMPLE 1
FIGURE F4 - OUTDOOR AREA - EXAMPLE 4
FIGURE F5 - OUTDOOR AREA - EXAMPLE 5
30 percent or more in total
of the remaining wall area is
open and unrestricted
30 percent or more in total
of the remaining wall area is
open and unrestricted
FIGURE F3 - OUTDOOR AREA - EXAMPLE 3
Both ends open
FIGURE F2 - OUTDOOR AREA - EXAMPLE 2
Open side at
least 25% of
total wall area
Open side at
least 25% of
total wall area
POSITIONING
YOUR HEATLIE
ROASTER IN
AN OUTDOOR
AREA

ROASTER
7
A-040-MAN Heatlie Roaster Instruction Manual Rev 3.00 15.09.23
ASSEMBLY
PROCEDURE
All Heatlie Roasters need to be kept under a weatherproof cover when
not in use.
Assembling the Wheel kit, legs, and Roaster
Instructions follow the assembly of Heatlie Roaster wheel kit, legs,
and racks.
Wheel Kit Assembly
1. Remove contents of Leg Kit Box.
2. To secure wheels on wheel leg kit:
3. Place the wheel on the axle.
4. Place one aluminium washer on the axle.
5. Pass axle through hole at the bottom of the wheel leg so the axle
thread is protruding from the inner side of the leg.
6. Place a thin washer on the axle.
7. Screw on the Nyloc nut with the nylon insert on the external side.
8. Tighten nut to required tension using a spanner.
9. Repeat the process for the other wheel.
Leg Kit Assembly
Two people are required to assemble the legs. Thumb screws are
packaged in the instruction pack - DO NOT MISPLACE.
1. Assemble the Wheel Leg End first. With one person standing at the
control end of the Roaster, lift the unit. The other person inserts the
Wheel Leg End (Figure F6). Ensure that the arms of the gas bottle
bracket are facing out.
2. Place the control end of the Roaster on the ground, and repeat for
the opposite end.
3. Insert and tighten the thumb screws into the stub legs.
Roaster Assembly
1. Slot the burner through the opening on the right-hand side.
2. Slot the end of the burner through the left-hand side and secure with
the barrel bolt.
3. Place the food racks on the support rail at the front and rear of the
Roaster. Ensure that the raised racks are placed at the rear of the
Roaster (Figure F7).
4. Insert handles into brackets and then secure with remaining thumb
screws (Figure F8).
FIGURE F6
FIGURE F7
FIGURE F8
Thumb
screws
Rotate lid as required

ROASTER
8A-040-MAN Heatlie Roaster Instruction Manual Rev 3.00 15.09.23
ASSEMBLY
PROCEDURE
Assembling the Accessories
Instructions follow for the assembly of Heatlie Roaster accessories.
Examine only those instructions appropriate to the product/s purchased.
End Table Assembly
End Tables can be placed on either side of the Roaster. Secure the end
table by positioning the mounting support hook into the space provided
above the legs. Use the adjustable feet on the end table to alter to the
desired level.
Double Up Racks Assembly
One or two double up racks are available. Sit the triangular support legs
to the front and rear. Place the double up rack grid onto the support legs.
Bain Marie Assembly
Remove racks and back support rail from the Roaster. Insert the Bain
Marie tank into the Roaster with the wire support brackets positioned
in the rear corners. Pour 25 litres of water into the Bain Marie tank. Insert
Pans onto support rails.
NOTE: Ensure that the Roaster Lid is always closed when the Bain Marie is
in use other than to load or unload food as required.
CONNECTING
TO A GAS
SUPPLY
Attaching the gas bottle and line fittings
1. Gas bottle: Place a 9kg gas cylinder on the brackets of the wheel leg
end (Figure F9).
2. Regulator: Connect the regulator to the bottle. Do not over tighten.
NOTE: This is a low-pressure appliance; a pressure regulator must be
used. The Roaster cannot be connected to a natural gas supply.
3. Gas line fittings: right-hand internal thread AS 4637, Type 27 CGAS
fitting. Keep gas line away from potential hot surfaces.
The regulator hose connects to the roaster with a ¼” Internal BSP fitting.
Leak Test
With the gas connected, turn the gas on and perform the following test
to check for gas leaks.
Using soapy water, brush, or spray over the joint between the gas
cylinder and the connection on the barbecue and watch for bubbles. If
bubbles appear, gas is leaking. The fitting may need to be tightened, or
this may be a result of faulty equipment.
FIGURE F9

ROASTER
9
A-040-MAN Heatlie Roaster Instruction Manual Rev 3.00 15.09.23
LIGHTING
INSTRUCTIONS
Before Lighting
1. Remove all protective plastic film from any stainless surfaces before
initial use.
2. Ensure the Roaster is at least 600mm away from any combustible
surface, placed on a solid surface, and with an overhead clearance
of 1.5 metres.
3. The Roaster must be level – adjust using thumbscrews on legs to raise
or lower each end.
4. Hang the Billy can under the drain outlet at the front of the Roaster.
5. The Roaster is designed for Universal LPG only.
6. Turn gas control to the OFF position.
7. Turn on valve at the 9kg gas cylinder.
8. Check there are no leaks. See leak test.
Lighting
1. Turn the gas control to the OFF position and open the roaster
hood lid.
2. Turn on gas by pushing down the knob and slowly turn to HIGH
(anti-clockwise). This will also engage the flame failure. Continue to
hold down knob.
3. You will hear a click; this will ignite the burner. If the burner does not
light, try again.
4. The flame will be on HIGH so adjust the flame to the required heat.
5. Close the roaster hood lid and enjoy cooking.
6. After use turn the knob control to OFF position and close the valve at
the gas cylinder.
7. If the appliance is not operating correctly, please check the Trouble-
Shooting guide on page 12.
Manual Lighting
1. Turn on valve at the 9kg gas cylinder.
2. Place a lit match through the viewing aperture adjacent to burner,
rotate knob to HIGH position and hold down for 5 seconds once lit.
3. Repeat steps 4 to 6 from previous lighting instructions above.
ROASTER
10 A-040-MAN Heatlie Roaster Instruction Manual Rev 3.00 15.09.23
USING THE
ROASTER
Cleaning the Roaster
After use, ensuring the Roaster is cold, clean and dismantle as
outlined below.
1. Disconnect hose at gas cylinder.
2. Open the roaster hood lid and remove food racks (Figure F10).
3. Remove burner by unbolting it on the left-hand side. Withdraw
burner through the hole (Figure F11).
4. Using warm soapy water, clean all parts including the base and lid
of unit.
Roaster Cooking Times (a guide)
With the lid down, cook on HIGH for ½ hour then turn down to LOW
setting for the remainder. Cooking times will vary with weight and
thickness of food. As a guide:
Meat
Whole Pigs – 40 kg 4 to 5 hours
Whole Lambs – 20 kg 3 to 3.5 hours
Whole Turkeys – 7.5 kg 2 to 2.5 hours
Whole Snapper – 8 to 9 kg 1 to 1.5 hours
Combination of pork legs – whole
topside or rumps 4 to 4.5 hour
Rolled shoulder of Pork, small cuts (legs
of lamb, chickens, etc.) To Operator requirements
Vegetables
A variety of garden vegetables can be cooked in the Heatlie Roaster.
Some vegetables can be wrapped in foil to retain moisture and flavour.
Potatoes cook well in their jackets.
FIGURE F10
FIGURE F11

ROASTER
11
A-040-MAN Heatlie Roaster Instruction Manual Rev 3.00 15.09.23
Cooking Tip
As the circular cooking system rotates hot air around the food, you will
find that the front and back of the unit are the hottest spots. Similarly, you
will also find food placed on the double-up rack cooks slightly quicker
than food placed on the standard racks.
Removal of Bain Marie
Follow the below instructions for removal of the Bain Marie.
1. Remove all pans and divider rails.
2. Lift front of the Bain Marie tank.
3. Pull rear of the tank to the front of the roaster.
4. Lift front of tank to allow water to drain into the Roaster.
HINT: The Roaster drain will take a 1” sink plug if you want to catch the
water and use it for washing up.
USING THE
ROASTER
ROASTER
12 A-040-MAN Heatlie Roaster Instruction Manual Rev 3.00 15.09.23
TROUBLE-
SHOOTING
Problem Possible Cause Remedy
Roaster burner
does not light
Gas supply
problem
Turn control knob slowly prior
to ignitor clicking so gas has
time to enter burner.
Check cylinder valve is open.
Check gas bottle is not empty.
Check hose is connected at
bayonet fitting.
The electrode is
too far away from
the burner
Wire probe needs to be
4 – 5mm away from the burner
and over a slot in the burner.
The electrode is
not sparking
Ensure the lead is connected
securely to the piezo.
Roaster burner
lights but does
not stay on
Gas supply
problem
Check cylinder valve is open.
Check gas bottle is not empty.
Check hose is connected at the
bayonet fitting.
Gas control valve
problem
Ensure the knob turns freely
and is on hight to light.
Thermocouple
is not positioned
correctly
Thermocouples need to be
positioned in the flame,
3 – 5mm above the burner slots.
Flame is low,
excessively
yellow and/or
depositing soot
Gas supply
problem
Low pressure may result from
the gas cylinder being close to
empty.
Change to a full gas cylinder.
Blocked burners Clean burners by blowing
compressed air through the
burner or brush slots with a
wire brush.
Inspect gas valve for blockage
caused by insects or spiders for
example.
Burner flame is
starved of air
Ensure the Roaster is ventilated
correctly.
If any of the above conditions cannot be rectified, contact the place of
purchase or the manufacturer, Heatlie Barbecues.

ROASTER
13
A-040-MAN Heatlie Roaster Instruction Manual Rev 3.00 15.09.23
MAINTENANCE
SCHEDULE
SERVICE AND
REPAIRS
This appliance does not require scheduled maintenance, apart from
regular cleaning.
Inspect the hose and regulator assembly regularly for signs of wear
and deterioration. Replace as necessary, ensuring any connections are
properly checked for leakage.
Spare parts are available online at www.heatlie.com.au.
Repairs should be carried out by authorised service personnel or Heatlie
Barbecues. It is the customer’s responsibility to cover freight costs when
sending goods back to Heatlie for repair.

ROASTER
14 A-040-MAN Heatlie Roaster Instruction Manual Rev 3.00 15.09.23
SPECIFICATIONS
AND GAS
CONSUMPTION
Injector Diameter 1.70 mm
Nominal Hourly Gas Consumption (per unit) 35 MJ/hr
Test Point Pressure 2.75 kPa
Weight 72.5 kg
Dimensions 1410 H (lid open) x 860 D
(lid closed) x 1450 W

ROASTER
15
A-040-MAN Heatlie Roaster Instruction Manual Rev 3.00 15.09.23
WARRANTY
POLICY
Heatlie Barbecues warrants its products to be free of original
manufacturing defects in material and workmanship, for a period of
ten years from the date of purchase for domestic use and one year for
commercial use. Any claim must be made within this time, dating from the
date of purchase.
Our goods come with guarantees that cannot be excluded under
Australian Consumer Law. You are entitled to a replacement or refund for
major failure and for compensation for any other reasonably foreseeable
loss or damage. You are also entitled to have the goods repaired or
replaced if the goods fail to be of acceptable quality and the failure does
not amount to major failure.
This warranty is subject to the following conditions:
1. The warranty applies to the original owner provided the original date of
purchase can be verified or the warranty card has been completed and
returned to Heatlie.
2. The owner has the responsibility of adequately packaging the product
and transporting it under insurance to place of purchase, or to Heatlie
Barbecues, at the owner’s cost.
3. Warranty service must be performed by a Heatlie authorised gas fitter
or by Heatlie Barbecues.
4. Installation must conform to the applicable gas and building standards
laid down by the country or state, and according to the Heatlie product
installation guide and instructions.
5. This warranty policy does not cover problems associated with
corrosion.
6. This warranty policy does not cover buckling or warping of the hotplate.
7. Lack of maintenance, abuse, misuse, neglect, accident, or improper
installation of the appliance will not be covered.
8. Corrosion or damage caused by exposure to the elements, insects,
weather, or hail will not be covered under this warranty.
NOTE: ALL BARBECUES MUST BE COVERED BY A WATERPROOF COVER
WHEN NOT IN USE.
9. Any evidence that the product has been modified or serviced by an
unauthorised person will void the warranty.
10. Heatlie authorised gas fitters may provide on-site warranty service. No
other costs shall be covered by warranty other than the costs of parts
and labour.
In the event that warranty service is required, contact the place of purchase.
No other warranties, either expressed or implied, whether by distributor,
retailer, or employees of Heatlie, will be recognised or honoured by Heatlie.
This limited warranty sets forth the sole remedy of the owner. The total
liability of Heatlie is limited to the purchase of the product. Heatlie are
continually updating and improving their products, therefore details
and specifications are subject to change.

Designed and manufactured by:
M&A Mead Investments Pty Ltd t/as Heatlie Barbecues
ABN 55 111 671 008
60 Kinkaid Ave NORTH PLYMPTON SA 5037
Phone (08) 8376 9330
Web Page: www.heatlie.com.au
Other manuals for Roaster R3000SS
2
Table of contents


