Heatport H2 User manual

USER MANUAL
HEATPORT H2 / H4
EnControl
Version 1.00 - 06/2021 Made in New Zealand

1. NORMAL OPERATION
NORMAL START
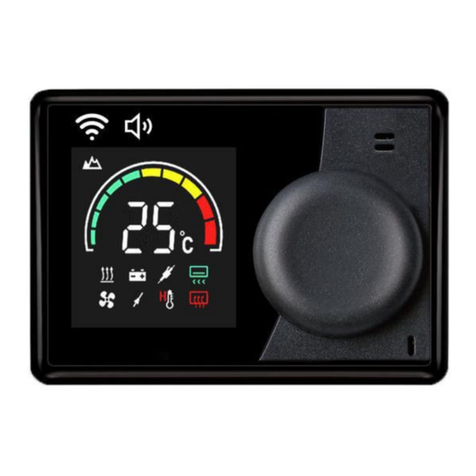
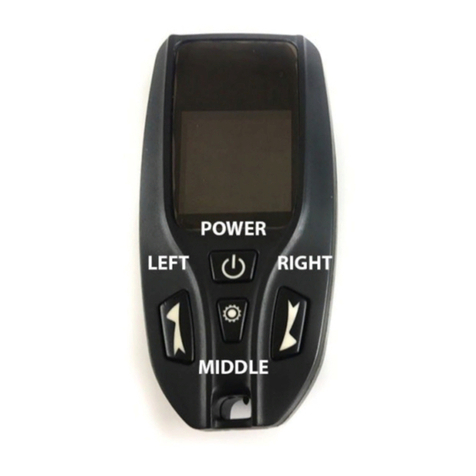
Click the “Rotary switch” or “ON” button on the Wireless Remote Controller in the shutdown state to turn
the heater on. The screen will show the ambient temperature, battery voltage and the local altitude.
The unit will start pre-heating and once it reaches the required temperature, the fuel pump will start
pumping fuel. After the successful ignition, the heater will start running in about 5 minutes. The settings of
the working modes will not be initiated until completing the startup process which can take a couple of
minutes.
Note: If the pump stops ticking and the display shows OFF, error code E1, it means that the fuel did not reach the heater. You
may fulfill the fuel lines using the fuel filling mode OR repeat this Start-up process again. If the unit continues providing the same
error code, please review the placement of the fuel lines, fuel filter and fuel pump.
WORKING MODE SELECTION
●Fixed Power Mode:
To switch into the Fixed Power Mode, click the “Rotary
switch”. Turn the “Rotary switch” on the wired
controller clockwise to increase or anticlockwise to
decrease the heating power. The display will show
values between P1-P5, with P5 as the highest heating
power. The same adjustment can be achieved by short
pressing the “+” or “-” button on the Wireless Remote
Controller. After a few seconds the buzzer will beep
once as settings confirmation.
●Thermostatic Mode
To switch into the Thermostatic mode, click the
“Rotary switch”. Turn the “Rotary switch” on the wired
controller clockwise to increase or anticlockwise to
decrease the preset ambient temperature. The display
will show values in degrees celsius. You may adjust
the temperature from 10°C to 35°C. The same

adjustment can be achieved by short pressing the “+” or “-” button on the Wireless Remote
Controller. After a few seconds the buzzer will beep once as settings confirmation.
Note: The above modes are only available if the unit is in ON state. The thermostatic mode will automatically adjust the heating
power within the range of the minimal heating power and maximal heating power. The controller allows full shut-down of the
heating process after reaching the preset temperature to avoid overheating of the heated space. The unit waits fully off and
initiates the next heating cycle again once the room temperature drops a couple of degrees below preset temperature. The
temperature sensor is located in the wired LCD Switch. The two modes can only be switched and can’t coexist. For example, the
previous setting of the thermostatic mode would be invalid after switching into power mode.
SHUTDOWN
To shutdown, press and hold the “Rotary switch” or press “OFF” button on the wireless remote controller to
execute the shutdown command. The buzzer beeps once, the screen displays OFF and the heater enters the
shutdown process. It can take several minutes until the heat exchanger is fully cooled down and ready to shut
down. When the screen displays ----, the screen turns off and the heater shuts down.
Note: Never turn off the unit by disconnecting the power supply while the unit is running or before finishing the cooling
process as it may cause permanent damage to the internal components. Warranty does not cover damages like this.
2. ADVANCED FUNCTIONS
FUEL PUMPING MODE
After installation of the heater the fuel line needs to be filled up
with diesel. Press and hold the “Rotary switch” in the
shutdown state, the screen lights up and buzzer beeps once.
When the screen displays “Polr”, release the button for
executing the fuel pumping procedure. The fuel pump will
enter the state of rapid pumping (500 rapid pulses). When the
fuel enters the heater pumping frequency will be set to normal
and the heater will run automatically.
Note: This process should not be performed for regular start of the heater,
there is risk of flooding the combustion chamber.
REMOTE CONTROLLER PAIRING
For pairing the wireless remote controller the heater has to be
running in “Thermostatic mode”. Keep turning the “Rotary
Switch” anticlockwise until the screen will display “Stu”. Now
you can press the “OFF” button on the wireless remote
controller to pair it. After pairing is successful the screen will
display “433”. Now you can adjust the temperature back to the
designated value via wireless remote controller.

FUEL TANK VOLUME SETTINGS
This controller is able to measure the fuel flow and
approximate how much fuel is left in your fuel tank. You can
switch between 5l, 8l and 10l preset tanks. When the heater is
running press and hold “Fuel volume settings key”. Screen will
display the size of the tank. If you want to change the size of
the fuel tank you have to wait for the buzzer to beep and
repeat the procedure.
When you fulfill your tank you can reset the fuel gauge by
pressing the “Fuel volume settings key”.
3. NOTES

4. FAULT CODES / TROUBLESHOOTING
Note: This fault code book is designed for an easy identification of any issue. Any repairs/replacements of the internal components of the
heater unit described below must be consulted and pre-approved first with the supplier of the product. The warranty will be voided if
there are any repairs/modifications or unauthorised changes in the hardware or firmware of the product without the approval of the supplier or
any replacement of non-original parts or components that are not supplied by the supplier.
E0
CONTROL UNIT
●Fault of the ECU
○Replace ECU.
●Incorrect ECU / Wired controller
○Replace ECU / Wired controller.
E1
FAILED IGNITION
●No fuel entering the heater unit
○This can happen when you run out of fuel in the individual fuel tank or the fuel level of
the main tank dropped just under the tip of the suction pipe. You must fill the tank and
then fulfill the fuel line using the Fuel pumping mode or repeat the start-up process again
and again until the successful ignition or until you remove all the bubbles appearing in
the fuel line.
●The wrong placement of fuel lines/fuel filter/fuel pump
○Problem especially on the intake side of the fuel line before the fuel pump, which is the
most vulnerable for creation of the airlock. Review the placement of the fuel line /filter/
fuel pump exactly as per the provided instructions.
If you are unsure if the problem is caused by the placement of the fuel lines (this can
happen on long horizontal fuel line), you may try to place the fuel pump directly under
the heater and suck the fuel straight from the jerry can to determine if the problem is
caused by the fuel line placement.
●Wrong diameter of the fuel lines
○The fuel lines supplied are a special size with very small internal diameter. Never use any
other type of fuel line.
●Blocked or compressed air intake / exhaust pipe
○Check the air intake / exhaust pipe for the blockage, dirt, snow, mud.
●Condensed / rain water staying in the air intake / exhaust pipe
○Reinstall the pipes per instructions to allow water to escape naturally down by gravity.
●Blocked fuel line or fuel filter
○Replace the fuel line or fuel filter.
●Bad quality of fuel
○Replace the diesel for new.
●Carbon deposition inside the burner
○Replace the burner.
●Carbon deposition in heat exchanger / exhaust pipe / exhaust silencer
○Pressure clean with water the heat exchanger/ exhaust pipe / exhaust silencer.
●Dirt on the atomising net of the glow plug
○Replace the atomising glow plug net
●Dirt on the glow plug
○Replace the glow plug
●Faulty blower motor / heat exchanger gasket OR burner / heat exchanger gasket
○Replace the gasket
●Fault of the Fuel Pump
○Replace the Fuel Pump.
●Fault of the ECU * please see above
E2
FLAME
EXTINCTION
*Same as E1
E3
UNDERVOLTAGE
OR
OVERVOLTAGE
●Undervoltage
○System minimum voltage is 10.5 volts (22.5V for 24V unit). Verify battery voltage.
Connect the multimeter to the positive and negative terminals of the wiring harness and
set to volts DC. If the wiring harness has been extended for a longer distance, check the
voltage at the main ECU connector.
○Record the voltage. If the voltage is less than 12.6 (flooded cell) 12.8 (AGM), connect the
battery charger and log off the job until the batteries are fully charged. Otherwise, turn on
the unit while watching the multimeter.
●Overvoltage
○System maximum allowed voltage is 15 volts for the 12V version and 30 volts for the 24V

version. The possible causes of this code are: 1) Battery charger in boost mode 2)
Alternator overcharging 3) Solar panel controller overcharging
●Wrong connection in connectors
○Check the connector of the main ECU board for any dirt or corrosion or the positive and
negative terminal at the wiring harness.
●Fault of wiring harness
○Inspect wiring for damage or short circuiting with the chassis of the vehicle. Check
continuity from the ECU board to the connector of the wired switch. In case of wrong
connection, replace a wiring harness.
●Fault of the ECU * please see above
E4
PREMATURE
IGNITION
IDENTIFICATION
●Residual fuel in the heater
○If the heater did not finish the shutdown procedure (eg. caused by voltage drop) there
might be some residual fuel left. Leave the heater on a warm and well vented place to
evaporate fuel leftovers.
E5
THERMAL
EFFICIENCY
FAILURE
●Bad quality of fuel
○Replace the diesel for new.
●Fuel filter is blocked
○Clean or replace fuel filter.
●Fuel inlet is blocked
○Clean fuel inlet and fuel tank.
●Carbon deposition inside the burner
○Replace the burner.
●Temperature sensor fault
○Replace the Pt1000 temperature sensor.
●Fault of the Fuel Pump
○Replace the Fuel Pump.
●
E6
TEMPERATURE
SENSOR
●Temperature sensor on controller is damaged
○Replace the controller
E7
FUEL PUMP
●Wrong connection in connectors
○Check the connectors of the fuel pump or main ECU board for any dirt or corrosion.
●Fault of the wiring harness * please see above
●Fault of the Fuel Pump * please see above
●Fault of the ECU * please see above
E8
BLOWER
MOTOR
●Blower motor interrupted
○Check heating air intake for obstructions, ensuring the blower turns freely. Run the unit
and listen if there is any suspicious sound or rubbing. Turn the blower by hand checking
for hard spots.
●Damage of the impeller
○Possible causes: 1) Physical obstruction 2) Ducting clamp over-torqued
3) Floor mat or debris under the heater when mounted. Replace the blower motor.
●Blower motor short circuit
○Connect the multimeter to the positive and negative terminals of the fan and check the
resistance. Check if the wiring to the fan is not damaged.
●Blower motor speed failure
○This motor speed varies from specification by more than 10% for longer than 30
seconds.
●A loose ECU casing
○Wrongly positioned ECU or magnetic sensor on ECU can cause inaccurate readings. Fix
the position of the ECU. If the ECU is loose, tighten the screw.
●Fault of the ECU * please see above
E9
GLOW PLUG
●Short circuit of the wiring of glow plug
○Replace the glow plug.
●Fault of glow plug
○Replace the glow plug.
●Fault of the ECU * please see above
E10
OVERHEAT
●Excess temperature is measured at the overheat sensor
○Check if the fan is not blocked/damaged and is spinning without any suspicious noise.
○Check airflow ensuring the ducting is free from obstructions.
●Wrong connection of the temperature sensor

○Remove the PT1000 sensor, check connections, wiring and reinstall.
○If the wiring is damaged or the connection is corroded, replace the temperature sensor.
●Faulty temperature sensor
○Replace the PT1000 sensor
●Fault of the ECU * please see above
E11
PT1000
TEMPERATURE
SENSOR
●Temperature sensor connection malfunction
○Check the connection of PT1000 temperature sensor to ECU.
●Temperature sensor is damaged
○Replace the PT1000 temperature sensor.
●Short circuit of the wiring of temperature sensor * please see above
●Wrong connection of the temperature sensor * please see above
●Faulty temperature sensor * please see above
●Fault of the ECU * please see above
E12
GLOW PLUG
●Disconnection of the glow plug
○Connect the glow plug to the ECU.
●Fault of glow plug* please see above
●Fault of the ECU * please see above
E14
PT1000
TEMPERATURE
SENSOR
●Temperature sensor is not positioned correctly
○Install the PT1000 temperature sensor correctly

© LF Bros NZ Pty Limited 2021
No part of this manual may be copied or reproduced in any form
without the express permission of LF Bros NZ Pty Limited.
This publication was correct at the time of going to print; however,
LF Bros NZ Pty Limited has a policy of continuous improvement
and reserves the right to amend any specifications without prior
notice.
LF Bros NZ Pty Limited
39B Pawsons Valley Road
Duvauchelle, 7581
Canterbury
New Zealand
www.heatport.co.nz
This manual suits for next models
1
Table of contents
Other Heatport Controllers manuals
