HeatRite HT1 Operating instructions

Welcome to the programming guide for
your new Heatrite HT1 thermostat
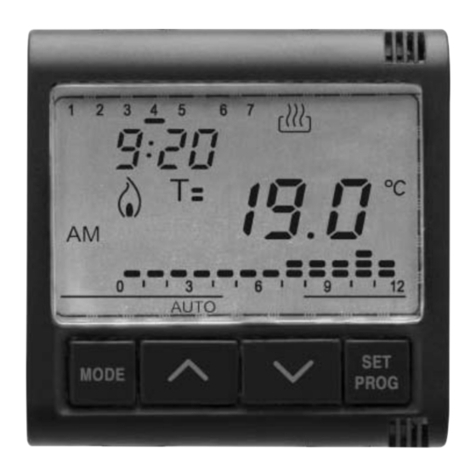
1. To Switch your thermostat on simply tap the power switch icon on your glass screen.
2. This will take you to the main home screen.
3. To begin programming the thermostat we first have to set the clock and the day of the
week.
4. To set the clock to the correct time gently tap on the tick icon at the bottom of the display.
Use the up and down arrows to adjust the time, once you have chosen the correct time tap
the tick icon.
5. You will now see the day of the week flashing, using the up and down arrows select the
correct day of the week, then tap the tick icon to confirm.
6. You have now set the time and day of the week and have returned to the home screen.
7. There are two options to choose from when programming your thermostat. Manual mode
or Auto Mode.
8. To run the thermostat in manual mode allows you to switch the heating on and off
manually and adjust the temperature manually.
9. To operate the thermostat manually and not program it around your daily lifestyle tap the
M button on the display. There will be a “click” sound and a handprint icon will appear with
a heat icon, this indicates the thermostat is currently heating.
10. By using the up and down arrows on the display you can increase and decrease the floor
temperature. When you have selected your temperature preference, tap the tick icon, your
floor is now heating to the desired set temperature.
11. We recommend to get the best out of your heating and to run it efficiently around your
daily lifestyle that you programme the thermostat to Auto Mode.
12. To run the thermostat in Auto mode, tap the M icon until the clock is displayed then press
and hold the M icon for 5 seconds. The thermostat is now in programming mode.
13. Displayed at the top of the screen are the numbers 1-5, these represent the days of the
week.
14. The time currently being displayed shows 0625am with P1 displayed next to it. This
indicates the time the thermostat will activate the heating in the morning. You may wish to
change the time by using the up and down arrows, we recommend you set the timer to 30-
60 minutes before you want to use the room. Once you have selected your chosen time
tap the M icon to confirm.
www.heatritenz.com

15. The temperature icon will now flash, use the arrows to set the desired temperature, we
recommend starting at 25 degrees, you may wish to increase or decrease this temperature
depending on how warm you wish the room to be. Again, tap the M icon to confirm.
16. You will see P2 is now displayed and the time is flashing again, this is the time you wish the
thermostat to switch off in the morning, use the arrows to set the time and confirm by
tapping the M icon.
17. The temperature icon will flash again, we recommend setting the temperature to 5
degrees, this is the minimum temperature and ensure the heating stays off during the day,
use the up and down arrows to adjust the temperature then press M to confirm.
18. You will now see the P3 icon and the time flashing. This allows you to se the heating for the
afternoon or evening.
19. To program the thermostat for the afternoon or evening adjust the time using the up and
down arrows then press M to confirm.( We have set it to come on at 730pm) You can
adjust the temperature the same way as you did when setting the morning program, use
the up and down arrows to adjust the temperature then tap M to confirm. P4 is now
displayed and the time is flashing, use the up and down arrows to set the time you wish
the thermostat to switch off in the evening, tap M to confirm.(we have set it to go off at
930pm). The temperature icon is now displayed use the down arrow to select the
minimum temperature of 5 degrees, this will ensure the heating stays off during the night,
tap M to confirm.
20. You will now see the numbers 6 and 7 displayed at the top of the screen, these indicate the
weekend days Saturday and Sunday. P1 is displayed with the time flashing, this is the time
you wish the heating to come on on the weekend days, use the arrows to adjust the time
then tap M to confirm and again adjust the temperature using the up and down arrows
then tap M to confirm. P2 is now displayed, set the time you wish the thermostat to switch
off by using the up and down arrows, then tap M to confirm. The temperature is now
flashing, adjust this down to 5 degrees to ensure the heating stays off during the day, tap
M to confirm.
21. P3 will now be displayed this is the afternoon or evening setting, use the up and down
arrows to set the time you wish the heating to come on in the evening tapping M to
confirm then select the desired temperature using the up and down arrows tapping M to
confirm. P4 is now displayed with the time flashing this is the time you wish the heating to
go off in the evening. Use the up and down arrows to select the time you wish the heating
to go off, then tap M to confirm. To ensure the heating stays off during the night set the
temperature to 5 degrees using down arrow. Now tap the tick icon to complete the
heating programming.
22. Your thermostat is now programmed and is running on auto mode.
If you would like to lock the thermostat so that no one can change the settings that have been
programmed or to stop any younger children playing with the thermostat, simply press and hold the
on button for 5 seconds, as you can see the key lock icon appears, this indicates the screen has been
locked. To unlock the screen simply press and hold the “on” button for 5 seconds until the key lock
icon disappears.
If you have any questions please get in touch through our website www.heatritenz.com or email us
www.heatritenz.com
Table of contents
Popular Thermostat manuals by other brands
Carrier
Carrier Performance Edger Thermidistat Control... installation instructions
Jada
Jada JRT-200 INSTALLATION, SETTINGS & USE
Bryant
Bryant Evolution Connex Control SYSTXBBECC01-C installation instructions
momit
momit Home installation guide
Henco
Henco UFH-THERM-RD manual
Herz
Herz H7711 Series datasheet

