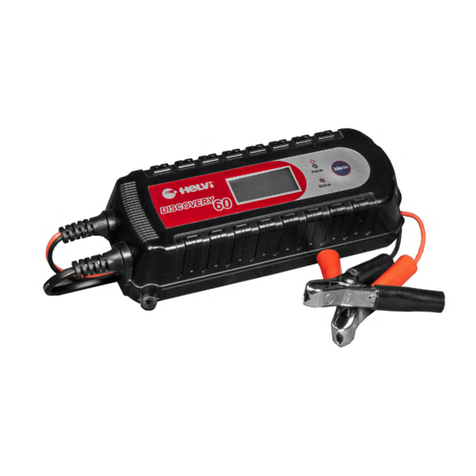
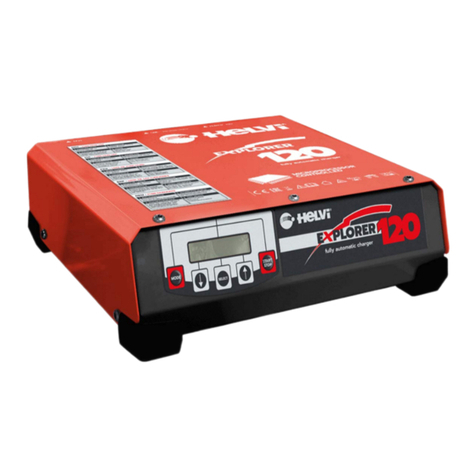
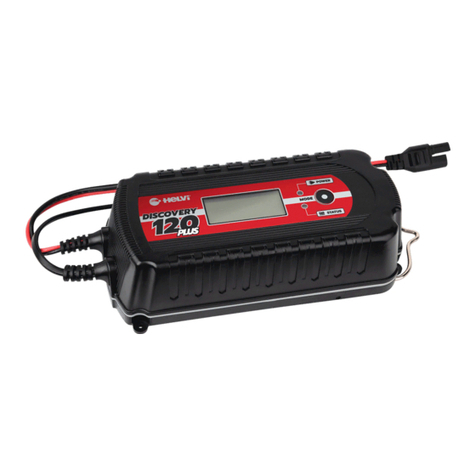
Helvi DIGICAR 5000 User manual

MANUALE D’ISTRUZIONE
GB IT
DIGITAL BATTERY CHARGER AND STARTER
CARICA BATTERIE E AVVIATORE DIGITALE
DIGICAR 5000
OPERATING MANUAL

2

3
SAFETY RULES AND WARNINGS 5
GENERAL INFORMATION ON THE BATTERY
CHARGER 6
INSTALLATION 6
ASSEMBLING - HANDLE AND WHEELS 6
LOCATION 6
CONNECTION TO THE SUPPLY 6
UNIT CONTROLS AND CONNECTIONS 7
PRELIMINARY RECCOMENDATIONS 7
OPERATIONS AS BATTERY CHARGER 8
CHARGING MORE THAN ONE BATTERY AT
THE SAME TIME 9
OPERATIONS AS BOOST STARTER 9
TROUBLESHOOTING 10
MAINTENANCE AND CARE 10
INDEX
AVVERTENZE SICUREZZA 12
INFORMAZIONI GENERALI SUL
CARICA BATTERIE 13
INSTALLAZIONE 13
ASSEMBLAGGIO - MANICO E RUOTE 13
COLLOCAZIONE 13
COLLEGAMENTO ALLA RETE 13
CONTROLLI E CONNESSIONI 14
RACCOMANDAZIONI PER
L’INSTALLAZIONE 14
FUNZIONAMENTO COME
CARICA BATTERIE 15
CARICA CONTEMPORANEA
DI PIU’ BATTERIE 16
ISTRUZIONI PER L’USO COME AVVIATORE 16
RICERCA GUASTI 17
MANUTENZIONE E CURA DEL
CARICA BATTTERIE 17

4

5
CAUTION!
BEFORE INSTALLING, OPERATING OR CARRYING OUT MAINTENANCE ON THE
BATTERY CHARGER, READ THE CONTENTS OF THIS MANUAL CAREFULLY, PAYING
PARTICULAR ATTENTION TO THE SAFETY RULES.
In the event of these instructions not being clear, please contact your supplier.
CONGRATULATIONS ON YOUR NEW PURCHASE!
YOU ARE NOW IN THE POSSESSION OF ONE OF THE SAFEST AND MOST
TECHNOLOGICALLY ADVANCED BATTERY CHARGERS ON THE MARKET.
FOLLOW OUR SUGGESTIONS AND YOU WILL BE GUARANTEED SAFE AND PROBLEM-FREE
OPERATION.
Gases
When the battery is being charged you may notice
bubbling in the fluid caused by the release of gas.
As the gas is flammable no naked lights should be
used around the battery, and the area should be
kept well ventilated.
Because of this risk of explosive gas only connect
and disconnect the battery leads when the mains
supply is disconnected.
Points of note
• When not in use, store the charger in a dry
area to avoid moisture damaging the inter-
nal parts.
Repair
• The Battery Charger should not be opened.
Any attempt at modification or repair by the
user may entail the loss of your guarantee.
• The mains supply cord of this appliance can
be replaced only by qualified personnel.
Danger!
• Avoid getting electrolyte on your skin or clo-
thes. It is acidic and can cause burns. If this
occurs you should rinse the affected area
with water immediately.
• If it gets into your eyes - wash thoroughly and
seek medical attention immediately.
• Never charge a frozen battery. If battery flu-
id (electrolyte) becomes frozen, bring battery
into a warm area to allow battery to thaw be-
fore you begin charging. Never let a battery
on top of charger or vice versa.
• Do not touch the battery clamps together
when the charger is on.
• Never operate charger if it has received a
hard blow, been dropped, or otherwise da-
maged. Take it to a qualified professional for
inspection and repair.
• Be sure to position the charger power cord
to prevent it from being stepped on, tripped
over, or damaged.
• Never pull out the plug by the cord when
unplugging the charger. Pulling on the cord
may cause damage to the cord or the plug.
Precautions When Working with Batteries
• If battery acid contacts skin or clothing, wash
immediately with soap and water. If
• acid enters eye, immediately flood eye with
running cold water for at least 20 minutes
and get medical attention immediately.
• Never smoke or allow a spark or flame in
vicinity of battery or Engine.
• Do not drop a metal tool on the battery. The
resulting spark or short-circuit on the battery
of other electrical part may cause an explo-
sion.
• Remove personal metal items such as rings,
bracelets, necklaces, and watches when wor-
king with a lead-acid battery.
• A lead-acid battery can produces a short-
circuit current high enough to weld a ring or
the like to metal, causing severe burns.
SAFETY RULES AND WARNINGS

6
The battery charger is an electrical device that is used
to charge or recharge batteries that are normally
used on motor vehicles, motorbikes, boats etc.
The battery is an accumulator that is able to store,
in the form of chemical energy, electrical energy
that is supplied while it is being charged by a direct
current power source.
The stored energy is given up as a discharge in the
form of direct current electrical energy. This process
of storing and giving up energy is repeated for the
whole life of the battery.
Before starting the charging process, make sure
that the capacity of the battery (Ah) to be charged
is no greater than that of the battery charger you
are about to use.
For battery chargers with adjustable charge current,
we recommend following the instructions of the
battery manufacturer, setting charging time at 10
hours with a current equal to 1/10 (10%) of the
battery capacity in Ah. This type of charging is
defined as SLOW.
GENERAL INFORMATION ON THE BATTERY CHARGER
Rapid charging is defined as charging done at
higher current levels, where the charging time is
usually controlled by a timer (if the model has one)
in order to prevent overheating in the battery.
To lengthen the life of the battery, it is better to
charge slowly in order to prevent overheating.
The time taken to charge a battery may vary,
depending on:
• environmental conditions (Cold/Hot)
• battery condition (Flat/Very Flat)
• age of battery (Old/New)
Never connect or disconnect the battery clam-
ps while the battery charger is working. First
switch off the device.
ASSEMBLING - HANDLE AND WHEELS
• Carefully remove the battery charger from its
packing;
• Attach the handle using the supplied screws;
• Insert the axle and attach the wheels using
the supplied rings.
LOCATION
Adopt the following guidelines for positioning your
battery charger correctly:
• Use the battery charger only and exclusively
indoors;
• The premises must be well-ventilated;
• The premises must be dry and dust-free;
• The air vents should be free of obstructions;
• The battery charger should be placed on a
stable surface.
CONNECTION TO THE SUPPLY
• Before making any electrical connection,
make sure that the available power supply
voltage corresponds with that indicated on
the data plate of your battery charger.
• If the power supply cable of your battery
charger is without a plug, follow the instruc-
tions below for wiring the plug.
• Wire the power supply cable to a standard (
2P + T ) plug of suitable capacity.
To wire up the plug, follow the instructions below:
• connect the brown wire to the plug terminal
marked L1
• connect the blue wire to the plug terminal
marked N
• connect the yellow/green wire to the plug ter-
minal marked PE or marked with the symbol
( )
In all cases, the connection of the yellow/green earth
wire to the PE ( ) terminal must be made so that
when the plug is pulled out this is the last terminal
to be disconnected.
The socket to which the battery charger will be
connected must be fitted with fuses or with an
automatic circuit-breaker.
If you need to use an extension for the power
supply cable, this should have an appropriate
section that is at least equal to that of the po-
wer supply cable.
INSTALLATION

7
FUNCTIONS
1
2
6
11
7
3
8 9
5 4 12
13
1. Main Switch
2. Charge / Boost Start Selector switch
3. Display
• Charge: visualization of real value of charge
current and voltage on the battery;
• Setting: visualization of the set charge cur-
rent and time.
• Alarms visualization
4. Selection Key of the following charge para-
meters:
• Voltage (Volt)
• Current (Amp)
• Time (min)
5. Charge parameter LEDs for showing the se-
lected parameter to set
6. Selection Key of the charge voltage, 12V or
24V.
7. Charge voltage LEDs for showing the se-
lected charge voltage.
8. Charge Mode Selection Key of Manual or
Automatic Charge and key for starting and
ending of the charge.
9. Charge Mode LEDs for showing the selected
charge mode.
10. Selection Key of the battery type:
• Pb/Gel,
• Ca/Ca
• AGM
11. Battery type LEDs for showing the selected
battery.
12. Charge current / Charge time Adjustment
Knob
13. 12V / 24V positive socket
UNIT CONTROLS AND CONNECTIONS
Figure 1 - Control Panel
10
Type of batteries
• This charger is only suitable for normal lead
acid, sealed, CA/CA, AGM and gel batteries.
It should not be used to recharge NICAD or
any other type of battery.
• Before you proceed check that the battery
capacity (Ah) is not higher than that of your
battery charger.
• The charge must be performed in a well ven-
tilated area
• Check the battery which has to be charged,
making sure that the case is in good condi-
tions, with no leaks and that the terminals
are not oxidized.
FUNCTIONS
PRELIMINARY RECCOMENDATIONS
• Remove the caps from the battery to allow
the gases which are produced during char-
ging to easily come out. If necessary add
distilled water, until the internal elements of
the battery are covered (correct value= 5-10
mm above the elements)
CAUTION: the electrolyte is a highly corrosive
acid!

8
WARNING: The charging process activates
only if the battery charger is connected to a
battery and only if the voltage parameters
comply with the following minimum voltage
values:
For 12V batteries: more than 7,5V
For 24V batteries: more than 15V
• Connect the red cable to the 12V / 24V po-
sitive socket (13). Be sure you connect the
cable to the right positive socket. Turn the
plug clockwise in order to lock it. Connect the
clamp to the positive terminal of the battery.
• Connect the black cable to the minus termi-
nal of the battery.
• Connect the battery charger to the mains
• Check that the socket is equipped with pro-
tection fuses or circuit breakers.
• Switch ON the battery charger through the
main switch 1.
• Select the Charge Function through the se-
lector switch 2.
• Before starting the charge you have to set up
the charging parameters:
– Battery type (10 - 11)
through the key 10 select which kind of bat-
tery you want to charge. This battery char-
ger can be used with normal Lead batteries
(sealed or unsealed), GEL, AGM batteries or
Calcium batteries. When selecting the battery
type be sure of which kind of battery you are
charging. In the even that you are not sure of
the battery type, select Calcium battery. The
LED 11 corresponding to the selected battery
type will light on.
– Charge mode (8 - 9)
select through the key 8 between these 2
charge modes:
1. AUTOMATIC= this mode will perform a full
charge (at the set current) until the set time
has run.
2. MANUAL= this mode will perform a full char-
ge (at the set current) until the battery will be
fully charged. The charge current will then
decrease to a lower fixed current. The display
will visualize the wording “FLT”. By floating
mode the charger will continuously check the
voltage at the battery terminals and will auto-
matically adjust the charge current.
– Charge current (4 - 5)
press the key 4 until the LED “Amp” lights
FUNCTIONS OPERATIONS AS BATTERY CHARGER
on to select the charge current, then set this
through the adjustment knob 12. The current
value will be shown in the display 3. Usually
you should set up a value that is 10% of the
battery capacity. For example, if you have a
140Ah battery you should set up 14A. This
battery charger allows you to set up any va-
lue of current from 1Amp till the maximum
rated amperage of the battery charger.
– Charge time (only by automatic charge
mode) (4 - 5)
press the key 4 until the LED “timer” lights
on to select the charge time. Then through
the adjustment knob 12 set the desired time,
which will be shown in the display 3 (maxi-
mum setting is 600min). If the charge time
has not been set, the charge will continue for
the max setting or for the time set on the pre-
vious charge.
– Charge Voltage (6 - 7)
through the key 6 select the charge voltage,
12V or 24V. The LED 7 corresponding to the
selected charge voltage will light on.
If you have made the wrong connection, the
display 3 will view the wording “BAT” and
both LEDs 7 will blink.
• check if all the parameters that you have set
up in the battery charger are according to
what you have planned and hold the key 8
for 3 seconds to START the charge. The LED 9
corresponding to the selected charge mode
will start to blink.
• To STOP the charge by manual mode hold
the key 8 for 3 seconds. Manual Mode LED
will stop blinking and will light fixed. By au-
tomatic mode, charge will stop once the set
time is passed, display will visualize the wor-
ding “END” and Automatic Mode LED will
stop blinking and will light fixed. To stop the
charge before the set time, just hold the key
8 for 3 seconds.
• during the charge, set parameters are visua-
lized in the display. Use key 4 to select the
parameter you want to read.
• during the charge, no setting can be chan-
ged. To change some setting, you have first
to STOP the charge.

9
Figure 2 - Connection Diagram
This battery charger is equipped with a boosting
system that will let you start your car without
damaging the electronic on board of your vehicle.
WARNING: Boost starts MUST be performed
when the battery is still mounted on the vehi-
cle.
WARNING: The charging or boosting process
activates only if the battery charger is con-
nected to a battery and only if the voltage pa-
rameters comply with the following minimum
voltage values:
For 12V batteries: more than 7,5V
For 24V batteries: more than 15V
• Connect the black clamp to the vehicle’s
chassis, far from the battery and from the
exhaust pipe.
• Connect the red cable to the 12V / 24V po-
sitive socket 13 and the clamp to the positive
terminal of the battery.
• Connect the battery charger to the mains.
Check that the socket is equipped with pro-
tection fuses or circuit breakers.
• Switch ON the battery charger through the
main switch 1.
Before starting the boosting procedure is advi-
sable to perform a fast charge with the maxi-
mum current for 10/15 minutes
• Select the Boost Start Function through the
FUNCTIONS OPERATIONS AS BOOST STARTER
selector switch 2. The display 3 will visualize
the wording “RDY”. After you have selected
this process, the battery charger won’t give
energy to the car until the car won’t ask for it.
• Go into the car, try to turn on the car. The
battery charger will give energy to the car for
4 seconds without overtaking the voltage se-
curity value.
• If the boost is not performed, you may try
again after 15 seconds, the countdown is vi-
sualized on the display 3. If necessary, per-
form a fast charge at the maximum current
for 10/15 minutes.
In the event that the battery is damaged (short
circuit or broken elements) the boosting will
not be performed by the battery charger, so
your car will not be damaged by an improper
boosting.
• Once the car is started, the battery charger
will automatically stop giving current. Turn
the charger OFF through the main switch 1.
• Disconnect the cables from the battery and
replace the battery caps
• Disconnect the charger from the mains sup-
ply and store it in a dry place.
Warning: do not charge batteries with diffe-
rent capacities or different types of batteries
at the same time.
If it is necessary to charge more than one battery
at the same time, they can be connected in series
or in parallel.
CHARGING MORE THAN ONE BATTERY AT THE SAME TIME
Connection in series is preferred because this makes
it possible to monitor the current circulating in each
battery, and this will be equal to that shown on the
ammeter.
Please, follow the below diagram:

10
TROUBLESHOOTING
Charger doesn’t charge
• Display visualises the wor-
ding “BAT” and LEDs 5
blink
• Display visualizes the wor-
ding “TER”
• Wrong Charge Voltage Se-
lection
• Battery voltage level lo-
wer than 7,5V@12V -
15V@24V.
• Charger overheated
• Select through the key 6
the correct charge voltage.
• Allow to the charger to
cool down.
Boost can not be performed
• Display doesn’t visualize
the wording “RDY”
• Display visualizes the wor-
ding “RDY”
• Wait for the OFF time of
15 seconds, display visua-
lizes the countdown
• Battery is damaged
• Try to boost start your vehi-
cle once display visualizes
the wording “RDY”
MAINTENANCE AND CARE
It is essential to keep your battery regularly charged
throughout the year, especially during the winter
months. In the winter the effectiveness of your car
battery is reduced by the cold. Oil is thick. Engines
are difficult to start and the heater, windscreen wipers
and lights are all draining power. It is at this time that
batteries have to be at peak power. If your battery
is not regularly maintained and kept fully charged,
it can cause problems and a possible breakdown.
Listed are some helpful hints on how to keep your
battery healthy in conjunction with your Battery
Charger.
Faulty Cells
Batteries are usually made with six cells. One of
these cells can deteriorate or get damaged. If, after
several hours charging your battery is still flat, you
should test the battery.
ONLY for NOT sealed batteries:
Take hydrometer readings from each cell in the
battery. If one reading is lower than the others, this
could indicate a faulty cell. If necessary, get an Auto-
Electrician to check your battery. One faulty cell is
enough to ruin your battery.
It is pointless to continue using it and you would be
better getting a new one.
Care
Sometimes the battery may appear flat, but this
could simply be dirty or loose connections on your
battery terminals. It is important to maintain the
leads on a regular basis. Do this by removing the
leads from the battery, clean the inside of each
connector and terminal posts on the battery, smear
the terminal posts and connectors with Vaseline, refit
in there correct positions and tighten firmly.
It is essential to keep the electrolyte level above the
plates.
Note, however, that you should not overfill it, as the
electrolyte is strongly acidic. When topping up do
not use tap water. Always use distilled or de-ionized
water. It is important to keep the acid level up. If
necessary have it checked by your garage.
Checking the condition of your battery (ONLY
for NOT sealed batteries)
Using a hydrometer, which can be purchased, from
most motor accessory stores, you can check the
specific gravity of the electrolyte in each cell. The
hydrometer is use to suck up a quantity of fluid from
the cell. The weighted float inside the hydrometer
will register the condition of that cell. Put the fluid
back into the cell after testing, taking care not to
splash the fluid about.

11

12
ATTENZIONE!
PRIMA DI INSTALLARE, UTILIZZARE O MANUTENZIONARE QUESTO CARICA BATERIE, LEG-
GETE ATTENTAMENTE QUESTO MANUALE CON PARTICOLARE ATTENZIONE AL NORME DI
SICUREZZA.
Nel caso le istruzioni non fossero chiare contattate il vostro rivenditore.
CONGRATULAZIONI PER IL VOSTRO ACQUISTO!
IL VOSTRO CARICA BATTERIE E’ UNO DEI PRODOTTI PIU’ SICURI E
TECNOLOGICAMENTE AVANZATI NEL MERCATO.
SEGUITE LE NOSTRE INDICAZIONI E POTRETE GODERE DEL VOSTRO
CARICA BATTERIE IN MODO SICURO E SENZA PROBLEMI.
Gas
Quando si inizia a caricare la batteria si potrebbe
notare il ribollire del liquido a causa del rilascio di
gas. Dato che il gas è infiammabile non si devono
avere fiamme libere nelle vicinanze della batteria e
l’area deve essere ben ventilata.
A causa del rischio dovuto ai gas esplosivi, connet-
tere e sconnettere i cavi del carica batterie solo se il
relativo cavo di alimentazione è sconnesso.
Avvertenze
Quando non in uso, il carica batterie deve essere po-
sizionato in una zona secca per evitare che l’umidità
possa danneggiare le parti interne.
Riparazione
• Il carica batterie non deve essere aperto.
Ogni tentativo di modifica o riparazione da
parte dell’utente potrebbe portare alla deca-
denza della garanzia.
• Il cavo di alimentazione di questo apparec-
chio può essere sostituito solo da personale
qualificato.
Pericolo
• evitare di entrare in contatto con l’elettrolita
della batteria con pelle o vestiti. E’ un aci-
do e può causare ustioni. In caso di contatto
dovete lavare immediatamente con acqua la
zona in cui è avvenuto il contatto.
• in caso di contatto con gli occhi, lavarli ab-
bonda mentente con acqua e contattate un
medico immediatamente.
• mai caricare una batterie congelata. Se il
liquido della batteria (elettrolita) si conge-
la, portate la batteria in una zona calda per
permettere alla batteria di scongelarsi prima
di iniziare la carica. Non mettere mai la bat-
teria sopra il carica batterie e viceversa
• non far toccare le pinze del carica batterie
quando lo stesso è in carica.
• non usare mai il carica batterie se ha subi-
to una gran botta, è caduto o se è danneg-
giato. Portatelo da un esperto qualificato per
un’ispezione e riparazione.
• Posizionate il cavo di alimentazione in modo
che non possa essere calpestato, strappato o
danneggiato.
• Non scollegare mai il cavo di alimentazione
tirandolo per il cavo. Tirare il cavo di alimen-
tazione può danneggiare il carica batterie.
Precauzioni da usare quando si lavora con
le batterie
• se l’acido della batterie entra in contatto con
la pelle o i vestiti, lavare immediatamente
con sapone ed acqua. Se l’acido entra in
contatto con gli occhi, lavateli immediata-
mente con acqua corrente per 20 minuti e
contattate un medico immediatamente.
• Non fumare o permettere fiamme o scintille
in prossimità della batteria o del motore.
• Non far cadere utensili di metallo sulla bat-
teria. La scintilla risultante o il corti circuito
sulla batteria o su altre parti elettriche può
comportare un’esplosione.
• Rimuovere oggetti di metallo ad uso perso-
nale, quali anelli, braccialetti, collane e oro-
logi quando si lavora con batteria al piom-
bo.
• Una batteria al piombo può produrre una
corrente di corto circuito sufficiente a salda-
re un anello o similari al metallo, causando
ustioni gravi.
AVVERTENZE SICUREZZA

13
Il carica batterie è un’apparecchiatura elettrica
usato per la carica e la ricarica delle batterie
comunemente usate nel campo automobilistico,
motociclistico,navale ecc.
La batteria è un accumulatore in grado di imma-
gazzinare energia elettrica fornita durante la sua
carica da un generatore di corrente continua, sotto
forma di energia chimica.
Tale energia viene restituita nella scarica sotto forma
di energia elettrica a corrente continua. Questo
processo di immagazzinamento e resa di energia
si ripete per tutta la vita della batteria.
Prima di procedere alla carica, verificate che la
capacità della batteria (Ah) che si intende caricare
non sia superiore a quella del carica batterie che
state usando.
Nei carica batterie con corrente di carica regolabile
è consigliabile seguire le indicazioni dei costruttori
di batterie che stabiliscono una durata della carica
di 10 ore con una corrente pari a 1/10 (0,1) della
capacità in Ah della batteria.
Tale tipo di carica si definisce LENTA.
INFORMAZIONI GENERALI SUL CARICA BATTERIE
Si definisce carica Rapida quella carica che viene
effettuata con correnti più elevate e dove, per evitare
eccessivi surriscaldamenti della batteria il tempo di
carica è generalmente controllato da un temporiz-
zatore (nei modelli che lo prevedono).
E’ preferibile per una durata superiore della
vita della batteria , scegliere cariche lente che
evitano il surriscaldamento.
Il tempo di carica di una batteria può variare in
funzione di:
• condizioni ambientali (Freddo/Caldo)
• stato della batteria (Scarica/Molto scarica)
• età della batteria (Vecchia/Nuova)
Non collegare né scollegare mai le pinze del-
la batteria con il carica batterie funzionante.
Spegnere prima l’apparecchio.
ASSEMBLAGGIO - MANICO E RUOTE
• Rimuovete con attenzione il carica batterie
dal suo imballo;
• Fissate il manico con le viti in dotazione;
• Inserite l’asse e fissate le ruote con gli anelli
in dotazione.
COLLOCAZIONE
Seguire le seguenti linee guida per la collocazione
corretta del vostro carica batterie:
• Usare il carica batterie esclusivamente all’in-
terno;
• L’ambiente deve essere ben areato;
• In luoghi protetti da polvere e umidità;
• I fori di areazione non devono essere ostruiti;
• Il carica batterie deve essere posizionato su
una superficie stabile.
COLLEGAMENTO ALLA RETE DEL CARICA
BATTERIE MONOFASE
• Prima di effettuare qualsiasi collegamento
elettrico, verificate che la tensione di alimen-
tazione e la frequenza disponibile sia corri-
spondente con quelle indicate nei dati di tar-
ga dal vostro carica batterie.
• Nel caso in cui il cavo di alimentazione del
vostro carica batterie sia sprovvisto di spina
seguite le istruzioni qui di seguito riportate
per collegare la spina.
• Collegate il cavo di alimentazione ad una
spina normalizzata ( 2P + T ) di portata ade-
guata.
Seguite le seguenti istruzioni per collegare il cavo
di alimentazione alla spina:
• -il filo marrone va collegato al morsetto con-
trassegnato dalla lettera L1 della spina
• -il filo blu va collegato al morsetto contrasse-
gnato dalla lettera N della spina
• -il filo giallo/verde va collegato al morsetto
contrassegnato dalla lettera PE o dal
• simbolo ( ) della spina
In tutti i casi il collegamento del lo di terra giallo/
verde al morsetto PE ( ) deve essere fatto in
modo tale che in caso di strappo della spina sia
l’ultimo a staccarsi.
La presa a cui verrà collegato il caricabatteria
deve essere provvista di fusibili di protezione o di
interruttore automatico.
Nel caso in cui si debba usare una prolunga
per il cavo di alimentazione, questa deve ave-
re una sezione adeguata e comunque non in-
feriore a quella del cavo di alimentazione.
INSTALLAZIONE

14
FUNCTIONS
1
2
6
11
7
3
8 9
5 4 12
13
1. Interruttore principale
2. Selettore processo di Carica / Avviamento
3. Display
• Carica: visualizzazione del valore di corrente
di carica reale e della tensione della batteria;
• Impostatazione: visualizzazione della corren-
te di carica e del tempo di carica impostati.
• Visualizzazione allarmi.
4. Tasto di selezione dei seguenti parametri di
carica:
• Tensione (Volt)
• Corrente (Amp)
• Tempo (min)
5. LED Parametri di carica per indicare il para-
metro impostabile.
6. Tasto di selezione della tensione di carica,
12V or 24V.
7. LED Tensione di carica per indicare la tensio-
ne di carica selezionata, 12V o 24V.
8. Tasto di selezione della modalità di carica,
Manuale o Automatica e tasto per iniziare e
terminare la carica.
9. LED Modalità di carica per indicare la moda-
lità selezionata, Manuale o Automatica.
10. Tasto di selezione del tipo di batteria:
• Pb/Gel,
• Ca/Ca
• AGM
11. LED Tipo di batteria per indicare la batteria
selezionata.
12. Manopola di regolazione della corrente di
carica e del tempo di carica.
13. Presa positiva 12V / 24V
CONTROLLI E CONNESSIONI
Figura 1 - Pannello di controllo
10
Tipi di batterie
• Questo carica batterie è adatto solo per bat-
terie al Piombo normali o stagne, Batterie al
GEL e non deve essere usato per ricaricare
batterie NICAD o altri tipi di batterie
• Prima di procedere alla carica, verificate che
la capacità della batteria (Ah) che si intende
caricare non sia superiore a quella del carica
batterie che state usando.
• Controllate la batteria da ricaricare verifi-
cando che la carcassa sia in buone condizio-
ni, senza perdite.
• Pulite i morsetti positivo e negativo da possi-
bili incrostazioni di ossido in modo da assi-
curare un buon contatto delle pinze.
• Eseguite la carica in ambienti areati per evi-
tare l’accumulo di gas.
FUNCTIONS
RACCOMANDAZIONI PER L’INSTALLAZIONE
• Rimuovete i tappi dalla batteria (se presenti)
per permettere la fuoriuscita dei gas che si
producono durante la carica.
• Controllate che il livello dell’ elettrolita rico-
pra gli elementi della batteria, se necessario
aggiungete acqua distillata fino a coprire gli
elementi interni della batteria ( valore corret-
to 5-10mm sopra gli elementi).
In questa fase fate particolare attenzione per-
ché l’elettrolita è un acido altamente corrosi-
vo.

15
ATTENZIONE: il processo di carica si attiva
solo se il carica batterie è connesso ad una
batteria e se i parametri di tensione rientrano
entro un valore minimo di tensione.
Batterie a 12V maggiore di 7,5V
Batterie a 24V maggiore di 15V
• Collegare il cavo rosso alla presa positiva
12V o 24V (13) inserendo e avvitando in
senso orario lo spinotto. Assicurarsi di colle-
gare il cavo alla presa corretta. Collegare la
pinza di carica al morsetto positivo (+) della
batteria.
• Collegare la pinza di carica di colore nero al
morsetto negativo (-) della batteria.
• Collegare il cavo di alimentazione ad una
presa. La presa a cui verrà collegato il cari-
ca batteria deve essere provvista di fusibili di
protezione o di interruttore automatico.
• Posizionare l’interruttore principale (1) in po-
sizione ON / I.
• Selezionare la funzione di Carica con il se-
lettore 2.
• Prima di iniziare la carica impostare i para-
metri di carica:
– Tipo di batteria (10 - 11)
selezionare mediante il tasto 10 quale tipo
di batteria si deve andare a caricare. Questo
carica batteria può essere usato per caricare
batterie normali al piombo (sigillate o non),
batterie al GEL, AGM o Calcio. Nel caso non
si abbia la certezza sul tipo di batteria che si
deve caricare selezionare batterie al calcio.
Il LED 11 corrispondente al tipo di batteria
selezionato si accenderà.
– Modalità di carica (8 - 9)
selezionate mediante il tasto 8 tra le due mo-
dalità di carica:
1. AUTOMATICA= questa modalità consente
una carica (alla corrente impostata) tempo-
rizzata, allo scadere del tempo di carica im-
postato il processo di carica si interrompe.
2. MANUALE= questa modalità consente una
carica completa (alla corrente impostata),
la carica si interrompe quando la batteria è
completamente carica. La corrente di carica
scenderà poi ad un valore fisso più basso. Il
display visualizzerà la scritta “FLT”. Duran-
te la fase di mantenimento il carica batteria
continuerà a controllare la batteria ai termi-
nali e regolerà automaticamente la corrente
di carica.
– Corrente di carica (4 - 5)
premere il tasto 4 fino all’accensione del LED
“Amp” per selezionare la corrente di carica.
Regolare la corrente mediante la manopola
di regolazione 12. Il valore impostato sarà
visualizzato nel display 3. E’ consigliabile se-
guire le indicazioni dei costruttori di batterie
che stabiliscono una durata della carica di
10 ore con una corrente pari al 10% della
capacità in Ah della batteria. Es. Batteria da
40Ah, Corrente di carica consigliata 4 A per
FUNCTIONS
FUNZIONAMENTO COME CARICA BATTERIE
un minino di 10 ore. Questo carica batterie
permette di impostare il valore della corrente
di carica da un minimo di 1Amp al massimo
della corrente nomnale del carica batterie.
– Tempo di carica (solo in modalità di carica
automatica) (4 - 5)
premere il tasto 4 fino all’accensione del
LED “timer” per selezionare il tempo di ca-
rica. Regolare il tempo mediante la mano-
pola di regolazione 12. Il valore impostato
sarà visualizzato nel display 3 (impostazione
massima 600min). Se non viene impostato
il tempo di carica, la carica continuerà fino
al tempo massimo o per il tempo impostato
nella fase di carica precedente.
– Tensione di carica (6 - 7)
selezionare la tensione di carica, 12V o 24V
mediante il tasto 6. Il LED 7 corrispondente
alla tensione di carica selezionata si accen-
derà. Nel caso di errata impostazione il di-
splay 3 visualizzerà la scritta “BAT” e entram-
bi i LED 7 lampeggeranno.
• controllare che tutti i parametri impostati
corrispondano alle necessità di carica e te-
nere premuto il tasto 8 per 3 secondi per INI-
ZIARE la carica. Il LED 9 in corrispondenza
della modalità di carica selezionata inizierà
a lampeggiare.
• Per FERMARE la carica in modalità manuale
tenere premuto il tasto 8 per 3 secondi. Il
LED di carica manuale smetterà di lampeg-
giare e resterà acceso. In modalità automa-
tica, la carica terminerà quando sarà pas-
sato il tempo di carica impostato. Il display
visualizzerà la scritta “END”, i LED di carica
automatica smetterà di lampeggiare e reste-
rà acceso. Per fermare la carica prima dello
scadere del tempo impostato, tenere premu-
to il tasto 8 per 3 secondi.
• durante la carica i parametri di carica sono
visualizzati sul display. Usare il tasto 4 per
selezionare il parametro che si vuole legge-
re.
• durante la carica non è possibile cambiare i
parametri impostati. Per cambiare le impo-
stazioni fermare prima la carica.

16
Figura 2 - Connection Diagram
Questo carica batteria è dotato di una sistema di
avviamento che permette di avviare il vostro veicolo
senza danneggiare l’elettronica di bordo.
ATTENZIONE: Gli avviamenti devono essere
fatti sempre con batteria collegata.
ATTENZIONE: il processo di carica o av-
viamento si attiva solo se il carica batterie è
connesso ad una batteria e se i parametri di
tensione rientrano entro un valore minimo di
tensione.
Batterie a 12V maggiore di 7,5V
Batterie a 24V maggiore di 15V
• Collegare la pinza di colore nero al morset-
to negativo della batteria, la pinza di colore
rosso al morsetto positivo della batteria e lo
spinotto del cavo rosso alla presa positiva a
12V o 24V.
• Collegare il cavo di alimentazione ad una
presa. La presa a cui verrà collegato il ca-
rica batterie/avviatore deve essere provvista
di fusibili di protezione o di interruttore au-
tomatico.
• Posizionare l’interruttore principale 1 in posi-
zione ON / I.
Effettuare una carica veloce di almeno 10-15
minuti alla corrente massima prima di proce-
dere all’avviamento.
• Selezionare la funzione di Avviamento con il
FUNCTIONSISTRUZIONI PER L’USO COME AVVIATORE
selettore 2. Il display 3 visualizzerà la scritta
the wording “RDY”. Dopo aver selezionato
questo processo il carica batteria non fornità
energia al veicolo fino a che questo non lo
richiederà.
• Salire nel veicolo e cercare di avviarlo. Il ca-
rica batteria fornirà energia al veicolo per 4
secondi senza superare il valore di tensione
di sicurezza.
• Se non si riesce ad avviare il veicolo è possi-
bile ritentare dopo 15 secondi, il conto alla
rovescia viene visualizzato nel display 3. Se
necessario effettuare una carica veloce di
10/15 minuti alla massima corrente.
Nel caso la batteria sia danneggiata
(corto circuito o elementi aperti) non sarà
possibile l’avviamento, il veicolo non sarà
quindi danneggiato da un avviamento
improprio.
• Una volta che il veicolo è avviato, il carica
batteria automaticamente smetterà di fornire
corrente. Spegnere il carica batteria median-
te l’interruttore principale 1.
• Scollegate prima la pinza di colore nero e poi
la pinza di colore rosso e rimettere i tappi.
• Scollegare il carica batterie/avviatore dalla
rete elettrica e conservarlo in un lugo asciut-
to.
Attenzione: non caricare batterie di capacità e
tipologia diversa fra loro.
Dovendo caricare più batterie contemporaneamente
si può ricorrere a dei collegamenti in “serie” o in
“parallelo”.
CARICA CONTEMPORANEA DI PIU’ BATTERIE
Tra i due sistemi è consigliabile il collegamento in
“serie” in quanto in questo modo si può controllare
la corrente circolante in ciascuna batteria che sarà
uguale a quella indicata dall’amperometro.
Seguite lo schema quì sotto:

17
RICERCA GUASTI
Il carico batteria non carica
• Il display visualizza la scrit-
ta “BAT” e i LED 5 lampeg-
giano.
• Display visualizza la scritta
“TER”
• selezione tensione di cari-
ca non corretta
• Livello della tensione della
batteria sotto 7,5V@12V -
15V@24V.
• Carica batteria surriscal-
dato
• Selezionare mediante il ta-
sto 6 la tensione di carica
corretta.
• Lasciare che il carica bat-
terie si raffeddi.
Avviamento non possibile
• il display non visualizza la
scritta “RDY”
• il display visualizza la scrit-
ta “RDY”
• Aspettare per il tempo di
pausa di 15 secondi, il
display visualizza il conto
alla rovescia.
• La batteria è danneggiata.
• tentare l’avviamento
quando il display visualiz-
za la scritta “RDY”
MANUTENZIONE E CURA DEL CARICA BATTTERIE
E ‘essenziale mantenere la batteria carica rego-
larmente durante tutto l’anno, soprattutto durante
i mesi invernali. In inverno l’efficacia della vostra
batteria dell’auto è ridotta dal freddo. Il carburan-
te è più denso, i motori sono difficili da avviare.
Tergicristalli e le luci sono tutte causa del calo di
carica della batteria. È in queste condizioni che le
batterie devono essere al massimo della loro resa.
Se la batteria non è regolarmente mantenuta e com-
pletamente carica, può causare problemi e essere
soggetta a possibili rotture.
Sono elencati alcuni suggerimenti utili su come
mantenere la batteria in buona salute in relazione
con il carica batterie.
Celle difettose
Le batterie sono solitamente realizzate con sei celle.
Una di queste celle può deteriorarsi o danneggiarsi.
Se, dopo diverse ore di carica la batteria è ancora
scarica, si dovrebbe verificare la batteria.
SOLO per batterie non sigillate: Prendere letture con
il densimetro da ogni cella della batteria. Se una
lettura è inferiore rispetto alle altre, questo potrebbe
indicare una cella difettosa. Se necessario, chiedete
ad uno specialista di verificare la batteria. Una cella
difettosa è sufficiente per rovinare la batteria.
E’ inutile continuare ad usarla e sarebbe meglio
prenderne una nuova.
Manutenzione della batteria
A volte la batteria potrebbe apparire scarica, ma
questo potrebbe essere semplicemente dovuto a
connessioni sporche o incoerenti sui terminali della
batteria. È importante controllare i cavi regolarmen-
te. A tale scopo, rimuovendo i cavi dalla batteria,
pulire l’interno di ogni connettore e i terminali
sulla batteria, pulire le morsettiere e i connettori
con vaselina, rimontarli nelle posizioni corrette e
stringere le connessioni saldamente.
E’ necessario mantenere l’elettrolita sopra il livello
delle piastre.
Si noti, tuttavia, che non si deve averne una quantità
eccessiva, in quanto l’elettrolita è fortemente acido.
Per il rabbocco non usare l’acqua del rubinetto.
Utilizzare solo acqua distillata o deionizzata. È im-
portante mantenere il livello di acidità. Se necessario
farlo controllare da uno specialista.
Controllare la condizione della batteria (SOLO per
batterie non sigillate)
Utilizzando un densimetro, che può essere acquista-
to nella maggior parte dei negozi di accessori auto,
è possibile controllare il peso specifico dell’elettrolita
in ogni cella. Il densimetro è utilizzato per aspirare
una quantità di fluido dalla cella. Il galleggiante
all’interno del densimetro registrerà la condizione
di quella cella. Rimettere il liquido nella cella dopo
il test, facendo attenzione a non schizzare il liquido.

18
SMALTIMENTO DI APPARECCHI DA ROTTAMARE DA PARTE DI PRIVATI NELL’UNIONE EUROPEA
Questo simbolo che appare sul prodotto o sulla confezione indica che il prodotto non deve essere smaltito assieme agli altri rifiuti domesti-
ci. Gli utenti devono provvedere allo smaltimento delle apparecchiature da rottamare portandole al luogo di raccolta indicato per il riciclag-
gio delle apparecchiature elettriche ed elettroniche. La raccolta ed il riciclaggio separati delle apparecchiature da rottamare in fase di smal-
timento favoriscono la conservazione delle risorse naturali e garantiscono che tali apparecchiature vengano rottamate nel rispetto dell’am-
biente e della tutela della salute. Per ulteriori informazioni sui punti di raccolta delle apparecchiature da rottamare, contattare il proprio comu-
ne di residenza, il servizio di smaltimento dei rifiuti locale o il negozio presso il quale è stato acquistato il prodotto.
DISPOSAL OF WASTE EQUIPMENT BY USERS IN PRIVATE HOUSEHOLDS IN THE EUROPEAN UNION
This symbol on the product or on its packaging indicates that this product must not be disposed of with your other household waste. Instead,
it is yr responsibility to dispose of yr waste equipment by handing it over to a designated collection point for the recycling of waste electri-
cal and electronic equipment. The separate collection and recycling of yr waste equipment at the time of disposal will help to conserve natu-
ral resources and ensure that it is recycled in a manner that protects human health and the environment. For more information about where
you can drop off yr waste equipment for recycling, please contact yr local city office, yr household waste disposal service or the shop where
you purchased the product.
EVACUATION DES ÉQUIPEMENTS USAGÉS PAR LES UTILISATEURS DANS LES FOYERS PRIVÉS AU
SEIN DE L’UNION EUROPÉENNE
La présence de ce symbole sur le produit ou sur son emballage indique que vous ne pouvez pas vous débarrasser de ce produit de la même
façon que vos déchets courants. Au contraire, vous êtes responsable de l’évacuation de vos équipements usagés et à cet effet, vous êtes tenu
de les remettre à un point de collecte agréé pour le recyclage des équipements électriques et électroniques usagés. Le tri, l’évacuation et le
recyclage séparés de vos équipements usagés permettent de préserver les ressources naturelles et de s’assurer que ces équipements sont recy-
clés dans le respect de la santé humaine et de l’environnement. Pour plus d’informations sur les lieux de collecte des équipements usagés,
veuillez contacter votre mairie, votre service de traitement des déchets ménagers ou le magasin où vous avez acheté le produit.
ENTSORGUNG VON ELEKTROGERÄTEN DURCH BENUTZER IN PRIVATEN HAUSHALTEN IN DER EU
Dieses Symbol auf dem Produkt oder dessen Verpackung gibt an, dass das Produkt nicht zusammen mit dem Restmüll entsorgt werden darf.
Es obliegt daher Ihrer Verantwortung, das Gerät an einer entsprechenden Stelle für die Entsorgung oder Wiederverwertung von
Elektrogeräten aller Art abzugeben (z.B. ein Wertstoffhof). Die separate Sammlung und das Recyceln Ihrer alten Elektrogeräte zum
Zeitpunkt ihrer Entsorgung trägt zum Schutz der Umwelt bei und gewährleistet, dass sie auf eine Art und Weise recycelt werden, die keine
Gefährdung für die Gesundheit des Menschen und der Umwelt darstellt. Weitere Informationen darüber, wo Sie alte Elektrogeräte zum
Recyceln abgeben können, erhalten Sie bei den örtlichen Behörden, Wertstoffhöfen oder dort, wo Sie das Gerät erworben haben.
ELIMINACIÓN DE RESIDUOS DE APARATOS ELÉCTRICOS Y ELECTRÓNICOS POR PARTE DE
USUARIOS DOMÉSTICOS EN LA UNIÓN EUROPEA
Este símbolo en el producto o en el embalaje indica que no se puede desechar el producto junto con los residuos domésticos. Por el contra-
rio, si debe eliminar este tipo de residuo, es responsabilidad de usuario entregarlo en un punto de recolección designado de reciclado de apa-
ratos electrónicos y eléctricos. El reciclaje y la recolección por separado de estos residuos en el momento de la eliminación ayudarán a pre-
servar recursos naturales y a garantizar que el reciclaje proteja la salud y el medio ambiente. Si desea información adicional sobre los luga-
res donde puede dejar estos residuos para su reciclado, póngase en contacto con las autoridades locales de su ciudad, con el servicio de
gestión de residuos domésticos o con la tienda donde adquirió el producto.
DESCARTE DE EQUIPAMENTOS POR USUÁRIOS EM RESIDÊNCIAS DA UNIÃO EUROPEIA
Este símbolo no produto ou na embalagem indica que o produto não pode ser descartado junto com o lixo doméstico. No entanto, é sua respon-
sabilidade levar os equipamentos a serem descartados a um ponto de colecta designado para a reciclagem de equipamentos eletro-eletrônicos.
A colecta separada e a reciclagem dos equipamentos no momento do descarte ajudam na conservação dos recursos naturais e garantem que os
equipamentos serão reciclados de forma a proteger a saúde das pessoas e o meio ambiente. Para obter mais informações sobre onde descartar
equipamentos para reciclagem, entre em contacto com o escritório local de sua cidade, o serviço de limpeza pública de seu bairro ou a loja em
que adquiriu o produto.

19

77611850
Table of contents
Languages:
Other Helvi Batteries Charger manuals
Popular Batteries Charger manuals by other brands
Lester
Lester 13820 24EL8 Safety and operating instructions
Clas Ohlson
Clas Ohlson OY059-A manual

Bosch
Bosch Performance Line Series Original instructions
Black & Decker
Black & Decker 2 AMP CHARGE RATE AUTOMATIC BATTERY... instruction manual
Siegen tools
Siegen tools S0547.V2 instruction manual
Schumacher
Schumacher SE-82-6 Important safety instructions
