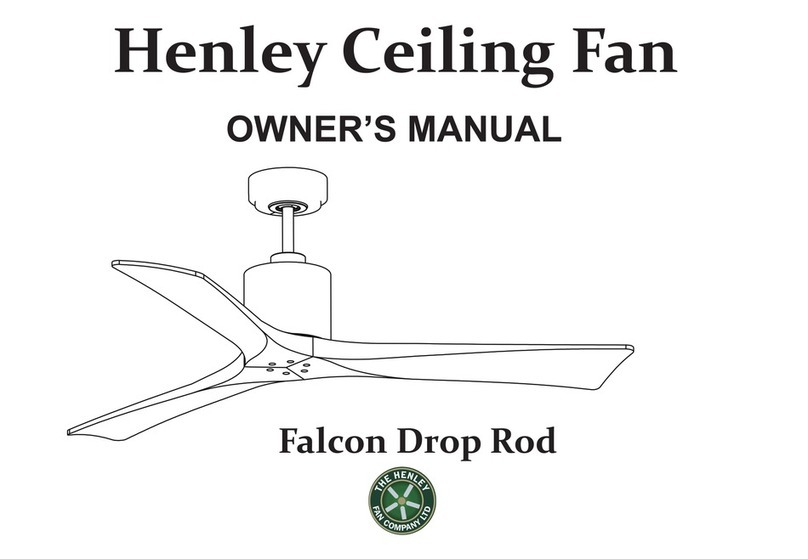
Henley AEOLUS Installation instructions

AEOLUS AC CEILING FAN
Installation & Operating Manual
2

OperatingInstructions
BeforeusingtheAeolusfanpleasereadtheoperatinginstructionscarefully.Keep
the operating instructions within reach and never pass the fan onto another
personwithouttheoperatinginstructions.
Caution–ImportantSafetyGuidance
This fan must be installed by a qualified electrician in accordance with British
StandardBS7671:2018(the18thEdition)"RequirementsforElectricalInstallations
IETWiringRegulations",informallyknownas“TheRegs".Themainsliveshould
befedviaafusedspurorwalllightswitchtothefantoenableittobeisolated.
Technicaldata:
Type
HenleyFanAeolus
Mainsvoltage:220‐240V/50Hz
Powermotor(W):57Watt(max.)
Protectionclass:I/IP20
Noofspeeds:3(withremotecontrol)
DimensionsØxH(mm)approx.1320x340
Dist.ceiling‐blades(mm)approx.340,290withshortdownrod
Weight(kg):approx.7,5kg
Serviceintervalonceayear
4
-
Thisceilingfanisforcirculatingroomair.Theiruseinmachines,outside,in
garages,inmoistorwetroomsorroomsindangeroffireorexplosion,isnot
permitted.
-
Thevoltagedetailsontheratinglabelaretoconformwiththeavailablemains
voltage.
-
Thebuildingmainsmustbeearthed!
-
Onlyoperatetheceilingfanwhencompletelyassembled!
-
Disposeofpackagingtakingtheenvironmentintoaccountandkeepoutofthereach
ofchildren.
-
Beforeaccessingtheconnection,allcurrentcarryingconductorsmustbe
isolated.
-
Thewireconnectionistobeprovidedwithamulti‐poleisolatorwithcontactgaps
ofatleast3mm.
-
Theconstructionandfixtureoftheholderandceilingistobeabletobear5
timestheweightofthefanwhenbeingmoved.
-
Chooseasafeplaceforinstallationandmakesurethattherearenoobjects
withinthe
a r e a
ofrotation.
-
Noneofthefanbladesaretobelessthan2.30mfromtheground.
-
Theceilingfanmustbecorrectlyearthed.
-
Beforefirstuseafterthesetup,allelectricalandmechanicalconnectionsareto
becheckedinordertopreventanyfall,fireorelectricshock.
-
Thisappliancecanbeusedbychildrenagedfrom8yearsandaboveandpersons
withreducedphysical,sensoryormentalcapabilitiesorlackofexperienceand
knowledgeiftheyhavebeengivensupervisionorinstructionconcerninguseof
theapplianceinasafewayandunderstandsthehazardsinvolved.
-
Childrenshallnotplaywiththeappliance.Cleaningandusermaintenanceshall
notbemadebychildrenwithoutsupervision.
-
Ensurethatthefanisswitchedofffromthesupplymainsbeforeserviceand
maintenance.
-
WARNING:lfanyunusualoscillatingmovementisobserved,immediatelystop
usingtheceilingfanandcontactthemanufacturer,itsserviceagentorsuitably
qualifiedpersons.
-
Thereplacementofpartsofthesafetysuspensionsystemdeviceshallbe
performedbythemanufacturer,itsserviceagentorsuitablyqualifiedpersons.

Mounting&Assembly
Securelyattachthehangerbrackettotheceilingjoistusingthelagbolts,flatwashers
andlockwasherssupplied.Useonlyforyourtypeofceilingsuitablescrewsandplugs
(notsup‐plied).Ifmountingbetweenjoiststhenasolidwoodcross‐membermustbe
used.Itmustnotbemountedonplasterboardonlyasthisisnotstrongenoughand
dangerous.
Pre‐install two canopy screws on the opposite sides of the hanger bracket. (Do not
tighten)!
6
Insertthemotorunitforpreassemblyreversedinthestyrofoampackaging.Mountthe
3bladeswithusing6rubberplugsand6screws.
Installthecanopyandmotorcouplingcover
throughdownrod.Loosentwoscrewsonthe
downrodsupport.Placethedownrodinto
downrodsupport.
DetailA:Aligntheholesonthedownrod
supporttotheholesondownrod.Fixthe
clevispinthroughthehole.Installthehairpin
clip.Tightenthetwoscrewsonthedownrod
support.

Connectthewiresfromthemotortothewiresfromdownrod.Aligntheholesonthe
downrodsupporttotheholesondownrod.Fixtheclevispinthroughthehole.Install
thehairpinclip.Tightenthetwoscrewsonthedownrodsupport.
Hangthepre‐assembledceilingfanintothehangerbracket.Connectthesafetyrope
withthescrewconnectiontoaloopandhangtheloopinthesafetyhook.
8
Placethereceiveroftheremotecontrolasshowninthefigureintheceilingbracket.
Connecttheplugsasshowninthepictureandconnectthemainsvoltageatthe
terminalblock.

Slidethecanopyuptothemountingbracketandplacethekeyholeslotsoncanopy
overthetwoscrewsonthemountingbracket.Rotatethecanopyuntilthescrews
headlocksinplace.Re‐tightenthe2screwsandreinstalltheother2screws.The
installationofyourceilingfanisnowcomplete.
10
Operation
Tochangethedirectionofrotation(summer/winter),pleaseusetheswitchAontop
ofthemotorhousing.Forthefunctionsandoperationofyourceilingfanwiththe
remotecontrol,pleaserefertotheoperatinginstructionsoftheremotecontrol
suppliedwithyourfan.
FaultFinding
Fault Remedy
Thefandoesnot
start.
Checkthefuses/tripsatthemainboxandotherconnections.
Checkthatliveiscomingoutofthereceiverwhenturnedon.
Checkthefanconnectiontothemains.
Thefanisnoisy. Checkthatallboltsandscrewshavebeentightened.
Runinthefanandthebearingsfor24hours.Mostnoises
disappearafterthistime.
Thefanvibrates
toomuch.
All screws during assembly of the ventilator, especially those
relatingtotheaxis,haveanimportantfunction.Nottightened
screwsarethemaincauseofimbalances.
Pleasemakesurethatallscrewsaretightened.
Allbladeshavebeenweighedandgroupedaccordingtoweight.
Woodisanaturalmaterial.Theirdensitycanvaryandtherefore
causevibrationevenwhenallbladesareofthesameweight.If
thebladescrewsofoneofthebladesarenottightenedproperly,
thiscouldcausemassivewobbling.Movementofupto10mmis
quiteacceptableanddoesnotmeanafaultyceilingfan.Alsotry
changingtheorderofthebladesandusethebalancingkit.
Checkthatthehangerbracketisfirmlyanchoredtotheceiling.
Important:
Openingupandrepairingtheunitmayonlybecarriedoutbyaspecialist!

Cleaning
-
Switchoffthepowerbyremovingthemainsfuse.
-
Cleanthesurfaceofthehousingandtheguardwithadrycleaningclothanda
dampbrush.
-
Neverusewaterforcleaningyourceilingfan.
-
Donotusepetroloranysimilarlightflammablecleaningmaterial.
Maintenance
-
Switchoffthepowerbyremovingthemainsfuse.
-
C h e c k o n c e a y e a r a l l t h e s c r e w s , e s p e c i a l l y t h o s e o f t h e c e i l i ngsuspension,for
tightness.
Checkelectricalconnectionsforproperconnection.
Disposal
ThisproductconformstoEUDirective2012/19/EU.Thisappliancebearsthe
symbolofthebarredwastebin.Thisindicatesthat,attheendofitsuseful
life,itmustnotbedisposedofasdomesticwaste,butmustbetakentoa
collectioncentreforwasteelectricalandelectronicequipment,orreturned
toaretaileronpurchaseofareplacement.Itistheuser‘sresponsibilityto
disposeofthisappli‐ancetroughtheappropriatechannelsattheendofitsusefullife.
Manufacturersandimportersfulfiltheirresponsibilitiesforrecycling,processingand
environmentallycompatibledisposaleitherdirectlyorbyparticipatingincollective
systems.
©TheHenleyFanCompanyLtd.2020
Unit1,22HarrisonClose
Twyford
Berkshire,RG100LL
01256636509
Table of contents
Other Henley Fan manuals
Popular Fan manuals by other brands

Flair
Flair Smart Vent installation guide

Swegon
Swegon PARAGON d Installation, commissioning maintenance

Monte Carlo Fan Company
Monte Carlo Fan Company 4TSR56 D Series Owner's guide and installation manual

HELLER
HELLER MIST40B instruction manual

Hunter
Hunter Margo installation manual

Hunter
Hunter 23488 Parts guide

Stadler Form
Stadler Form Charly little operating instructions

Inspire
Inspire Notos SN42301 Assembly, Use, Maintenance Manual

Parrot Uncle
Parrot Uncle F6214 Installation & operating instructions

LUV Systems
LUV Systems the halo 5RM installation guide

Hunter
Hunter 28672 Owners and installation manual

Ruck Ventilatoren
Ruck Ventilatoren EM M Series Assembly instruction