Henry Schein 112-6915 User manual

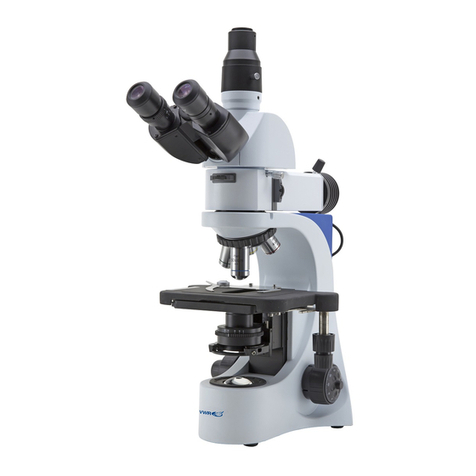
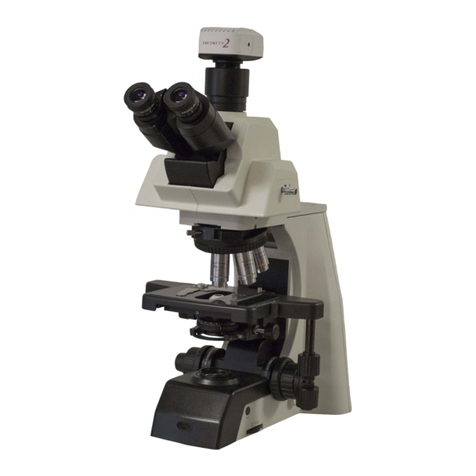
Microscope
Item # 112-6915
OPERATION MANUAL
Revision Date 2014/03
Distributed by (in US only):
(manufacturer)
HENRY SCHEIN INC.
135 Duryea Road
Melville, NY 11747 USA
Henry Schein U.K. Holdings Ltd.
Medcare House, Centurion Close
Gillingham Business Park
Gillingham ME8 0SB U.K.

2
CAUTION
Read this manual before operating the Microscope
Introduction
Henry Schein, Inc. has been a long standing provider of quality laboratory equipment for
the medical, veterinary, and educational markets years. With a range of microscopes
designed to meet today’s stringent lab needs, as well as a full range of microscopes,
Henry Schein is constantly searching for newer and better technology. The Henry Schein
Microscope offers the needed performance level in the fast growing medical and health
care industries.
Unpacking
Each Microscope has been packed with utmost care. Please take a moment to examine
the outer and inner cartons for any visual damage. We recommend that you keep all of
the packing material until you have fully assembled, examined and tested your new
microscope. If you note any damage, please contact Henry Schein.
Unpack your microscope using the following checklist for the parts and accessories.
(Your specific model may vary.)
(1) Microscope stand with NA 1.25 Abbe condenser
(1) Binocular Head
(2) 10x Extra Wide field, High-Eyepoint eyepieces
(4) Achromatic objectives 4x, 10x, 40xr and 100xr (oil)
(2) Replacement fuses (1.5A)
(1) Dust cover
(1) Operation manual
If any parts are missing, please contact your Henry Schein representative
Microscope Features
Objectives:
Each microscope comes with 4 achromatic DIN objectives mounted on a reverse
position nosepiece. The color-coded, polished objectives are parfocal and
parcentered. The 100X (oil) and the 40X (high dry) are spring loaded to prevent
damage.
Eyepieces:
Two Widefield 10X 20 mm Extra Widefield “High-Eyepoint” eyepieces are
included with each microscope. The specialized High- Eyepoint eyepieces are
designed to reduce eyestrain while wearing glasses.
Filter Holder:
A swing-out filter holder is installed under the condenser for holding a filter.
Head:
The binocular head is Seidentopf type, inclined 30°.

3
Additional microscope features:
Extra-Large mechanical stage (150mm x 180mm) with low mounted coaxial
controls. The stage upper-movement limit (safety lock) can be set as desired to
protect slides as well as objectives.
Coaxial coarse and graduated fine focusing knobs with tension adjustment
control.
Focusable Abbe condenser (N.A. 1.25) with a graduated Iris diaphragm.
Pre-aligned illumination and easy lamp replacement, 6 Volt/20 Watt Halogen.
Universal power input from 110V/60Hz to 230V/50Hz, detachable power cord.
1 year warranty, parts and labor.
Electronics
Henry Schein microscope uses UL and CSA approved electrical components. The
circuit board in the base of the unit contains all the electrical functions. There are no user
repairable parts on the circuit board.
Power Input: AC 115V/60Hz - 220V/50Hz universal.
Output: 6V/20W (Halogen bulb, G4 pin type)
Fuse: 1.5 Amp
Assembly Instructions
1. Remove the stand of the microscope and place it on a sturdy, dust free surface. Set
the base so that the Henry Schein label faces you.
2. If objectives are pre-installed, skip to step 5.
3. Remove the plastic dust plugs from the nose piece. Save these in individual objective
containers.
4. Install the objectives. Each objective is packed in an individual plastic container.
Remove each objective from its container, save the containers in the Styrofoam
carton. Install the objectives in the following order: 4x, 10x, 40x, and 100x. Make
certain that they are screwed in all of the way.
5. Remove the microscope head from the Styrofoam carton. Remove the plastic dust
plugs from the eyepiece tubes as well as the protective plastic cover from the head
(save the protective plastic parts). Plug on base the upper part of the arm and secure
with the retention screw. Note: Don’t over tighten.
6. Unwrap the protective tissue from the eyepieces carefully and slide in each eye tube.
Using The Microscope
Note: If your microscope has been exposed to temperature extremes, please allow
time for all the parts to come to room temperature before turning on the power.
Excess cold can fog the lenses and may cause the bulb to fail.
1. Once you have assembled all the parts, plug the power cord into the power inlet at the
rear of the arm and plug the other end of the power cord into the AC outlet
(110V/60Hz – 230V/50Hz).

4
2. The illumination control (intensity rheostat) wheel is located on the left side of the
base. It turns the illuminator On/Off. Turn the control wheel to the brightness
desired. To turn off the illumination, simply reverse the turning until you hear a click
stop.
Note: Rapid repeated changes in light intensity would dramatically shorten the life of
the quartz halogen lamp.
3. In order to speed your familiarity with controls, choose a specimen slide you are
familiar with, such as an old hematology slide or a commercially prepared slide.
Place the slide into the slide holder by pushing back on the thumb guard and placing
the slide toward the back of the holder. Allow the metal slide holder to gently hold
the slide in place.
Note: Do not allow the slide holder to “snap-back” against the slide, this could cause
the slide to chip or shatter.
4. Move the slide to the center of the stage, by turning the mechanical stage control
knobs, just below the stage on the right side. These knobs allow you to move the
slide in the X-Y axis (left-right and forward-backward).
5. Open the aperture of the iris diaphragm on the Abbe condenser (controlled by the
small black lever on the condenser). Also open the aperture of the iris diaphragm in
the illuminator (Koehler Illumination).
6. Once you are comfortably seated, look into the oculars and move the eyepiece tubes
together or apart until you see only one complete circle of light. You have now
adjusted your interpupillary distance. The interpupillary distance range is 55-75
mm.
7. Focusing procedures
7.1 Bring the 4x objective into working position. As you bring the objective into place,
will feel a “stop” (clicking) when the objective is seated properly. Use the coarse and
fine adjustment knobs to locate the image and bring the 4x objective into focus.
7.2 Move the 10x objective into place. Minor coarse adjustment may be needed yet the
fine focusing knob is needed to bring the 10x objective into focus.
7.3 Rotate to the 40x objective. Focus with fine focusing knob for the best image.
7.4 You will now be in the middle of the focus range. You may have to adjust the
aperture diaphragm (on the condenser) for the best contrast.
7.5 Immersion oil is required when 100X oil objective is used. Never allow 40X or other
dry objectives to touch immersion oil! Note: Make sure the slide cover glass is
0.17mm or less in thickness.
8. Diopter adjustment
If you are using a binocular microscope, you have to adjust for the normal difference
in vision between your two eyes. This is a simple but critical adjustment! The

5
Henry Schein microscope has a diopter adjustment ring located on the left eye tube of
the Seidentopf head. Follow the procedures below:
Set the diopter to “0”.
Close your left eye and with your right eye open, look into the right ocular.
Adjust the microscope’s fine focus to give you the best image.
Close your right eye and look with your left eye into the left ocular.
Rotate the adjustment (diopter) ring on the left ocular tube until you see a
clear focused field.
9. Focus Tension Control
Focus tension has been pre-adjusted. If needed, the focus tension can be adjusted at
any time without tools. To adjust the tension of your focusing controls, simply turn
the tension control ring. This knurled ring is located on the right side between the
microscope stand and the focusing knob. Note: Removing too much tension may
cause the stage to drift down.
10. Mechanical Stage Safety Stop (Upper Limit Setting)
The safety stop is provided to help prevent objectives and slide damage. The safety
stop sets the upper limit movement of the mechanical stage. The safety stop setting
screw is located on top of stage driving block.
The stage upper limit is preset. If adjustment is needed, turn the setting screw with a
screwdriver to set the desired upper limit.
Note: Improper stage upper limit setting may cause high power objective unable
to focus. The slide should almost touch the top lens of 40X objective (the top lens
of the 40X objective is retractable) when the stage is raised to its highest limit.
You are now ready to use your Henry Schein Microscope.
Bulb Replacement
CAUTION: Always unplug the microscope before changing the bulb.
Allow the microscope to cool down if recently used. Use only a 6V/20W halogen bulb.
When handling a new bulb, be sure not to touch the glass portion with your fingers. Oil
and sweat on the bulb may cause it to explode or shatter as it heats up.
1. Unscrew the collecting lens assembly to access the bulb. The collecting lens housing
is secured to the base with a screw, which is accessible from the bottom of the base.
2. Gently turn the microscope on its side. You will see a thumbscrew with knurled
knob. Loosen this locking screw to release the collecting lens assembly.
3. Gently pull the old bulb out and discard.
4. Hold the new bulb with a lint-free tissue or piece of cloth. Gently insert the two
metal pins on the base of the bulb into the lamp holder. This is a friction fit and you

6
may have to very gently rock the bulb back and forth as you insert it into the holder.
Never attempt to spread the pins, as this will result in immediate damage to the new
bulb.
5. Carefully return the microscope to the upright position and plug the microscope into
the appropriate AC outlet.
6. The bulb should be centered. If it is not, adjust the lamp socket locking screws and
bring the bulb to center.
Fuse Replacement
A 1.5 Amp fuse protects the circuit board from electrical overload. The fuse case is part
of the power inlet socket located in the back of the microscope. When replacing the fuse,
always install a new one of the same size and amperage.
CAUTION: Always unplug the microscope before changing fuse.
a) Unplug the power cord. Turn the illuminator control wheel to “off”
b) Remove the power cord from the power inlet on the back of the
microscope.
c) Locate the fuse holder. The fuse holder is a part of the power inlet.
Microscope Stand
Back View
Power Inlet Fuse Holder
d) Use a flat head type screwdriver to take the snap-in type holder cover off.
Remove the blown fuse and replace it with the same type and rating fuse
which is: 250V/1.5A
e) Put the snap-in fuse holder back.
Maintenance
1. Always cover your microscope with the dust cover when not in use.
2. When cleaning the lenses, use lens paper or a Q-tip dipped in lens cleaning solution.
3. Excess immersion oil should be cleaned of at once. An alcohol pad is best for
removing oil from the stage and on the other metal parts, but is not recommended for
use on the lenses.
4. Dust in the nosepiece or ocular tubes should be blown out using only filtered air.
Canned air dusters work well for this job.

7
5. Whenever you remove an objective, we recommend that you place the plastic cap
over the hole and put the objective back into the original plastic shipping vial until
ready to be placed back on the microscope. This will keep the objective safe from
dust and other foreign matter.
6. To keep your microscope in top condition for years, we recommend that you have the
microscope professionally serviced once a year.
For support, please call HENRY SCHEIN at (800) 588-9776 or (732) 274-1155.
Table of contents
