Leica DMIRE2 User manual

CMN Imaging Core
January 16, 2013
1
LEICA DM IRE2 MICROSCOPE MANUAL
Neuroscience Imaging Core
Rightmire Hall
Ohio State University
Director: Tony Brown
Rightmire 060
292-1205
Facility Manager: Paula Monsma
Rightmire 062
292-3025
This manual prepared by Tony Brown.

CMN Imaging Core
January 16, 2013
2
TABLE OF CONTENTS
LEICA DM IRE2 MICROSCOPE MANUAL................................ 1
Getting to know the microscope.............................................. 3
Microscope control panel......................................................... 7
LCD display panel...................................................................... 8
LCD display panel buttons ....................................................... 9
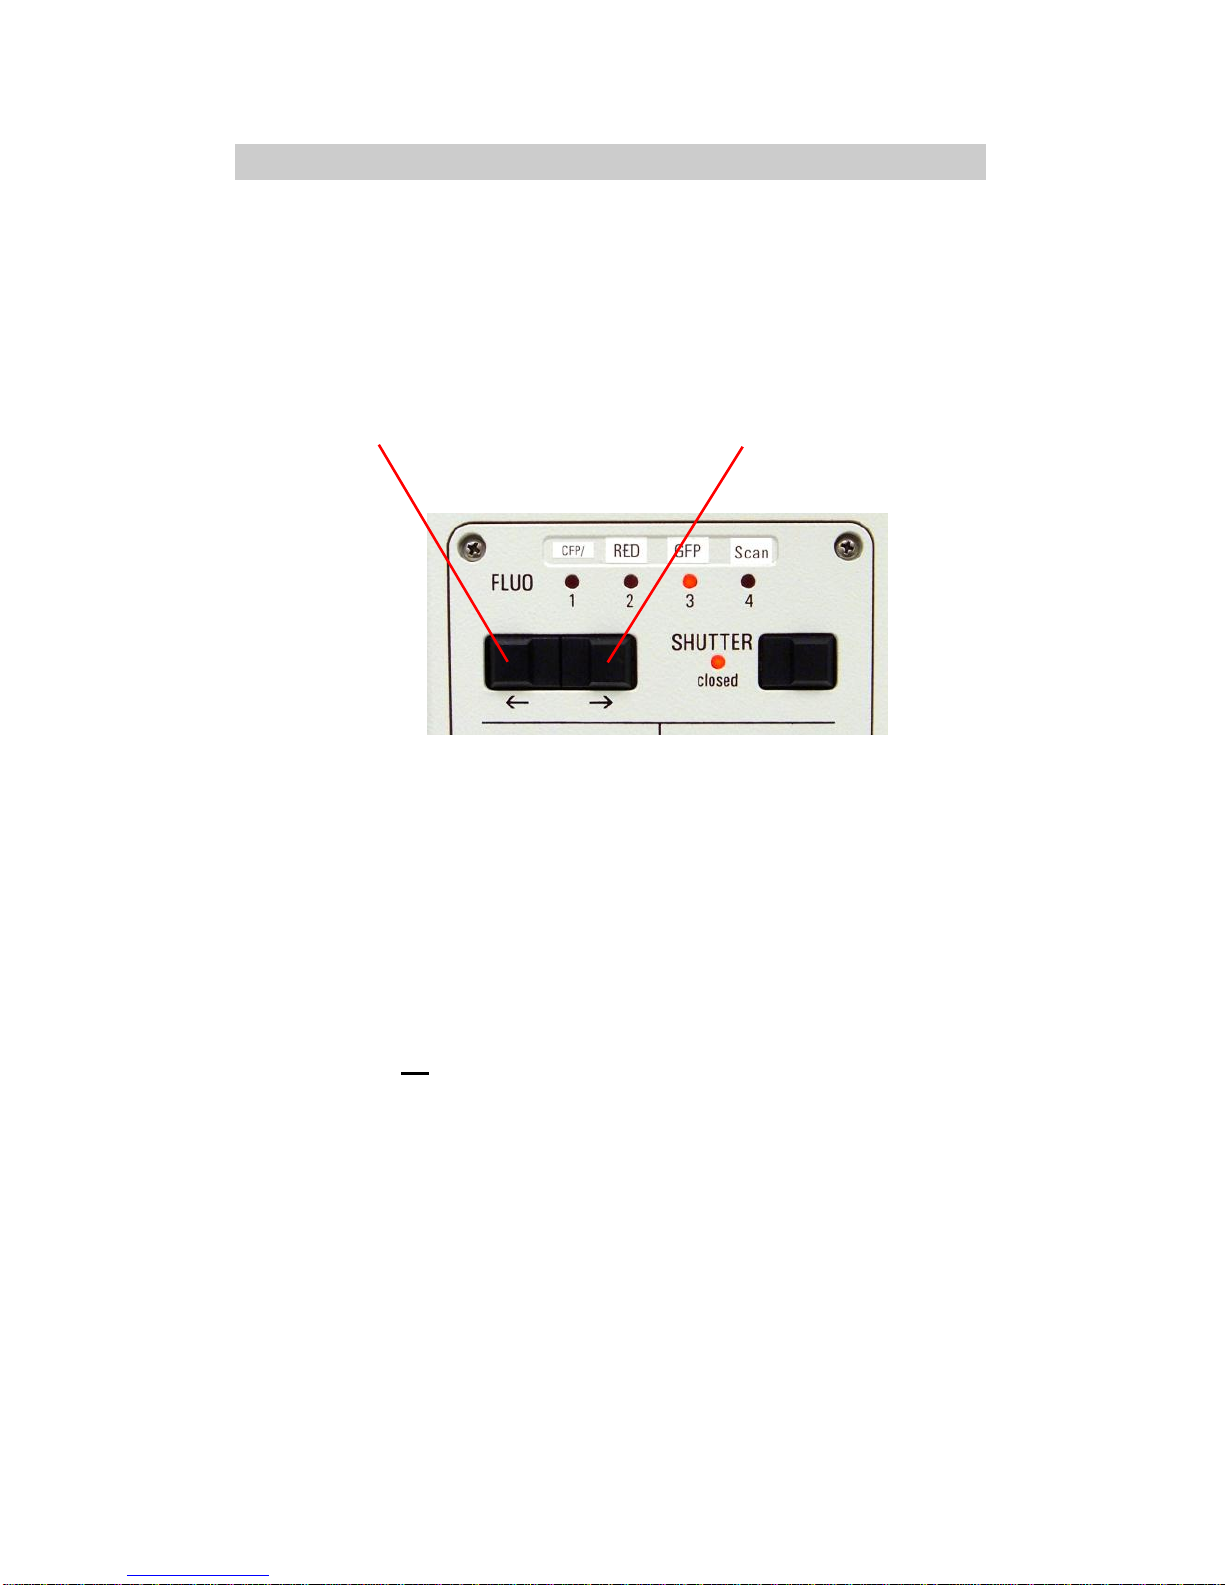
Changing filters .......................................................................10
Changing objectives................................................................ 11
To switch between dry and immersion objectives............... 12
Adjust halogen lamp brightness............................................13
To focus using the focusing knobs.......................................14
Using the focusing buttons....................................................15
Changing the coarseness of the focusing............................16
Eyepieces ................................................................................. 17
Placing a slide on the Z-galvo stage...................................... 17
Transmitted light detector selection knob............................ 18
Bright field observation .......................................................... 18
Koehler illumination ................................................................19
Phase contrast......................................................................... 20
Differential interference contrast (DIC) .................................21
Switching stage holders .........................................................22
Using immersion objectives...................................................23
Cleaning objectives................................................................. 24
Applying oil to objective without removing slide.................25
Specimen preparation............................................................. 26
DOs and DON’Ts......................................................................27

CMN Imaging Core
January 16, 2013
3
Getting to know the microscope
VIEW FROM LEFT
Microscope
control panel
Laser scan
head
with 3
fluorescence
detectors
Condenser
lens
Side port
Focus knob
Eyepieces
Transmitted
light detector
Z- galvo stage
(detachable)
Halogen lamp
intensity
adjustment
wheel
Filter cube
turret
Transmitted light
illumination column
(tilts back for better
access to stage)

CMN Imaging Core
January 16, 2013
4
VIEW FROM RIGHT
Halogen lamp
housing
(transmitted light)
Mercury lamp
housing
(epi-fluorescence)
Focus knob
X-Y stage
movement
Filter holders
(empty)
Transmitted light
detector
selection knob
Condenser turret
Tube lens module
with Bertrand lens
Objective turret

CMN Imaging Core
January 16, 2013
5
OBJECTIVE TURRET (DETAILED VIEW)
objective
turret
objective
prism turret
filter cube
turret
cuvesfou
DIC analyzer
Epi-fluorescence
field diaphragm
(controls area of
illumination)
Epifluorescence
Illumination
diaphragm
(controls
brightness of
illumination)

CMN Imaging Core
January 16, 2013
6
OBJECTIVE PRISM TURRET POSITIONS
Objective
turret
position
Description
Matching objectives
BF
Empty (for bright field
or phase contrast)
C
DIC objective prism
20x multi-immersion
D
DIC objective prism
63x water
immersion
100x oil immersion
E
DIC objective prism
40x oil immersion
63x oil immersion
CONDENSER TURRET POSITIONS
Condenser
turret
position
Description
Matching objectives
BF
Empty (for bright
field)
PH1
phase ring
10x dry
PH2
phase ring
40x dry
20
DIC condenser
prism
20x mulit-immersion
40/63
DIC condenser
prism
40x oil immersion
63x water immersion
63/100
DIC condenser
prism
63x oil immersion
100x oil immersion

CMN Imaging Core
January 16, 2013
7
Microscope control panel
LCD display
switch filter cube
GFP: green fluorochromes
RED: red fluorochromes
CFP/: far red fluorochromes
SCAN=empty slot
select port
VIS=light to eyepieces
SIDE=light to scanner
BOTTOM: disabled
switch tube lens
(disabled)
LCD display
panel buttons
Red light
shows current
filter selection
Mercury lamp
shutter
(red light is on
when shutter is
closed)

CMN Imaging Core
January 16, 2013
8
LCD display panel
Indicates
position of
objective
relative to
upper limit
Indicates
current
step size
setting for
focusing
arrow
indicates
upper limit
has been
set
arrow
indicates
lower limit
has been
set
Indicates
current filter
cube
Indicates
current
objective
Indicates
desired DIC
objective
prism
D= dry mode
I= immersion mode
Indicates
actual DIC
objective
prism in light
path

CMN Imaging Core
January 16, 2013
9
LCD display panel buttons
Do not press the LEARN button (this will enter you
into learn mode, which you must not play with). If you
accidentally press this button, you will see the word
“EXIT “ flashing. Press the LEARN button again to
exit the learn mode.
Learn mode
(DO NOT
USE!)
Set lower
limit of
travel for
objective
(DO NOT
USE!)
Toggle
between
voltage
readout
and
objective
readout
Adjust step
size for
coarseness
of focusing
Set upper
limit of
travel for
objective
(DO NOT
USE!)

CMN Imaging Core
January 16, 2013
10
Changing filters
Use the motorized fluorescent filter cube changer on
the microscope control panel:
Red light shows current filter cube selection
The filter cube turret contains three filters plus an
empty slot
GFP : cube for green fluorochromes
RED : cube for red fluorochromes
CFP/ : cube for far red fluorochromes
or cube for CFP (see Paula for details)
SCAN : empty slot
Notes:
The cube in the CFP/ position is normally the far
red cube, suitable for fluorochromes such as
TOTO-3 and Cy5
The SCAN position is used for confocal imaging
and for transmitted light observation through the
eyepieces
Press left button
to rotate filter
cube turret left
Press right button
to rotate filter
cube turret right

CMN Imaging Core
January 16, 2013
11
Changing objectives
Use the objective turret control buttons on the left
side of the microscope
Current objective indicated on LCD display panel
Press upper
key to
increase
magnification
Press lower
key to
decrease
magnification

CMN Imaging Core
January 16, 2013
12
To switch between dry and immersion objectives
The standard objectives on our microscope are
grouped into three blocks or modes:
100x oil immersion
63x oil immersion
40x oil immersion
20x oil/water/glycerol immersion
40x dry
10x dry
To reduce the chance of immersion medium getting
on to a dry objective or the chance of mixing of
different immersion media, the microscope will not
allow you to move freely between these modes using
the objective turret control buttons.
To switch from one mode to another:
simultaneously press the “upper limit” and “lower
limit” buttons on the microscope control panel
the words “CHANGE OBJECTIVE” flash on the
LCD display panel
now you can change the objective using the
objective turret control buttons
multi immersion mode
oil immersion mode
dry mode
Press these two
buttons
simultaneously

CMN Imaging Core
January 16, 2013
13
Adjust halogen lamp brightness
Use the dial on the front left side of the microscope
stand near the base
The lamp voltage will display automatically on the
microscope control panel display when the intensity
dial is adjusted
To switch off transmitted light illumination adjust
lamp intensity to 2.5V then continue rotating dial
beyond this point
0V on control panel display indicates illumination is off
To switch on transmitted light illumination, rotate
briefly in the opposite direction
Halogen lamp
brightness
control

CMN Imaging Core
January 16, 2013
14
To focus using the focusing knobs
One way to focus is using the focusing knobs
located on the left and right side of the microscope.
Turning the knob so that your thumb moves away
from you focuses down
Turning the knob so that your thumb moves toward
from you focuses up
Focusing knobs
(turn in direction of arrows to
focus objective down)

CMN Imaging Core
January 16, 2013
15
Using the focusing buttons
Another way to focus is to use the focusing buttons
located on the right side of the microscope
Note about upper limits:
If an upper limit is set for the objective (see LCD
display panel) then the objective will not move above
that limit if you are focusing using the focusing
buttons.
The only way to focus above the upper limit is to use
the focusing knobs
This is a safety feature to prevent accidental
damage of the objective when focusing using the
focusing buttons.
Press upper
focus key to
focus up
Press lower
focus key to
focus down

CMN Imaging Core
January 16, 2013
16
Changing the coarseness of the focusing
The focusing is electronic and has five settings:
Setting
Step size
S0
Fine
S1
Medium fine
S2
Medium coarse
S3
Coarse
You can use any step size with any objective, but
when you first select an objective the default step
size will be as follows:
Objective
Setting
63,100x
S0
40x
S1
20x
S2
10x
S3
Press STEP button to switch between S0, S1, S2
and S3
STEP button

CMN Imaging Core
January 16, 2013
17
Eyepieces
Adjusting interpupillary distance:
Adjust eyepieces to match interpupillary distance
by moving the eyepieces closer together or further
apart
Adjusting parfocality
Focus on specimen using electronic focusing
controls
Close right eye and adjust the left eyepiece so that
the image appears in focus to your left eye
Close the left eye and adjust the right eyepiece so
that the image appears in focus to your right eye
The eyepieces are now parfocal
Placing a slide on the Z-galvo stage
To avoid touching or damaging the objective,
lower the objective turret all the way using the
focusing buttons
Position the slide holder clips as shown above
Insert slide into the holder in a front-to-back
motion (1)
Slide clips inward onto slide to secure the slide (2)
2
1
2
1
1
1

CMN Imaging Core
January 16, 2013
18
Transmitted light detector selection knob
For any transmitted light
observation (bright field, DIC,
phase contrast), this knob should
be in the vis position.
Bright field observation
Bright field observation means observation with
transmitted light using no contrast enhancement
method (e.g. no phase contrast or DIC)
For bright field observation:
rotate condenser turret to BF (empty) position
rotate objective prism turret to BF (empty)
position
switch filter cube turret to SCAN (empty) position
Condenser turret in bright
field (BF) position

CMN Imaging Core
January 16, 2013
19
Koehler illumination
Koehler illumination is essential to obtain good
transmitted light images
Select objective
Open the condenser aperture diaphragm
(move lever to the right)
Focus on specimen
Close the field aperture diaphragm
(move lever to left)
Focus condenser using condenser focusing
knob until the image of the aperture is sharp
If necessary center the field diaphragm in the field
of view using the two centering screws located
on the front of the condenser
Open field aperture diaphragm until it just
disappears from the field of view
Close down the condenser aperture diaphragm
until the desired contrast is achieved
Field aperture
diaphragm
Condenser
aperture
diaphragm
Condenser
focusing knob
DIC polarizer
centering
screws
Condenser
turret
Phase ring centering
keys insert here

CMN Imaging Core
January 16, 2013
20
Phase contrast
For phase contrast, you need:
a phase contrast objective
a matching phase ring in the condenser turret
To set up phase contrast:
Select a phase contrast objective (i.e. either of the
dry objectives)
rotate objective prism turret to BF (empty)
position
Rotate condenser turret to select phase ring
PH1 for 10x
PH2 for 40x
Focus on specimen
Insert the Bertrand lens into the optical path
using by rotating the tube lens module from
“SCAN” to “B”
Focus on the phase ring using the Bertrand lens
focus slider on the tube lens module
If condenser phase ring (dark ring) is not centered
on the objective phase ring (light ring), center it
using the insertable phase ring centering keys
(see Paula for instructions)
Set Koehler illumination
Tube lens
module in B
position
Bertrand lens
focus slider
Other manuals for DMIRE2
1
Table of contents
Other Leica Microscope manuals
Popular Microscope manuals by other brands

Velleman
Velleman CAMCOLMS3 user manual

Vanguard
Vanguard 1210CM, 1211CM, 1220CM, 1221CM, 1222CM, 1223CM, 1230CM, 1231CM, 1232CM,... Operation manual

Vanguard
Vanguard 1200CM Series Operation manual

Hologic
Hologic ThinPrep Operator's manual

Philips
Philips CM200 operating manual

Nikon
Nikon SMZ25 instruction manual