HEPF Musger MG 19 Golden Eagle User manual

www.hepf .atwww.hepf .at
HEPF GmbH
Tel. +43 5373 570033
[email protected] | www.hepf.at
find us on
• This manual is suitable for any color scheme
• The chosen color scheme in this guide is just an example
•
Wingspan: 400 cm body length:
198.5 cm
Weight: ~ 5000 g
•
Musger MG 19 "Golden Eagle"
Musger MG 19 "Golden Eagle"
INSTRUCTIONS
USER

2 Hotline +43 5373 570033
Musger MG 19 "Golden Eagle" Version 2.0 German - 09/13/2017
Copyright 2017 HEPF GmbH
Without written permission of the company HEPF GmbH this publication may be neither completely, nor copied in part, modified, copied or translated into another
language. HEPF GmbH reserves due to constant changes
Development prior to their products. The current version of the user manual or the assembly instructions may be
shop.hepf.com be downloaded free of charge in the product overview.
Thank you for purchasing a product of HEPF GmbH! Before commissioning please
read this manual carefully.
For questions, please feel free to contact our support:
E-mail: [email protected] Tel .:
+43 5373 570033
We hope you have fun with your product!
Your HEPF team!

1. General ............................................... ............................................. 4
1.1 Technical data ............................................... ............................................... 4
1.2 Recommended accessories ............................................... ........................................ 5
1.2.1 Drive options .............................................. ............................................. 5
1.3 Safety ................................................ ......................................... 6
1.4 Disclaimer ................................................ ........................................... 6
1.5 Guiding instructions .............................................. ....................................... 7
1.6 Warranty provisions ................................................ ....................... 7
1.7 preparations ................................................ ................................................. 7
2. building instructions ............................................... ........................................... 9
2.1 Hull ................................................ .................................................. ............. 9
2.1.1 Schleppkupplung .............................................. ............................................. 9
2.1.2 Motor mounting .............................................. .................................................. 12
2.2 Rudder ................................................ .................................................. ... 14
2.3 Elevator ................................................ .................................................. .. 18
2.4 hydrofoil ................................................ .................................................. ... 23
2.5 spoilers fitted ................................................ .......................................... 26
2.6 Cockpit ................................................ .................................................. .......... 32
2.7 RC Fittings .............................................. .................................................. .. 34
2.8 RC settings .............................................. ............................................... 35
CONTENT

4 Hotline +43 5373 570033
1. GENERAL
1.1 Specifications
Congratulations on your purchase of the Musger MG-19 GB models and wish you many
successful flights with this model!
Gernot Bruckmann (owner GB-Models)
To successfully build this model and be able to operate, please read the following assembly
instructions carefully and follow the safety instructions.
•electric version
•Schleppkupplung
•Similar model
Manufacturer: UK Models
Weight [g]: from 5000
Kit guide: ARF
Hull Length [cm]: 198.5
Span [cm]: 400

1.2 Recommended accessories
1.2.1 Drive Options
To take advantage of the first-class flight characteristics of the MG-19 in its entirety, we
recommend using a computer remote control and high-grade (digital) servos.
For this model, a drive with 5 cells Lipo from 4000mAh is recommended. Due to the
recoverable power surplus of Antribesvarianten this model is strongly recommended that
only experienced pilots. It will be appreciated that such models are not suitable for
maneuvering at very high speed because of the lightweight construction in combination with
the high engine performance.
The following drive configurations have been tested and are highly recommended:
Engine: AX 4130/16 V2Engine: AX 4130/16 V2
controller: 120 Mezon light, spin Pro opto 77controller: 120 Mezon light, spin Pro opto 77
Propeller: 18,5x10 with a 52mm middle piecePropeller: 18,5x10 with a 52mm middle piece
Suitable accessory kits are available in our
Online shop:
Propulsion: Style No .:
AXI MG19-5.
Servoset: No .:
RC-MG19 Art.
shop.hepf.com shop.hepf.com

6 Hotline +43 5373 570033
1.3 Safety
1.4 Disclaimer
Flight models with remote control are not toys and operation requires responsible persons
acting.
The construction and operation requires technical knowledge, craftsmanship and
safety-conscious behavior. Improper handling of such models may lead to personal injury
and property damage. Note to the dangers that may arise from rotating parts such as
propeller safety regulations when handling electrical and electronic components and pay
particular attention. Never stand in the rotational plane, and keep in mind that any time you
can come to technical defects, such as an unexpected start of the motor.
Before each use, the MG-19 for damage and skim Never persons or livestock.
Always perform a range check by taking note of the manufacturer of your remote control, the
specifications.
In many countries it is a legal requirement for the operation of a model airplane to have taken
out liability insurance.
Since we have no influence on the installation, selection of components and their installation
and maintenance, and may also affect the actual operation of the model in any way, is any
liability and claim for damages in connection with the operation of this model with explicit
reference to this risks excluded. We all liability for loss, damage or costs can be accepted.

1.5 Guiding instructions
1.6 Warranty provisions
1.7 preparations
The construction and operation of such a model is a certain amount of building and flying
experience requires therefore this construction manual is provided as a resource to the
completion of this model - the order of individual sections was created by goal-oriented
point of view.
The texts and illustrations are only guidelines and icon images are We reserve last-minute
changes to the technical design as part of quality improvement without prior notice -.
Claims can from this construction manual or any deviations and changes are derived. The
shown accessories, especially electronics and drive are basically not an integral part of the
kit.
We guarantee that the kit of the MG-19 is delivered in full and without damage. Before you
begin construction of the MG-19, check all components on coming of age and damage. We
point out that partially constructed models are non-returnable.
Before you start, check the individual components and assign the accessories allotted to
each step to the assembly.
Opt for optional building steps before the beginning of the form of realization - Changes in
arrears are no longer feasible only with great effort or not.
Check the condition of the clothing. Due to changing climatic conditions during transport
and storage is a rarely

8th Hotline +43 5373 570033
Appearance of wrinkles and partial detachment of the Bespannmaterilas possible
-in this case it is recommended due to the ease of handling, to smooth it prior to the start of
construction by means of heat gun or iron. It is imperative to pay attention to the correct
temperature setting to avoid damaging the covering - low temperature and begin
inconspicuous border pieces - avoiding delays! Familiarize yourself with the safety
requirements of the adhesives and other chemicals used and pay attention to proper
ventilation.
Note that in each case the principle: "Light flying light" and "make worse" nothing - this kit is
equivalent to 1: 1 of the original design by Gernot Bruckmann and meets all maneuvers
despite consistent lightweight construction, which correspond to the model.
Much flown to and Happy Landings wishes the entire team
HEPF model and GB-Models
2. INSTRUCTIONS
2.1 hull
Here you are right in front of the first important decision, because it raises the question of
whether you simply want to build a glider version with tow release, or a nose drive to be
independent. The following section of the engine installation as well as the installation of
the tow release is described.
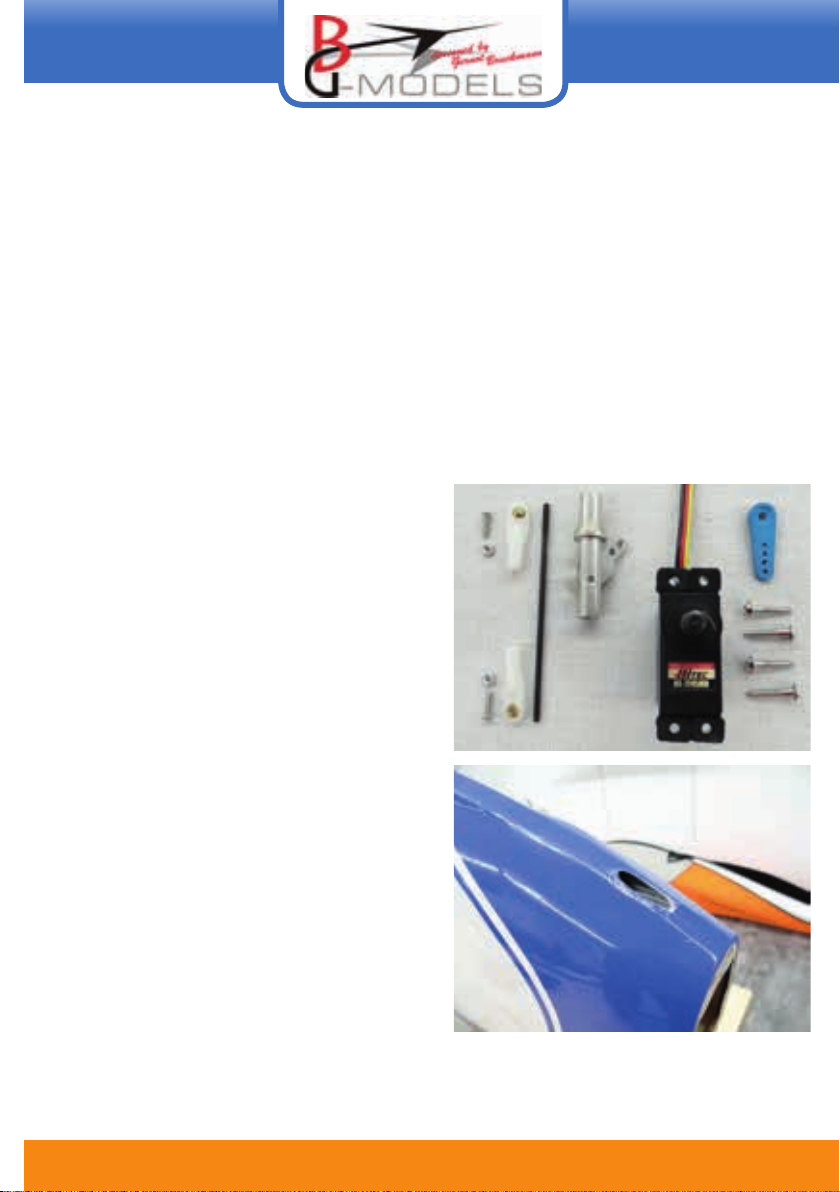
Here you can see all the necessary
components (in this case, a HITEC HS
7245MH) and components for the tow
release
On the fuselage underside, a tube is glued
into which the enclosed tow hook is glued
2.1.1 Schleppkupplung
10 Hotline +43 5373 570033
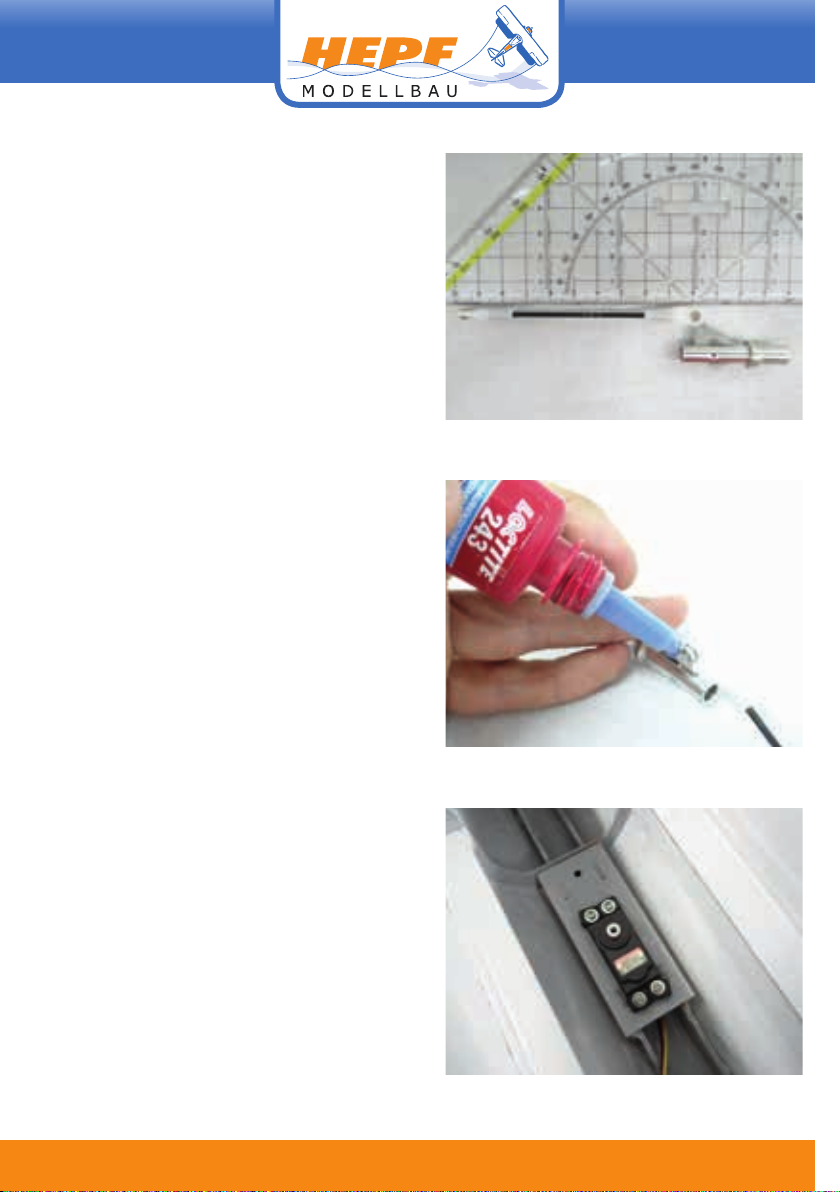
Lengths from the linkage to 95mm and mount
it to the tow release
Secure all screws on the model with Loctite,
so they do not become loose later
Screw the servo Schleppkupplungs- in the
front recess provided
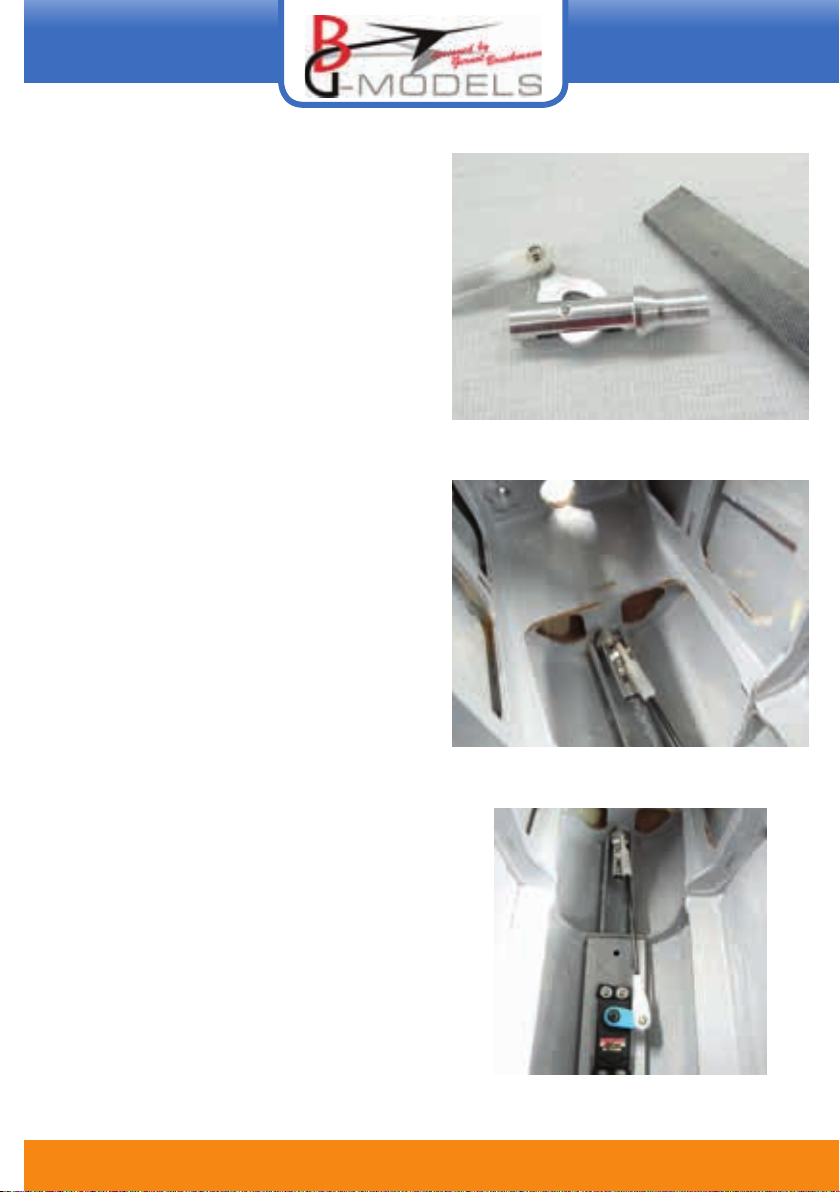
Roughen the gluing point of Schleppkupplung
good ...
,,, and stick them in the previously named
pipe on the hull bottom
Finally, connect more linkage and power
together. Respect, think highly of
you there on the
Servo center

12 Hotline +43 5373 570033
2.1.2 Engine Installation
Here see all important components of the
combos and AX 4130/16 with a 120 Mezon
light and a 18 "folding propeller
Here you can see the mounting points for the rear
mounting of the Axi 4130/16
Mount the motor using 4 M4 screws in the
hull, the propeller was previously not
shortened so that it then not too far from the
model projects
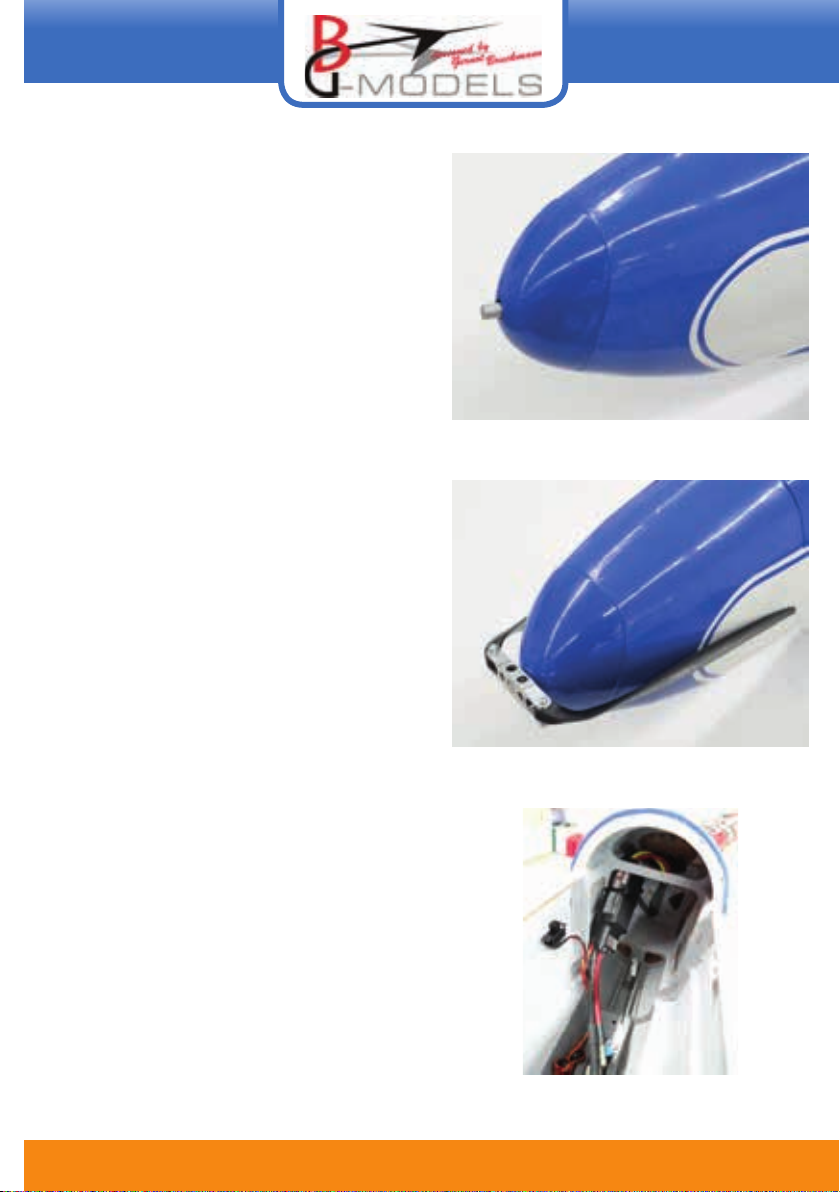
Then fit the fiberglass nose, this is simply
screwed with an M3 screw from the cockpit
fixed
The propeller is easy to
clamped the protruding shaft and can
be easily disassembled to use the MG-19 as
a pure glider
Finally, the Mezon controller is mounted by
means of a cable tie to the left side of the
fuselage wall and the engine mounting is
completed
14 Hotline +43 5373 570033
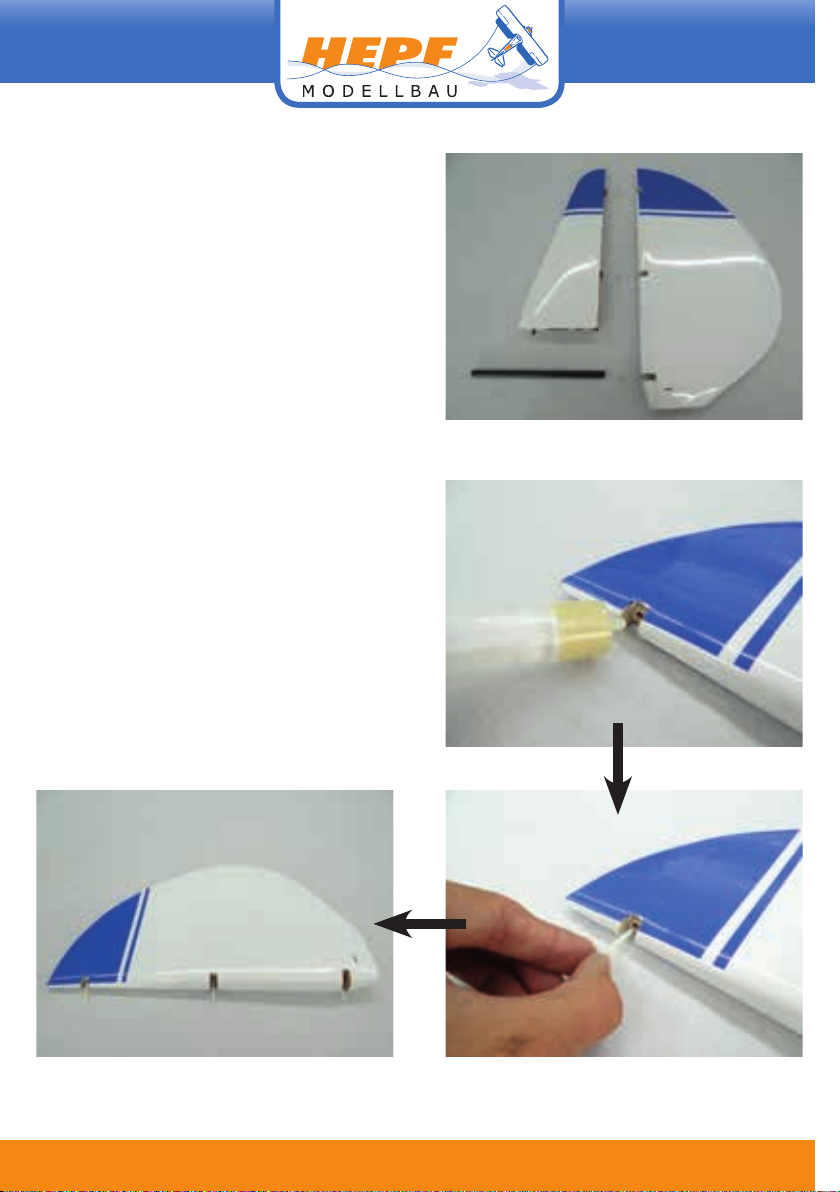
2.2 Rudder
The next step is to start using the rudder
Begin glued anything with the gluing of the
three hinges, this previously still oiled and
then glue with polyurethane adhesive. Make
sure that the three pivot points are located in
a line
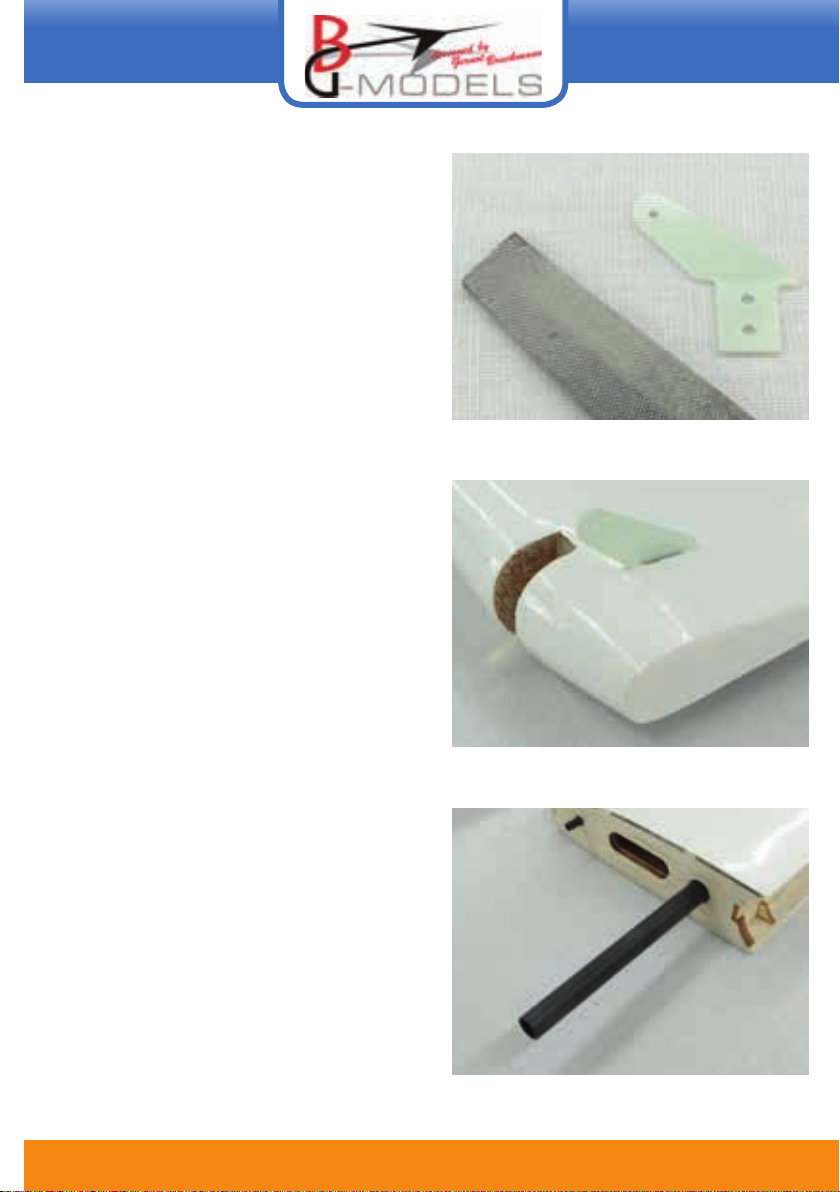
Rough the two tiller good ...
,,, and stick them on both sides in the
vertical stabilizer
Now glue the
Seitenruderstockungsrohr in the rudder
damper

16 Hotline +43 5373 570033
if this hardened is
Glue the rudder to the fuselage
As a next step, the rudder is connected to the
damper, first, you lubricate one every 3
hinges, so that nothing can stick
Use PU adhesive to the
Glue the hinges. be careful before curing that
the rudder is also perfectly aligned
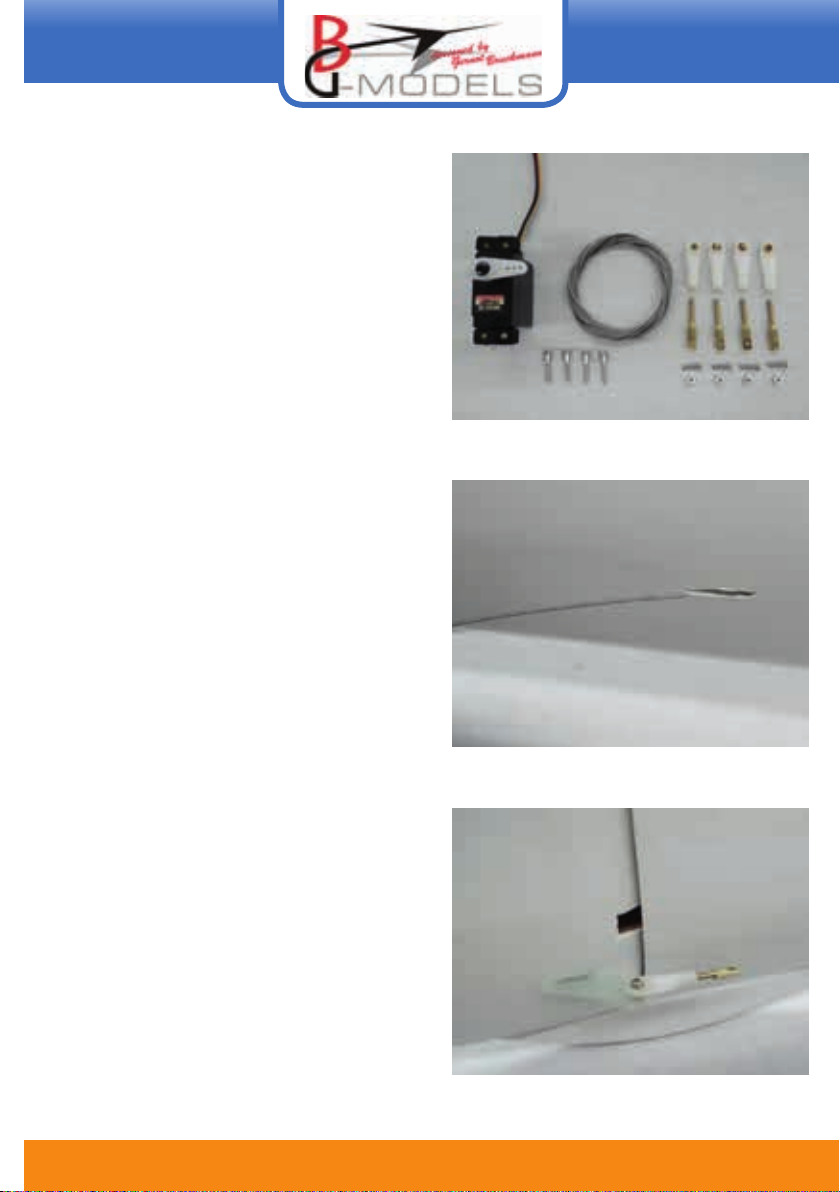
Here you can see all the necessary parts for
the Rudder
Run the supplied cable into the fuselage
opening. Make sure that the two cables are
not entangled in the fuselage
Screw the ball head with the eye bolt and
mount it and the two previously glued rudder
levers
18 Hotline +43 5373 570033
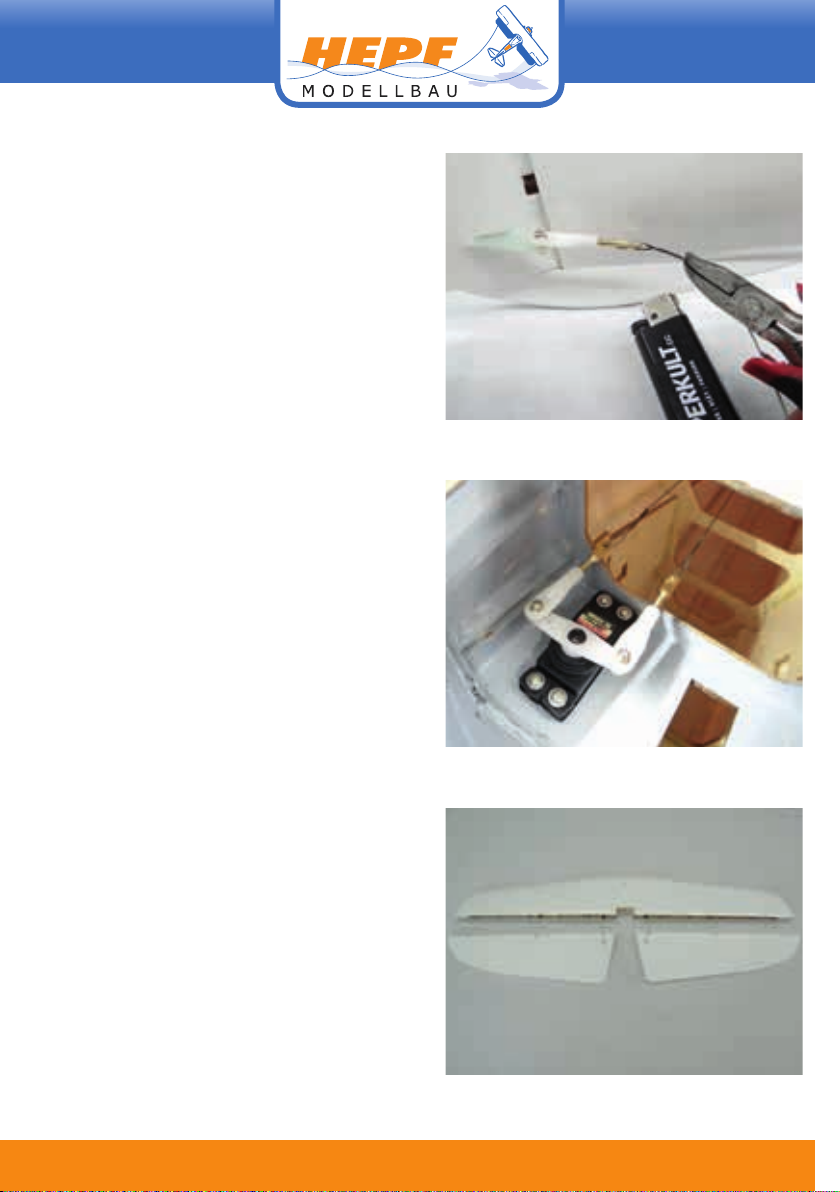
The enclosed Anlenkungsseil is plastic
coated and can be easily merged with the
lighter. For aesthetic reasons, you can still be
a shrink tube over the twisted point
Finally, screw the rudder servo (here HITEC
HS7245MH) to the right (as seen in flight
direction) Servo neck and connect the cables
on the same way as already applied at the
rear with the servo. Pay attention to the
neutral position of the servos
Next, dedicate themselves to the elevator
2.3 Elevator

Again, you start again with the glue the pin
hinges in the two rowing
eighth before curing that all three pivot points
are in a line.
Grinding before gluing the tiller good. Make
sure that you make a left as right rudder and
the two tillers have the same distance from
the pivot point exactly to get a symmetrical
rash later.

20 Hotline +43 5373 570033
Now before connecting rudder with damper,
oil the hinges 6 to prevent a sticking. Now
you can attach the two oars with the damper,
reuse PU glue here
be careful before curing of the adhesive that
both rudders have a constant distance, and
then later to allow the same rash
With the following points, we conclude the
elevator installation
Table of contents
Popular Toy manuals by other brands


HYPE
HYPE FunFly manual

MGA Entertainment
MGA Entertainment little tikes Pillow Racers BEE manual

Fisher-Price
Fisher-Price Cadillac ESCALADE M0409 Owner's manual & assembly instructions

Seagull Models
Seagull Models MUSTANG P-51 Assembly manual

Faller
Faller 130192 manual

Eduard
Eduard MiG-29 A air brake 1/32 quick start guide

Mini Gadgets
Mini Gadgets BB2Dog Boy user manual

Mattel
Mattel Mega Bloks TARTARUGA manual

LeapFrog
LeapFrog My Pal Violet quick start guide

LEGO
LEGO 60022 CiTY Building instructions

Elenco Electronics
Elenco Electronics SCROV-50 instruction manual

Discovery Telecom
Discovery Telecom RC T-REX quick start guide