HYPE FunFly User manual
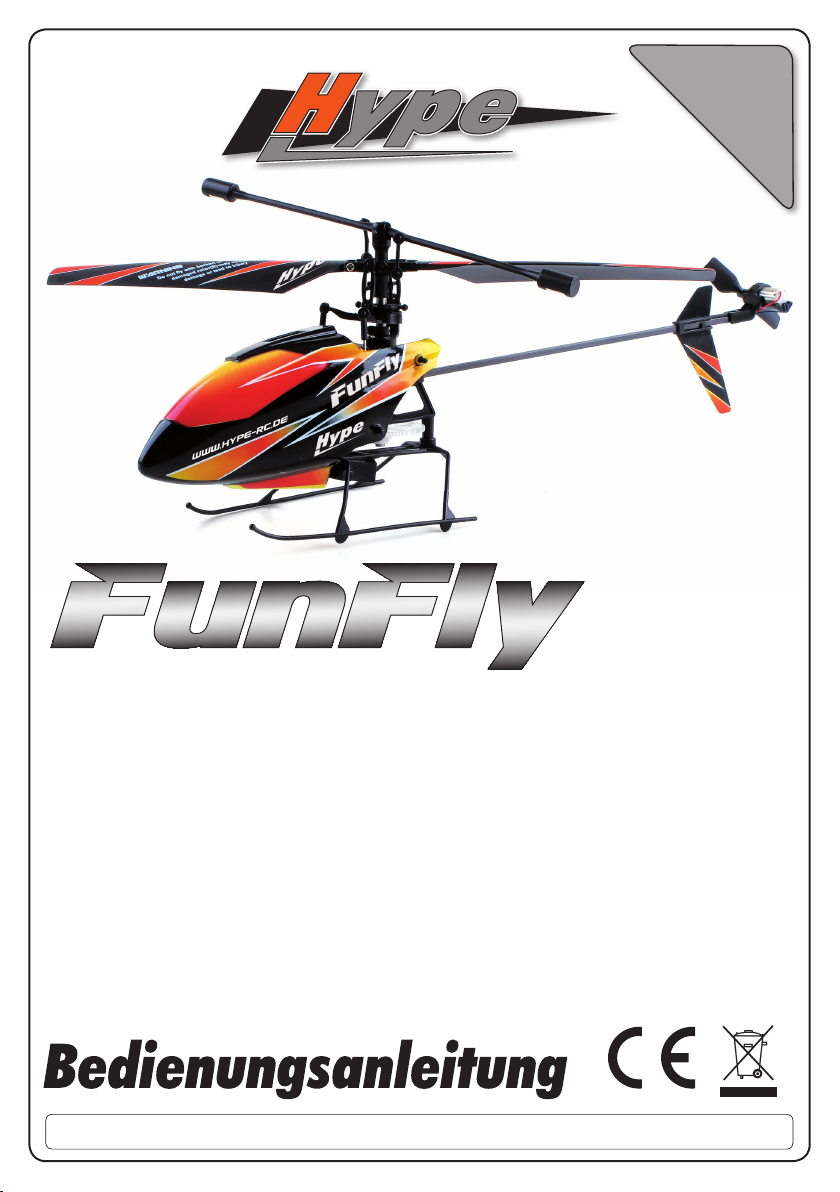
Ein Qualitätsprodukt aus dem Hause
Best.-Nr. 034-1101/2
Dieses
Produkt ist kein
Spielzeug, geeignet
für Modellsportler ab 14 Jahren.
Vor der ersten Inbetriebnahme, die Anleitung sorgfältig durchlesen! Beachten Sie unbedingt die Sicherheitshinweise!
Bewahren Sie diese Dokumentation an einem sicheren Ort auf!
Technische Daten
Länge:...................................240 mm
Breite: .....................................53 mm
Abuggewicht: ............................32 g
Hauptrotor:........................ Ø 192 mm
Heckrotor:........................... Ø 36 mm
RC-System: ..........................2.4 GHz
Technical Data
Length:..................................240 mm
Width: .....................................53 mm
Weight: .......................................32 g
Main Rotor:....................... Ø 192 mm
Tail Rotor: ........................... Ø 36 mm
RC-System: ...........................2.4GHz
Caratteristiche tecniche
lunghezza: ............................240 mm
larghezza:...............................53 mm
peso i.o. di volo:..........................32 g
rotore principale:............... Ø 192 mm
rotore di coda:..................... Ø 36 mm
sistema RC:...........................2.4GHz
Mit einem Abuggewicht von nur 32 Gramm und aggressivem Look, setzt sich der FunFly eindrucks-
voll in Szene. Die Steuerung des Modells erfolgt über die Veränderung der Drehzahl an Haupt- und
Heckrotor sowie über die Taumelscheibe. Für die Stabilisierung des Hecks ist ein Subminiatur-
Piezo-Kreisel im Modell integriert. Somit ist der FunFly ein vollwertiger Helicopter, der über sämtliche
Features verfügt, die man sonst nur von den „Großen“ kennt…! Die beiden Motoren werden über
spezielle MOSFETs mit schnellem Regelverhalten angesteuert. Die Anlenkung der Hauptrotorblätter
erfolgt zyklisch über die Taumelscheibe.
With a weight of 32 grams only and its aggressive look, the FunFly sets an impressive impact where-
ver you are. The steering of the model is done by main and tail rotor and the swash plate as well. For
the stabilization of the tail a subminiature piezo gyro is integrated on the maniboard. So the FunFly
is equipped with all the features that normally are known from the „big ones“ only...! The two motors
are controlled by special MOSFETs with fast acceleartion characteristics. The main rotor blades are
linked by the cyclic swashplate.
Con un peso in ordine di volo di soli 32 grammi ed un aspetto veramente “aggressivo”, FunFly si
mette subito in scena! Il modello si pilota aumentando o diminuendo il numero di giri del rotore prin-
cipale e di quello di coda, così tramite il piatto oscillante. Per la stabilizzazione della coda, il modello
si avvale di un giroscopio piezoelettrico in miniatura che è integrato nel modello. FunFly è quindi un
elicottero radiocomando a tutti gli effetti, con caratteristiche che normalmente troviamo solo dagli
elicotteri “grandi”. I due motori elettrici sono regolati da due MOSFET molto veloci, il passo delle pale
del rotore principale è regolato dal piatto oscillante.
MicroSeries

Seite 2 Best.-Nr. 034-1101/2
www.hype-rc.de
1. Inhaltsverzeichnis / Content / indice
1. Inhaltsverzeichnis / Content / indice
2. Lieferumfang / Kit Content / contenuto del kit
3. Inbetriebnahme / Getting Started / messa in funzione
4. Hinweise zur Bedienung / How To Use / l‘utilizzo
5. Sicherheitshinweise / Safety Instructions / avviso di sicurezza
6. Ersatzteile / Spare Parts / ricambi
7. Garantiebedingungen / Warranty / garanzia
Seite 3
Best.-Nr. 034-1101/2 www.hype-rc.de
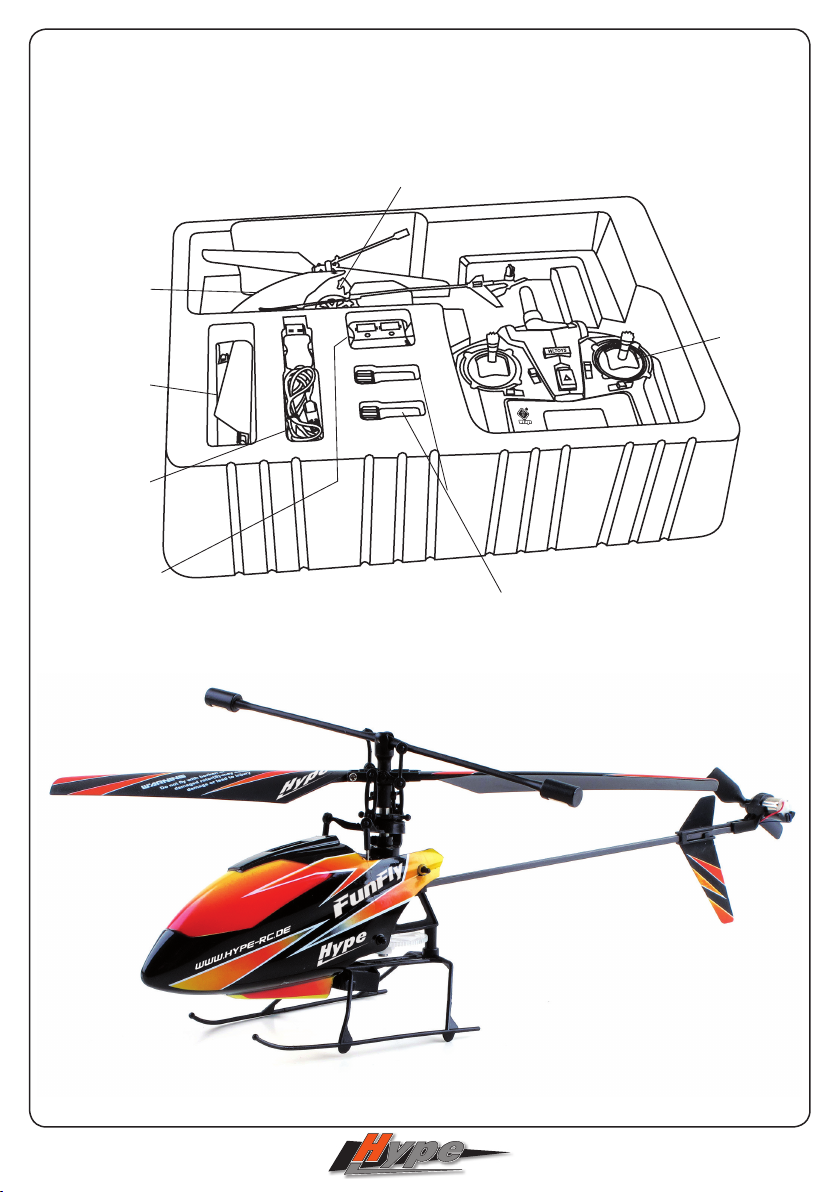
2. Lieferumfang / Kit Content / contenuto del kit
Rumpfhaube
Canopy
cabina di pilotaggio
Ersatz-Rotorblätter
Spare Rotorblades
pale rotore di
ricambio
Ladegerät für Helicopter
Charger for Helicopter
caricabatterie per elicotterini
Vormontiertes Modell
Preassembled Model
modello premontato
USB-Kabel
USB-Cable
cavetto USB
Sender
Transmitter
trasmittente
2x LiPo-Akku
2 pcs. LiPo Battery
2 batterie LIPO

Seite 4 Best.-Nr. 034-1101/2
www.hype-rc.de
Antenne
Antenna
antenna
Steueranordnung
Stick Mode
stick mode
LC Display
LC Display
display LCD
Power LED
Power LED
power LED
Schalter
Switch
interruttore
Ladekabel
Charging Cable
cavo di ricarica
Trimmung
Trim
trim
Steuerknüppel
Control Stick
leva di controllo
Steuerknüppel
Control Stick
leva di controllo
Trimmung
Trim
trim
2.1 Der Sender / Transmitter / la trasmittente
Batteriespannung
Battery Indicator
indicatore stato batteria
Pitch Anzeige
Throttle Indicator
indicazione del passo
Trimmwert-Anzeige
Trim Indicator
indicazione trim
Trimmwert-Anzeige
Trim Indicator
indicazione trim
Batteriefach
Battery Box
vano batteria
Steueranzeige
Steering Indicator
indicazione pilotaggio
Steuerwirkung Heckrotor
Tail Rotor Reaction
reazione del rotore di coda
Steueranzeige
Steering Indicator
indicazione pilotaggio
Seite 5
Best.-Nr. 034-1101/2 www.hype-rc.de
3. Inbetriebnahme / Getting started / messa in funzione
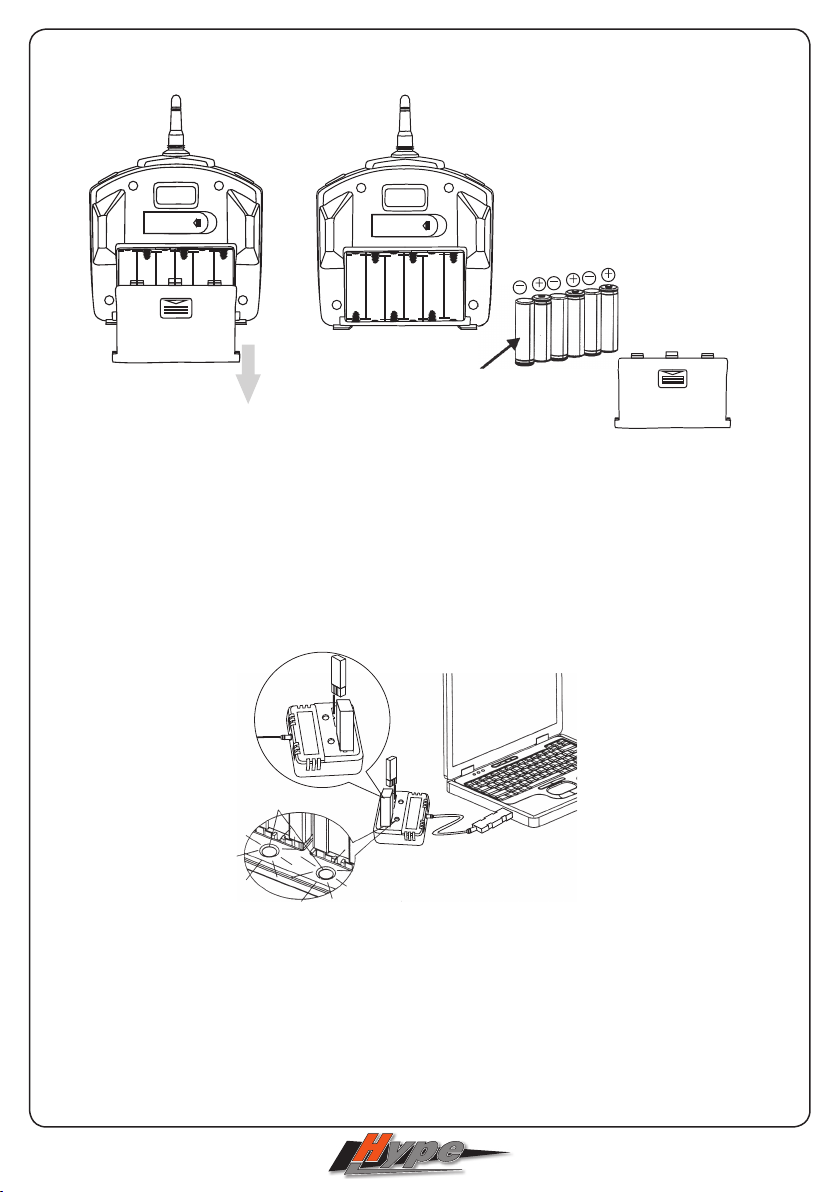
1. Öffnen Sie den Batteriefachdeckel, wie dargestellt. / Open the battery hatch as shown. / Aprire il vano batterie
come mostrato in foto.
2. Setzen Sie 6 Stück Batterien der Größe AA in das Batteriefach ein. Unbedingt auf korrekte Polung achten. / Insert
6 pcs. AA size batteries into the battery box. Note the correct polarization! / Inserire 6 ministilo AA nel vano batteria,
faccendo attenzione a non invertire la polarità.
3. Batteriefachdeckel wieder schließen. / Close the battery hatch again. / Chiudere il vano batterie.
3.1 Laden mit dem USB-Lader / Charging by USB-Charger / usare il caricabatterie USB
Das Ladegerät ist mit zwei Steckplätzen für Akkus ausgestattet, so dass zwei Akkus gleichzeitig geladen werden
können. / The charger offers two slots for batteries, so two batteries can be charged at the same time. / Il caricabat-
terie ha due prese per le batterie, quindi potete ricaricare due batterie contemporaneamente.
1. Verbinden Sie das USB-Kabel mit einem freien USB-Steckplatz an Ihrem Computer. Anschließend das andere
Ende in die Buchse vom Ladegerät stecken. / Connect the USB-Cable to your computer and put the other side into
the jack of the charger. / Collegare il cavo USB con una porta USB libera del vostro computer. Poi inlare l‘altra parte
del cavetto nella presa del caricabatterie.
2. Setzen Sie die LiPo-Akkus in die beiden Steckplätze ein. / Put the LiPo-Batteries into the charging slots. / Inlare
le due batterie nelle due sedi.
6x Batterie AA
6x Battery AA
6x ministilo AA
LEDs
LiPo-Akkus
LiPo-Batteries
Batterie LIPO

Seite 6 Best.-Nr. 034-1101/2
www.hype-rc.de
3. Die rote LED im USB-Lader leuchtet dauerhaft auf, solange der Akku geladen wird. Wenn der Akku vollständig ge-
laden ist, erlischt die rote LED im USB-Lader. Die Ladezeit beträgt bei einem völlig entladenen Akku ca. 30 Minuten.
/ The red LED in the USB-Charger turns on, while the battery is charged. When the battery is fully charged, the red
LED turns off. The charging time for a fully discharged battery will be approx. 30 minutes. / Il led rosso del caricabat-
terie USB si illumina costantemente, mentre la batterie viene caricata. Quando la batteria è totalmente piena, il led
rosso si spegne. Il tempo di ricarica di una batteria totalmente vuota è di circa 30 minuti.
3.2 Laden mit dem Sender / Charging by Transmitter / La ricarica con la trasmittente
1. Alternativ kann der Helicopter über den Sender geladen werden. Öffnen Sie die Klappe auf der Senderrückseite
und stecken Sie das Ladekabel in die Buchse am Ladegerät. Anschließend den Sender einschalten. / Open the
hatch on the transmitter backside and plug the charging cable into the charger. Switch on the transmitter. / In alter-
nativa l‘elicottero può essere caricato tramite la trasmittente. Aprire il tappo sull parte posteriore della trasmittente e
inlare il cavo di ricarica nella presa sul caricabatterie. Poi accendete la trasmittente.
2. Setzen Sie die LiPo-Akkus in die beiden Steckplätze ein. / Put the LiPo-Batteries into the charging slots. / Inlare
le due batterie nelle due sedi di ricarica.
3. Die rote LED im USB-Lader leuchtet dauerhaft auf, solange der Akku geladen wird. Wenn der Akku vollständig
geladen ist, erlischt die rote LED im USB-Lader. Die Ladezeit beträgt bei einem völlig entladenen Akku ca. 30 Minu-
ten. / The red LED in the USB-Charger turns on, while the battery is charged. When the battery is fully charged, the
red LED turns off. The charging time for a fully discharged battery will be approx. 30 minutes. / Il led rosso si illumina
sso durante la fase di ricarica. Quando la batteria è totalmente carica, il LED rosso si spegne. Il tempo di ricarica di
una batterie totalmente scarica è di 30 minuti circa.
3.3 Das Ein- und Ausschalten / Switching on & off / accendere e spegnere
1. Schalten Sie zuerst den Sender ein, die LEDs und das Display leuchten auf, es ertönt ein Beep-Beep-Beep...
Signal. / Turn on the transmitter rst, the LEDs and the display light up, you will hear a Beep-Beep-Beep... signal. /
Prima accendere la trasmittente, il LED e il display si illuminano, si sente „ beep beep beep“.
LEDs
LiPo-Akkus
LiPo-Batteries
batterie LIPO
Seite 7
Best.-Nr. 034-1101/2 www.hype-rc.de
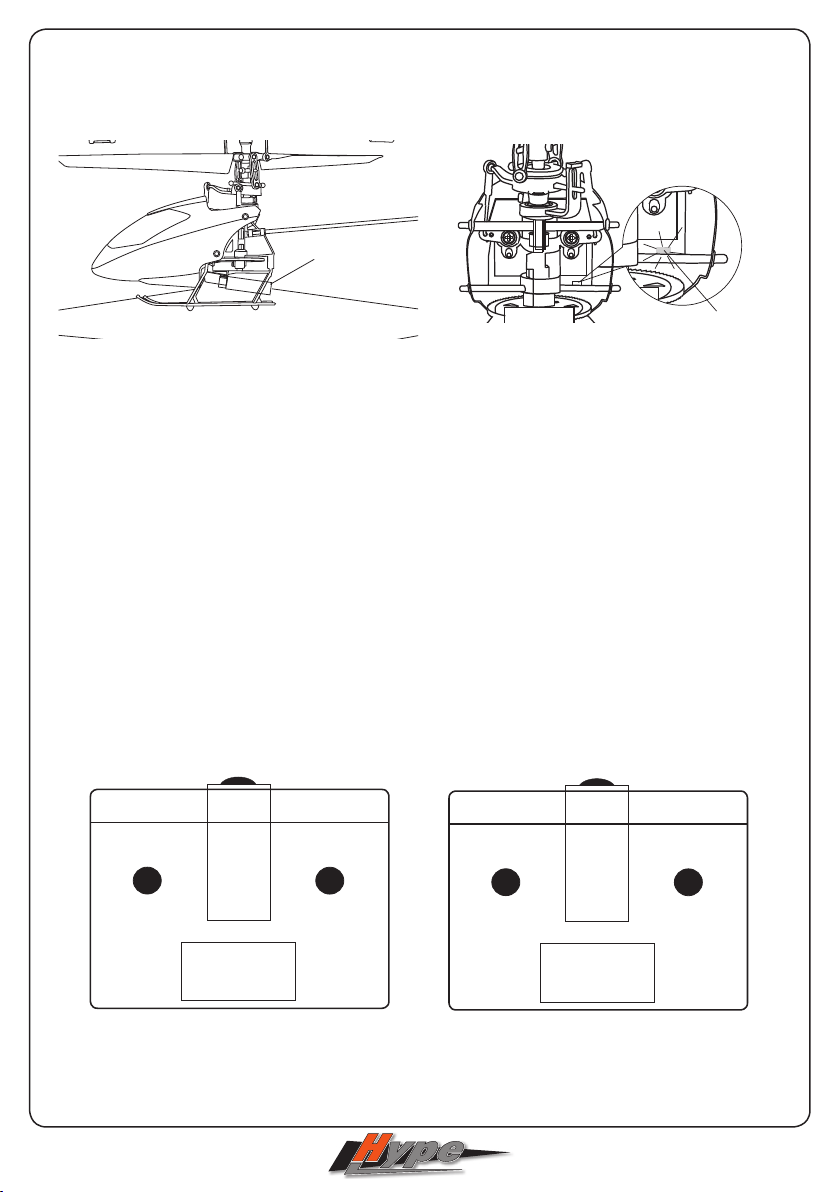
2. Stellen Sie den Helicopter auf eine ebene Fläche und setzen Sie den Akku in das Modell ein, wie dargestellt. Die
rote LED im Modell pulsiert. / Put the helicopter on a at surface and connect the battery as shown. The red LED
starts to pulse. / Appoggiare l‘elicottero su un ripiano piano e inserire la batterie come mostrato in foto. Il Led rosso
nel modello pulsa.
Nachdem die Verbindung zwischen Sender und Modell hergestellt ist, leuchtet die LED dauerhaft, der Flugbetrieb
kann beginnen. / After the initilization between transmitter and helicopter is done, the LED is turned on constantly.
You can now start to y with your model. / Una volta che la connessione tra trasmittente e modello è stata stabilita, il
LED si illumina sso, potrete iniziare a volare.
Beim Ausschalten stets zuerst das Modell und dann den Sender ausschalten. / When you have nished your ying,
rst switch off the model - afterthat turn off the transmitter. / Quando spegnete, spegnete sempre prima il modello e
poi la trasmittente.
4. Hinweise zur Bedienung / How To Use / l‘utilizzo
4.1 Knüppelbelegung Mode 1 & Mode 2 / Stick Mode 1 & Mode 2 / stick mode Mode 1 & Mode 2
Das Modell wird in zwei unterschiedlichen Sender-Versionen geliefert. Bei Mode 1 bendet sich der Pitchknüppel auf
der rechten, bei Mode 2 auf der linken Seite. Bitte beachten Sie die nachfolgende Grafk für die Steueranordnung.
/ The model is available in two different transmitter versions. In Mode 1 the pitch lever is on the right side, at Mode
2 you will nd the picth lever on the left side. Please note the different controls in the following graphic. / Il modello
viene consegnato con due mode differenti: mode 1 ha il motore a destra e mode 2 ce l‘ha a sinistra. (vedere graci
sotto)
MODE 1
Auf- & Abwärts
Up & Down
su e giù
Vor- & Rückwärts
For- & Backwards
avanti dietro
Rechts / Links
Right / Left
dx sx
Drehung
Rotation
rotazione
MODE 2
Auf- & Abwärts
Up & Down
su e giù
Vor- & Rückwärts
For- & Backwards
avanti dietro
Rechts / Links
Right / Left
dx sx
Drehung
Rotation
rotazione
LiPo-Akku
LiPo-Battery
batteria LIPO
LED

Seite 8 Best.-Nr. 034-1101/2
www.hype-rc.de
4.2 Die Steuerung des Modell / Steering your model / Il pilotaggio del modello
In den nachfolgenden Skizzen verdeutlichen wir Ihnen, wie die Steuerung des Modells erfolgt. / Please see the fol-
lowing sketches in order to understand how to control the helicopter. / Nei seguenti disegni illustriamo come si pilota
l‘elicotterino.
Pitch / Pitch / passo Heckrotor / Tailrotor / coda Nick / Nick / nick Roll / Roll / roll
MODE 1
Auf- & Abwärts
Up & Down
su & giù
Drehung
Rotation
rotazione
Vor- & Rückwärts
For- & Backwards
avanti e dietro
Rechts & Links
Right & Left
dx & sx
Pitch / Pitch / passo Heckrotor / Tailrotor / coda Nick / Nick / nick Roll / Roll / roll
MODE 2
Auf- & Abwärts
Up & Down
su & giù
Drehung
Rotation
rotazione
Vor- & Rückwärts
For- & Backwards
avanti & indietro
Rechts & Links
Right & Left
dx & sx

Seite 9
Best.-Nr. 034-1101/2 www.hype-rc.de
4.3 Sendertrimmungen / Transmitter Trims / trim della trasmittente
Falls das Modell im Flug driftet, obwohl beide Steuerknüppel auf neutral stehen, kann man dies mit dem Trimm-
reglern am Sender korrigieren. / If the model drifts away, although the control sticks are in neutral position, you can
correct this with the trims on the transmitter. / Se il modello in volo non andasse dritto (drift), nonostante entrambe le
leve di comando siano nella posizione neutra, questo si può regolare mediante il trim.
4.4 Acro Mode / Aerobatic Mode / modo acrobatico
Beim Einschalten des Modells, wird der normale Flugmodus aktiviert. Wenn Sie mit dem Modell schnelle Flugmanö-
ver ausführen möchten, gelangen Sie durch Drücken der Flight Mode Taste in den Acro Mode, um die Wirkung der
Steuerbefehle zu erhöhen. Duch nochmaliges Drücken gelangen Sie in den Normal Modus zurück. / When switching
on the model, the normal ight mode is activated. In case you want to y quick maneuvers, push the ight mode but-
ton to activate the Aearobatic Mode for more aggressive steering behaviour. Return to normal mode by pushing the
ight mode button again. / Accendendo il modello, si attiva il modo di volo „normale“. Se invece desiderate effettuare
manovre veloci, potete attivare il modo „Acro mode“ premendo il tasto „ight mode“ (questo tasto incrementa l‘effetto
dei comandi. Se premete il tasto di nuovo, tornare nel menu „standard“.
Trimmung
Trim
trim
Trimmung
Trim
trim
Flight Mode Taste
Flight Mode Button
tasto ight mode

Seite 10 Best.-Nr. 034-1101/2
www.hype-rc.de
4.5 Der Bindungsvorgang / Binding Procedure / Il binding
Sender und Empfänger müssen miteinander gebunden sein, damit das Modell auf die Steuerbefehle des Senders
reagiert. Diesen Vorgang nennt man auch Pairing. Wenn Sie Ihr Modell aus der Schachtel nehmen, sind der Sender
und das Modell bereits miteinander initialisiert (gebunden) und Sie können diesen Schritt auslassen. Wenn Sie
jedoch ein anderes Modell mit Ihrem Sender iegen möchten, müssen Sie diesen zunächst mit dem neuen Modell
binden. / Transmitter and Receiver must be paired (binded) with each other, so that the model will react on the
steering commands from this specic transmitter. This procedure is called binding (pairing). When you take out your
new model from the box, the transmitter and the receiver are already paired and you can forget about this procedure.
But in case you want to y another model with your transmitter, you have to pair your transmitter with the new model
before. / Trasmittente e ricevente devono essere „sintonizzati“, afnché il modello possa rispondere ai comandi della
trasmittente. Questo procedimento si chiama „binding“ oppure „pairing“. Quando tirate fuori il vostro modello dalla
confezione, il pairing è già stato fatto in fabbrica e non dovete pensare a nulla.
1. Stellen Sie den Helicopter auf eine ebene Fläche und setzen Sie den Akku in das Modell ein. Die rote LED im
Modell pulsiert. / Put the helicopter on a at surface and connect the battery as shown. The red LED starts to pulse. /
Appoggiate l‘elicottero su un piano diritto e inserite la batteria nel modello. Il led rosso pulsa.
2. Schalten Sie den Sender ein, die LEDs und das Display leuchten auf, es ertönt ein Beep-Beep-Beep... Signal. /
Turn on the transmitter, the LEDs and the display light up, you will hear a Beep-Beep-Beep... signal. / Accendete la
trasmittente, i LED e il display si illuminano, sentite „beep beep beep...“
Nachdem die Verbindung zwischen Sender und Modell hergestellt ist, leuchtet die LED dauerhaft, der Flugbetrieb
kann beginnen. / After the initilization between transmitter and helicopter is done, the LED is turned on constantly.
You can now start to y with your model. / quando la connessione tra la trasmittente e il modello sono stati effettuati,
il LED si illumina sso e potete iniziare a volare.
LiPo-Akku
LiPo-Battery
batteria LIPO
LED
This manual suits for next models
2
Table of contents
Other HYPE Toy manuals

HYPE
HYPE G-103 Twin III Acro User manual

HYPE
HYPE EDGE 540 User manual

HYPE
HYPE FOCKE WULF FW-190 User manual

HYPE
HYPE Miss America P-51 User manual

HYPE
HYPE Freestyler User manual

HYPE
HYPE F-35 Lightning User manual

HYPE
HYPE Focus User manual

HYPE
HYPE DG-1000 User manual

HYPE
HYPE Swift User manual

HYPE
HYPE FOX User manual


